

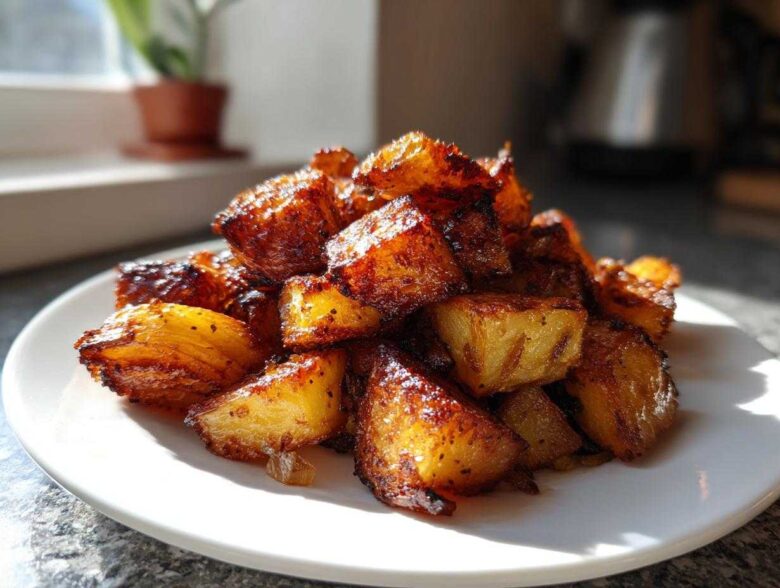
Oh, I know the feeling. You wake up dreaming of that perfect weekend brunch, but the reality is potatoes that feel more like steamed mush than golden-brown perfection. It’s heartbreaking! I spent so many mornings fighting my skillet just to get a decent sear. But trust me, I finally cracked the code on making the most phenomenal, ridiculously crispy breakfast potatoes imaginable. We’re skipping the guesswork today! I’m Hana, and I put just as much love into perfecting a simple side dish as I do a fancy sourdough, so you know these oven-roasted gems are going to steal the show. This method guarantees that shatteringly crisp exterior you’ve always wanted.
We aren’t settling for soggy ever again. If you’re ready to make the best side dish for your morning table, you can check out all our other savory recipes over in the Breakfast category!
Why You Will Love These Crispy Breakfast Potatoes
Look, breakfast sides should never be complicated, but they absolutely have to deliver on texture and flavor. These oven-roasted gems check every single box. You’re going to look forward to making these every weekend.
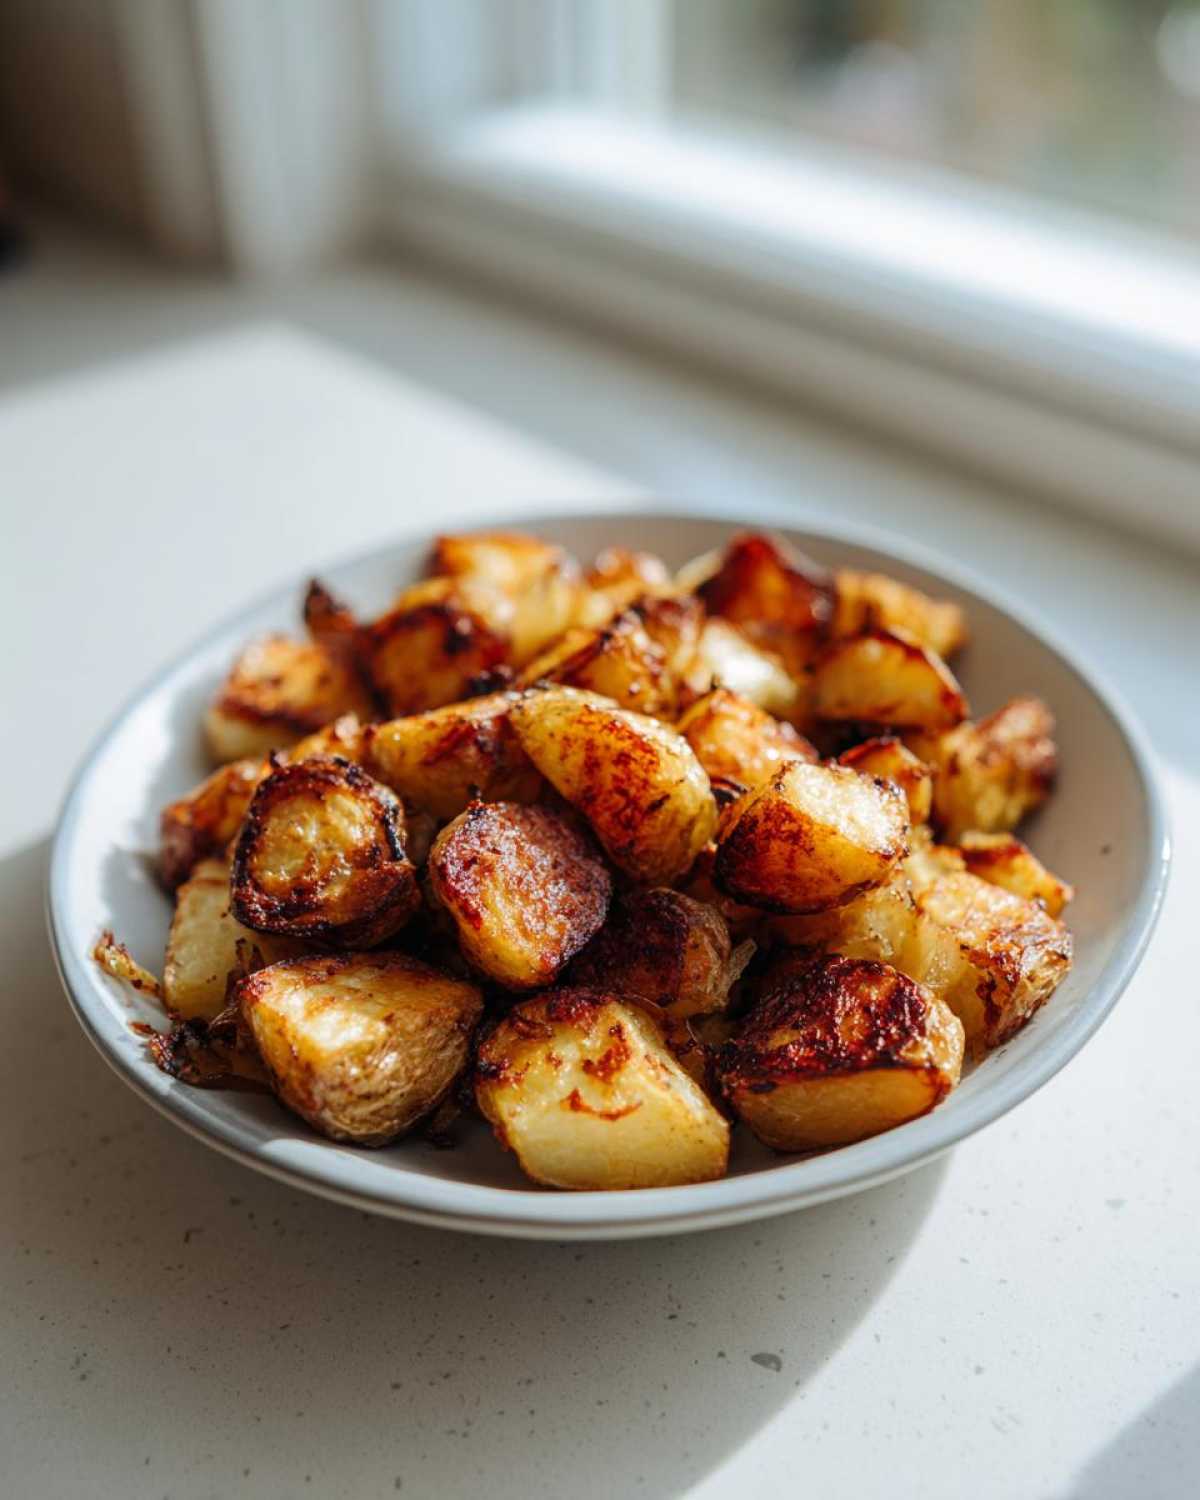
Guaranteed Golden Brown Texture
Seriously, we tackle sogginess head-on! By making sure the potatoes are bone dry before they hit the heat, and blasting them at a high temperature, we get that crunch we all dream about. Every single bite is perfectly golden brown.
Simple Preparation for Easy Breakfast Potatoes
Even though the oven does most of the work, the prep time is ridiculously short. This recipe is my go-to for an easy breakfast potatoes solution when I need something savory fast. You’ll spend less time fussing and more time enjoying your morning.
Essential Ingredients for Flavorful Breakfast Potatoes
When we talk about making the best savory side dish, the ingredients are everything. I’ve learned that sticking to quality items makes a massive difference, especially with something as simple as potatoes. For this recipe, I insist on using Yukon Golds. Why? Because russets tend to fall apart on you at high heat, but Yukon Golds hold their shape beautifully while still getting fluffy inside. It’s key for that perfect texture we are chasing!
- 2 lbs Yukon Gold potatoes, scrubbed and diced into 1-inch pieces
- 2 tablespoons avocado oil (or other high-heat oil)
- 1 teaspoon smoked paprika
- 1 teaspoon garlic powder
- 1/2 teaspoon onion powder
- 1/2 teaspoon dried rosemary
- 1/2 teaspoon salt
- 1/4 teaspoon black pepper
- 1 small yellow onion, diced
Ingredient Notes and Substitutions
If you’re out of avocado oil, don’t stress! You need an oil with a high smoke point since we are roasting at 425°F. Vegetable oil or grapeseed oil work perfectly fine as substitutes, but please, please avoid olive oil for the primary roasting stage—it burns too quickly and imparts a bitter taste. You lose that clean, savory flavor we want.
Now, about those Yukon Golds versus Russets: Trust me on the Yukon Golds here. Russets have high starch, which makes them great for mashing, but when you try to roast them for your homemade breakfast potatoes, they tend to crumble too much before they get that gorgeous golden-brown exterior. Yukon Golds strike that perfect balance of creamy insides and crisp-holding edges.
The Secret to Perfectly Crispy Oven Roasted Breakfast Potatoes
Okay, this is where the magic happens. Forget everything you thought you knew about making breakfast potatoes that turn out floppy. The real secret isn’t just the seasoning; it’s the prep work we do *before* they even see the oven. I promise, if you follow these steps exactly, you will get the best side dish you’ve ever made at home!
Preheating and Preparation for Oven Roasted Potatoes Breakfast
First things first: we need serious heat. Preheat your oven to 425 degrees Fahrenheit. While that’s warming up, line a big baking sheet with parchment paper. Trust me on the parchment paper—it means zero scrubbing later! If you skip this, you’ll spend ten minutes scraping cheese and charred bits off your pan instead of eating those glorious potatoes. This high heat is what shocks the potato surface into crispness.
Seasoning and Spreading Your Breakfast Potatoes
You absolutely must dry those diced potatoes completely after rinsing them. I mean, pat them silly with paper towels! Any trace of water turns into steam in the oven, and steam means soggy. Once they’re dry, toss them with the oil and all those savory spices until every piece looks coated. Then, and this is my *big* rule for the oven roasted potatoes breakfast method: they must be in a single layer on that sheet. If they are touching too much or piled up, they steam. We want them roasting side-by-side to get fluffy inside and perfectly golden brown outside. If you have to use two pans, please do!
The Roasting Timeline for Golden Brown Potatoes
We roast in two stages, which is another pro trick. Pop the tray in for a full 20 minutes. When you pull them out, toss them quickly with your diced onion—onions burn fast, so we add them later. Then, back into the oven they go for another 15 to 20 minutes. You’ll know they are done when they look deeply golden and you can pierce one easily with a fork, but the outside still has that nice, firm texture. These are the perfect savory companion for my recipe for scrambled eggs with kale and minced ham, or you can check out our over-the-top breakfast nachos for a real party!
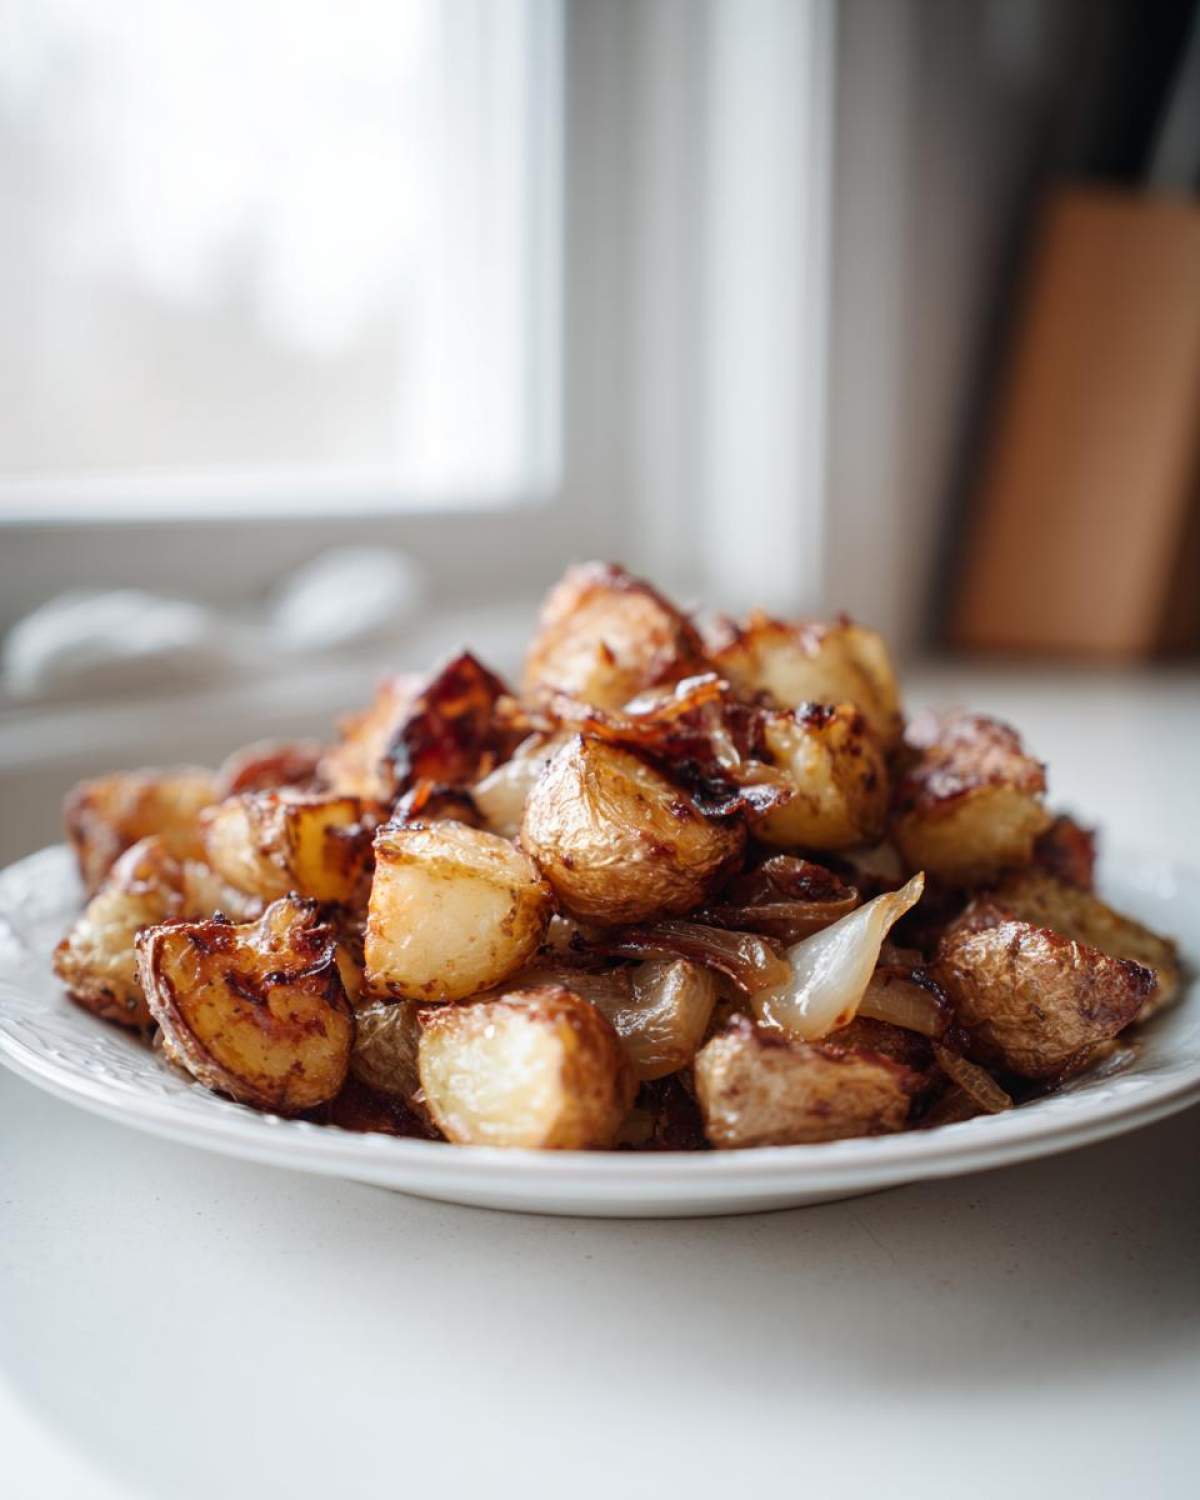
Skillet Breakfast Potatoes Alternative Method
Now, I know not everyone has room for a giant sheet pan in their kitchen, or maybe you just prefer that satisfying sizzle sound only a cast-iron skillet can make. If you want to tackle these on the stovetop, I’ve got you covered. The skillet method is faster, but it still requires respecting the heat!
For this approach, use your biggest cast-iron skillet you have. Get that skillet nice and hot over medium-high heat *before* adding the oil—that initial blast helps kickstart the crisping process. I usually add the oil first and wait until it shimmers. Then, add your seasoned potatoes, but listen to me: you MUST cook them in a single layer. If you crowd the pan, they fall apart and boil in their own steam. Seriously, if you have too many potatoes, cook them in two batches! Noah always tries to cram them all in, and I have to physically stop him because then we just end up with steamed, sad potato chunks.
Once they are settled in that hot oil, give them space and don’t touch them for a solid 8 to 10 minutes. You need patience while they develop that crust. After that first side browns up, you can flip them, add the onions, and continue cooking until they’re tender inside, tossing maybe every 5 minutes. It takes about 20 to 25 minutes total on the stove. If you’re interested in seeing some of my other quick kitchen experiments, you can always poke around the main blog page for more ideas!
Tips for Success with Homemade Breakfast Potatoes
I feel like cooking potatoes is one of those things people think is easy, but getting them *perfectly* crispy every time requires knowing a couple of secrets. I’ve made every mistake in the book trying to get these homemade breakfast potatoes right, so let me save you some trouble! These little bits of advice make the difference between a satisfying side dish and just… potatoes.
Remember how I stressed Yukon Golds? That’s Tip Number One! But there are a few other things I always do, especially when I’m trying to double the batch for a big weekend brunch. If you follow these simple techniques, your potatoes will be golden every time.
If you’re looking for something slightly different to snack on after you’ve finished your potatoes, I have tons of great ideas over in my Snacks category!
The Wet vs. Dry Starch Battle
We already talked about patting them dry, but I want to emphasize *why* that initial soaking step is so important. When you dice the potatoes, starch gets released onto the surface. If you don’t rinse that starchy coating off, it gets gummy and essentially fries itself, creating that soggy layer we hate. I like to soak mine for a solid 20 minutes in icy cold water. Then, when you dry them, you might think they feel damp, but they are actually dry on the *outside*. That dry exterior is what lets the oil adhere and crisp up beautifully in the oven.
Don’t Be Shy with Your Spices—But Use Good Ones!
These potatoes are simple, which means the seasonings have to shine! Smoked paprika is non-negotiable for me; it gives that gorgeous, deep red color and a hint of smokiness that tastes like they’ve been cooked over an open flame. But here’s a little test for you: taste your dried herbs before tossing them on. If your rosemary has lost all its scent and just tastes like dry leaves, toss it! Old herbs give you nothing but bitterness. Freshly ground pepper also wakes up the entire dish, so grind it right before you use it. That fresh pop cuts beautifully through the richness of the oil.
Giving Potatoes Personal Space on the Pan
This is the number one reason people end up with sad, steamed potatoes instead of crispy ones. The baking sheet is NOT a cozy gathering spot for your veggies; it’s a roasting arena! If your cubed potatoes are touching their neighbors, the moisture they release gets trapped between them, and they steam. When you spread them out in one single layer—even if it means grabbing a second baking sheet (yes, even if it’s slightly smaller!)—you let that heat circulate all the way around. That airflow is crucial for achieving that all-over golden brown exterior. It’s worth the extra pan to wash later, I promise!
Serving Suggestions for Your Breakfast Potatoes
Honestly, these are so good they could probably be eaten straight out of the oven with a fork, but where’s the fun in that? The crispy texture and those smoky spices—the paprika really wakes everything up—make them the perfect sidekick to almost anything you want for breakfast or brunch. Since they are so savory and robust, they pair wonderfully with fluffier, lighter items.
The absolute classic, of course, is pairing these potatoes with eggs. Whether you’re doing soft scrambled eggs, a simple sunny-side up, or maybe even a fluffy omelet, these potatoes bring the hearty element. They are also fantastic alongside crispy bacon or breakfast sausage when you want that full, traditional diner feel at home.
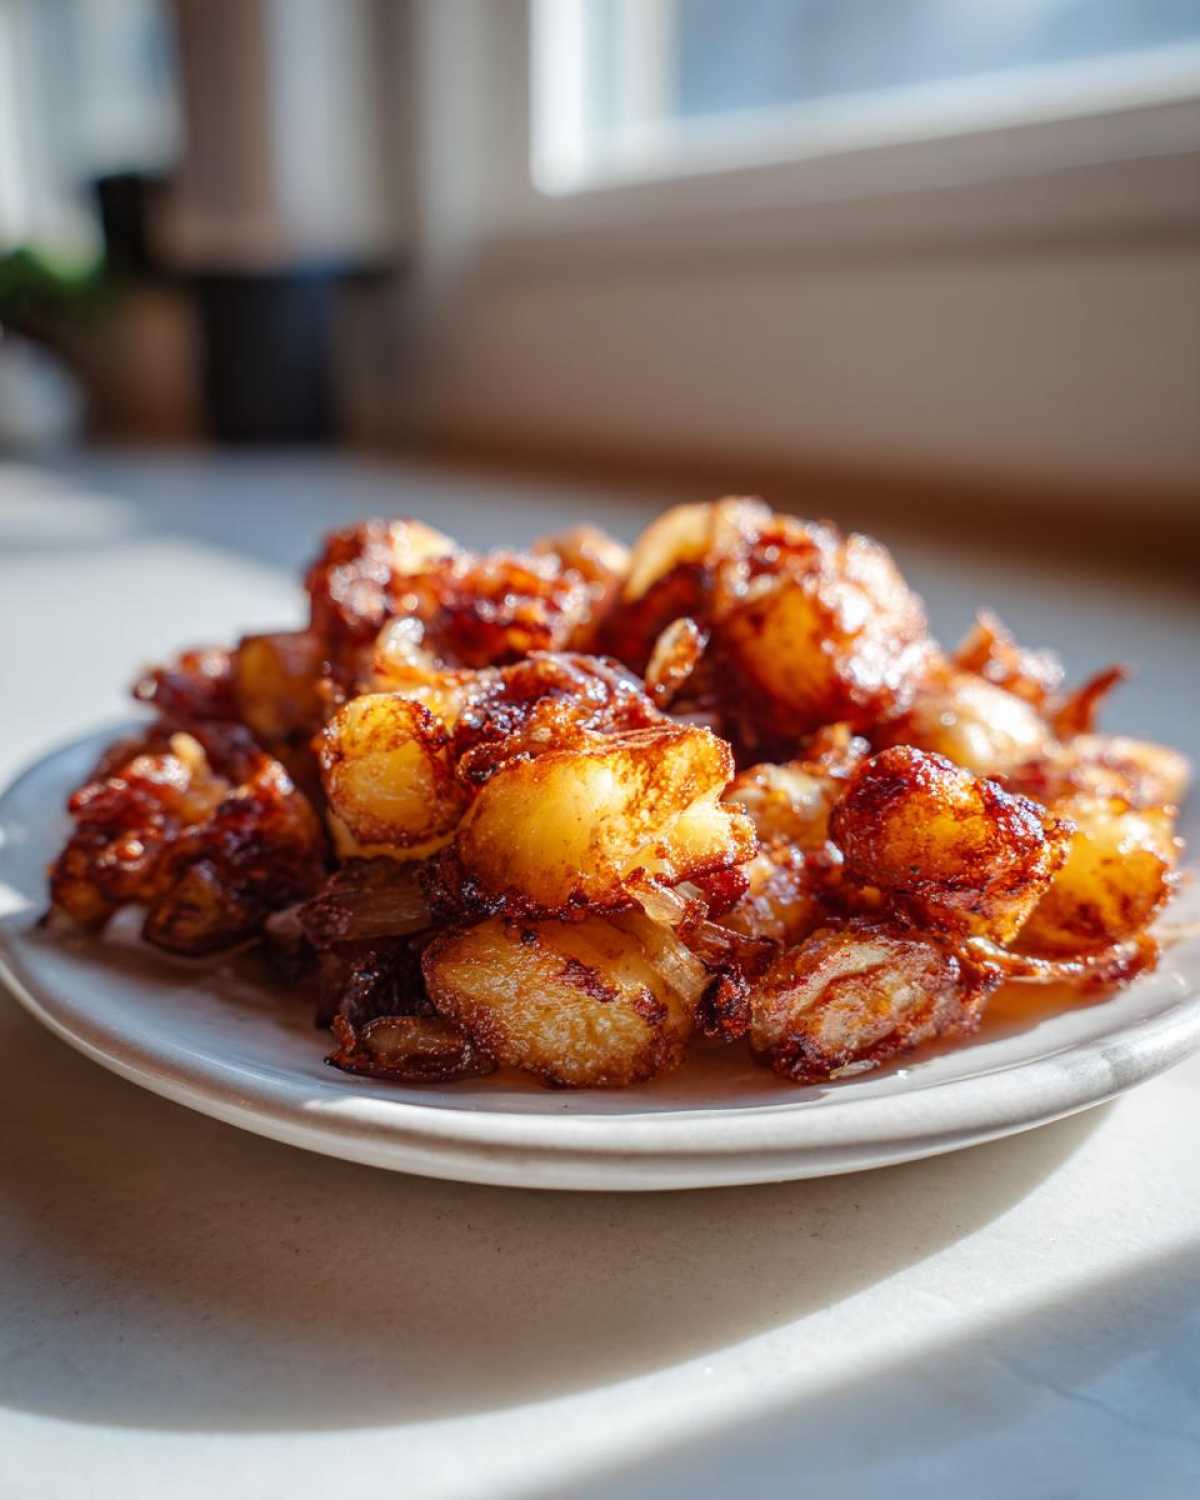
But for a real weekend brunch showstopper? Try serving them underneath poached eggs with a little drizzle of hollandaise. The crispiness holds up so well against the creamy sauce. They are also amazing crumbled into a breakfast burrito bowl with black beans, salsa, and a dollop of Greek yogurt instead of sour cream. If you’re feeling extra ambitious, these potatoes would be the perfect base for my Savory Muffins if you want a complete spread!
Storage and Reheating Instructions for Leftover Breakfast Potatoes
Okay, you made a huge batch because, let’s be honest, sometimes these flavorful morning potatoes disappear faster than you expect! The good news is that these are fantastic for meal prep or just making sure you get to enjoy them the next day. But here’s my big warning: the microwave is the enemy of crispness. If you use the microwave, you are essentially turning those beautiful golden-brown bits into chewy, disheartening sponges. We can’t have that!
For safe storage, let the potatoes cool down completely on the pan after they come out of the oven—never store hot food immediately. Once cool, tuck them into an airtight container. They should be good in the fridge for about three to four days, max. They’ll still taste great, but that amazing crisp exterior will soften up a bit.
Bringing Back the Crunch: Best Reheating Methods
This is the most important step if you want your leftovers to taste like they just came out of the oven. Forget reheating them on a plate in the microwave—you’ll just end up steaming them again. We need to use dry heat to pull that moisture back out and re-crisp the exterior!
The Oven Method: This is my go-to if I’m making a big batch. Spread the cooled potatoes out in that same single layer on a baking sheet (you can even add a tiny fresh drizzle of oil if they look dry). Pop them into a 375°F oven. Give them about 10 to 12 minutes, just until they are piping hot all the way through and you can hear that satisfying little crunch when you poke them. It’s totally worth the extra five minutes!
Air Fryer Magic for Quick Reheating
If you have an air fryer, you have found the cheat code for reheating any crispy food! Seriously, this is my favorite way to revive leftovers. Place your potatoes in a single layer in the basket—you might have to do this in two small batches, depending on your fryer size, which is fine. Set the air fryer to 375°F and cook for about 5 to 7 minutes. They come out unbelievably crispy, almost better than when they were first made sometimes! It’s fantastic for a quick breakfast side during the week.
A Note on Storage if Added Onions
If you added your onions during that second roast like I suggested in the recipe, they will be softer and more caramelized when you reheat them. They still taste delicious, but they won’t get crispy again like the potato chunks do. If you are making a huge batch specifically for meal prepping multiple days, you might consider roasting the potatoes plain on the first day and only adding the onions to the portion you plan to eat that first day. Save the rest plain and season/roast the onions with a fresh batch when you reheat!
Frequently Asked Questions About Making Breakfast Potatoes
It’s funny how a simple side dish can bring up so many questions! I get emails all the time asking about tweaks and substitutions for this recipe. If you’re still buzzing with curiosity about how to get the absolute best results for your morning meal, maybe one of these common reader questions will help you out. I want everyone to succeed in making the best breakfast potatoes! If you have more questions that I didn’t cover here, please feel free to reach out via my contact page!
Can I use Russet potatoes instead of Yukon Golds for these breakfast potatoes?
That’s such a common question! You absolutely *can* use Russets, but you are going to get a very different result than what I describe here. Yukon Golds are considered a ‘waxy’ potato; they hold their structure really well while roasting, which helps them become crispy breakfast potatoes on the outside and beautifully creamy inside. Russets, on the other hand, are starchy. If you use Russets, they are much more likely to break down and give you a softer, almost fluffy texture all the way through, and they can get a little mushy instead of developing that defined crust we worked so hard to achieve.
How do I make these breakfast potatoes ahead of time for a crowd?
This is a great idea if you are hosting a big brunch! For crowds, the key is definitely getting the prep done early. You can dice all your potatoes and complete the soak/rinse step the night before. Drain them really well, then spread them out on a sheet pan (or seal them in a container) and store them in the fridge overnight. Here’s the critical part: You MUST pat them completely dry right before you toss them with oil and seasoning, even if you think they look dry from the fridge. That moisture management is essential for a quick breakfast side dish that actually crisps up when you bake it!
Are these easy breakfast potatoes suitable for a vegan diet?
Yes, absolutely! The core recipe for these easy breakfast potatoes—using Yukon Golds, avocado oil, and just spices—is naturally gluten-free and vegan, which is why I love it so much for feeding a mixed crowd. My personal recipe uses standard spices, but just double-check your smoked paprika or any seasoning blends to ensure there are zero dairy fillers or hidden animal products if you need to be strictly compliant. But on the whole? This is a fantastic, savory vegan side that everyone will devour!
Nutritional Estimates for These Breakfast Potatoes
I always like to include some basic nutritional info here for those of you counting macros or just curious about what you’re digging into! Remember, Noah is the technical guy, not a nutritionist, so these figures are just calculated estimates based on the ingredients listed. They’re great for getting a ballpark idea, but they aren’t set in stone.
If you use a different type of oil, or if you add extra onions or swap out any spices, those numbers will shift a bit. Always assume your own batch might vary slightly based on how much oil actually soaks in versus what drips off onto the parchment paper!
- Serving Size: 1 serving
- Calories: 250
- Fat: 10g
- Saturated Fat: 1g
- Unsaturated Fat: 9g
- Trans Fat: 0g
- Carbohydrates: 38g
- Fiber: 4g
- Sugar: 1g
- Sodium: 350mg
- Protein: 5g
- Cholesterol: 0mg
See? Pretty wholesome for such a satisfying side dish! As long as you aren’t drowning them in butter and cheese afterward—which I totally support doing sometimes, by the way—these oven-roasted beauties are a solid way to start your day.
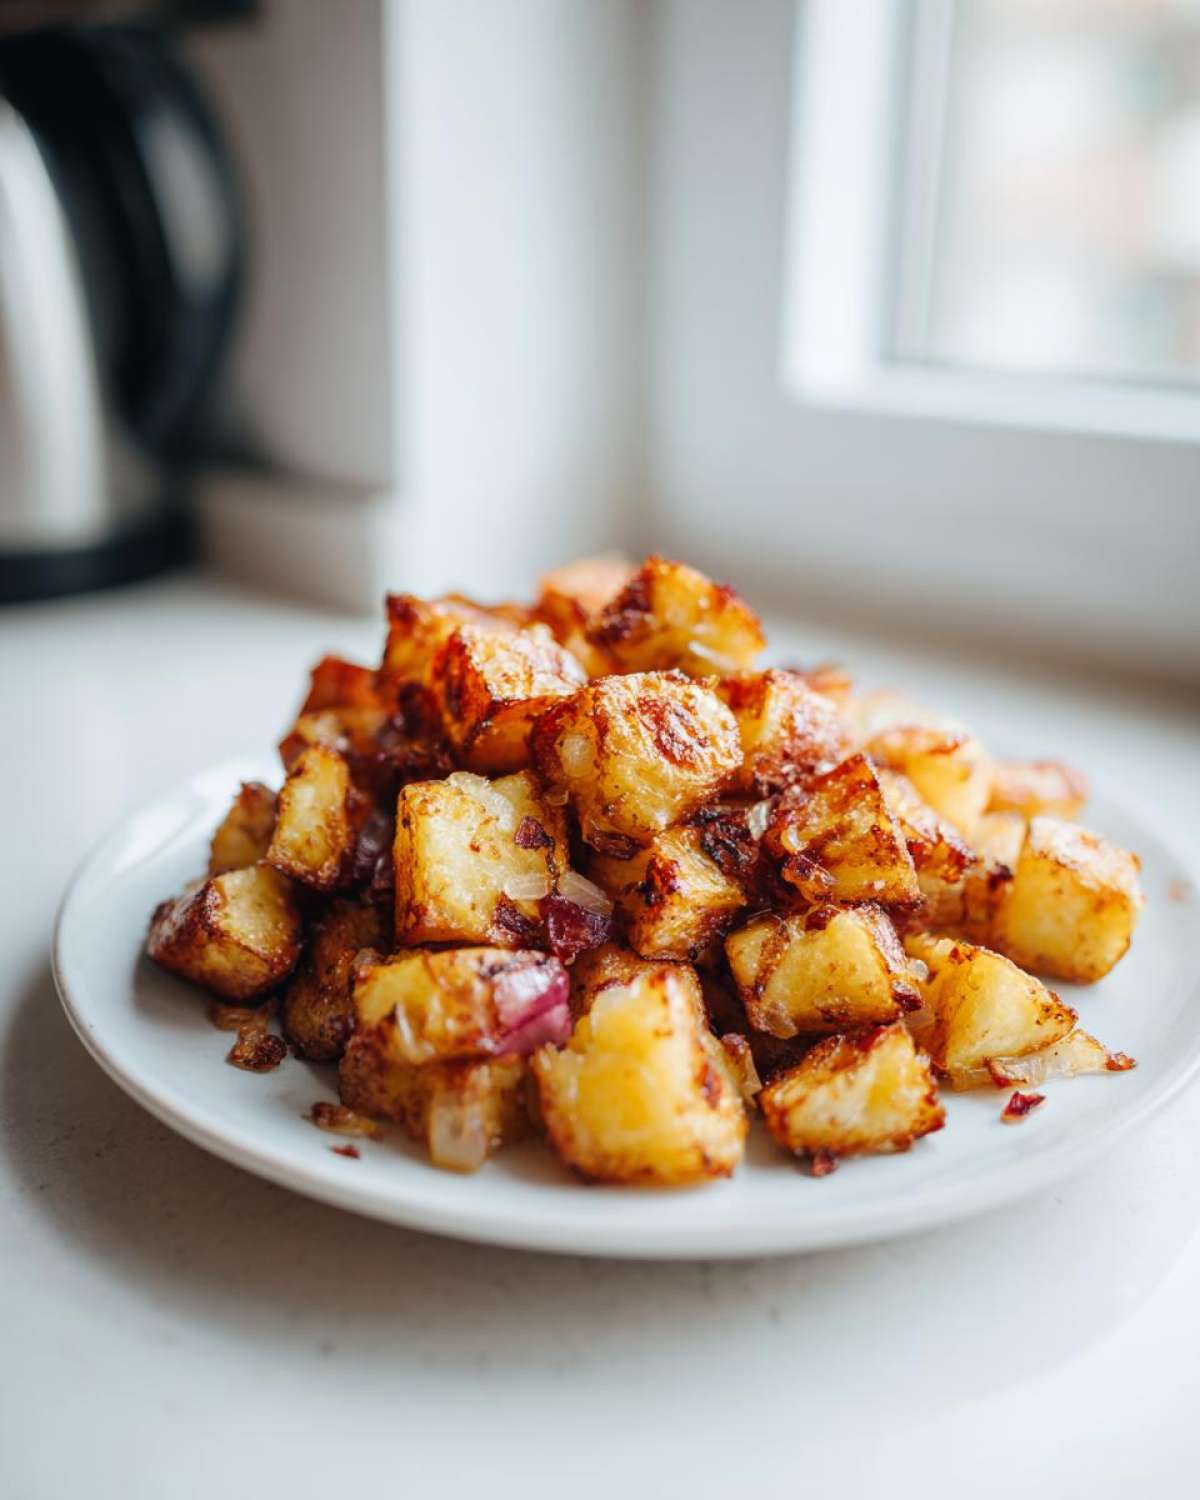
Perfectly Crispy Oven Roasted Breakfast Potatoes
You deserve breakfast potatoes that are golden brown and perfectly crispy every time. Follow these simple steps for flavorful, easy oven roasted breakfast potatoes that make the best side dish for any morning meal.
- Prep Time: 15 min
- Cook Time: 40 min
- Total Time: 55 min
- Yield: 4 servings
- Category: Breakfast Side
- Method: Oven Roasting
- Cuisine: American
- Diet: Gluten Free
Ingredients
- 2 lbs Yukon Gold potatoes, scrubbed and diced into 1-inch pieces
- 2 tablespoons avocado oil (or other high-heat oil)
- 1 teaspoon smoked paprika
- 1 teaspoon garlic powder
- 1/2 teaspoon onion powder
- 1/2 teaspoon dried rosemary
- 1/2 teaspoon salt
- 1/4 teaspoon black pepper
- 1 small yellow onion, diced
Instructions
- Preheat your oven to 425 degrees Fahrenheit. Line a large baking sheet with parchment paper for easy cleanup.
- Place the diced potatoes in a large bowl. For extra crispiness, soak the potatoes in cold water for 15 minutes, then drain them completely and pat them very dry with paper towels. This step removes surface starch.
- In the bowl with the dry potatoes, add the avocado oil, smoked paprika, garlic powder, onion powder, rosemary, salt, and pepper. Toss everything together until the potatoes are evenly coated with the seasoning.
- Spread the seasoned potatoes in a single layer on the prepared baking sheet. Do not overcrowd the pan; use two sheets if necessary to ensure they roast instead of steam.
- Roast for 20 minutes.
- Remove the pan from the oven. Add the diced yellow onion to the potatoes and gently toss them with a spatula.
- Return the pan to the oven and roast for another 15 to 20 minutes, or until the potatoes are golden brown and wonderfully crispy on the outside and tender inside.
- Serve your homemade breakfast potatoes immediately alongside your favorite eggs or bacon.
Notes
- To achieve the best golden brown texture, make sure your potatoes are completely dry before adding oil and seasoning.
- If you prefer a skillet breakfast potatoes method, use a large cast-iron skillet over medium-high heat. Cook in batches if needed to maintain high heat for crisping.
- These are great for meal prep; reheat them in a toaster oven or air fryer for a few minutes to restore crispness.
Nutrition
- Serving Size: 1 serving
- Calories: 250
- Sugar: 1
- Sodium: 350
- Fat: 10
- Saturated Fat: 1
- Unsaturated Fat: 9
- Trans Fat: 0
- Carbohydrates: 38
- Fiber: 4
- Protein: 5
- Cholesterol: 0