

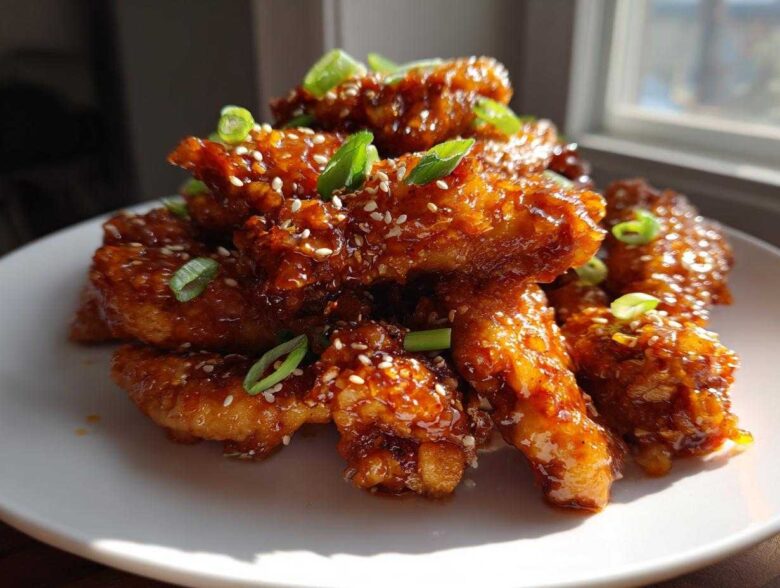
Oh my gosh, if you’re looking for the ultimate party starter or just something amazing to snack on while watching the game, stop scrolling right now! I have finally cracked the code on wings that are crispy underneath but absolutely drenched in sauce—the perfect kind of sticky.
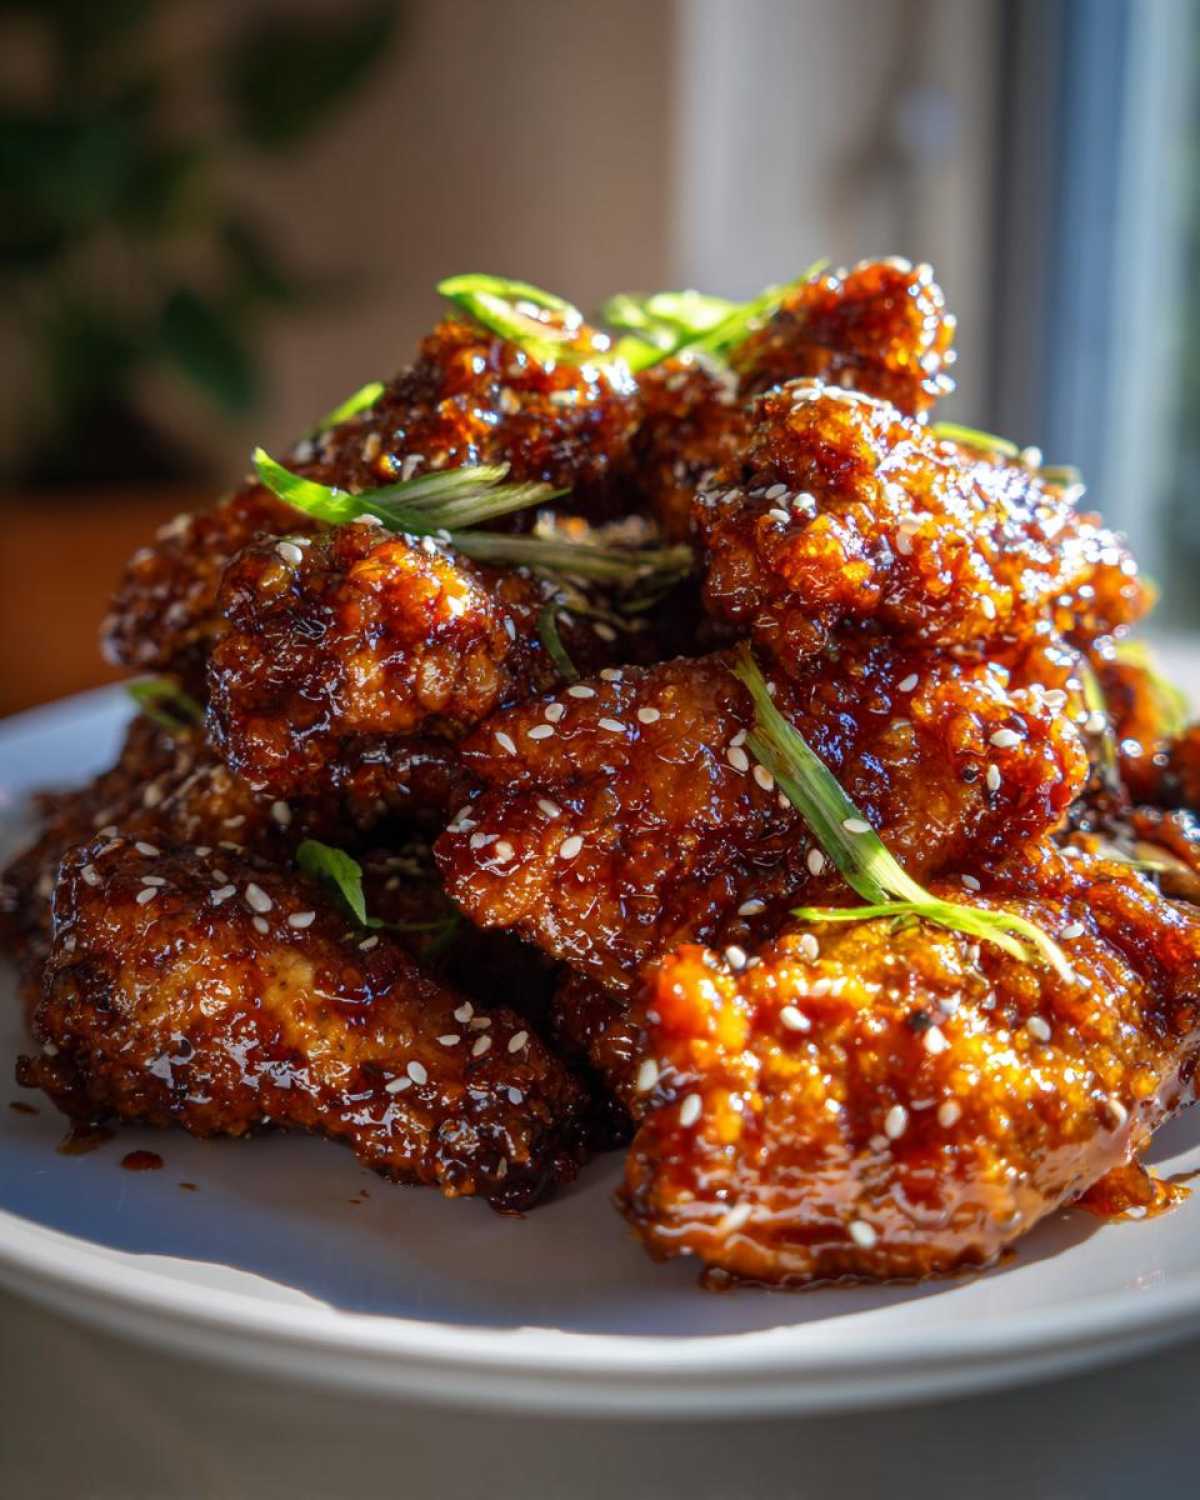
For years, my sauces ran thin, or they just slid right off the crispy coating, which is the worst, right? I messed around with simmering times and cornstarch ratios forever until I nailed it. Trust me, these Sticky Orange Chicken Wings with Honey Glaze are completely restaurant-quality, but you can make them right here in your kitchen. Seriously, the balance of sweet, tangy orange, and that rich honey is just addictive.
I’m linking some of my other favorites over at the main blog page, just in case you need even more inspiration after you devour these. Go check out my latest posts while the oil heats up!
Why You Will Love This Sticky Orange Chicken Wings with Honey Glaze Recipe
Honestly, what’s not to love? This isn’t just another average wing recipe; this is the one that makes people ask for the recipe immediately. Here’s why I know you’ll be making this batch after batch:
- That Perfect Sticky Texture: We nail the consistency! That honey-orange sauce clings to every single crisp edge, making them genuinely messy in the best way possible.
- Incredible Flavor Balance: It hits all the right notes—sweet from the honey and brown sugar, bright tang from the fresh orange juice, and just a tiny kick if you add the sriracha. Sweet and tangy perfection!
- Crispy Foundation: Even under the glaze, these wings stay delightfully crisp. That flour and cornstarch dredge is my little secret for holding up against all that delicious sauce.
- Restaurant Style at Home: You will seriously think you ordered these from your favorite Asian-inspired take-out place. They look impressive but take under an hour total!
Essential Ingredients for Sticky Orange Chicken Wings with Honey Glaze
Okay, let’s talk ingredients! You can’t cheat on the flavor here, especially with the glaze. I’ve broken this down into two simple groups so you know exactly what goes where. Having everything ready before you start cooking is a lifesaver, especially when dealing with hot oil!
For the Crispy Coating and Wings
This is where we set the foundation for maximum crispiness before they drown in that amazing sauce. Make sure you get your wings separated into flats and drumettes—it helps them cook evenly!
- 2 lbs chicken wings, separated into flats and drumettes
- 1 tablespoon soy sauce (for the quick marinade)
- 1 teaspoon ground ginger
- 1/2 teaspoon black pepper
- 1/4 cup all-purpose flour
- 1/4 cup cornstarch (this is key for that shatter!)
- Vegetable oil, for frying (you’ll need about 3 cups, depending on your pot size)
For the Honey Orange Glaze
This is where the magic happens! Please, please, use real, fresh-squeezed orange juice here if you can. The difference in flavor from zest and fresh juice versus bottled is night and day. It just brightens everything up so much!
- 1/2 cup orange juice, fresh squeezed
- 1/4 cup honey
- 1/4 cup brown sugar, packed
- 2 tablespoons rice vinegar
- 1 tablespoon soy sauce
- 1 tablespoon orange zest (don’t skip this!)
- 2 cloves garlic, minced
- 1 teaspoon sriracha or chili garlic sauce (keep this optional if you’re sensitive to spice)
- 1 teaspoon cornstarch mixed with 2 teaspoons cold water (this is your slurry—it thickens everything up perfectly!)
- Sesame seeds, for garnish
- Sliced green onions, for garnish
Equipment Needed for Perfect Sticky Orange Chicken Wings
I always tell people who are nervous about frying that preparation is half the battle. If you have these few tools ready to go, the rest is super easy. Getting the right setup means safer cooking and way better results. Don’t stress if you don’t have a deep fryer; a heavy pot works just fine!
Here’s what you’ll want gathered on your counter before you turn on the stove:
- A Dutch oven or deep, heavy-bottomed pot: This is crucial for deep frying because it holds heat much better than a flimsy pan. Safety first, always use a heavy pot!
- A Wire rack set over a baking sheet: You need somewhere for those freshly fried wings to drain where the air can circulate underneath them. Paper towels alone can trap steam, which means less crispy skin when we go to glaze them!
- A Small saucepan: This is dedicated solely to simmering down that beautiful honey orange sauce until it’s thick and glossy.
- A Large mixing bowl: You’ll need one big enough to aggressively toss all 2 lbs of wings in the glaze without launching cooked chicken across your kitchen. Trust me, I’ve learned that lesson the hard way!
- A Whisk and rubber spatula: Essential for making the slurry and stirring that glaze while it thickens up over the heat.
Step-by-Step Instructions to Make Sticky Orange Chicken Wings with Honey Glaze
Okay, this is where we turn those seasoned wings into golden perfection and cook up the glaze. This part moves fast, so have your cooling rack ready to go! If you’ve ever made my Korean Fried Chicken Wings, the initial part of cooking them will feel familiar, but the sauce is completely different.
Preparing and Cooking the Chicken Wings
First things first: dryness is your best friend! Pat those wings totally dry with paper towels. Then, toss them gently in a bowl with the soy sauce, ginger, and pepper. Next, make sure the flour and cornstarch mixture is ready. Dredge each slightly damp wing piece in that coating, and *really* shake off the excess. Too much coating equals a gummy wing!
Heat your oil up to exactly 350°F (175°C). You need that temperature right so they cook through without burning. Fry them in batches—don’t cram the pot, or the oil temp will drop! Let them fry for about 8 to 10 minutes until they are golden brown and look totally cooked. Pull them out and let them drain on that wire rack immediately.
Creating the Thick Honey Orange Glaze
While those wings are smelling amazing draining, let’s get the sauce built. I like to use the little bit of residual heat in the saucepan for this. Combine the orange juice, honey, brown sugar, vinegar, soy sauce, zest, minced garlic, and sriracha (if you’re being brave!). Bring this to a nice gentle simmer over medium heat. You want to stir it until that sugar dissolves completely. Let it bubble happily for about 3 to 5 minutes until it starts looking a little syrupy.
Now, here’s the secret to getting that thick, clinging texture: the slurry! Whisk that cornstarch and cold water together until it’s totally smooth—no lumps allowed! Slowly drizzle that slurry into the simmering sauce while stirring constantly. Keep it going for just one minute more until it thickens up and looks shiny. Pull it off the heat right away so it doesn’t turn into candy!
Glazing and Serving Your Sticky Orange Chicken Wings
Transfer your beautifully fried, cooked wings to a really large bowl. Pour about two-thirds of that heavenly glaze over the top. Use a spatula or even clean hands to gently toss everything until every single wing is covered in that glistening orange honey goodness. You might not need all the sauce, but it’s better to have a little too much than not enough!
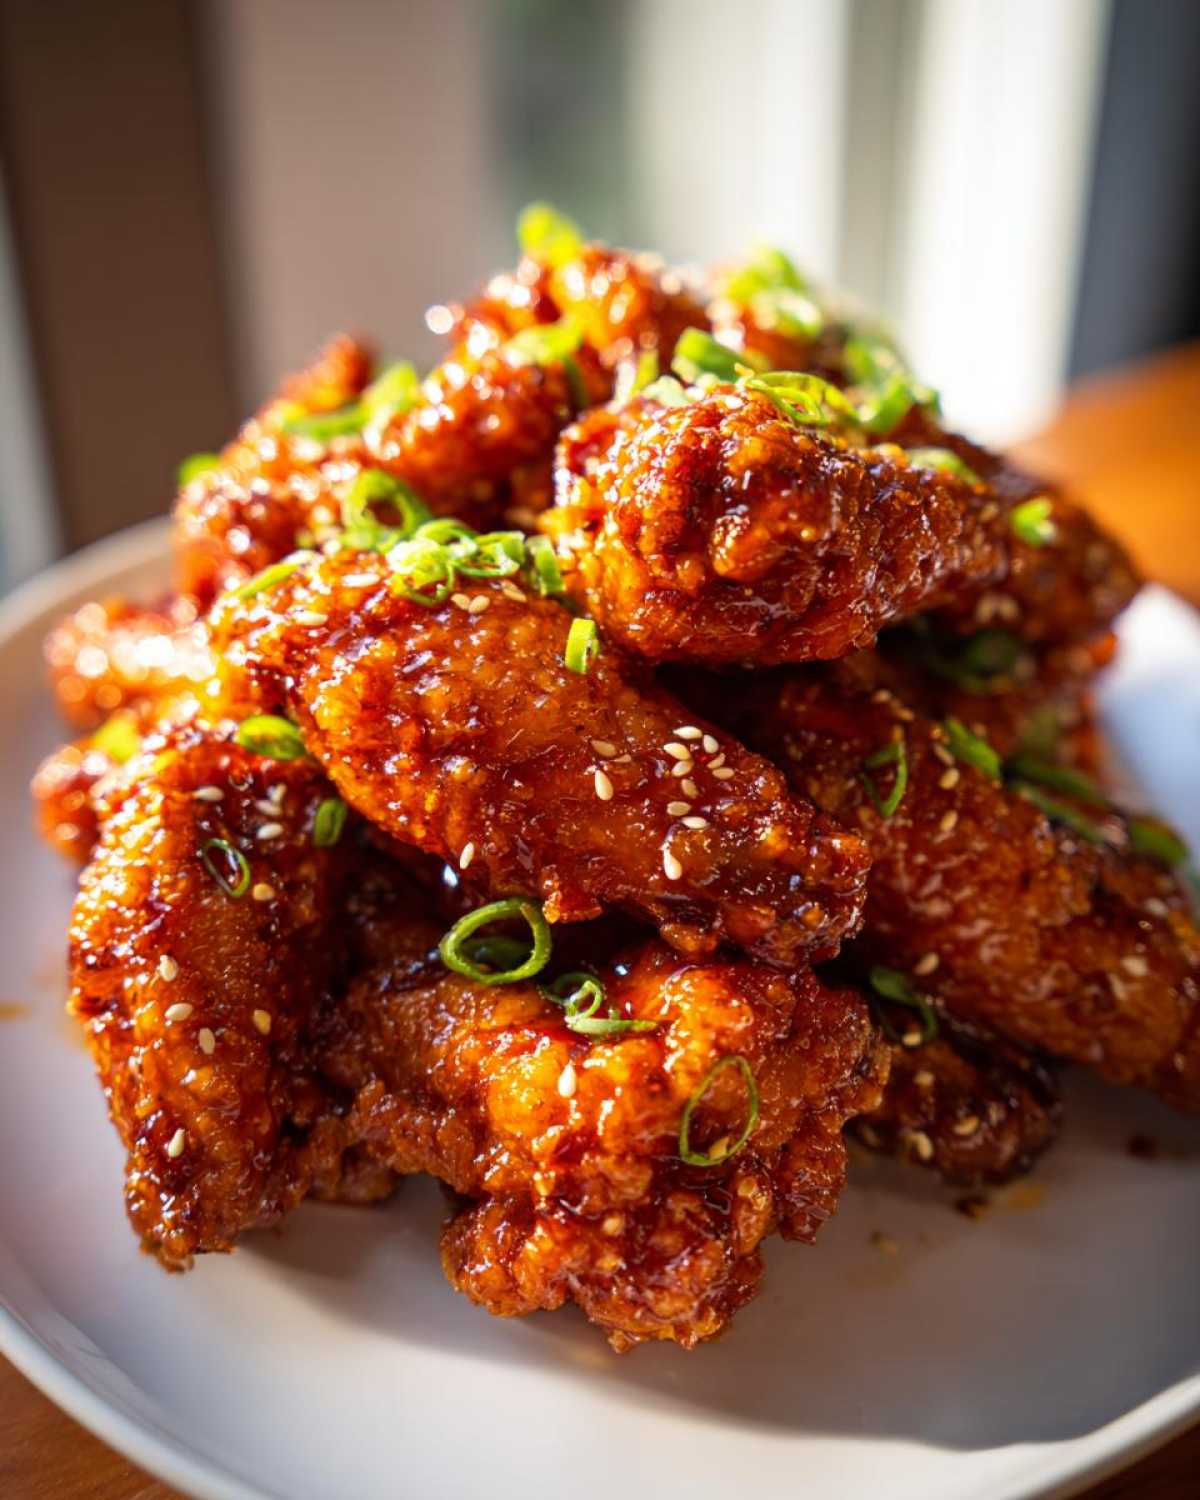
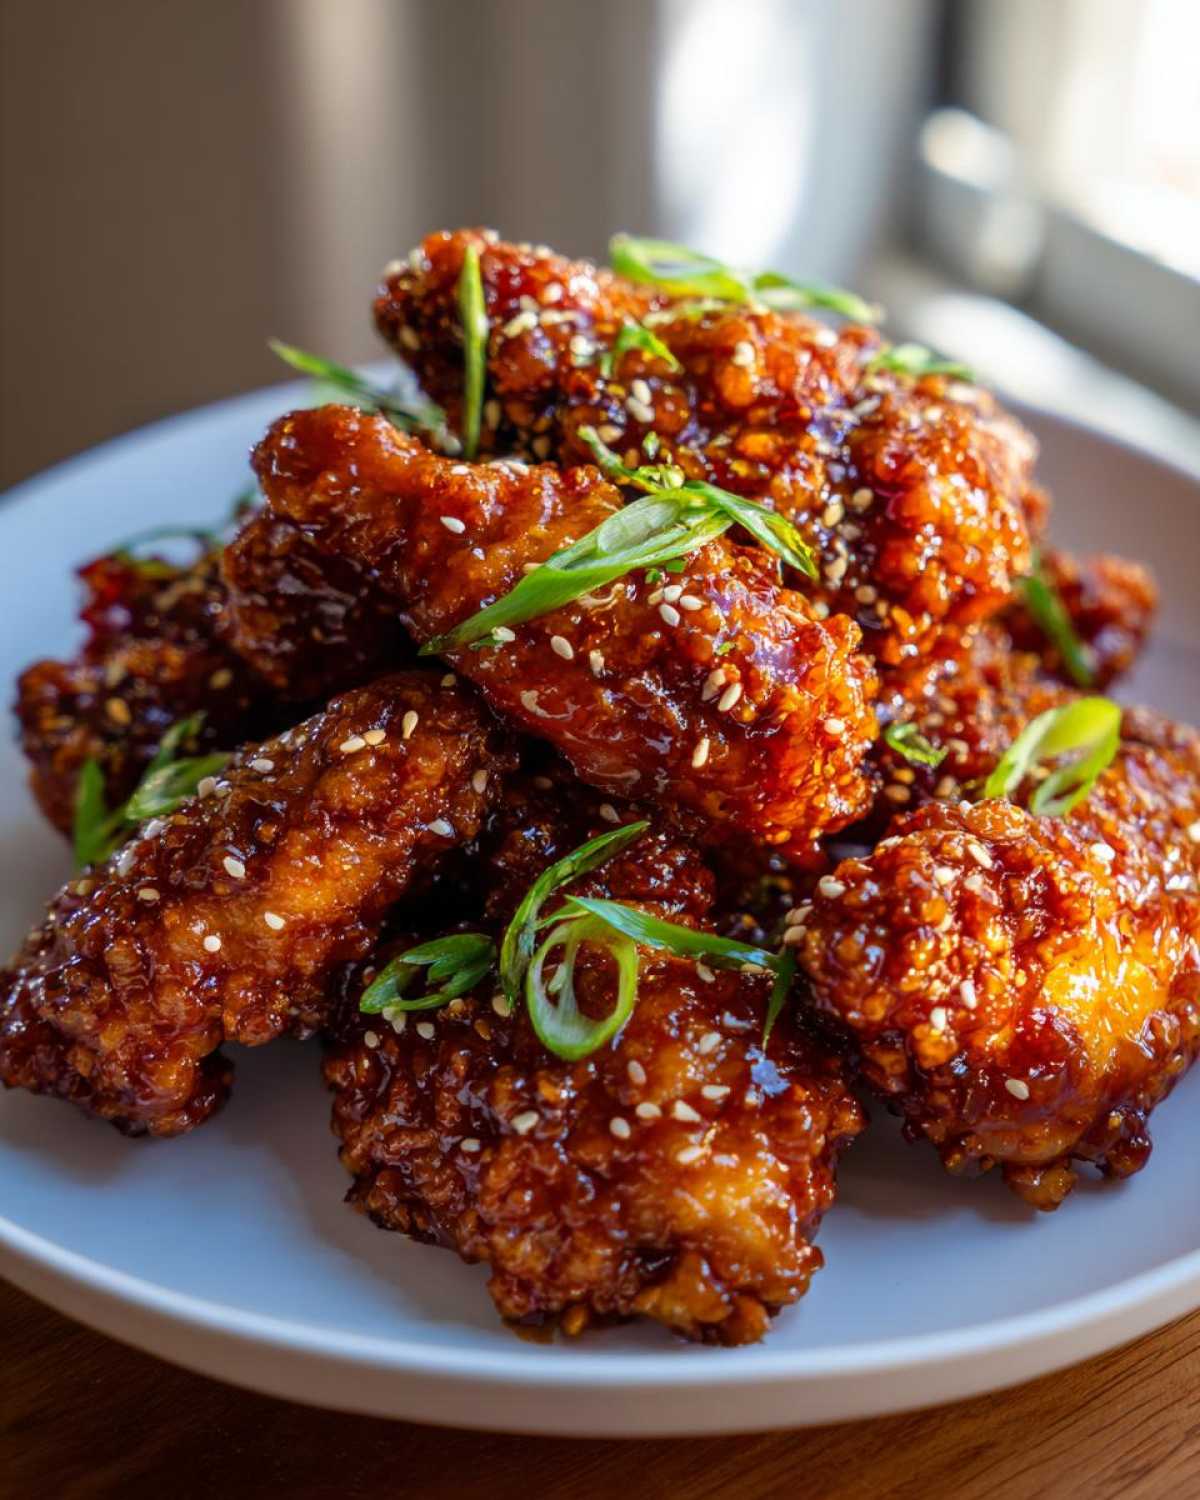
Get those glazed wings right onto your serving platter. Sprinkle them generously with sesame seeds and sliced green onions for color and freshness. You absolutely have to serve these right away! The crispy exterior lasts just a few precious minutes before the glaze really soaks in, so eat ’em hot!
Tips for Achieving Crispy Wings When Making Sticky Orange Chicken Wings
I know, I know, deep frying is delicious, but sometimes you just don’t want the mess or the oil splatter, right? Trust me, I totally get it. The good news is that this coating mixture—the flour and cornstarch combo—works beautifully for other methods too. If you want that crispy base under the orange sauce but skipping the deep fryer, I have a couple of proven techniques up my sleeve!
My goal is always to deliver the best possible texture for these Sticky Orange Chicken Wings, whether you’re using a fryer or not. These oven and air fryer tips are game-changers and honestly, a little better for you!
Crispy Baked Orange Chicken Wings Method
If you’re baking, you need a little patience, but the payoff is huge. The trick here is to cook them in two stages at different temperatures. Start by tossing those coated wings lightly with a tiny bit of oil—just enough to help them brown, not swim! Bake them first at 400°F (200°C) for about 20 minutes.
This initial bake sets the coating. Then, crank that oven up to 425°F (220°C) and roast them for another 10 minutes. You want them really nicely browned when they come out. Once they hit that temperature, pull them out and toss them immediately in your honey orange glaze. They’ll maintain great crispness!
Air Fryer Sticky Orange Wings Technique
For anyone who owns an air fryer, this is probably my favorite hands-off method! I use my air fryer constantly for snacks—you can see how I use it for ranch chickpeas here, which tells you how much I trust the machine!
Toss the coated, un-fried wings with a light spray of oil. Pop them into the air fryer basket, making sure not to overcrowd them at all. Cook them at 380°F (195°C) for about 18 to 22 minutes total. You have to flip them halfway through, but they come out perfectly cooked and ready to soak up that amazing glaze!
Why Drying the Wings is Non-Negotiable
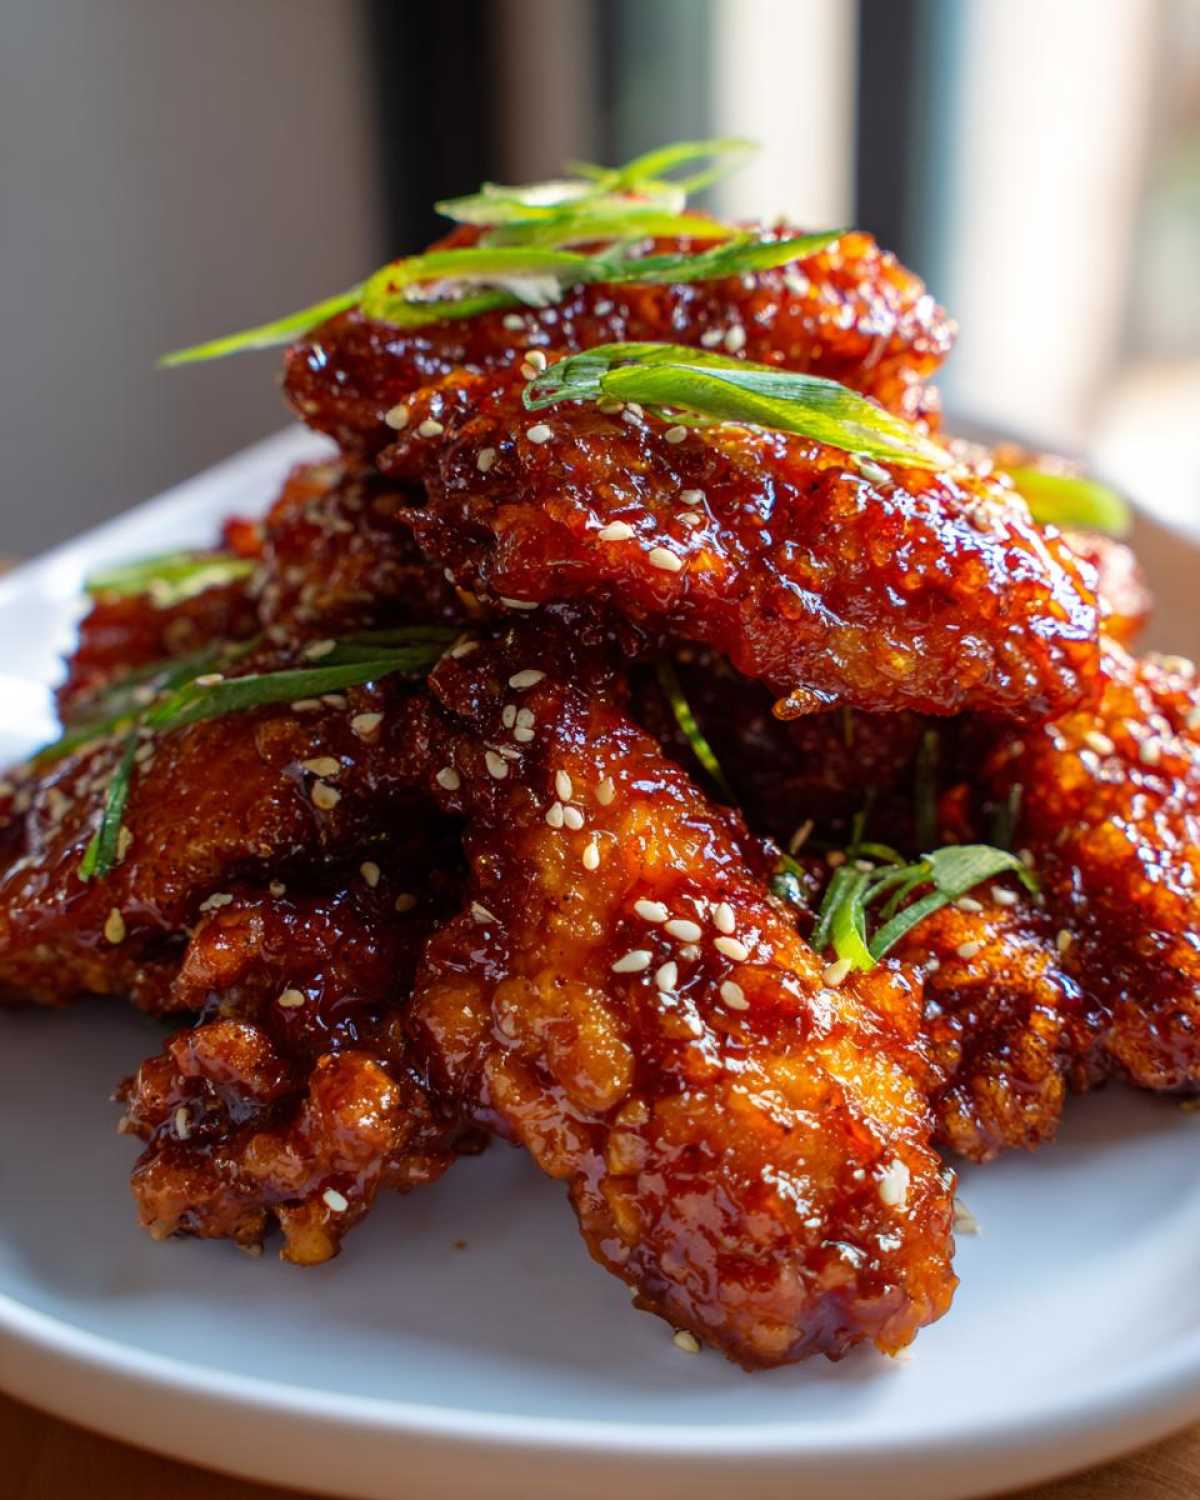
This isn’t really a cooking method, but it’s the single most important success factor for crispy wings, no matter if you bake, fry, or air fry. You have to pat those wings until they feel almost dusty dry with paper towels before you even think about seasoning them. Moisture creates steam during cooking, and steam melts the coating. Dry wings mean crispy wings! Don’t skip this step, seriously.
Ingredient Notes and Substitutions for the Honey Glaze
The glaze is the star of the show here, and I want to make sure you get that perfect sweet and tangy punch every time. Since this is an Asian Inspired Chicken Wings recipe, using specific ingredients really boosts that authentic flavor profile. Don’t worry if you’re missing one thing; I’ve got backup plans!
For example, the orange flavor needs to really sing. That’s why I insist on fresh orange juice. When you use bottled juice, it often tastes a little cooked down and sometimes metallic after heating. Fresh juice, especially combined with that bright orange zest, brings a lively, vibrant citrus note that makes these Honey Glazed Chicken Wings sing. Please, just take the extra two minutes to squeeze that orange—it’s worth it!
Now, let’s talk heat and sweetness, because balancing those is crucial for the best sticky glaze.
Adjusting the Heat Level
If you don’t like sriracha, or maybe you ran out, you can absolutely swap it! If you want the same vinegary heat kick, just swap in a teaspoon of chili garlic sauce, like I mentioned in the ingredient list. But if you’re looking for pure, clean heat without that garlic element, use about 1/4 to 1/2 teaspoon of cayenne pepper.
Be careful when adding cayenne, though—it’s more intense than sriracha, so start low! You can always add more heat later, but you can’t take it out once it’s simmered into your beautiful sauce!
What to Use Instead of Honey
Honey is fantastic because it adds a unique floral sweetness and really helps that glaze cling to the wings when it cools slightly. However, if you’re out, maple syrup is a decent substitute for these Sweet and Tangy Chicken Wings. Maple syrup tends to be thinner, though, so you might need to use just a touch less water when you mix up your cornstarch slurry, or let the sauce simmer for an extra minute to concentrate it.
Also, understand that maple syrup will give the final product a slightly earthier, different kind of sweetness than honey. It won’t be *wrong*, but it changes the profile subtly. Other liquid sweeteners, like agave, work too, but they tend to be thinner than honey, so treat them like maple syrup!
The Importance of Rice Vinegar
Seriously, do not skip the rice vinegar in this Honey Orange Sauce for Chicken! It provides that necessary acidic backbone to cut through the richness of the chicken fat and the sweetness of the honey and brown sugar. Without it, the glaze just tastes flat and sugary. If you absolutely must substitute, use distilled white vinegar, but use just a tiny bit less—maybe 1.5 tablespoons instead of 2—because the sharpness can be aggressive if you use too much white vinegar.
Storage and Reheating Instructions for Leftover Sticky Orange Chicken Wings
I wish there were never leftovers, because these Sticky Orange Chicken Wings with Honey Glaze are best enjoyed fresh! But, let’s be real—sometimes you make too much, or you know you need a great lunch for the next day. When that happens, you need to treat them right so they don’t get soggy and sad.
The main problem with storing fried wings covered in sauce is that the moisture from the glaze soaks into the crispy coating, right? I’ve tested this probably a dozen times, and the microwave is the enemy here. Microwaving reheats them fast, but it turns the skin into rubbery disappointment. Blech!
Storing Your Sticky Orange Chicken Wings Properly
If you have extras, get them into the fridge as soon as they’ve cooled down a bit—aim for within two hours of cooking. Place the wings in a airtight container. You could line the bottom with a paper towel just to soak up any extra moisture that pools at the bottom, but honestly, it’s the reheating that saves them.
Don’t layer them too thickly; try to keep them in a single layer if you can. They’ll last safely in the refrigerator for about three to four days. If the glaze gets really stiff, don’t panic, that just means the honey is settling beautifully!
Restoring Crispness When Reheating
If you want to recapture that amazing texture we worked so hard for, you must use dry heat. The oven or air fryer is your savior for reheating these Honey Glazed Chicken Wings. You want to cook off that surrounding moisture to crisp the skin back up before the glaze softens it slightly again.
For the oven method: Preheat your oven to about 375°F (190°C). Lay the cold wings out on a wire rack set on a baking sheet—this airflow is super important, just like when you first cooked them! Bake them for about 8 to 10 minutes. This dries out the coating and warms the meat through.
If you have an air fryer, that’s even faster! Pop the wings in your basket at 370°F (188°C) for just 5 to 6 minutes. They don’t need long since they are already fully cooked; we are just reviving the texture.
What About Extra Glaze?
Remember how I told you to reserve some of that incredible sauce? Keep that reserved glaze in a small, sealed container in the fridge too. It might look like a thick, sticky blob when it comes out, but trust me, it’s fine! Just scoop out what you need and gently warm it in a tiny saucepan over low heat, stirring until it’s pourable again.
Once the wings are hot and crispy, you can drizzle that warmed sauce over them, or you can toss them lightly again if you want them extra saucy. They taste almost as good on day two, I promise!
Frequently Asked Questions About Sticky Orange Chicken Wings Recipe
I figured you might have a few final things swirling around your head about making these Sticky Orange Chicken Wings. It’s always better to ask than to guess, especially when dealing with frying and that perfect glaze consistency! I use these quick tips all the time to troubleshoot.
Can I make the Honey Orange Sauce ahead of time?
Oh, absolutely, you can! This is a huge time-saver, especially if you’re having people over for Game Day. You can definitely whip up the Honey Orange Sauce for Chicken a day ahead. Once it has cooled down completely, store it in an airtight container in the fridge. When you’re ready to use it, pull it out about 30 minutes before you plan to toss the wings.
Since the honey and sugar cause the sauce to thicken up significantly when it cools, you’ll need to wake it back up. Just put it in a small saucepan over low heat and stir constantly until it’s warm and pourable again. You might need to add a tiny splash of water—like a teaspoon—if it seems too stiff, but be careful not to thin it out too much! We need that sticky coating!
How do I get the wings extra sticky?
This is the million-dollar question, isn’t it? The key separates a truly amazing batch of Homemade Sticky Chicken Wings from a watery disaster, and it all comes down to two things we covered. First, make sure you let the sauce simmer long enough *before* you add the slurry, so it reduces slightly and concentrates the flavors. That thick base is what we want!
Second, and most importantly, is that cornstarch slurry! You must ensure you’re using the right measurement (1 teaspoon cornstarch to 2 teaspoons cold water). When you swirl that slurry in and let it cook for that final minute, it thickens the sauce dramatically. When you toss the hot, crispy wings in that thickened glaze, they grab onto it and stay sticky! Try not to drown them all at once; toss them until they are just coated, and reserve any extra sauce for drizzling on top!
What is the best way to serve these Sweet and Tangy Chicken Wings?
Because these Sweet and Tangy Chicken Wings are so intensely flavorful and definitely sticky, you need a couple of simple sides to balance the meal out. We usually make a big batch for parties, and they disappear before I can even think about sides, much less!
But if you’re serving them as a main dish, I highly recommend piling them on a platter next to a big bowl of perfectly plain steamed white rice. The rice soaks up any extra glaze that drips off, which is heavenly. For something green and fresh, a simple side of crunchy Asian slaw—maybe just cabbage, carrots, and a light vinaigrette—really cuts through the richness of the sauce. And don’t forget those garnishes like sesame seeds and green onions; they add texture and make the presentation look professional!
If you have any other questions at all about technique or substitutions, feel free to drop me a line over at the contact page. Happy cooking!
Nutritional Estimate for Sticky Orange Chicken Wings with Honey Glaze
Now, I always bake these kinds of indulgent appetizers into my weekend eating, but for those of you who track things closely, I want to give you a rough idea of what’s in these beauties. Remember, this is homemade food, so the exact numbers can dance around a little depending on the size of your wing pieces or how much glaze you manage to lick off the pot!
These estimates are based on four servings, which comes out to about four wings per person. Don’t forget to read the full disclaimer over on the site if you need the super fine print details! You can check out my full disclaimer page here just to be totally safe about these numbers.
Here is what we are looking at, per serving (four wings):
- Calories: Around 350
- Sugar: About 18 grams (That’s the honey and brown sugar working their magic!)
- Sodium: Roughly 450mg (The soy sauce definitely plays a role here, so be mindful if you’re watching salt intake!)
- Total Fat: Right around 18 grams
- Protein: A solid 22 grams, thanks to all that chicken!
- Carbohydrates: Approximately 25 grams (Mostly from the glaze and the light coating flour/cornstarch)
Overall, these Sticky Orange Chicken Wings with Honey Glaze pack a huge flavor punch without totally wrecking your day! They’re perfect for snacking, but you definitely want to pair them with something lighter if you’re making it a full meal.
PrintSticky Orange Chicken Wings with Honey Glaze
Follow this recipe to make flavorful, sticky orange chicken wings coated in a sweet and tangy honey glaze. This recipe focuses on achieving a thick, clinging sauce.
- Prep Time: 20 min
- Cook Time: 25 min
- Total Time: 45 min
- Yield: 4 servings
- Category: Appetizer
- Method: Frying
- Cuisine: Asian Inspired
- Diet: Low Lactose
Ingredients
- 2 lbs chicken wings, separated into flats and drumettes
- 1 tablespoon soy sauce
- 1 teaspoon ground ginger
- 1/2 teaspoon black pepper
- 1/4 cup all-purpose flour
- 1/4 cup cornstarch
- Vegetable oil, for frying (about 3 cups)
- 1/2 cup orange juice, fresh squeezed
- 1/4 cup honey
- 1/4 cup brown sugar, packed
- 2 tablespoons rice vinegar
- 1 tablespoon soy sauce
- 1 tablespoon orange zest
- 2 cloves garlic, minced
- 1 teaspoon sriracha or chili garlic sauce (optional)
- 1 teaspoon cornstarch mixed with 2 teaspoons cold water (slurry)
- Sesame seeds, for garnish
- Sliced green onions, for garnish
Instructions
- Pat the chicken wings completely dry with paper towels. In a bowl, toss the wings with 1 tablespoon soy sauce, ginger, and black pepper.
- In a separate shallow dish, combine the flour and cornstarch. Dredge each wing piece in the flour mixture, shaking off any excess coating.
- Heat the vegetable oil in a deep pot or Dutch oven to 350°F (175°C). Fry the wings in batches, turning occasionally, until golden brown and cooked through, about 8 to 10 minutes per batch. Remove wings and drain on a wire rack set over paper towels.
- While the wings drain, prepare the glaze. In a small saucepan, combine orange juice, honey, brown sugar, rice vinegar, 1 tablespoon soy sauce, orange zest, minced garlic, and sriracha (if using).
- Bring the sauce mixture to a simmer over medium heat, stirring until the sugar dissolves. Let it simmer for 3 to 5 minutes until it begins to thicken slightly.
- Whisk the cornstarch slurry and slowly pour it into the simmering sauce while stirring constantly. Continue to cook for about 1 minute until the sauce becomes thick and glossy. Remove from heat immediately.
- Place the cooked wings in a large bowl. Pour about two-thirds of the glaze over the wings. Toss gently until every wing is evenly coated. Add more glaze if needed, reserving some for serving.
- Transfer the glazed wings to a serving platter. Sprinkle with sesame seeds and sliced green onions before serving immediately.
Notes
- For crispier wings without deep frying, bake the coated wings at 400°F (200°C) for 20 minutes, then increase the heat to 425°F (220°C) for another 10 minutes before glazing.
- If you prefer an air fryer method, cook the coated wings at 380°F (195°C) for 18 to 22 minutes, flipping halfway through.
- Use fresh orange juice for the best flavor in the glaze.
Nutrition
- Serving Size: 4 wings
- Calories: 350
- Sugar: 18
- Sodium: 450
- Fat: 18
- Saturated Fat: 5
- Unsaturated Fat: 13
- Trans Fat: 0
- Carbohydrates: 25
- Fiber: 1
- Protein: 22
- Cholesterol: 90