

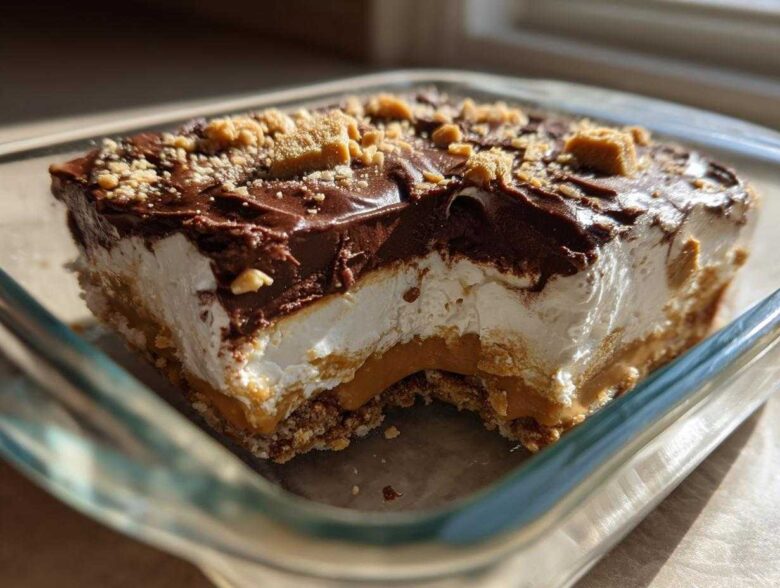
If you are anything like me, sometimes you just need a showstopper dessert that requires absolutely zero time sweating around a hot oven. Football Sundays, last-minute friends visiting, or when you just need a sugar rush that doesn’t involve complex baking – that’s when my incredible layered dips save the day. Seriously, nothing gets gobbled up faster than this ultimate **Dessert 7-Layer Dip (Peanut Butter and Chocolate)**. I first whipped this up years ago for a neighborhood potluck; I didn’t expect the reaction! People went absolutely wild for the creamy, salty-sweet combination. Because it’s entirely no-bake, it’s a lifesaver for any last-minute gathering. Just mix, spread, chill, and watch it disappear!
Why This Dessert 7-Layer Dip (Peanut Butter and Chocolate) Is Your New Favorite Party Staple
You need this recipe in your life, trust me. Forget fussy tarts or cakes that collapse the minute they leave the counter. This dip is designed for maximum impact with minimum effort. It’s the kind of **No Bake Layered Dessert** that looks like you spent hours on it, but really, you barely needed the mixer!
- It features that perfect salty-sweet dynamic—rich peanut butter meets deep chocolate—which is scientifically proven to make people happy.
- The layers are gorgeous! Seeing the distinct bands of cream cheese, peanut butter, chocolate pudding, and chips makes it feel like a real treat.
- It’s the ultimate **Easy Party Dessert Dip**. You just chill it and forget it until it’s time to serve, leaving you free to worry about the actual guests.
- It’s incredibly versatile! You aren’t restricted to chips; you can serve this with sturdy cookies, pretzel crisps, or even fresh apple slices. This means everyone finds something they love to dip with.
Quick Assembly for Any Occasion
Honestly, the active prep time is less than 20 minutes. That’s right! You mix seven components, stack them up, and into the fridge it goes. Since there’s no actual baking required, this is the perfect solution when you need a stunning **No Oven Dessert Layered** option ready in an hour or two. You can literally make this between chores!
Gathering Ingredients for Your Dessert 7-Layer Dip (Peanut Butter and Chocolate)
Okay, let’s talk parts. For a recipe this decadent, you might think we need a full pantry raid, but nope! It’s surprisingly straightforward, relying on standard fridge and pantry staples to create something magical. We are aiming for 10 amazing servings out of this batch, so make sure you have a decent square dish ready to go—an 8×8 inch dish is perfect for deep, stacked layers.
I always lay out everything before I start mixing, just so I don’t forget anything crucial like softening the cream cheese! Remember, temperature matters here, especially since we aren’t turning on the oven to save us later. You’ll need:
- One standard 8-ounce package of cream cheese, make sure it’s softened completely on the counter.
- One cup of powdered sugar—don’t try to substitute granulated, it won’t mix right!
- One full cup of your favorite creamy peanut butter.
- One 8-ounce container of frozen whipped topping, thawed gently.
- One small box (that’s about 3.4 ounces) of instant chocolate pudding mix.
- One cup of regular milk for mixing with that pudding.
- One standard cup of semi-sweet chocolate chips—I prefer semi-sweet so it balances the sweetness of the peanut butter layer.
- And if you want that extra crunch on top, about half a cup of chopped peanuts. Totally optional, but highly recommended!
That’s the whole list! Not bad for something this rich, right? Getting these ingredients ready is half the battle toward making the **Best Chocolate Peanut Butter Dessert** in your social circle.
Step-by-Step Guide to Assembling the Seven Layer Dessert Recipe
This is where the magic really happens! Because we’re building this dip vertically, the key is gentleness and patience between steps. Remember, we want defined layers, not one giant muddy mess of deliciousness! We’re going to treat each section like its own little flavor zone. Make sure your 8×8 dish is sitting flat on the counter before you start spreading anything, because moving it once it’s layered is risky business.
Preparing the Cream Cheese Base (Layer 1)
Start with your softened cream cheese and put it into a bowl with exactly one cup of powdered sugar. You need to beat this until it is super smooth and creamy—no lumps allowed! You are looking for that soft, spreadable consistency. Take your time here; use a hand mixer or a sturdy whisk. This forms our foundation, Layer 1. Spread it right to the edges of the pan evenly. We want full coverage!
Building the Peanut Butter and Whipped Layers (Layers 2 & 3)
Next up is peanut butter perfection! Smooth out your cup of creamy peanut butter right over that white base. It should spread fairly easily across Layer 1. For Layer 3, this is important: gently fold your thawed whipped topping into the peanut butter layer. Don’t just plop it on top; folding incorporates it slightly so it tastes like one unified, fluffy ribbon of peanut heaven.
Creating the Chocolate Finish for Your Layered Peanut Butter Treat (Layers 4, 5, 6, & 7)
Now for the chocolate action. Whisk that instant chocolate pudding mix with the cold milk. Whisk hard for about two minutes until it starts thickening up nicely—it’ll look like thick pudding. Carefully spoon this chocolate goodness over the whipped peanut butter layer to make Layer 4. Before it sets too much, dollop the rest of your thawed whipped topping (Layer 5) gently on top of the pudding. Finally, finish with the chocolate chips and peanuts (Layers 6 and 7). That visual contrast is stunning!
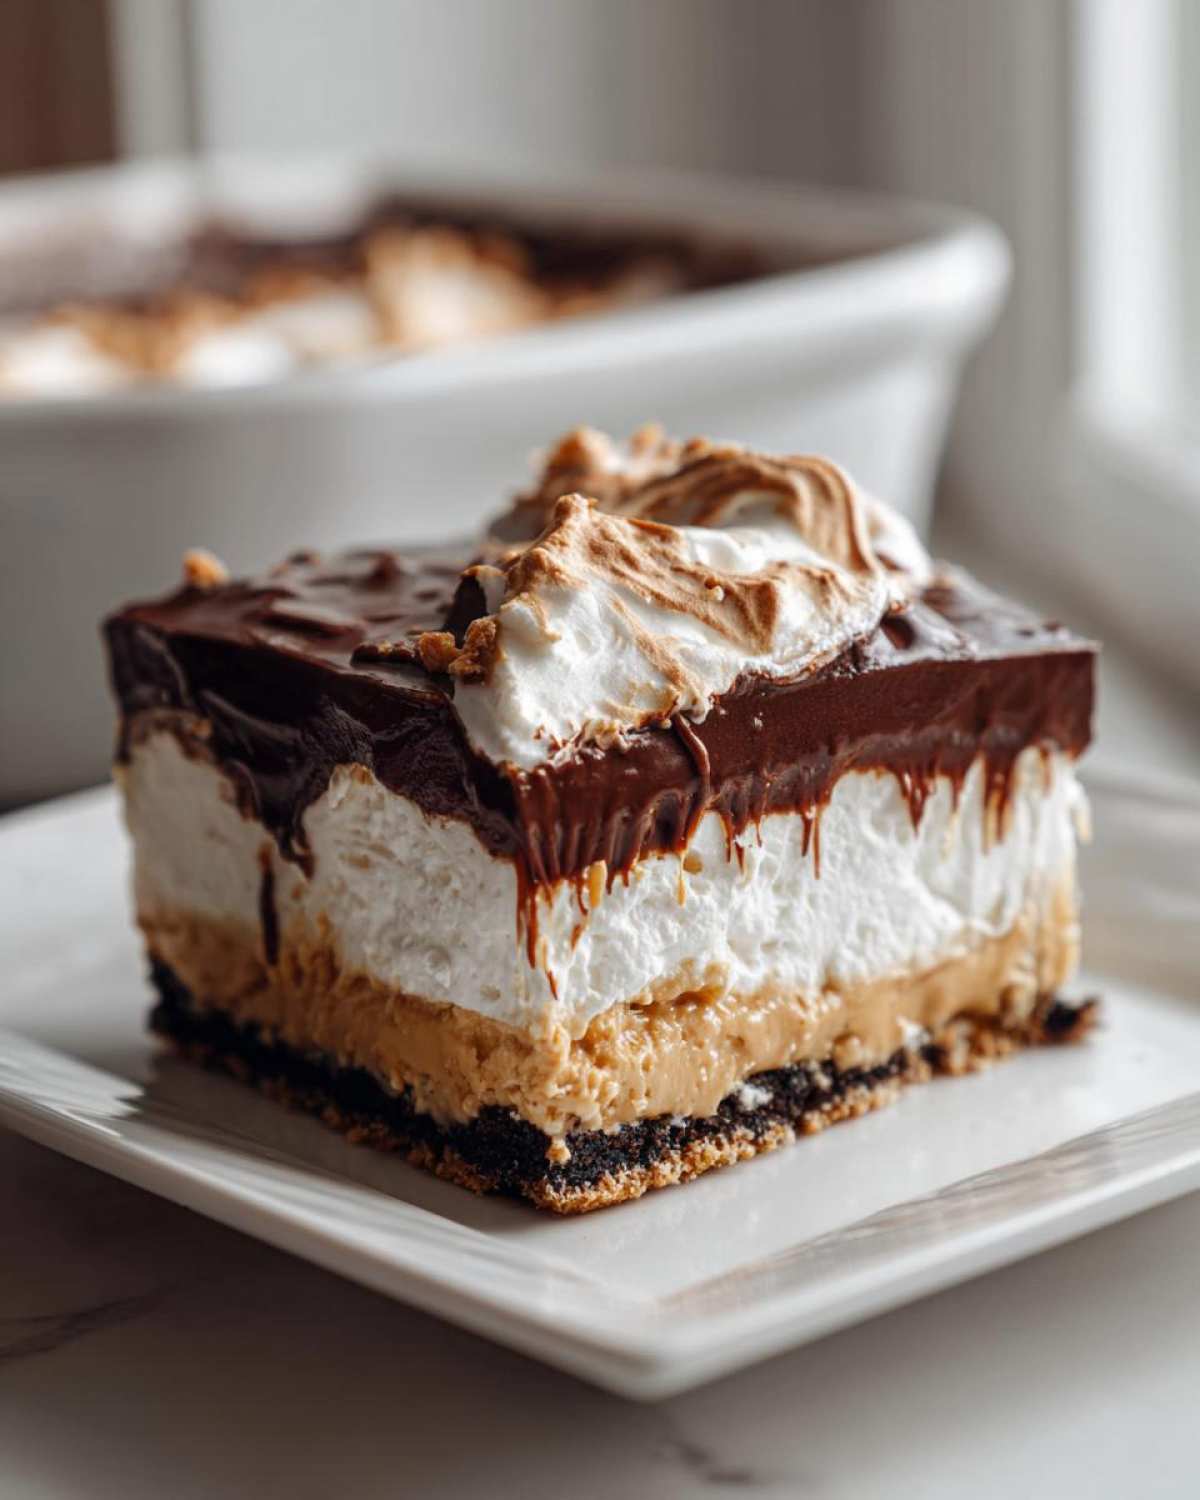
We made sure to link to our inspiration page so you can see the team behind our favorite recipes over at Spoon Swirl!
Tips for the Best Chocolate Peanut Butter Dessert Experience
You’ve assembled this beauty, but now comes the most crucial, yet hardest, part: waiting! Seriously, don’t even think about diving in right away. The minimum chilling time for this **fun layered sweet dip** has to be two hours. That time allows the cream cheese and pudding layers to firm up just enough so they don’t try to migrate into each other when you start digging in.
If you want really sharp edges between your layers—especially that pretty chocolate layer—make sure you spread gently. Use the back of a spoon and just let the weight of the topping do the work; don’t press down! If you decide to include the optional chopped peanuts, save those for the very last second, right before serving. They stay crunchier that way, adding a fantastic brittle texture to contrast with all that soft creaminess in our Best Chocolate Peanut Butter Dessert.
Ingredient Notes and Substitutions for this Fun Layered Sweet Dip
I always get questions when I post this **Fun Layered Sweet Dip** on social media because people are worried about ingredient swaps. Look, I love creative kitchen freedom, but for a layered dip that relies on structure, you have to respect the temperatures and volumes, especially when dealing with peanut butter!
The main question I get is about the peanut butter itself. If someone in your crowd has a peanut allergy—or maybe you just ran out—you can definitely substitute almond butter. It gives a slightly toastier flavor, but it works perfectly fine in Layer 2. Just make sure whatever nut butter you use is creamy, not the oily natural kind that separates too much, okay? We need that gooey stability!
Now, let’s talk about those chocolate chips on top. In the main instructions, I told you to just sprinkle them over Layer 5. That keeps them firm and you get that pleasant snap when you bite into them. But, if you want something fudgier—like a true chocolate frosting layer instead—you have an option!
If you want a firmer chocolate layer, here’s what you do instead of just sprinkling the chips:
- Take those semi-sweet chocolate chips and put them in a small microwave-safe bowl.
- Add just one tablespoon of butter—no more!
- Microwave them in 20-second bursts, stirring well between each one, until it’s smooth and glossy.
- Quickly pour and spread that melted chocolate mixture right over the whipped topping (Layer 5). This becomes your new Layer 6.
If you do the melted chocolate method, you might want to pop that dish back into the fridge for about 15 minutes to let that layer set before you add your optional chopped peanuts on top. It just keeps everything super clean!
Serving Suggestions for Your Peanut Butter Chocolate Dessert Dip
This is genuinely the fun part! Once this gorgeous, towering **Peanut Butter Chocolate Dessert Dip** is chilled and ready to go, you need the perfect vehicles to scoop up all that creamy goodness. Since this dip is so rich, you need a variety of textures to give people options. I try to offer something salty, something sweet, and something fresh every time I serve this.
If you are worried about picky eaters or just want to make sure it’s a giant crowd-pleaser, you can’t go wrong with the classics. Think about setting out bowls of these alongside your 8×8 dish:
- Classic Cookies: Vanilla wafers are my absolute favorite partner here—they are slightly salty and sturdy enough not to break when you hit a thick layer of peanut butter. Graham crackers are always a massive hit too!
- Fresh Fruit: Don’t skip the fruit option! The coolness and tartness of fresh fruit really cut through the richness of the chocolate and peanut butter beautifully. Thinly sliced apples (especially Granny Smiths!) and strawberries are fantastic dippers here.
- Salty Pretzels: I know, I know, pretzels sound weird next to dessert, but the saltiness against the sweet dip? Forget about it! Pretzel crisps or even the thin dipping sticks work wonders.
- Simple Wafers: For the quickest option, you can always rely on those plain, crisp, buttery tea cookies. They don’t compete with the flavor profile at all.
The goal, remember, is to provide a great **Sweet Dip for Fruit and Cookies** experience. Whatever you put out, just make sure you put plenty of everything, because this dip disappears faster than anything else on the potluck table. You’ve been warned!
Storage and Make Ahead Instructions
One of the reasons I love this recipe so much—and why it’s my go-to for Game Day prep—is how flexible it is. You absolutely, 100% can make this ahead of time! Knowing I can prep my most popular dessert the day before the party means I’m far less stressed on the actual event day. It saves me so much time.
The recipe notes mention you can prep this up to one day in advance, and I stick to that. Here is my best advice for prepping ahead:
- Go ahead and assemble all seven layers exactly like the instructions tell you to.
- Cover your 8×8 dish tightly. I use plastic wrap, but foil works just as well. Make sure the wrap isn’t touching the chocolate chip topping if you can help it, as it can sometimes leave marks when you pull it off later.
- Pop the whole thing into the refrigerator. It needs that minimum two hours to set up, but if you make it the day before, that’s even better! Sometimes I think the flavors actually meld together more perfectly overnight.
Storage after serving is simple too. Since this dip is packed with cream cheese, pudding, and whipped cream, it needs to stay chilled, just like any dairy-based dessert. Just cover whatever leftovers you have tightly and put them right back in the fridge. It stays perfectly good for about three to four days, though honestly, we’ve never had leftovers last past day two at my house!
Now, I get asked this all the time: Should I reheat this? Nope! Don’t do it. This is a chilled creation meant to be served cold. Trying to warm up whipped topping and cream cheese just results in a soupy, sad mess. If you want warm chocolate, you’d have to add that back right before serving, but really, this **Peanut Butter Chocolate Dessert Dip** shines when it’s cold and firm!
Frequently Asked Questions About This Layered Dessert
I know that whenever you try a new layered recipe, a few questions always pop up right before you start scooping things into the pan. It’s totally normal! You want to make sure the layers stay pretty and that everyone can enjoy it. Here are the things I hear most often about assembling this fantastic **Layered Peanut Butter Treat**.
Can I make this Chocolate Peanut Butter Potluck Recipe the day before serving?
Oh yes, please do! This is what I do most of the time when I bring this to a gathering. As I mentioned before, making it ahead of time lets those layers chill out and firm up beautifully, which always makes slicing into it much cleaner. If you are making it a full 24 hours ahead, here’s my one small piece of advice:
- Assemble Layers 1 through 5 exactly as written (Cream Cheese, Peanut Butter, Whipped, Pudding, Whipped).
- Cover it tightly and chill it overnight.
- Only add your topping layers—the semi-sweet chocolate chips (Layer 6) and the optional chopped peanuts (Layer 7)—right before you head out the door or about an hour before you plan to serve it.
If you put the chocolate chips on the night before, sometimes the moisture from the pudding layer underneath can make them slightly soggy. We want crunch, not soft chocolate melting into the pudding, so wait until the last minute for those final touches!
What is the best way to prevent layers from mixing?
That’s the eternal struggle with any great layered dip, isn’t it? You want definition! The absolute biggest key here is chilling time. You must let each layer firm up—even just for 10 minutes—before adding the next, but we account for that by telling you to chill the whole thing for two hours at the end. Also, it’s all about the spreading technique.
When you are spreading something soft, like the whipped topping over the peanut butter, never use a circular spreading motion. Instead, use a spatula and gently *plop* the topping down in blobs across the surface. Then, very lightly, coax those blobs together until they meet, using just the weight of the spatula. If you press hard, you are just pushing that top layer down into the layer below it. Use a light, fast touch, and you’ll keep those beautiful layers separate!
If you have any other pressing questions about ingredients or timing, don’t hesitate to reach out to us; we love hearing from our readers over at Spoon Swirl!
Disclaimer Regarding Nutritional Data
Now, I have to throw in a little note here about the nutrition counts I listed earlier. I know some of you are tracking macros or watching sugar intake, and I want to be super upfront about what you’re looking at. When I calculate statistics for something like this amazing **Peanut Butter Chocolate Dessert Dip**, I’m using standard estimates based on the brands of cream cheese, peanut butter, and pudding mix that I personally use in my kitchen.
Because every single brand—and even how much topping you decide to use—affects the final numbers, these figures are purely estimates. They give you a general idea, but they aren’t a guarantee, okay? Think of it as a friendly guide, not a strict mandate!
For the official, comprehensive details on how we handle the numbers on this site, please take a look at our full disclaimer page. We try to be as transparent as possible about everything coming out of the kitchen, whether it’s a savory meal or a decadent dessert!
You can find all the detailed legal jargon and our process over here: Check our official Nutritional Disclaimer. Happy dipping, friends!
PrintSeven Layer Peanut Butter Chocolate Dessert Dip

A layered, no-bake dessert dip featuring distinct layers of peanut butter, chocolate, and creamy fillings, perfect for serving with fruit or cookies.
- Prep Time: 20 min
- Cook Time: 0 min
- Total Time: 20 min
- Yield: 10 servings
- Category: Dessert
- Method: No Bake
- Cuisine: American
- Diet: Vegetarian
Ingredients
- 1 package (8 ounces) cream cheese, softened
- 1 cup powdered sugar
- 1 cup creamy peanut butter
- 1 container (8 ounces) frozen whipped topping, thawed
- 1 package (3.4 ounces) instant chocolate pudding mix
- 1 cup milk
- 1 cup semi-sweet chocolate chips
- 1/2 cup chopped peanuts (optional, for topping)
Instructions
- In a medium bowl, beat the softened cream cheese and powdered sugar until smooth. Spread this mixture evenly over the bottom of an 8×8 inch serving dish. This is Layer 1.
- In a separate bowl, mix the creamy peanut butter until smooth. Carefully spread the peanut butter over the cream cheese layer. This is Layer 2.
- In another bowl, gently fold the thawed whipped topping into the peanut butter layer, creating a light, fluffy layer. This is Layer 3.
- In a small bowl, whisk together the instant chocolate pudding mix and milk until thickened, about 2 minutes. Spread this chocolate pudding mixture over the whipped topping layer. This is Layer 4.
- Pour the remaining half of the thawed whipped topping over the pudding layer. This is Layer 5.
- Sprinkle the semi-sweet chocolate chips evenly over the whipped topping. This is Layer 6.
- If using, sprinkle the chopped peanuts over the chocolate chips. This is Layer 7.
- Chill the dip for at least 2 hours before serving to allow the layers to set. Serve cold with graham crackers, vanilla wafers, or apple slices.
Notes
- You can substitute almond butter for peanut butter if needed.
- For a firmer chocolate layer, melt the chocolate chips with 1 tablespoon of butter and spread it before adding the final whipped topping layer.
- Prepare this dip up to one day ahead of time.
Nutrition
- Serving Size: 1/10 of dip
- Calories: 350
- Sugar: 35
- Sodium: 250
- Fat: 22
- Saturated Fat: 8
- Unsaturated Fat: 14
- Trans Fat: 0
- Carbohydrates: 35
- Fiber: 2
- Protein: 8
- Cholesterol: 25