

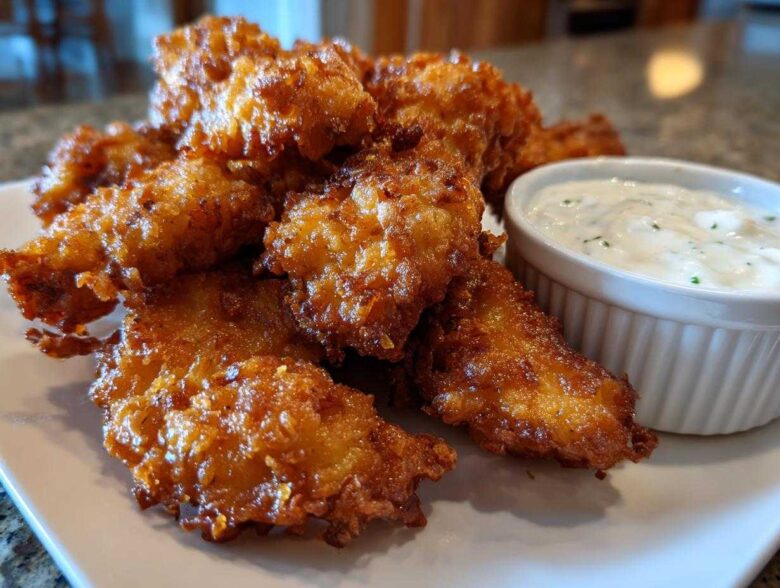
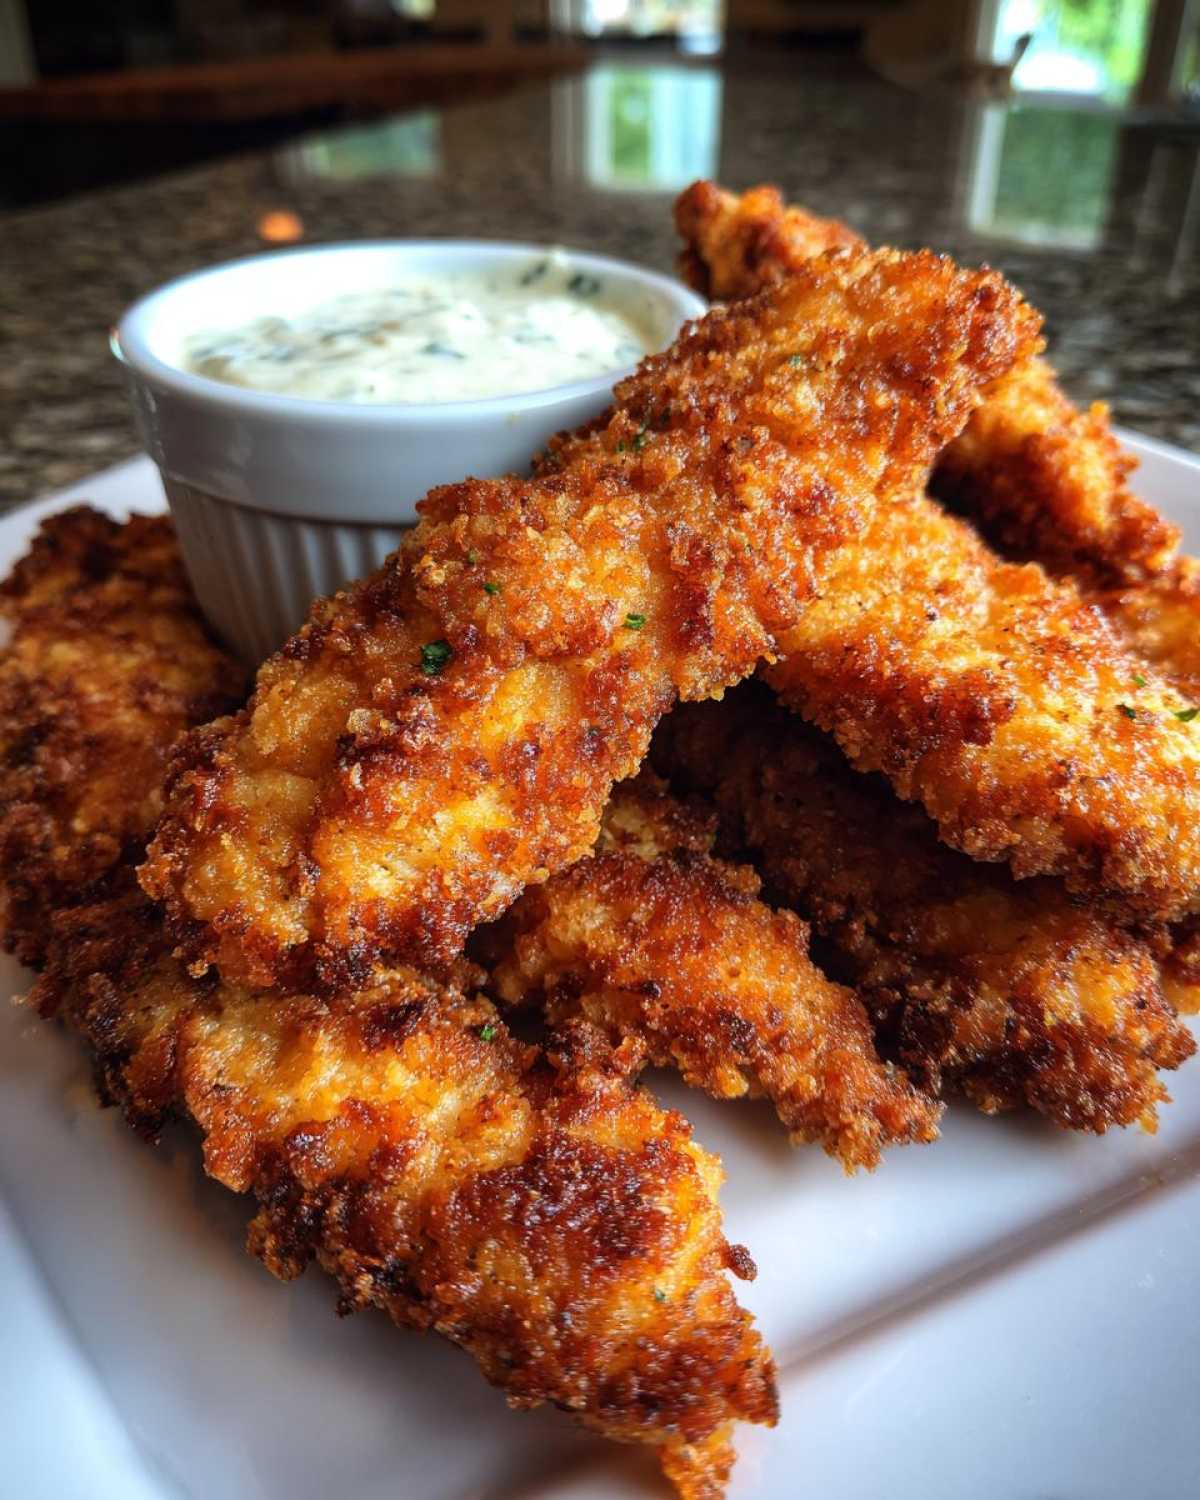
I swear, trying to get that perfect, audible CRUNCH on a homemade chicken tender without ending up with dry, sad chicken inside feels like mastering a secret level of cooking, right? Well, stop searching, because I finally cracked the code! I’m so excited to share my recipe for the ultimate Crispy Chicken Tenders with Garlic Parmesan Dip. Trust me, we’re talking shattering crispiness on the outside and tender, juicy meat inside—no more bland freezer basket repeats!
The real magic, which I learned after years of soggy coating disasters, is all in the dredging process. We’re doing a double-dip technique here, which locks in all the moisture while creating that incredible craggy crust. Pair that with my super simple, unbelievably creamy Garlic Parmesan Dip, and you’ve got an easy chicken tender appetizer that will ruin takeout for you forever. Let’s get cooking!
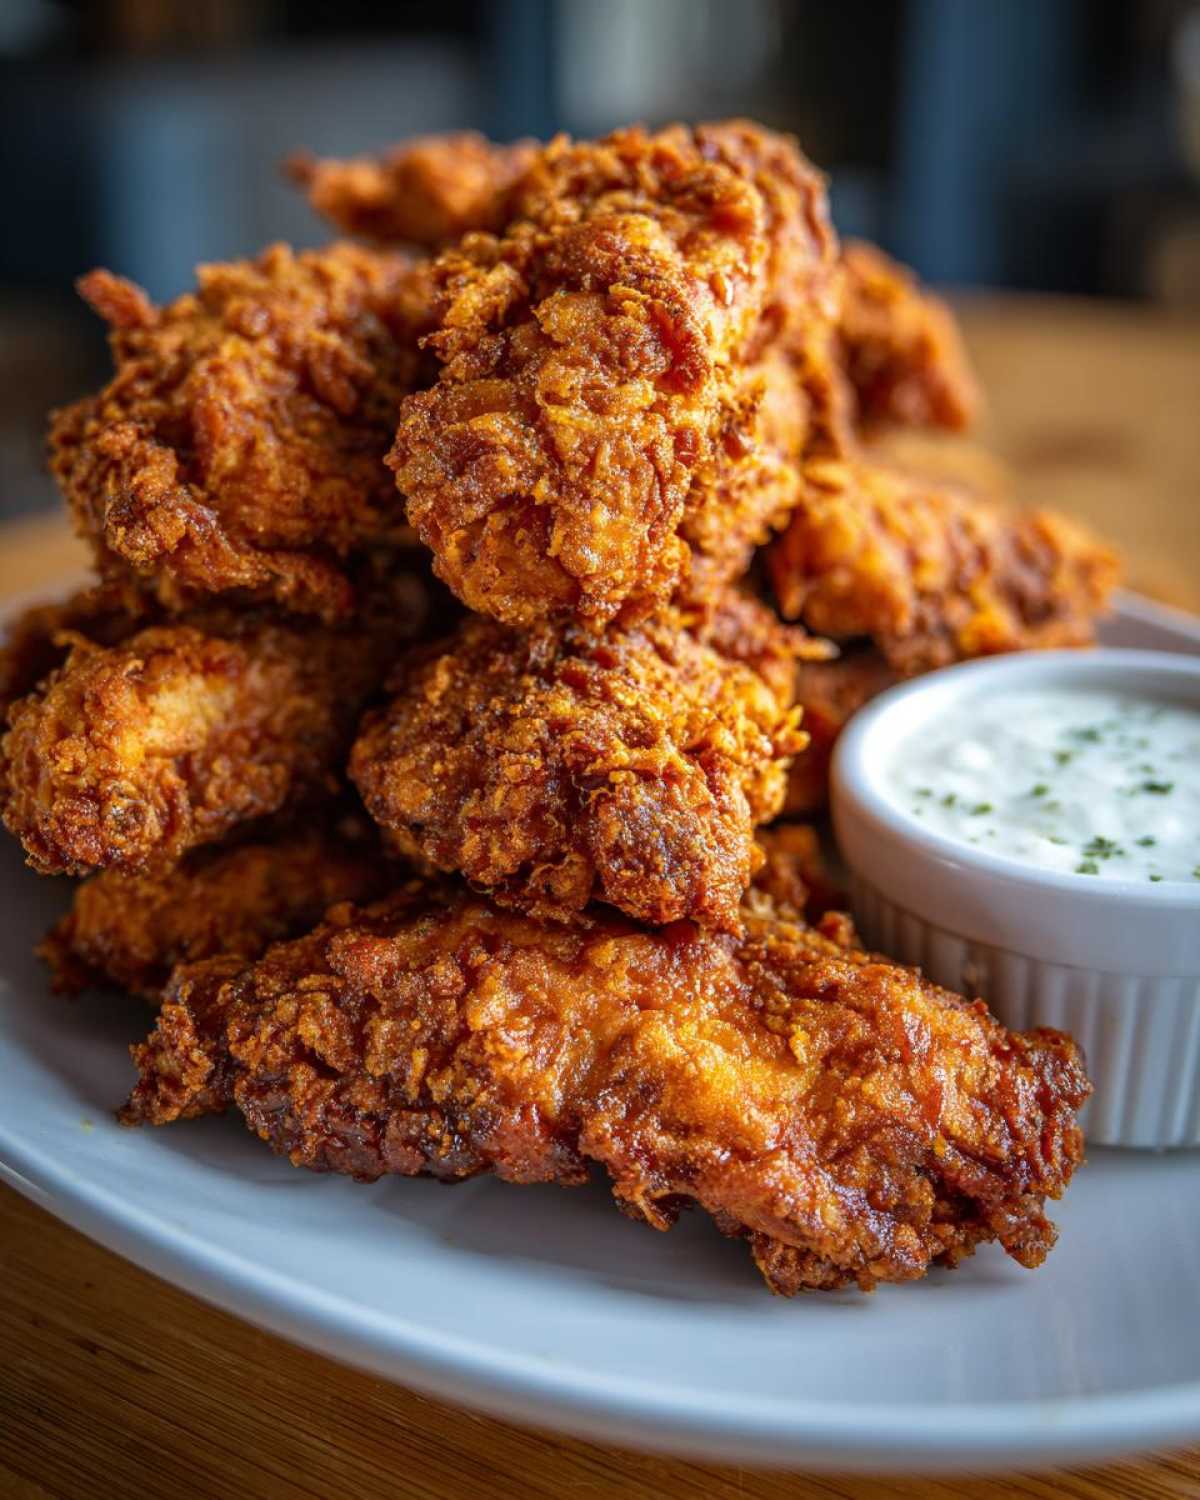
Why You Must Make These Crispy Chicken Tenders with Garlic Parmesan Dip
Look, I know there are a million chicken tender recipes out there, but you need this one in your life for a few non-negotiable reasons. This isn’t just another weeknight meal; it’s practically an event! Here’s why this recipe jumps to the top of your pull-out-the-recipe-binder list:
- The Texture Guarantee: We nail that coveted Juicy Inside Crispy Outside Chicken combo every single time. That double-dredge thing I mentioned? It actually works like a charm! You get a shield of crunch that protects the tender meat inside.
- The Dip is Essential: Honestly, the tenders are great, but the creamy, sharp Garlic Parmesan Dip Recipe elevates this whole dish. It’s cool, savory, and the perfect counterpoint to the hot, zesty chicken.
- Family Approved Power: If you’re looking for Family Friendly Chicken Dinner Ideas that kids actually cheer for, this is it. It’s a major upgrade from anything frozen, but still cooks lightning fast.
- Party Perfection: Need an Easy Chicken Tender Appetizer that disappears instantly at a gathering? These are perfectly portioned, easy to grab, and just require you to keep the dip bowl filled. Check out some other fantastic snack ideas over at my snacks archive when you’re planning your next party!
- Control Over Ingredients: You know exactly what’s going into the coating and the oil. No weird fillers or mystery powders here, just good old flour, eggs, and panko!
Essential Ingredients for Crispy Chicken Tenders with Garlic Parmesan Dip
Okay, before we even look at the stovetop, we need to gather our crew! Getting the right ingredients lined up is half the battle, especially when we’re aiming for maximum crunch. I always put everything out in little bowls so I can see exactly what I have. When it comes to the chicken itself, make sure you pat those 1-inch strips totally dry with paper towels. This moisture control is key for us experts!
We break our ingredients into three important groups: the chicken, the coating stations, and that amazing dip we’ll mix up later. Precision here makes all the difference in achieving truly Homemade Crispy Chicken Tenders.
For the Ultimate Crispy Coating
This is where the texture happens, so don’t skimp on the good stuff! We need three dishes. First, your flour base—this is just your standard all-purpose stuff, seasoned up nicely with salt, pepper, and a tiny bit of paprika for color.
- 1 cup all-purpose flour
- 1 teaspoon salt
- 0.5 teaspoon black pepper
- 0.5 teaspoon paprika
Next, two eggs, beaten until they look pale yellow and frothy. Then comes the secret weapon for crunch: Panko breadcrumbs! Don’t even think about using regular breadcrumbs; Panko gives you those light, airy shards that stay crispy even when coated in sauce.
- 2 large eggs, beaten
- 1.5 cups panko breadcrumbs
For the Homemade Garlic Parmesan Dip Recipe
This dip comes together while the oil is heating, so be ready! The base needs to be creamy, but the Parmesan and fresh garlic are what give it that savory, sharp kick that perfectly complements our Crispy Chicken Tenders with Garlic Parmesan Dip.
- 0.5 cup mayonnaise (full fat works best for richness!)
- 0.25 cup sour cream
- 0.5 cup grated Parmesan cheese (use the powdery stuff in the green can if you like it strong, or fresh grated otherwise!)
- 2 cloves garlic, minced finely
- 1 tablespoon lemon juice (just a hint of brightness!)
- 1 teaspoon dried parsley
The Best Chicken Tenders Recipe: Step-by-Step Preparation
Alright, this is where you put on your game face! Making truly amazing Crispy Chicken Tenders with Garlic Parmesan Dip comes down to technique, not just ingredients. Since we went to the trouble of drying the chicken and setting up our stations, we need to respect the process. Don’t rush this part—it’s what separates the floppy tenders from the crunchy champions!
We start with the coating, and then we move straight into the heat. You’ll want to keep a close eye on your oil temperature; that’s my number one rule for success here! If you need a general refresher on all things chicken, I have a whole guide on how to make chicken tenders, but let’s focus on this coating genius below.
Setting Up Your Dredging Station for Crispy Chicken Tenders
First things first: remember how I stressed drying those chicken strips? Get them bone dry! Moisture is the enemy of crispness, so pat, pat, pat those pieces!
Now, arrange your three dishes in the order they’re needed. You’ll take a dry strip and dredge it first in the flour mixture—shake off anything that isn’t clinging on. Next, dip it completely into that egg wash. Let the extra egg drip off for just a second. Finally, press that wet tender firmly into the panko crumbs. Make sure every single millimeter is covered!
Now, here’s the pro move for that extra-loud crunch: if you want the ultimate texture, just repeat the process! Dip that already-crusted tender back into the egg, and then back into the panko one more time. That double layer of breading is your armor against sogginess.
Perfect Frying Technique for Crispy Chicken Tenders with Garlic Parmesan Dip
You absolutely need a candy or frying thermometer for this part—I’m serious! Pour about two inches of vegetable oil into a heavy pot and heat it gently until the thermometer reads exactly 350 degrees Fahrenheit (175 Celsius). If it’s too cool, the chicken soaks up oil and gets greasy. Too hot, and the outside burns before the center is cooked.
Carefully lower about four or five tenders into the oil. Don’t shake the pot or crowd them! Let them fry, undisturbed, for maybe three to four minutes per side until they are deeply golden brown. Once they look perfect, pull them out with a slotted spoon and immediately place them on a wire rack set over a sheet pan. This allows air to circulate so they stay crisp. Pop them out immediately on the rack, sprinkle with a tiny bit of finishing salt, and you are ready!
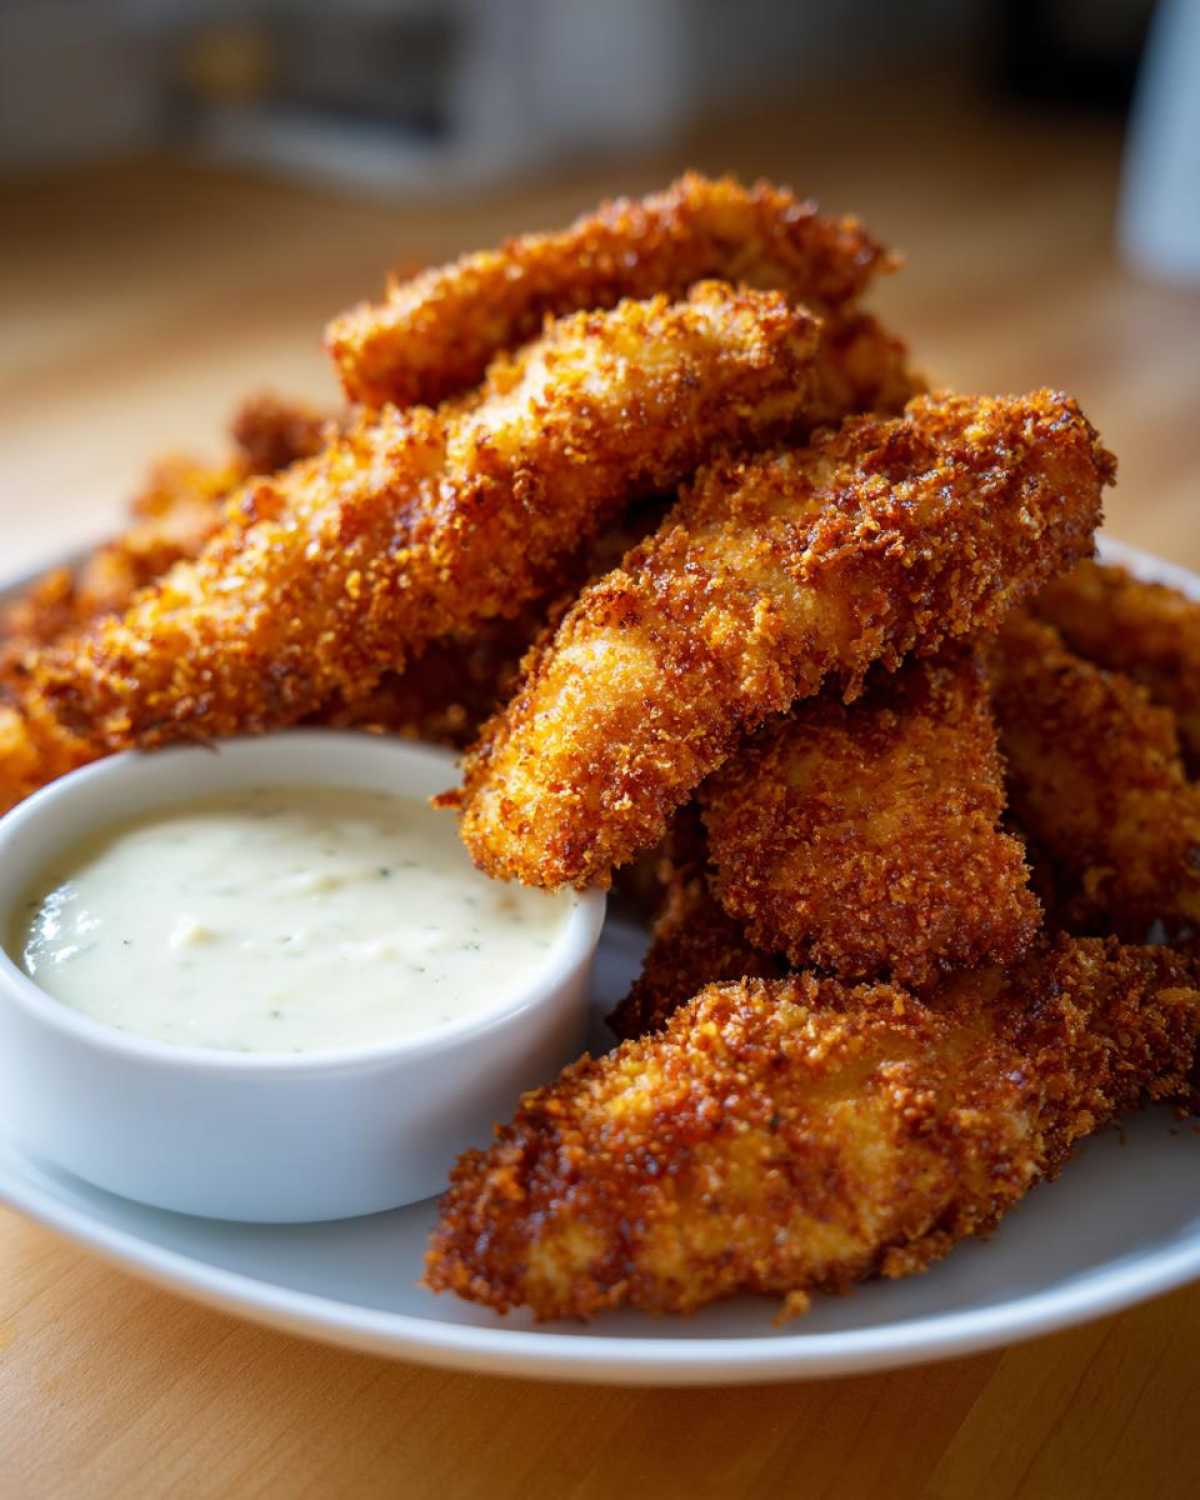
Mastering the Garlic Parmesan Dip Recipe
While those glorious chicken tenders are draining and keeping warm, you can whip up the Garlic Parmesan Dip Recipe. Seriously, don’t even think about grabbing a bottle of that fluorescent green ranch—this homemade sauce is miles better and takes less time than boiling water!
The secret to a wonderfully smooth, irresistible dip for your Crispy Chicken Tenders with Garlic Parmesan Dip is making sure all the creamy components are room temperature, or at least not ice-cold straight from the fridge. It just blends easier that way.
Grab a small bowl—no need for the big mixer here—and toss in your mayonnaise and sour cream. Whisk those two together first until they look like one beautiful, pale base. You want zero lumps showing!
Next up is the armor: the Parmesan cheese and garlic. Make sure that garlic is minced super fine, because nobody wants a big chunk of raw garlic hiding in their sauce! Stir the grated Parmesan, the minced garlic, the bright hit of lemon juice, and the dried parsley right into the creamy base.
Just mix it gently until everything is fully incorporated and you have a thick, creamy sauce. Taste it! Does it need a tiny pinch more salt? Maybe a whisper more lemon? Adjust it until it sings. If you want even more inspiration on amazing dipping sauces, you absolutely have to check out my smoked paprika dip recipe for another flavor profile!
This dip is intensely flavorful, but it’s great because it’s robust enough to stand up to that spicy, garlicky crunch of the chicken. You can serve it right away, or, if you can manage to keep your hands off it, let it chill in the fridge for about 30 minutes for the flavors to really marry. Honestly, these Crispy Chicken Tenders with Garlic Parmesan Dip are best served hot with a scoop of this incredibly creamy sauce!
Alternative Cooking Methods: Oven Baked Crispy Tenders and Air Fryer Chicken Tenders
Okay, I know that deep frying is the gold standard for that unbeatable crunch, but let’s be real—sometimes you don’t want a big pot of hot oil, or maybe you’re trying to keep things a little lighter for a weeknight dinner. That’s why I always include instructions for baking and air frying! These are fantastic ways to get great results if you’re looking for Oven Baked Crispy Tenders or speedy snack prep.
Don’t worry, you still need to do the whole three-step dredging station first; that coating is non-negotiable for success no matter how you cook it! But once they are coated, transfer them right over to your chosen cooking vessel. If you are new to air frying, I have tons of tips and tricks for crispy results, like these amazing air fryer ranch chickpeas that might inspire you!
Oven Baked Crispy Tenders: A Lighter Approach
If you’re using the oven, the absolute key here—and I mean this—is to get the coated tenders up off the baking sheet so air can circulate completely around them. If you just lay them flat, the bottom gets steamed and sad. You need a wire rack set over a baking sheet!
Preheat your oven to a pretty high temperature: 400 degrees Fahrenheit (about 200 degrees Celsius). Place your breaded strips on that oiled wire rack. You’re going to bake them for about 18 to 22 minutes total. About halfway through their cooking time (so around the 10-minute mark), you have to flip every single tender! This ensures both sides get that gorgeous golden-brown color. They’ll be done when they hit that safe 165°F inside temperature.
Air Fryer Chicken Tenders: Speed and Efficiency
Look, the air fryer wins hands-down for speed if you’re making a smaller batch or just need a snack ASAP. It gives you a texture that is surprisingly close to fried—way better than the oven, in my honest opinion.
Set your air fryer temperature to 380 degrees Fahrenheit (around 195 degrees Celsius). Now, this is crucial: don’t stack them in the basket! Cook them in a single layer. You might need to work in batches, but seriously, don’t crowd them or they steam. They cook super fast, usually just 10 to 12 minutes total. Remember to shake the basket gently halfway through the cooking time to flip them over and make sure they crisp evenly on all sides.
Tips for Success with Crispy Chicken Tenders with Garlic Parmesan Dip
Even with the best recipe, sometimes little things trip us up, right? I’ve learned a few insider tricks over the years in my kitchen that ensure these Crispy Chicken Tenders with Garlic Parmesan Dip come out perfect every single time, especially when I’m making a huge party platter.
These aren’t just random pointers; these are the steps I follow religiously whenever I’m whipping up a batch. If you want that incredible crunch to last more than five minutes, pay close attention to how you handle them right after they leave the oil!
Always Use a Wire Rack for Draining
This is non-negotiable, friend! When those golden-brown tenders emerge from the bubbling oil, your instinct might be to put them on paper towels. Stop! Paper towels trap steam underneath the chicken, and steam is the arch-nemesis of the crispy coating we worked so hard to build.
Instead, you absolutely must transfer them straight to a wire rack placed over a baking sheet. This allows air to move all around the chicken, letting moisture escape freely while keeping the bottom from getting soggy. It’s the best way to maintain that audible crunch.
Season Immediately While Hot
As soon as those hot tenders hit that wire rack, grab your salt shaker! You need to season them while the exterior is still slick with residual hot oil. That little bit of oil acts like glue for the finished salt, making the flavor adhere beautifully right to the crust. If you wait five minutes until they’ve cooled slightly, the salt just slides right off, and you end up with bland spots.
A light dusting of fine sea salt right after frying makes a massive difference in the final flavor profile of these Crispy Chicken Tenders with Garlic Parmesan Dip.
Don’t Skip the Double Dredge for Maximum Crunch
I know I keep circling back to it, but seriously, if you are worried about texture retention—especially if you are planning on transporting these to a gathering or if you want them to stay fantastic while you finish the dip—always do the second coating.
That extra flour, egg, and panko layer creates a much thicker barrier. When that thick coating hits the hot oil, it puffs up just slightly, giving you more surface area to crisp, and it insulates the juicy chicken breast inside even better. It’s the most reliable way to guarantee a great texture for homemade appetizers.
If you’re looking for more deep dives on perfecting specific techniques in the kitchen, feel free to poke around my main blog page. Happy crunching!
Serving Suggestions for Your Easy Chicken Tender Appetizer
Whew! The Crispy Chicken Tenders with Garlic Parmesan Dip are done, drained, and they sound incredible—I know you are dying to eat them immediately! But sometimes, you’ve got a crowd, or maybe you need to stretch this into a real dinner, not just a snack fest. I always keep things simple when serving these because the tenders and the dip are already so rich and flavorful.
You’ve got options here depending on whether you’re planning an absolute feast or just need a solid Family Friendly Chicken Dinner Idea. Trust me, you don’t want sides that fight with that garlicky dip; you want things that complement that salty crunch!
Here are the three ways I love serving these up:
The Classic Comfort Platter
If you’re making these for a game day or a casual movie night, you have to stick to the classics. You can’t go wrong with crispy chicken and a salty side. These pairings are perfect for dipping!
- Perfectly Seasoned Fries: Skip the frozen stuff and make some homemade fries if you have the energy, or just toss frozen ones in the air fryer until they are extra crispy. Dipping a hot, salty fry right into that cool Parmesan sauce is next level.
- Sweet Potato Fries: If you want a little sweetness to slightly balance the garlic, sweet potato fries are wonderful. They offer a nice contrast in color on the platter, too!
- Thick-Cut Onion Rings: If you are going all out on fried goodness (and who can blame you?), crunchy onion rings are a natural partner for amazing chicken tenders.
Making it a Lighter Dinner
If you’re aiming for a healthier family option or just need to balance out the richness from the frying oil, throw in some crisp, fresh vegetables. This turns your appetizer into a full, satisfying meal. Check out some other great dinner ideas on my dinner recipe page!
- Simple Green Salad: Toss some crisp romaine or mixed greens with a light, tangy vinaigrette—maybe a lemon-herb dressing. The acidity cuts right through the richness of the dip perfectly.
- Crunchy Veggie Sticks: Carrot sticks, celery sticks, and slices of crisp bell pepper are fantastic additions. They add texture, they’re hydrating, and heck, you can even dip the veggies if you’re feeling frisky!
- Broccoli Florets (Steamed Lightly): Just steam them until they are bright green but still have a good snap. A little squeeze of salt and pepper on those, and they complement the main event beautifully.
Elevating for a Party Appetizer Recipes Spread
When this is part of a bigger spread for a party, you want variety in presentation. People love dipping into different things!
- Served Over a Bed of Flaky Lettuce: Instead of having the dip in a separate bowl, try arranging the tenders on a big platter lined with butter lettuce or iceberg shreds. It looks fancy, and it catches any little crumbs or sauce drips.
- Mini Skewers: For super easy grabbing, thread the cooled tenders onto small bamboo skewers. You can alternate with a cherry tomato or a cube of mild cheese. This makes them super easy to manage when mingling!
No matter how you serve them, the star is always going to be that crunchy bite followed by that creamy, savory dip. Enjoy putting your spread together!
Storage and Reheating Instructions for Leftover Crispy Chicken Tenders
Listen, the hard part is usually making enough Crispy Chicken Tenders with Garlic Parmesan Dip to actually have leftovers! If, by some miracle of self-control, you have some glorious crunchy tenders the next day, storing them correctly is essential if you want to recapture that magic crunch. Please, for the love of good texture, do not ruin these beauties by reheating them in the microwave. We worked too hard on that Panko shell!
The key here is treating the tenders and the dip like two separate entities. They are best buddies, but they don’t need to be stored as a couple. If you let the dip sneak onto the cold tenders, you guarantee a soggy mess by morning. Here is my foolproof system for keeping leftovers tasting almost as good as fresh.
Storing the Chicken Tenders Safely
First things first: cooling them down. It’s tempting to bag them up right away, but you need to let them cool completely on the counter first. If you put warm chicken in an airtight container, you trap that heat and steam, and guess what? Soggy tenders.
Once they are completely cool (this might take 30 minutes or so), grab an airtight container. The best practice here, honestly, is to save a little piece of parchment paper and lay it in the bottom of the container before adding the tenders. Don’t stack them more than two layers deep, maximum. If you have a ton left, use two containers spaced out.
Seal that container up TIGHTLY and pop it in the fridge. They keep well for about three to four days, but let’s be honest, a chicken tender rarely lasts that long in my house!
Storing the Homemade Garlic Parmesan Dip
This dip is mayonnaise and sour cream based, so it needs to stay cold, obviously. Since it’s dairy-heavy, it usually lasts about a week in the fridge, easily. Transfer your leftover dip into a clean, small airtight container. Make sure you scrape out every last bit of that creamy goodness so none goes to waste!
Just like the chicken, give the dip a quick stir when you take it out of the fridge the next day. Sometimes the Parmesan cheese can firm up slightly, but a quick whisk almost always brings it right back to that perfect, dippable consistency.
The Best Way to Reheat for Maximum Crispiness
If you want that wonderful, audible crunch back in your Crispy Chicken Tenders with Garlic Parmesan Dip, you need dry heat. Forget the microwave; it’s the texture destroyer.
Option 1: The Air Fryer Champion (My Top Pick!)
- Preheat your air fryer to a moderate temperature, around 375°F (190°C).
- Place the cold tenders in a single layer in the basket. Again, no stacking!
- Cook for just 4 to 6 minutes. You just need to reheat them through and crisp up that coating again, not cook them from raw. They’ll be perfect, hot, and crunchy!
Option 2: The Oven Revival
If you don’t have an air fryer, the oven is your next best friend. Preheat it to 400°F (200°C). Set the tenders on that trusty wire rack over a baking sheet again—yes, even leftovers need the rack! Pop them in for about 8 to 10 minutes, checking them closely around the 6-minute mark. They should heat through nicely and the coating should feel wonderfully crisp again.
Serve your perfectly revived tenders with that cool, savory Garlic Parmesan Dip, and you’ll swear you just made them fresh!
Frequently Asked Questions About Making Crispy Chicken Tenders
I get so many questions whenever I post about this recipe, and that’s totally fair! Mastering the perfect crunch sometimes takes a little fine-tuning, especially if you’re switching up the usual routine. Here are some of the top things people ask me about achieving these incredibly Homemade Crispy Chicken Tenders and making that phenomenal dip.
If you have a question that isn’t answered here, feel free to shoot me a message over at my contact page, and I’ll gladly share my expertise!
Can I use chicken thighs instead of breasts for this recipe?
Oh, that’s a great question! Yes, you absolutely *can* use chicken thighs. Many folks prefer them because they have a higher fat content, which naturally keeps the meat extra moist. When using thighs, make sure you trim off any excess fat or gristle, and cut them into roughly the same 1-inch strip sizes.
The only thing you need to watch out for is the cooking time. Since thighs can be a bit denser, you might need to add a minute or two to the frying time, or perhaps drop the oven/air fryer temperature slightly to ensure they reach that safe 165°F internal temperature without any risk of burning that beautiful Panko crust. They make for fantastic Juicy Inside Crispy Outside Chicken!
Can I make the Garlic Parmesan Dip ahead of time?
You totally can, and I often recommend it! Making the Garlic Parmesan Dip Recipe ahead of time is perfect because it actually allows the flavors to meld together—that fresh garlic really gets to know the Parmesan! I usually mix mine up the day before I plan to serve the tenders and keep it covered tightly in the fridge.
The only minor tip I have is that the sour cream and mayo base might firm up a tiny bit overnight. Just pull the dip out about 15 to 20 minutes before you plan on eating, give it a good stir, and it will be back to its luscious, creamy self, ready to go with your Crispy Chicken Tenders with Garlic Parmesan Dip.
What is the absolute best oil to use for frying?
When you’re frying, you need an oil with a high smoke point—that means it can get really hot without smoking up your kitchen disastrously! For the best results in my Fried Chicken Tenders Guide, I always recommend vegetable oil or canola oil. They are flavor-neutral and they handle the 350°F requirement beautifully.
Peanut oil is fantastic too, if you have it on hand and don’t have any nut allergies in the house, as its smoke point is super high. Just avoid olive oil for deep frying; it breaks down too quickly and gives everything a strangely bitter taste!
Can I freeze the coated, uncooked tenders?
Yes! This is how you turn a simple recipe into the ultimate Easy Chicken Tender Appetizer stockpile. After you finish the double-dredging process, lay the raw, coated tenders in a single layer on a parchment-lined baking sheet. Pop that sheet right into the freezer until the tenders are completely rock hard—this usually takes an hour or two.
Once they are frozen solid, you can transfer them into a heavy-duty freezer bag. When you want to cook them, you can cook them straight from frozen! Just add about 3 to 5 extra minutes to your frying or baking time. They still come out wonderfully crispy!
Nutritional Estimates for Crispy Chicken Tenders with Garlic Parmesan Dip
I always feel a little guilty sharing this section because, let’s be honest, deep-fried chicken coated in that amazing creamy dip isn’t exactly what I’d call “health food.” But hey, knowledge is power, and you deserve to know what you’re eating! I gathered up the estimates based on how the recipe is written, which assumes you’re using the frying method since that’s the primary way I detailed cooking them.
Think of these numbers as a general guide. How much oil sticks to the crust, how salty you sprinkle it, and whether you use low-fat sour cream versus full-fat mayo—all that stuff changes the final tally! If you’re using the air fryer or baking method—which is a great choice for a lighter meal—your fat content will be significantly lower, so keep that in mind!
For the most transparent look at what’s in a standard serving (which I’ve listed as 4 tenders plus 2 tablespoons of that rich dip), here is the breakdown:
- Serving Size: 4 tenders + 2 tbsp dip
- Calories: 450
- Protein: 32g (That’s the chicken doing the heavy lifting!)
- Fat: 25g
- Saturated Fat: 5g
- Unsaturated Fat: 20g
- Carbohydrates: 25g
- Sugar: 3g
- Sodium: 650mg (I always try to go lighter on the salt shaker for this reason!)
- Fiber: 1g
- Cholesterol: 110mg
Remember, these numbers are based on the ingredients listed for the fried version. If you swap to the air fryer method, you might drop that fat content down considerably! We always want you to feel good about the food you’re making in your kitchen.
For more detailed information about what we share on this site and how to interpret these figures based on cooking methods, please take a look over at my official site disclaimer. Happy eating!
PrintCrispy Chicken Tenders with Garlic Parmesan Dip

Follow this guide to make juicy chicken tenders with a very crispy coating, served with a rich homemade garlic parmesan dipping sauce.
- Prep Time: 20 min
- Cook Time: 15 min
- Total Time: 35 min
- Yield: 4 servings
- Category: Main Course
- Method: Frying
- Cuisine: American
- Diet: Low Fat
Ingredients
- 1.5 lbs boneless, skinless chicken breasts, cut into 1-inch strips
- 1 cup all-purpose flour
- 2 large eggs, beaten
- 1.5 cups panko breadcrumbs
- 1 teaspoon salt
- 0.5 teaspoon black pepper
- 0.5 teaspoon paprika
- Vegetable oil, for frying (about 2 inches deep)
- For the Dip: 0.5 cup mayonnaise
- For the Dip: 0.25 cup sour cream
- For the Dip: 0.5 cup grated Parmesan cheese
- For the Dip: 2 cloves garlic, minced
- For the Dip: 1 tablespoon lemon juice
- For the Dip: 1 teaspoon dried parsley
Instructions
- Prepare the chicken: Pat the chicken strips completely dry with paper towels. This step helps the coating stick and crisp up.
- Set up the dredging station: Place flour mixed with salt, pepper, and paprika in one shallow dish. Beat the eggs in a second dish. Place panko breadcrumbs in a third dish.
- Coat the chicken: Dredge each chicken strip first in the flour mixture, shaking off excess. Dip it into the egg wash, letting excess drip off. Finally, press firmly into the panko breadcrumbs to coat completely. Repeat the flour, egg, and panko process for a double coating if you want extra crispiness.
- Heat the oil: Pour vegetable oil into a heavy-bottomed pot or deep skillet to a depth of about 2 inches. Heat the oil over medium-high heat until it reaches 350 degrees Fahrenheit (175 degrees Celsius). Use a thermometer to check the temperature.
- Fry the tenders: Carefully place 4 to 6 tenders into the hot oil, ensuring you do not overcrowd the pan. Fry for 3 to 4 minutes per side, until golden brown and cooked through (internal temperature reaches 165 degrees Fahrenheit).
- Drain the tenders: Remove the cooked tenders with a slotted spoon and place them on a wire rack set over a baking sheet to drain excess oil. Sprinkle lightly with salt immediately after removing from the oil.
- Make the dip: While the chicken rests, combine mayonnaise, sour cream, Parmesan cheese, minced garlic, lemon juice, and parsley in a small bowl. Stir until smooth.
- Serve immediately with the garlic parmesan dip.
Notes
- For an oven-baked version, preheat your oven to 400 degrees Fahrenheit (200 degrees Celsius). Place coated tenders on a lightly oiled wire rack set over a baking sheet. Bake for 18 to 22 minutes, flipping halfway, until golden brown.
- For an air fryer, cook at 380 degrees Fahrenheit (195 degrees Celsius) for 10 to 12 minutes, shaking the basket halfway through.
- To keep the tenders crispy longer, avoid stacking them immediately after frying.
Nutrition
- Serving Size: 4 tenders + 2 tbsp dip
- Calories: 450
- Sugar: 3
- Sodium: 650
- Fat: 25
- Saturated Fat: 5
- Unsaturated Fat: 20
- Trans Fat: 0
- Carbohydrates: 25
- Fiber: 1
- Protein: 32
- Cholesterol: 110