

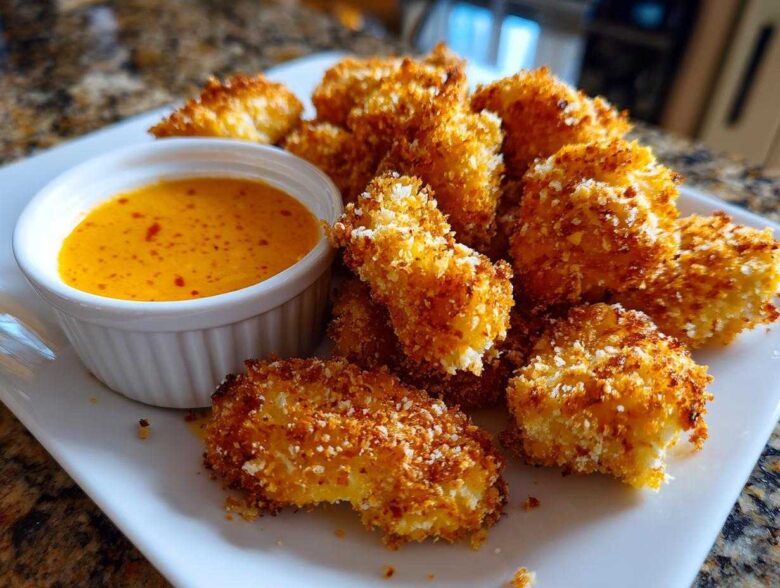
Listen, if you think you can’t beat those fast-food nuggets right in your own kitchen, you are so wrong! I spent way too many Saturdays testing coat after coat, flour type after flour type, trying to crack the code for true, shatteringly crunchy homemade chicken. And I finally did it. Forget soggy, bland chicken pieces; this recipe is the absolute one for achieving genuinely **Crispy Chicken Nuggets with Spicy Garlic Dip** that actually stay crisp, even after dunking!
The secret sauce—literally and figuratively—is getting the breading just right, which for me, means a simple but non-negotiable double-dredge. Trust me; that extra step pays off huge. Plus, we’re whipping up my favorite dipping sauce on the side—it’s garlicky, it’s got a kick, and it makes these nuggets completely addictive. You simply have to see how easy it is to make restaurant-style quality right now. Be sure to check out more easy recipes over at my blog!
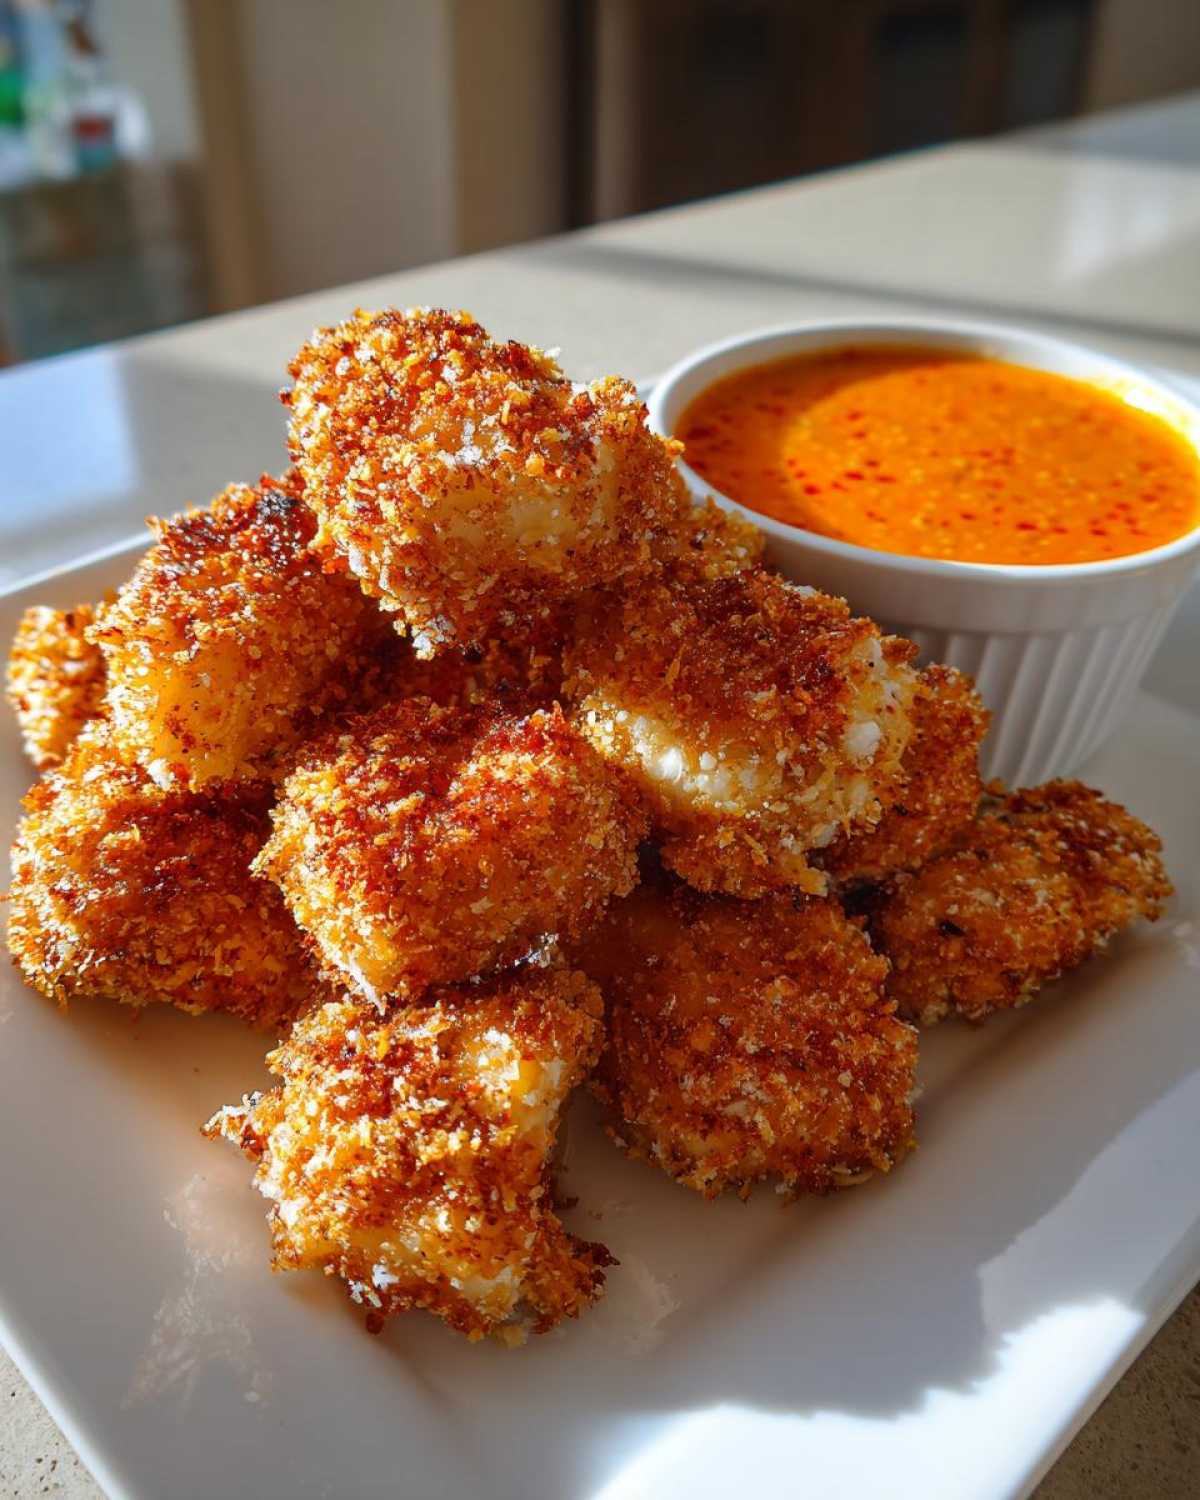
Why You Will Love These Crispy Chicken Nuggets with Spicy Garlic Dip
Seriously, these nuggets hit every single check box. I’ve tried every shortcut, but these are the ones I keep coming back to because they just *work*. If you’re tired of sad, limp breading, you need this recipe in your life.
- They are genuinely crunchy! We aren’t settling for soggy chicken here. The texture is what makes our **Crispy Chicken Nuggets with Spicy Garlic Dip** stand out from everything else you’ve tried.
- The dipping sauce is mandatory. That bright, garlicky heat cuts through the richness of the coating perfectly. It’s the pairing you didn’t know you needed.
- They taste way better than what you get in the drive-thru, guaranteed. You control the quality of the chicken and the salt!
- They come together surprisingly fast, which is a huge bonus for busy evenings.
Achieving Ultimate Crunch with the Double Dredge
Okay, this is where we earn our bragging rights. To get that ridiculously crunchy coating that mimics the best restaurant style, we use the double dredge. This means the chicken goes in the flour, then the egg, then back into the flour again, then back into the egg, and finally into the panko breadcrumbs. That triple layer of coating absorbs oil when frying (or gets perfectly textured in the oven) and locks in all the flavor. This technique is essential for those **Crispy Chicken Nuggets with Spicy Garlic Dip** to make it through the dipping process without falling apart.
Quick Prep Time for a Weeknight Meal
I know what you’re thinking—homemade nuggets sound like an all-day project. Not here! The prep and cook time clock in at about 35 minutes total. That means you can get these golden, crunchy beauties on the table fast enough for a **Quick Weeknight Chicken Dinner**. Seriously, it’s faster than waiting for delivery when you add in the spice of the dip!
Essential Ingredients for Crispy Chicken Nuggets with Spicy Garlic Dip
Alright, ingredient gathering time! Because we want these nuggets to taste amazing and have that serious crunch, we need a few things prepped before we dive into the dredging madness. Don’t skimp here; the quality of these components is what makes the difference between a mediocre nugget and the best you’ve ever made. Everything is laid out clearly below so you can grocery shop like a champion.
Ingredients for the Homemade Crispy Chicken Nuggets
This section covers the chicken itself and the three coats that make these crunchy.
- 1.5 lbs boneless, skinless chicken breast, cut into 1-inch pieces
- 1 cup all-purpose flour
- 1 teaspoon salt
- 1/2 teaspoon black pepper
- 1/2 teaspoon paprika (this gives a tiny bit of color!)
- 2 large eggs, beaten
- 1 tablespoon milk
- 2 cups panko breadcrumbs (This is mandatory! Panko is the key to the best texture, far superior to basic breadcrumbs.)
- 1/2 cup vegetable oil (only if you choose shallow frying)
Components for the Spicy Garlic Dipping Sauce
This dip comes together in seconds, but the flavor is intense. You absolutely need fresh garlic here; the jarred stuff just doesn’t pack the same punch for our **Spicy Garlic Dipping Sauce**.
- 1/2 cup mayonnaise (I use a good quality one, it makes a difference!)
- 2 cloves garlic, minced (Use a microplane if you want it almost dissolving into the sauce, or mince finely if you like bigger garlic texture.)
- 1 tablespoon sriracha or hot sauce (Adjust this based on how much heat you can handle!)
- 1 teaspoon lemon juice (For brightness!)
- 1/4 teaspoon salt
Step-by-Step Instructions for Crispy Chicken Nuggets with Spicy Garlic Dip
Okay, deep breath! This part looks like a lot of steps, but honestly, once you get the system down, you’ll fly through it. The secret to getting those incredible **Crispy Chicken Nuggets with Spicy Garlic Dip** is setting up your dredging station correctly. Don’t try to dredge while mixing anything else; keep your stations separate and organized!
Preparing the Chicken and Dredging Stations
First thing’s first: we need dry chicken. Take your 1-inch pieces of chicken breast and pat them down firmly with paper towels until they feel as dry as possible. This is a huge step, I swear! If they’re wet, the flour won’t stick, and your beautiful coating slides right off later.
Now, set up three shallow dishes side by side. Dish one gets your seasoned flour (that’s the flour, salt, pepper, and paprika). Dish two is for your egg wash—whisk those two eggs with the splash of milk until they are nicely combined. Dish three? That’s where the magic happens: your panko breadcrumbs go in there all by themselves.
The Double-Dredge Technique for Crunchy Homemade Nuggets
This is where we build the crunch! Take one piece of dry chicken at a time. First, toss it thoroughly in the flour mixture, making sure every side is coated, then shake off any big clumps. Second, dip it completely into the egg wash, letting the excess drip drip drip back into the bowl. Finally, press that wet nugget *firmly* into the panko breadcrumbs. You want to really squish those panko flakes onto the chicken so you have total coverage. Put the coated nugget on a clean wire rack while you finish the rest. Don’t stack them!
Cooking Method 1: Achieving Perfection with Shallow Frying
If you want that true restaurant-style experience, shallow frying is the way to go. Pour about a half-inch of vegetable oil into a large skillet and heat it up over medium-high heat until it hits 350°F (175°C). If you don’t have a thermometer, drop a tiny bit of panko in; if it bubbles rapidly right away, you’re good to go! Carefully place your nuggets into the hot oil—don’t overcrowd the pan, or the oil temperature will drop and they’ll get greasy. Fry for just 3 to 4 minutes on each side until they are deeply golden brown. Remember the safety rule: chicken is done when it hits 165°F (74°C) internally.
Cooking Method 2: Oven Baked Crispy Nuggets Alternative
If frying feels like too much fuss, the oven works great, especially if you want to try using the air fryer later (you can read my air fryer chickpea recipe for more air fryer tips!). Preheat your oven to a nice hot 400°F (200°C) and line a sheet pan with parchment paper. Place your dredged nuggets on the tray, making sure they aren’t bumping into each other. Give them a really light spray all over with cooking spray—this mimics the fat from frying. Bake them for about 15 to 20 minutes, flipping them halfway through. They should look crisp and golden when they come out!
Mixing the Flavorful Spicy Garlic Dipping Sauce
While the nuggets are frying or baking, whip up this amazing dip! It’s super fast. Grab a small bowl and dump in the mayonnaise, that freshly minced garlic (don’t be shy!), your chosen hot sauce, the lemon juice, and a pinch of salt. Just stir everything together until it’s totally uniform and smooth. That’s it! You have a killer **Spicy Garlic Dipping Sauce** ready to go for your **Crispy Chicken Nuggets with Spicy Garlic Dip**.
Tips for the Best Crispy Chicken Nuggets with Spicy Garlic Dip
I’ve spent enough time in the kitchen messing this up to know exactly what makes the difference between ‘decent’ nuggets and mind-blowing, **Crispy Chicken Nuggets with Spicy Garlic Dip**! Even a great recipe needs a little nudge here and there depending on your oven or air fryer. If you follow these insider tips, you’ll nail that crunchy exterior every single time, which is honestly half the fun of eating them.
Maximizing Crispiness in the Oven or Air Fryer
If you skip the deep frying and go the oven route, you absolutely must treat your breading to a little oil spray. When you bake, the coating tends to dry out rather than brown and crisp, which is sad. Lightly spraying the coated nuggets—even if you used oil in the shallow fry—with cooking oil before they go into the heat gives you that immediate surface tension needed for a good crunch. Don’t skip this! It’s how we fake that deep-fried texture at home.
For the air fryer crowd, you can use the same concept, but watch your time carefully. Keep the temperature around 375°F and check them after about 10 minutes. Keep them in a single layer, or you’ll end up with steamed chicken instead of crunchy nuggets, and nobody wants that!
Ingredient Swaps for Flavor and Texture
While my main recipe uses chicken breast because it’s lean, I sometimes get requests for a richer flavor, especially for myself. You can totally swap the chicken breasts for boneless, skinless chicken thighs here! Thighs are naturally fattier, which keeps them juicier, though you might need an extra minute or two in the heat.
Now, back to the **Spicy Garlic Dipping Sauce**. I mentioned this briefly, but if you want to lighten up the sauce or make it less heavy, substitute about half of the mayonnaise with plain Greek yogurt. It adds a nice tang, thickens things up, and cuts the richness beautifully. It’s a great way to make a quick Garlic Aioli Spicy Version!
Speaking of dips, if you ever want something savory and cheesy to go alongside these, you have to try my recipe for Smoked Paprika Dip. It’s totally different, but my kids love rotating between the cheesy one and the spicy garlic one!
Serving Suggestions for Homemade Chicken Nuggets with Dipping Sauce
Okay, the nuggets are crispy, and the dip is ready—now we need sides! Since these nuggets are fantastic for a **Quick Weeknight Chicken Dinner**, I always lean toward quick-prep sides that won’t involve turning on a second oven or messing up the amazing crunch we just worked so hard to achieve.
The savory, salty nugget pairs so wonderfully with something fresh or creamy. The spicy garlic dip begs for some cooling elements on the side to balance everything out. Forget fussy sides; let’s keep this meal fun and easy!
For a full, satisfying meal that uses minimal cleanup, you can’t go wrong with roasted sweet potato fries. I use the same 400°F oven temperature as the nuggets, so you can often bake them at the same time! They offer a nice sweetness that plays incredibly well against the heat of the spicy dip.
If you want something green, a simple slaw is perfect. Shredded cabbage or broccoli slaw tossed with a tiny bit of olive oil, a splash of apple cider vinegar, and maybe just a pinch of salt is all you need. It adds the crunch factor without competing with the nugget’s crunch.
And hey, if you’re already using the oven for the nuggets, why not whip up something a little more substantial? You could try making a sheet-pan dinner next time, like my Sheet Pan Steak and Shrimp idea—that might be a little fancier than nugget night, but the one-pan cleanup philosophy is the same!
Honestly, though, these nuggets are perfect served simply alongside some thick-cut carrot sticks and celery. Dipping those veggies into the leftover spicy garlic dip? Heaven. It feels healthier, and you get that glorious crunch contrast!
Storage and Reheating Instructions for Crunchy Homemade Nuggets
If you somehow manage to have leftovers of these amazing nuggets (which I highly doubt!), you definitely want to save them the right way. The biggest danger to a perfectly crunchy nugget is moisture, so how we store them matters a lot.
First, the nuggets must be completely cool before they go into any container. If you box them up warm, that trapped steam turns your lovely crisp panko coating into sad, damp mush. Let them sit on the cooling rack for at least 30 minutes after they come out of the oil or oven.
Once fully cooled, you can store your **Crunchy Homemade Nuggets** in an airtight container in the fridge for up to three days. I don’t recommend stacking them for too long in storage; if you’re making a big batch, use parchment paper to separate the layers. It helps them breathe a little!
Now for the critical part: reheating. Please, I beg you, do not use the microwave. The microwave will heat the chicken perfectly, but it guarantees a completely limp, soggy exterior. We want that crunch back!
You have two options to bring back that magic crust:
- The Oven Method: Set your oven to 375°F (about 190°C). Lay the nuggets in a single layer on a baking sheet lined with foil or parchment paper. Bake them for about 7 to 10 minutes. Check them after 7; when they feel hot and the coating sounds crisp when tapped, they’re done.
- The Air Fryer Champion: This is my favorite way to reheat leftovers! Set your air fryer to 380°F (about 195°C). Give the nuggets a tiny light spray of cooking oil so they really pop. Cook for just 4 to 6 minutes, shaking the basket once halfway through. They come out tasting almost freshly fried!
As for the **Spicy Garlic Dipping Sauce**? That’s even easier. Store the leftover dip in an airtight jar in the fridge. It stays good for about a week, though that fresh garlic flavor is best within the first five days. I find that letting the dip sit on the counter for about 15 minutes before serving takes the chill off, which makes the garlic and spice flavors bloom nicely.
Frequently Asked Questions About Crispy Chicken Nuggets with Spicy Garlic Dip
Look, I know when you get a perfect recipe down, you immediately start thinking about how to tweak it or how to make it ahead of time for busy weeks! I always get tons of questions after I post a really popular recipe like this, so I wanted to answer some of the most common ones right here. Hopefully, this solves your immediate baking dilemmas!
Can I make these Air Fryer Crispy Chicken Nuggets?
Absolutely! This recipe translates beautifully to the air fryer without sacrificing that crunch factor we worked so hard for. Toss those breaded nuggets with a tiny bit of oil spray—that’s the secret ingredient for air frying success, trust me. Set your air fryer temperature to 375°F (about 190°C). You’ll want to cook them for about 10 to 12 minutes total, but you must shake the basket halfway through cooking. This ensures all sides get that beautiful golden-brown finish on your **Air Fryer Crispy Chicken Nuggets**!
How do I make the Spicy Garlic Dipping Sauce milder?
I love heat, but I respect those who prefer a little less fire in their **Spicy Garlic Dipping Sauce**! If you find the Sriracha a bit too intense, the easiest fix is to simply cut the amount you use in half. You’ll still get that lovely crimson color and balanced chili flavor, but without the burn.
If you want to change that profile entirely, try this substitution: keep the amount of Sriracha the same, but swap out half of the mayonnaise for plain Greek yogurt. That yogurt instantly cools down the heat while adding a nice, welcome tanginess to the sauce. It’s a great trick for making a version that even the kids will enjoy!
Can I freeze the breaded chicken before cooking?
Yes, and this is my favorite tip for busy parents or anyone wanting a quick lunch option! This recipe is perfect for making a big batch ahead of time. Once you’ve finished breading the chicken—meaning it’s gone through the flour, egg, and panko stages—lay the coated nuggets out in a single layer on a baking sheet lined with parchment paper. Pop that sheet into the freezer for about an hour until the coating is hard to the touch. Then, you can transfer them into a freezer-safe bag. This whole process is how you create **Make Ahead Chicken Nuggets**!
When you are ready to cook them later, you can bake or air fry them directly from frozen! Just add about 5 to 8 minutes extra to the cooking time listed in the main instructions. They will still come out wonderfully crispy!
Estimated Nutritional Data for This Recipe
Now, I’m not a nutritionist, so take these numbers like you would take any recipe estimate—they’re a good guideline, but your exact results will depend on the brand of mayo you use and how much oil you drain off! These calculations are based on using the shallow fry method and a serving size of about six nuggets.
This is just an estimate based on the ingredients listed and is provided for convenience only. For the most accurate information, you may need to input the specific brands you use into a dedicated nutrition calculator. Always check the source of your ingredients!
- Serving Size: 6 nuggets
- Calories: 350
- Protein: 28g
- Fat: 18g (with 3g being saturated fat)
- Carbohydrates: 18g
- Sugar: 2g
- Sodium: 450mg
I always point out that we try to keep the sugar low in the nugget base itself—all that flavor comes from the paprika and the fat content, not added sweeteners! For the full legal breakdown, please see my website disclaimer.
Share Your Experience Making Crispy Chicken Nuggets
I truly hope you love making these **Homemade Crispy Chicken Nuggets** as much as I love making them every time for my family! The sound of that crunch when you bite in is just the best feeling in the world.
Once you’ve tried this recipe—whether you fried them, baked them, or even air-fried them—I want to hear about it! Did you go heavy on the sriracha in the dip? Did you try thighs instead of breasts? Don’t be shy!
Please leave a star rating right below this section so other home cooks know what you thought. And if you snapped a picture of your beautiful, golden nuggets alongside that spicy garlic sauce, tag me on social media! I always love seeing your kitchen successes. If you have a burning question that I missed above, feel free to reach out directly via my contact page. Happy cooking!
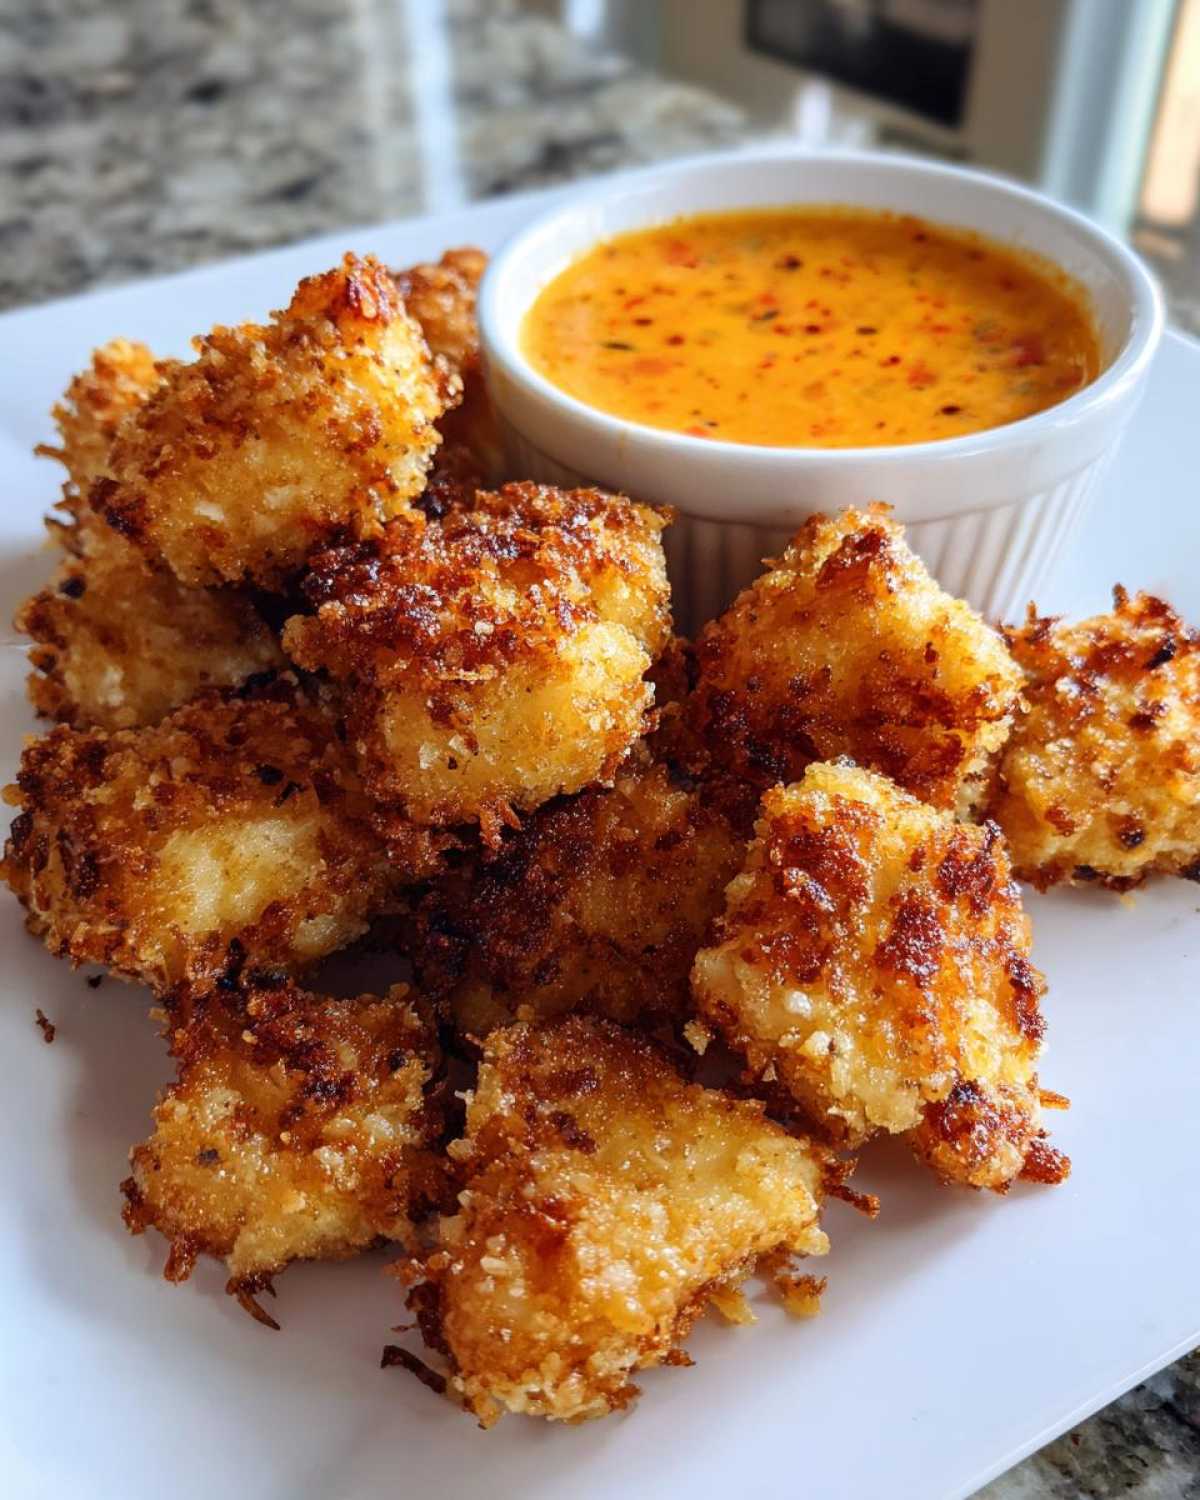
Estimated Nutritional Data for This Recipe
Now, I’m not a nutritionist, so take these numbers like you would take any recipe estimate—they’re a good guideline, but your exact results will depend on the brand of mayo you use and how much oil you drain off! These calculations are based on using the shallow fry method and a serving size of about six nuggets.
This is just an estimate based on the ingredients listed and is provided for convenience only. For the most accurate information, you may need to input the specific brands you use into a dedicated nutrition calculator. Always check the source of your ingredients!
- Serving Size: 6 nuggets
- Calories: 350
- Protein: 28g
- Fat: 18g (with 3g being saturated fat)
- Carbohydrates: 18g
- Sugar: 2g
- Sodium: 450mg
I always point out that we try to keep the sugar low in the nugget base itself—all that flavor comes from the paprika and the fat content, not added sweeteners! For the full legal breakdown, please see my website disclaimer.
Share Your Experience Making Crispy Chicken Nuggets
I truly hope you love making these **Homemade Crispy Chicken Nuggets** as much as I love making them every time for my family! The sound of that crunch when you bite in is just the best feeling in the world.
Once you’ve tried this recipe—whether you fried them, baked them, or even air-fried them—I want to hear about it! Did you go heavy on the sriracha in the dip? Did you try thighs instead of breasts? Don’t be shy!
Please leave a star rating right below this section so other home cooks know what you thought. And if you snapped a picture of your beautiful, golden nuggets alongside that spicy garlic sauce, tag me on social media! I always love seeing your kitchen successes. If you have a burning question that I missed above, feel free to reach out directly via my contact page. Happy cooking!
PrintCrispy Chicken Nuggets with Spicy Garlic Dip
Make genuinely crispy homemade chicken nuggets using a double-dredge method, served with a flavorful spicy garlic dipping sauce.
- Prep Time: 20 min
- Cook Time: 15 min
- Total Time: 35 min
- Yield: 4 servings
- Category: Main Course
- Method: Frying or Baking
- Cuisine: American
- Diet: Low Fat
Ingredients
- 1.5 lbs boneless, skinless chicken breast, cut into 1-inch pieces
- 1 cup all-purpose flour
- 1 teaspoon salt
- 1/2 teaspoon black pepper
- 1/2 teaspoon paprika
- 2 large eggs, beaten
- 1 tablespoon milk
- 2 cups panko breadcrumbs
- 1/2 cup vegetable oil (for shallow frying)
- For the Dip: 1/2 cup mayonnaise
- 2 cloves garlic, minced
- 1 tablespoon sriracha or hot sauce
- 1 teaspoon lemon juice
- 1/4 teaspoon salt
Instructions
- Prepare the chicken: Pat the chicken pieces dry with paper towels. This helps the coating stick.
- Set up the dredging stations: In one shallow dish, mix the flour, salt, pepper, and paprika. In a second dish, whisk the eggs and milk together. In a third dish, place the panko breadcrumbs.
- Dredge the chicken: Take a piece of chicken and coat it completely in the flour mixture, shaking off excess. Dip it into the egg wash, letting excess drip off. Finally, press it firmly into the panko breadcrumbs, ensuring full coverage. Place coated nuggets on a wire rack.
- Cook the nuggets (Shallow Fry Method): Heat the vegetable oil in a large skillet over medium-high heat until it reaches 350°F (175°C). Carefully place the nuggets in the hot oil, ensuring not to overcrowd the pan. Fry for 3 to 4 minutes per side until golden brown and cooked through (internal temperature of 165°F or 74°C). Remove and drain on a paper towel-lined plate.
- Cook the nuggets (Oven Bake Method): Preheat your oven to 400°F (200°C). Lightly spray the coated nuggets with cooking spray and place them on a baking sheet lined with parchment paper. Bake for 15 to 20 minutes, flipping halfway through, until golden and crisp.
- Make the dip: Combine the mayonnaise, minced garlic, sriracha, lemon juice, and salt in a small bowl. Stir until fully mixed.
- Serve the crispy nuggets immediately with the spicy garlic dip.
Notes
- For extra crispiness when baking or air frying, lightly spray the coated nuggets with cooking oil before cooking.
- You can substitute chicken thighs for breasts for a richer flavor.
- If you prefer a thicker dip, use Greek yogurt instead of half the mayonnaise.
Nutrition
- Serving Size: 6 nuggets
- Calories: 350
- Sugar: 2
- Sodium: 450
- Fat: 18
- Saturated Fat: 3
- Unsaturated Fat: 15
- Trans Fat: 0
- Carbohydrates: 18
- Fiber: 1
- Protein: 28
- Cholesterol: 90