

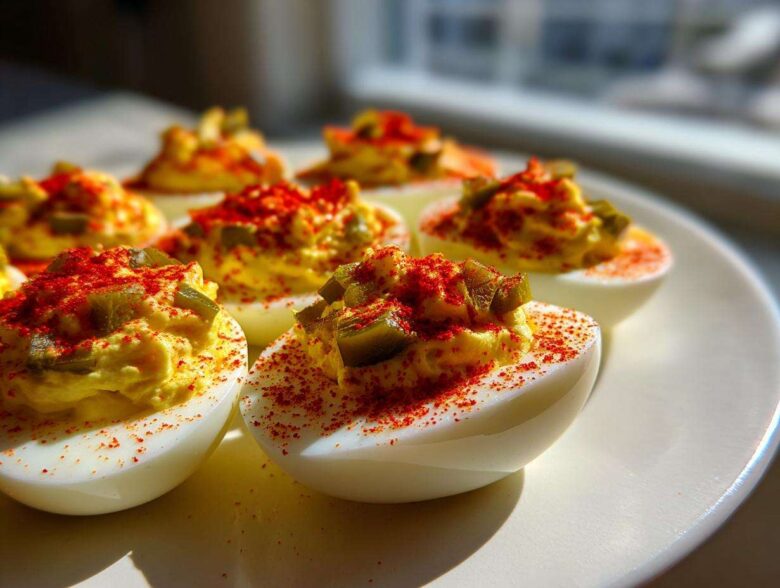
Oh, the appetizer tray! It just isn’t a proper family get-together without a platter piled high with deviled eggs, trust me on this. Everyone has a version, but I’m here to tell you that mine—the Classic Deviled Eggs with Dill Pickle Relish—is the one you absolutely need in your life. Forget those dry, chalky ones you sometimes get! My secret is making sure the filling is unbelievably creamy while hitting that perfect sharp, tangy note from the dill pickle relish. That tiny addition elevates the whole thing from a simple side to the star of the show. If you want the ultimate guide to making these, check out my main baking index over at my blog! This is the recipe I bring every single summer cookout, and I always end up having to make a second batch before the appetizers are even served!
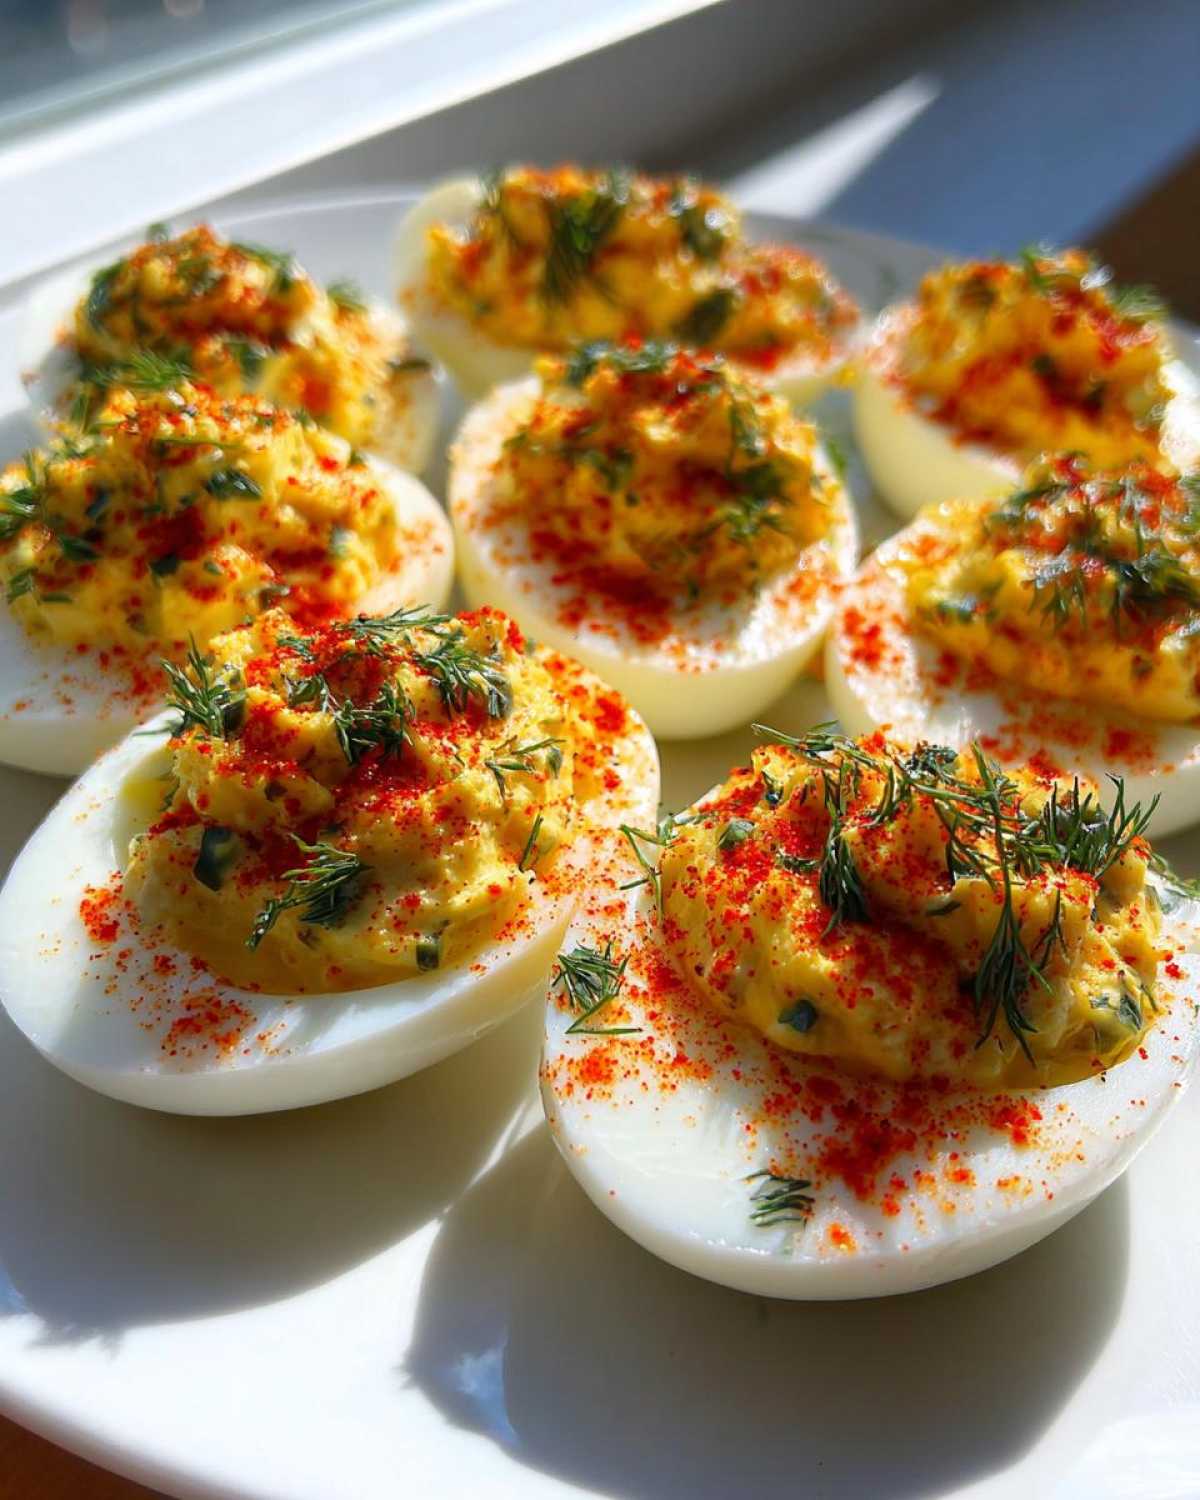
Why You Will Make These Classic Deviled Eggs with Dill Pickle Relish Every Time
I know, everyone claims their deviled eggs are the best, but hear me out! This recipe nails the trifecta of texture, flavor, and making-ahead ease. You need these for your next shindig, I promise. They disappear faster than cookies at a bake sale!
- That Creamy Factor: We go heavy on the yolks and use the right ratio of mayo to create a filling that practically melts in your mouth. No gritty texture allowed here!
- The Tangy Kick: That little bit of brightness from the drained dill pickle relish cuts through the richness perfectly. It’s what makes these stand out among all the other **Party Appetizer Ideas** floating around.
- Easy Prep: Once the eggs are boiled (and I have some tricks for that below!), the filling comes together in about five minutes flat. It’s seriously quick work.
- The Ultimate Crowd Pleaser: Whether it’s a formal holiday gathering or just a casual afternoon, these are always the first things gone off the platter. They become instant **Potluck Perfect Sides**.
- Make-Ahead Magic: You can mix the filling the day before and pipe them right before you serve. They hold up beautifully!
It’s just a better deviled egg experience, honestly. You won’t even want to look at another recipe after trying this tangy twist. You can sneak a peek at how I handle another legendary party dip over here, just in case you need another star for your platter: my Jalapeño Cheddar Dip recipe!
Essential Ingredients for Classic Deviled Eggs with Dill Pickle Relish
Okay, let’s get our mise en place ready! The beauty of this recipe is how few ingredients you actually need, which means we can focus all our energy on picking the absolute best quality for each item. When you’re dealing with something this simple, quality really shouts.
- 12 large eggs – Make sure they’re fresh, but not *too* fresh, or peeling will be a nightmare! (More on that in a bit!)
- 1/2 cup mayonnaise – Use the good stuff; this is the backbone of our creaminess.
- 2 tablespoons yellow mustard – Don’t grab the fancy Dijon here; the classic sharp bite of plain yellow mustard is absolute perfection with the pickles.
- 1/4 cup dill pickle relish, drained well – This is the star! We need that crunch and tang.
- 1 teaspoon white vinegar
- 1/4 teaspoon salt
- 1/8 teaspoon black pepper
- Paprika, for garnish – Gotta have that pretty red dust on top!
When you have your ingredients laid out, you can almost smell the perfect balance we’re aiming for. If you love pickle flavor, you might also want to check out my recipe for Dill Pickle Popcorn while you’re gathering your supplies!
Ingredient Notes and Substitutions
This is the crucial advice bit. If you skip this step, your filling might end up looking sad and watery, and we definitely don’t want that.
The Relish Warning: You absolutely must drain your dill pickle relish thoroughly. I typically dump it onto a small piece of cheesecloth or a few paper towels and squeeze out every drop possible. Excess liquid is the fastest way to ruin a perfectly thick, beautiful **Tangy Deviled Egg Filling**. If your filling starts looking too loose after mixing, that’s almost always because the relish wasn’t dry enough.
As for the mayo, if you’re watching calories or just want slightly less richness, you can absolutely substitute up to half of the mayonnaise with plain, full-fat Greek yogurt. It adds a nice, subtle tanginess too! Just don’t go over 50% substitution, or you risk thinning out that gorgeous yolk base we worked so hard to create.
How to Achieve Perfectly Cooked Eggs for Your Classic Deviled Eggs with Dill Pickle Relish
Listen, if you can’t get the eggs right, the whole deviled egg dream falls apart before you even start mixing the filling. The boiling and peeling process is where most people panic, but I have a method that gives you the most stunning, easy-to-peel eggs every single time. Trust me, nailing these **Perfectly Cooked Eggs** is half the battle!
Start by putting your dozen eggs in a saucepan and covering them completely with cold water—don’t rush that part. Crank the heat up high until you hit a full, rolling boil. The second that water is bubbling hard, turn the burner *completely* off, slap a lid on that pan, and let those eggs just sit there and steam for exactly 12 minutes. No peeking! That resting time is key because it gently cooks the interior without over-hardening the whites.
When the timer goes off, you need to shock them immediately. Transfer them straight from the hot water into a big bowl filled with ice water—an ice bath! If you let them cool slowly on the counter, they get rubbery. The ice bath keeps the eggs from continuing to cook and helps that membrane separate from the white. Let them chill there for at least ten minutes until they are totally cool to the touch. That chilling, combined with the resting time, makes peeling them a dream! You can grab a recipe for some delicious breakfast tacos using those eggs later on right here.
Mixing the Creamy Classic Deviled Eggs with Dill Pickle Relish Filling
Now we get to the best part, where we transform those sad-looking yolks into the richest, tangiest filling imaginable! Remember, the goal here is ultra-smooth perfection. That means we are going to treat those yolks like clay before we add in the wet stuff.
Once your eggs are peeled and halved, get those yolks into a bowl—a medium one works best for mixing. Take a fork and just mash them, mash them, mash them! I mean it, take your time until they are powdery fine. If you add your mayonnaise and mustard while there are still pea-sized lumps, you will never get that smooth texture we’re looking for. Seriously, scrape those lumps against the side of the bowl until it looks practically like fine sand. This step is the secret sauce for truly **Creamy Hard Boiled Eggs** that look professional.
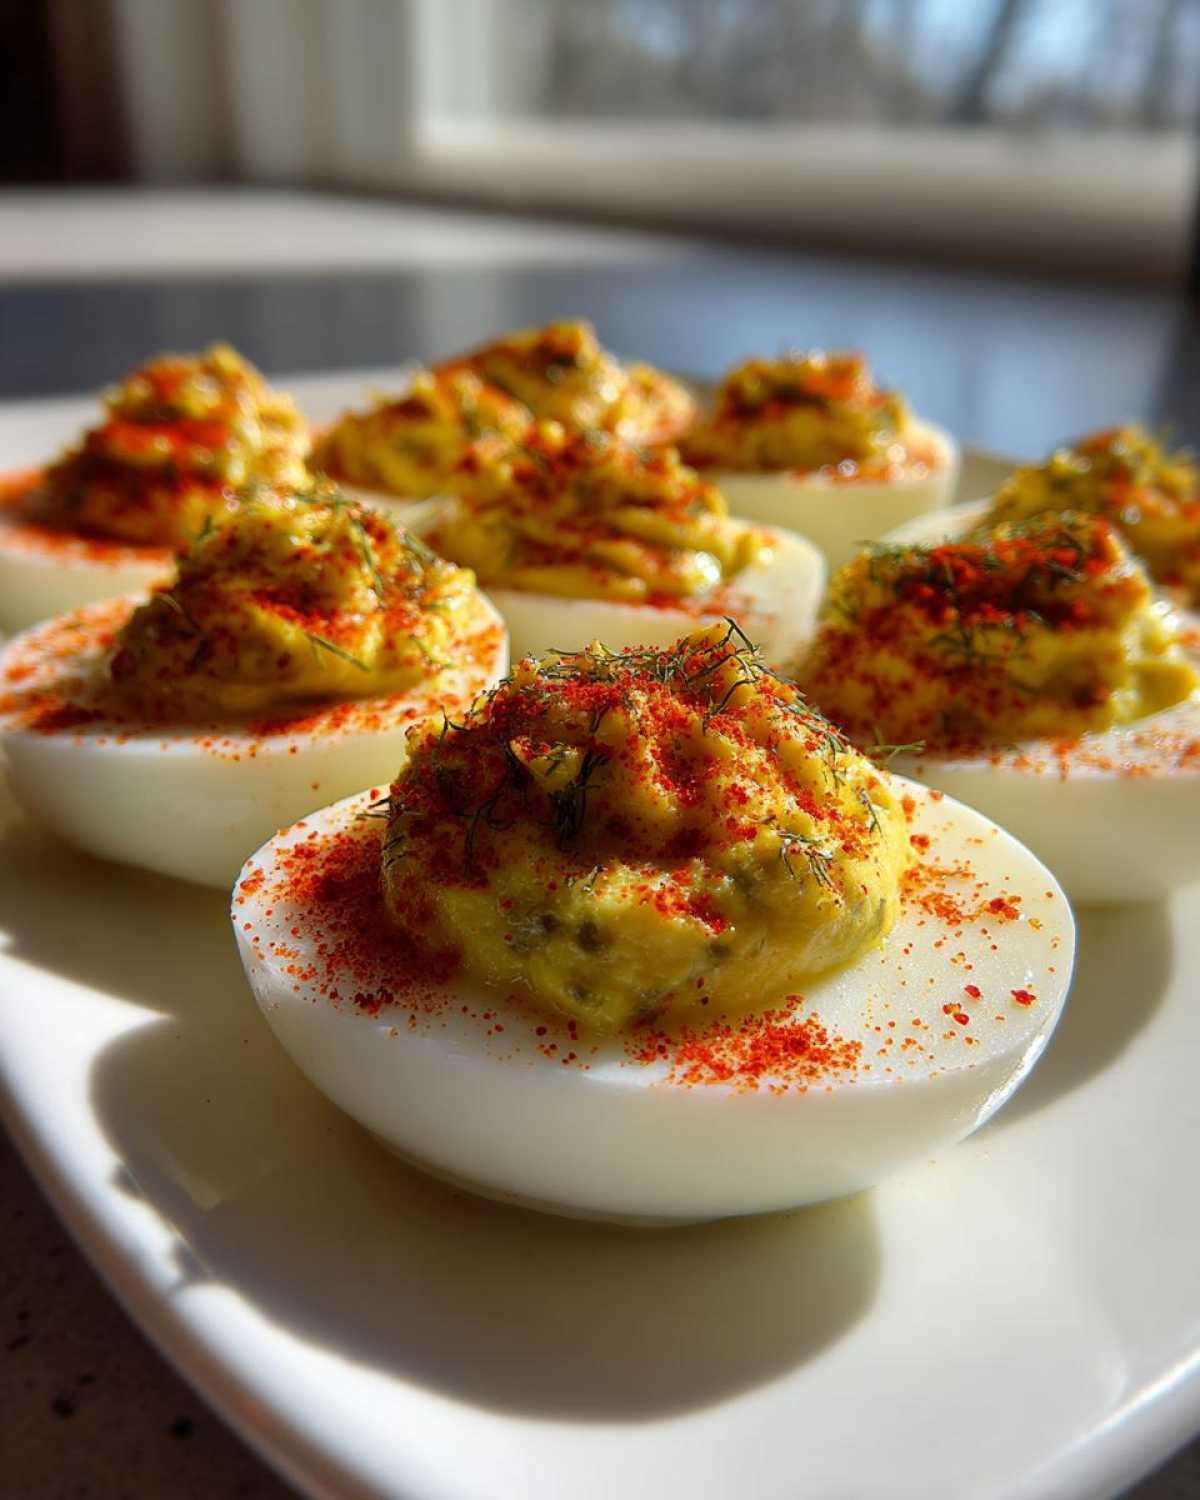
Once the yolks are smooth, it’s time to build that incredible flavor for our **Tangy Deviled Egg Filling**. Add in your mayonnaise, the yellow mustard, the salt and pepper, your vinegar, and all that beautifully drained dill pickle relish. Gently fold everything together. Start slow, because you don’t want to splash! Keep mixing until everything is evenly distributed and takes on a beautiful, uniform pale yellow color. Give it a tiny taste check here—maybe it needs a pinch more salt, or maybe you want just a hair more vinegar tang. Make those final tweaks now!
Piping vs. Spooning the Filling
How you get that filling back into the whites totally changes the presentation. If you’re in a rush for a picnic, a simple spoon works just fine. Just mound the filling generously into each white half.
But if you want that classic, show-stopping presentation—the **Old Fashioned Appetizers** look that just screams ‘party’—you absolutely must pipe it! Grab yourself a pastry bag and fit it with a large star tip, like a Wilton 1M. Scoop the filling into the bag, gently twist the top closed, and pipe a nice swirl right up out of the egg white. It gives you those beautiful ridges that hold the garnish perfectly. It makes such a difference, and honestly, it’s not much more effort than spooning!
If you’re looking for another creamy dip inspiration while your filling is chilling later, check out my recipe for Chive and Almond Dip—it’s always a huge hit!
Tips for Success When Making Classic Deviled Eggs with Dill Pickle Relish
I’ve made batches of these deviled eggs that have been amazing and batches that have been… well, a little sad. Over time, I figured out the little things that make the difference between a good appetizer and the kind people ask for the recipe for! Keep these insider tips in mind, and you won’t have any problems.
First up, let’s talk age. While you need fresh eggs to start boiling, using eggs that are at least a week old makes peeling way easier. Seriously! Fresh eggs cling to their shells like it’s their job, but older eggs practically slide right out of the membrane after their ice bath. If your eggs are super fresh, don’t panic; just be patient and peel them under running cold water—the water sometimes helps lubricate the peeling process.
Second, drain that relish until your hands hurt! I mentioned it before, but it’s worth repeating because running to drain it mid-mix is always a recipe for a sloppy disaster. If you really want to guarantee the smoothest texture, especially if your yolks look slightly crumbly even after mashing, grab a fine-mesh sieve.
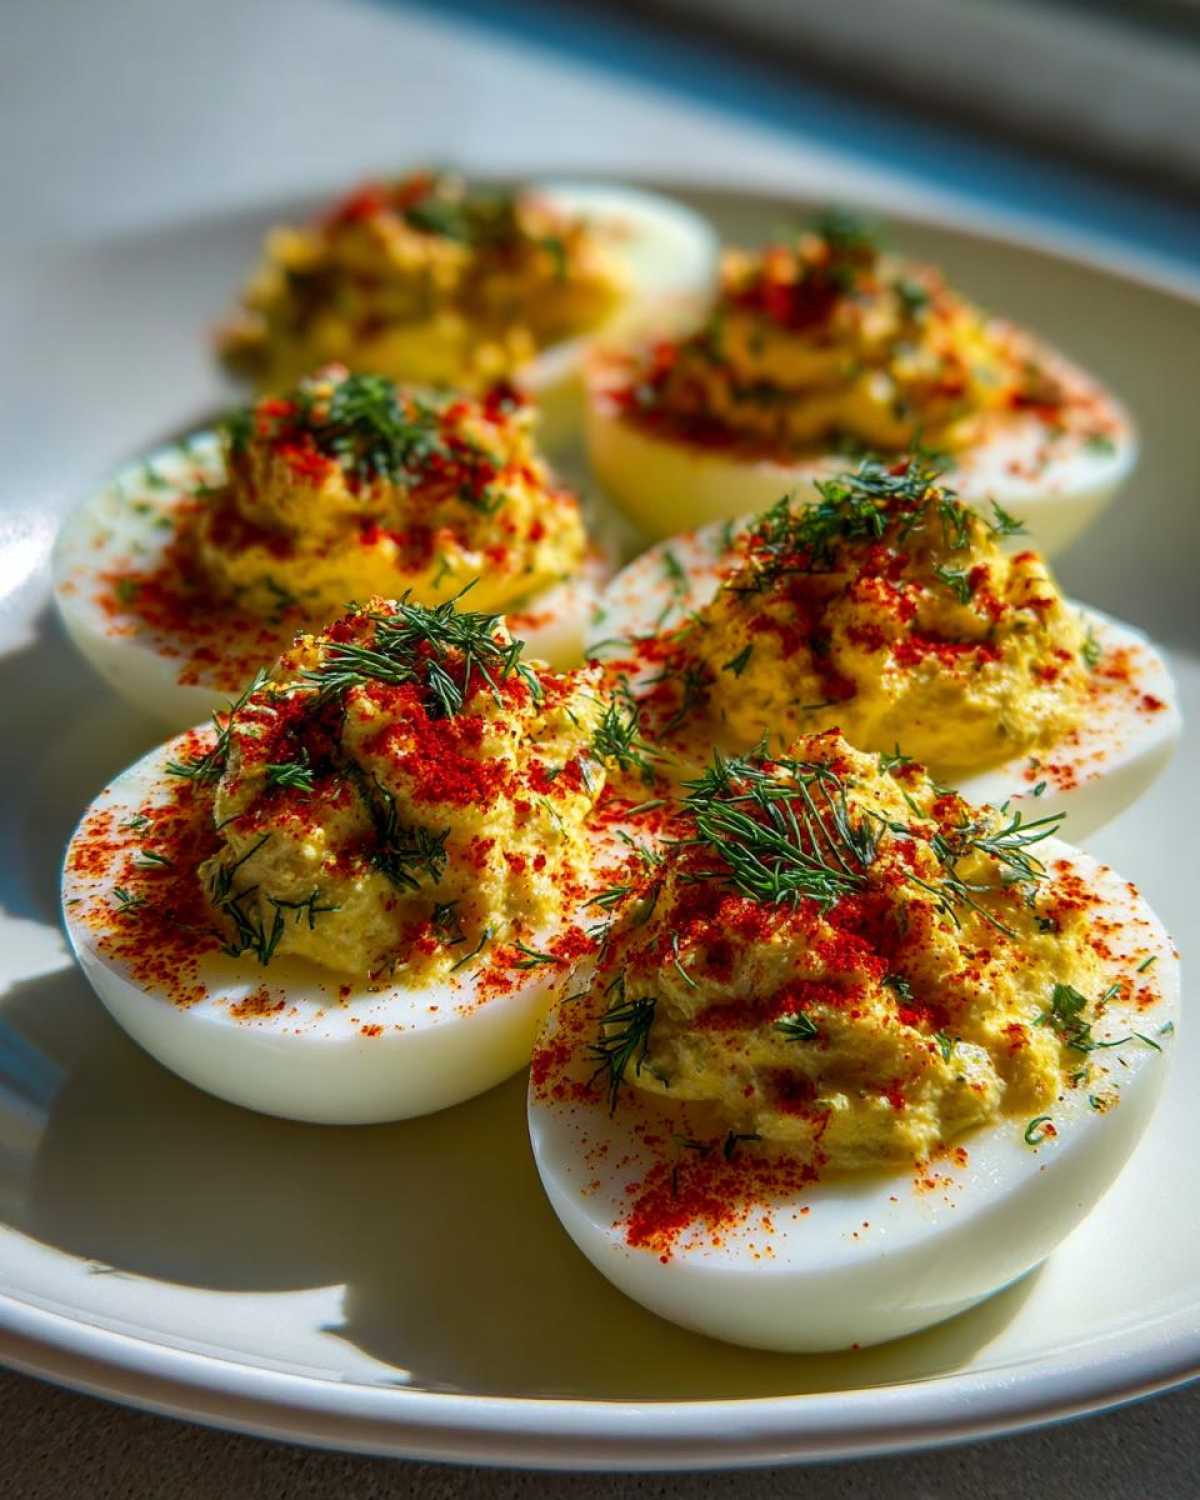
This is my little trick for next-level smoothness: after you mash the yolks completely with a fork, press that mashed yolk mixture through the sieve and back into the bowl. Yes, it’s an extra step and makes a bit of mess, but it removes those final tiny bits that just won’t mash down. It ensures every single bite of your **Tangy Deviled Egg Filling** is purely velvety. It also helps if you plan on using a piping bag!
Finally, think about your seasoning timing. While I list the salt and pepper with the wet ingredients, taste your mixture *before* you add the relish juice or any extra brine. The saltiness from the relish can surprise you! It’s always better to undersalt slightly now, fill your platter, and then use a tiny pinch of salt sprinkled over the top *after* you garnish them. That way, the seasoning is bright right on the surface.
If you want more dips where paprika plays a starring role, you have to check out my recipe for Smoked Paprika Dip; it brings such a warm, smoky complexity to the table!
Presentation and Storage for Your Classic Deviled Eggs with Dill Pickle Relish
Presentation is where these eggs truly shine! You’ve got your beautifully creamy, tangy centers—now we have to make them look as good as they taste. For the garnish, the classic paprika dust is non-negotiable, in my opinion. It just screams ‘deviled egg.’ Use a fine shaker or a small sieve and dust lightly over the top of the filling swirls right before you carry them out to the party.
If you want to lean into that fancy look for your **Holiday Egg Appetizers**, I love taking a tiny sprig of fresh dill—yes, the same herb from the relish family!—and sticking just one small, perfect frond right into the center of the piped swirl. It gives it height and lets everyone know there are fresh flavors involved. For big summer events or when serving them as **Summer Gathering Food**, presenting them on a clean, white platter really makes the orange-red paprika pop.
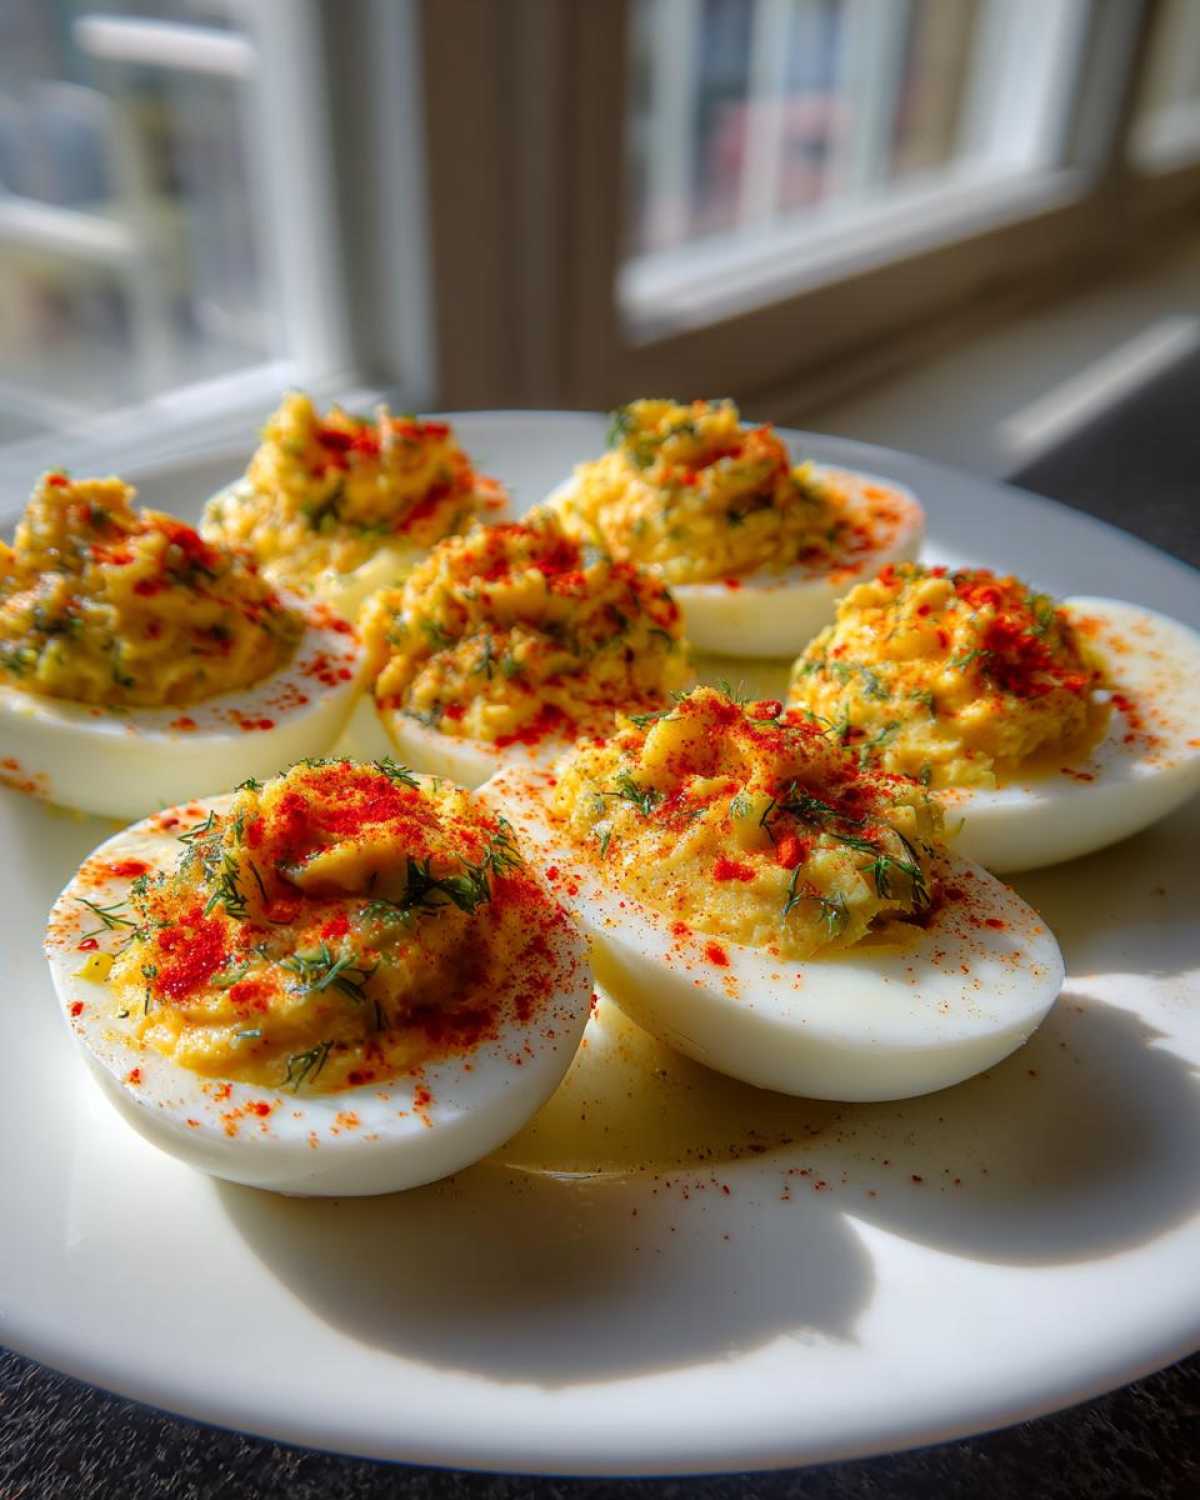
Now, let’s talk about keeping them fresh, because these are fantastic **Make Ahead Appetizers**, but they do need a little care. If you’ve piped the filling, you should cover the entire platter loosely with plastic wrap. Don’t press the wrap right onto the filling, or you’ll smudge your gorgeous piping work!
They are best eaten the day you make them, but they absolutely hold up well for up to 24 hours in the refrigerator. Any longer than that and the filling starts to get a little bit looser, and the whites might start to weep moisture. If you need to prep them ahead by a day, here’s what I do: fill the egg white halves, cover them loosely, and store them in the fridge. Keep the paprika and any fresh dill garnish separate. Only add that final dusting right before you serve them. It keeps everything looking bright and vibrant!
If you’re wondering about other great throwbacks to serve alongside these, you have to check out my collection of Old Fashioned Appetizer recipes; it’s full of gems just like this one!
Frequently Asked Questions About Tangy Deviled Egg Filling
Can I use sweet pickle relish instead of dill relish?
Oh, you definitely *can*, but it changes the whole game! This recipe is built around getting that sharp, vinegary bite that balances the rich yolks. Sweet relish brings a lot of sugar, which makes the filling taste much sweeter and loses that classic tang we are going for. If you use sweet relish, I strongly recommend cutting the amount down to just one tablespoon and adding an extra half teaspoon of that white vinegar to try and bring back some acidity. For the authentic flavor profile of this **Tangy Deviled Egg Filling**, stick to dill relish if you can.
How long can I keep the filling refrigerated before piping?
I like to get the filling mixed up the morning of my event, which is about 4 to 6 hours before serving. That gives the flavors time to meld together but keeps the mixture nice and firm enough to pipe beautifully. You can absolutely make the filling the night before, as I mentioned it makes great **Make Ahead Appetizers**! Just store it in an airtight container, but try not to let it sit for more than 18 hours total. When you pull it out the next day, give it a very quick whisk with a fork before piping, just in case the mayo coating has separated slightly.
What truly makes this recipe different from traditional Southern Style Deviled Eggs?
That’s a great question because **Southern Style Deviled Eggs** are legendary! Traditionally, very old-school Southern recipes often skip the relish entirely and focus heavily on mustard, maybe a dash of pickle *juice* instead of relish, and sometimes they just use paprika and pepper. My recipe leans into the relish for that extra texture and bright acidity, which is a popular modern Southern twist but maybe not strictly “Old Fashioned Appetizers” in every single county! Also, Southern versions often use a touch of sweet pickle juice or even a tiny bit of sugar, whereas we are relying on the savory pickle brine for our sweetness.
My filling seems too thick after soaking in the fridge. What should I do?
If your filling is just too stiff after chilling—maybe you didn’t drain the relish quite enough, or maybe you refrigerated it overnight—don’t worry, we can save it! Before you panic-pipe, take a teaspoon of mayonnaise or a splash of milk, and gently fold it in until it loosens up just enough to move smoothly through your piping tip. You want it creamy, not stiff! This is much safer than trying to add more vinegar, which could throw off the overall flavor balance of these **Crowd Pleasing Starters**.
If you’ve got extra pickle or dill flavors on your mind, you might enjoy learning how I put together my Seven Layer Dip, which also features a creamy base element! You can find that here: The Southern 7 Layer Dip Recipe.
Estimated Nutritional Data for Classic Deviled Eggs with Dill Pickle Relish
Okay, let’s talk about the numbers, just so you know what you’re getting into when you serve up these wonderful appetizers! Since these are so rich and delicious, sometimes people worry they are sneaking in a ton of sneaky calories, but honestly, for a party starter, they aren’t bad at all, especially since you only eat one or two!
But remember, this is all based on my recipe measurements—the 12 eggs, the mayonnaise, the relish, everything mixed exactly as written. If you change up your mustard or use low-fat mayo, your numbers will shift, of course. These figures reflect one single half of a deviled egg, so if you crush three eggs worth, you’re probably looking at around 225 calories.
Think of this as just a baseline guide for serving your guests. If you want the full legal breakdown, that’s always detailed over on my general disclaimer page, but here is the snapshot for a single serving (one half):
- Calories: Around 75
- Fat: 6.5 grams (A good chunk comes from that creamy yolk and mayo, naturally!)
- Protein: 2.5 grams
- Carbohydrates: Just 0.5 grams
- Sodium: 110 mg (That’s the pickle relish doing its job!)
It’s all about moderation, right? One or two of these beauties alongside some veggie sticks makes for a fantastic, satisfying bite without ruining dinner plans. They are truly such a classic for a reason!
Share Your Experience Making These Crowd Pleasing Starters
Whew! That’s it—you’ve got the best, creamiest, tangiest **Classic Deviled Eggs with Dill Pickle Relish** ready to go! Now, I genuinely want to know how they turned out on your table. When you make a recipe that has been tweaked and tested as much as this one has, seeing it succeed in *your* kitchen is the most rewarding part for me.
Did you stick to my exact recipe, or did you sneak in a little extra dash of mustard? Were they the hit of your **Crowd Pleasing Starters** spread?
Please, please, please tell me about it! Head down to the comments section below and give this recipe a rating—five stars if you think they are party-perfect! I love hearing what you changed up, whether you paired them with shrimp for a deluxe look or just served them simply plain.
If you snap a photo of your platter piled high with these tangy appetizers, tag me on social media! Sharing your successes is almost as much fun as eating the eggs themselves. If you ever need to get in touch with me about a question or suggestion, you can always reach out through my contact page. Happy eating!
PrintClassic Deviled Eggs with Dill Pickle Relish

A traditional recipe for creamy deviled eggs featuring the bright, tangy flavor of dill pickle relish.
- Prep Time: 20 min
- Cook Time: 12 min
- Total Time: 32 min
- Yield: 24 halves
- Category: Appetizer
- Method: Boiling and Mixing
- Cuisine: American
- Diet: Vegetarian
Ingredients
- 12 large eggs
- 1/2 cup mayonnaise
- 2 tablespoons yellow mustard
- 1/4 cup dill pickle relish, drained well
- 1 teaspoon white vinegar
- 1/4 teaspoon salt
- 1/8 teaspoon black pepper
- Paprika, for garnish
Instructions
- Place eggs in a saucepan and cover with cold water. Bring the water to a rolling boil over high heat.
- Once boiling, remove the pan from the heat, cover it, and let the eggs stand for 12 minutes.
- Immediately transfer the eggs to an ice bath (a bowl of ice and water) and let them cool completely, about 10 minutes.
- Peel the cooled eggs and slice them in half lengthwise. Gently scoop the yolks into a medium bowl.
- Place the empty egg white halves on a serving platter.
- Mash the yolks thoroughly with a fork until no lumps remain.
- Add the mayonnaise, mustard, drained dill pickle relish, white vinegar, salt, and pepper to the mashed yolks. Mix until the filling is smooth and creamy.
- Spoon or pipe the yolk mixture back into the egg white halves.
- Sprinkle the tops of the filled eggs with paprika before serving.
Notes
- To ensure easy peeling, use eggs that are at least one week old.
- Drain the pickle relish thoroughly; excess liquid will make the filling runny.
- For a smoother filling, press the mashed yolks through a fine-mesh sieve before mixing in the other ingredients.
- You can pipe the filling using a pastry bag fitted with a star tip for a decorative look.
Nutrition
- Serving Size: 1 half
- Calories: 75
- Sugar: 0.5
- Sodium: 110
- Fat: 6.5
- Saturated Fat: 1.5
- Unsaturated Fat: 5.0
- Trans Fat: 0.0
- Carbohydrates: 0.5
- Fiber: 0.1
- Protein: 2.5
- Cholesterol: 75