

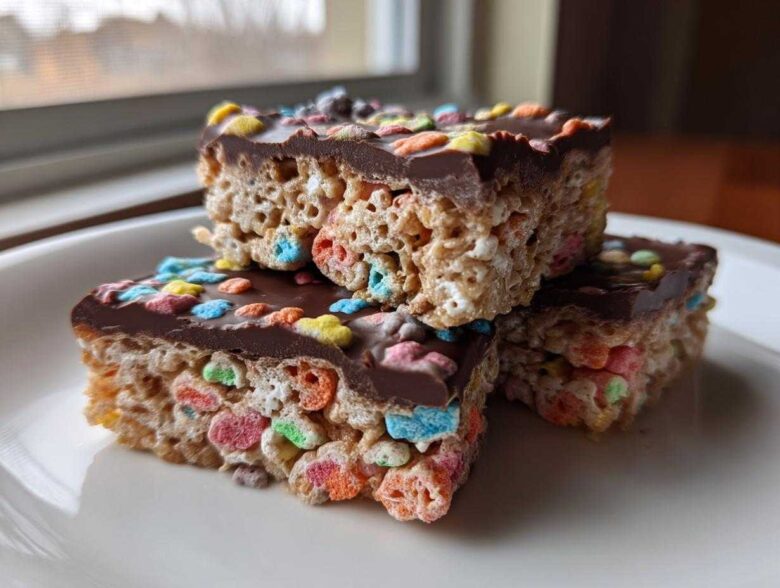
Oh my gosh, if you need a showstopper that takes almost zero effort, stop scrolling right now! I live for those moments when a simple snack explodes into something totally magical, and that’s exactly what happens with these **Chocolate Dipped Lucky Charms Marshmallow Bars**. Seriously, they are the best part of any gathering, even if the gathering is just me and the dog watching bad TV.
The last time I made a batch, my niece looked at them like I’d brought home a unicorn. She’s usually pretty picky, but a fluffy marshmallow base studded with those colorful charms, all dipped in dark chocolate? Instant win. I used to just make regular rice krispie treats, but once I added the vibrant rainbow cereal and that layer of decadent chocolate, there was no turning back. Trust me, these quick, **No Bake Sweet Treats** are about to become your new obsession.
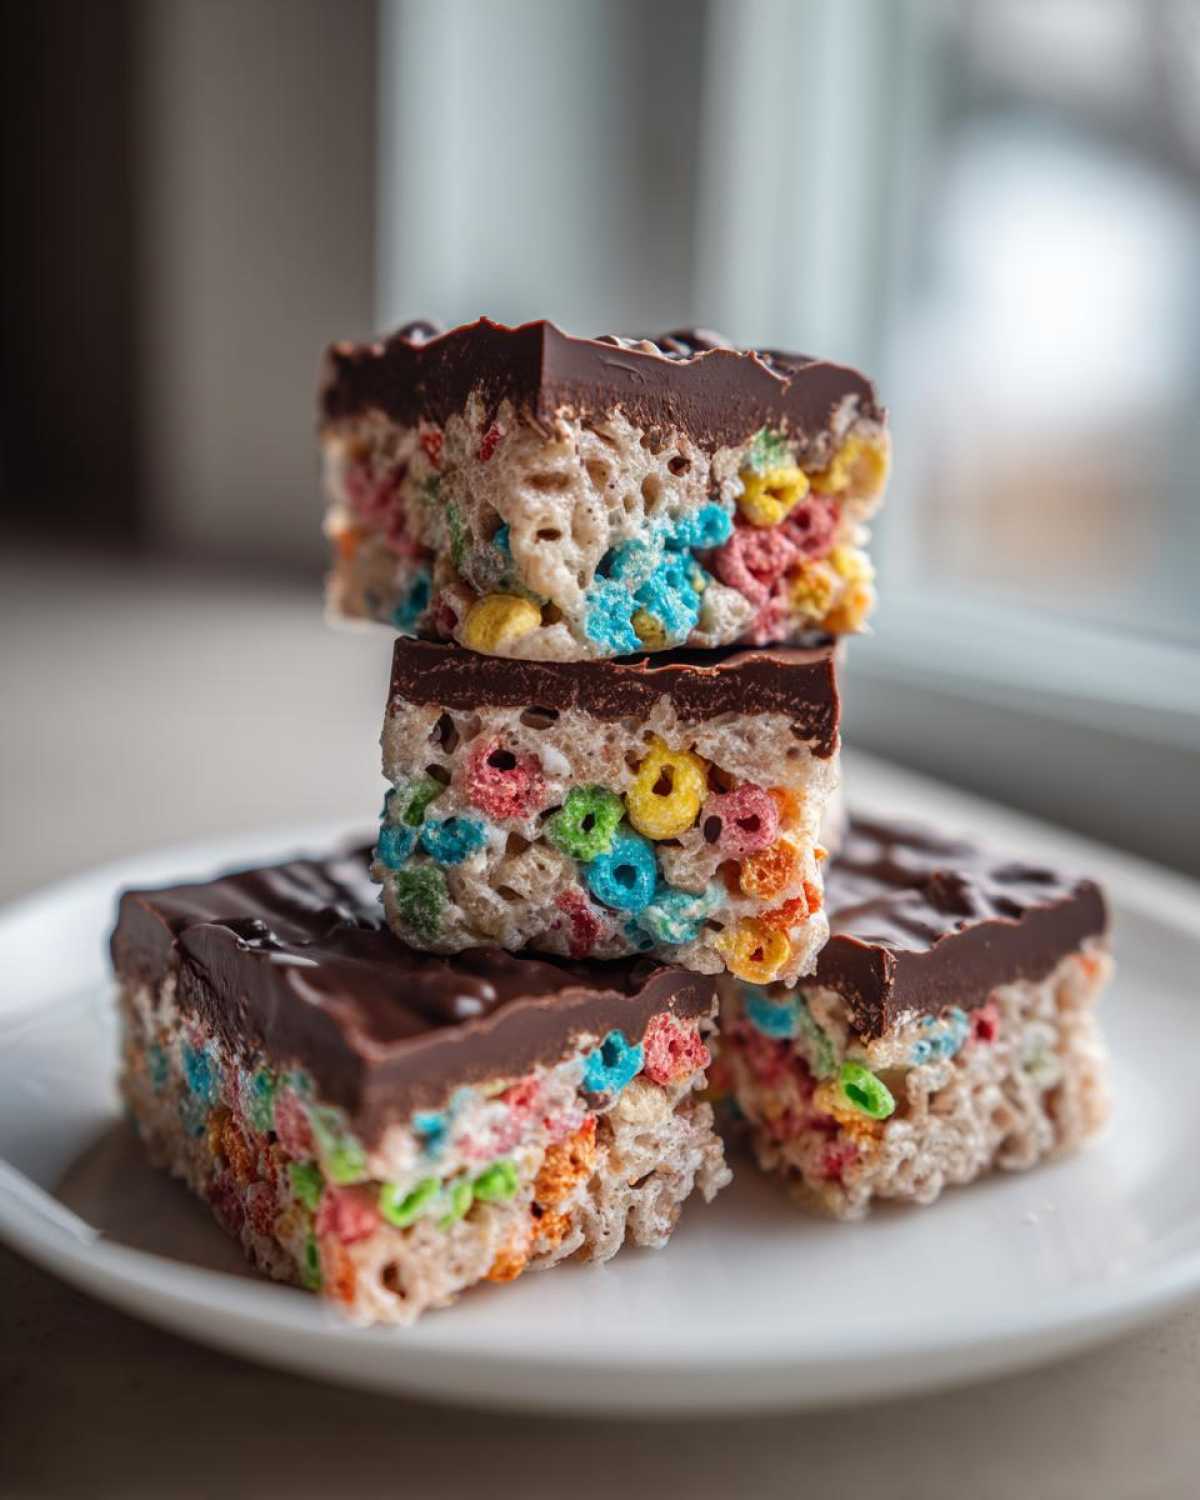
Why You Will Love These Chocolate Dipped Lucky Charms Marshmallow Bars
Honestly, who has time for complicated baking these days? These bars are for everyone who wants fantastic flavor without turning on the oven for more than five minutes. You’re going to adore these for so many reasons:
- They are the definition of **No Bake Sweet Treats**—just melt, mix, and press!
- They look amazing! The bright colors make this the ultimate in **Fun Kids Snacks**.
- That layer of rich, melted chocolate knocks these **Sweet and Chewy Bars** way over the top.
- They cut beautifully once chilled, giving you perfect squares every single time.
Essential Ingredients for Perfect Marshmallow Cereal Recipe
Okay, let’s talk about what you need to make these legendary bars. Remember, since these are **No Bake Sweet Treats**, the quality of your meltables really matters. We are using standard measurements here for a 9×13 inch pan, which gives us a good thick bar.
You’ll need 6 tablespoons of good unsalted butter—don’t skimp here! Then, grab one whole 10-ounce bag of those cute little miniature marshmallows; using minis helps them melt down way faster for you. For the star of the show, you need 6 cups of Lucky Charms cereal. Of course, a splash of vanilla extract adds that little something special.
And finally, for the coating, have 12 ounces of semi-sweet chocolate chips or melting wafers ready to go. That’s it! Simple, right?
Ingredient Notes and Substitutions for Your Sweet and Chewy Bars
Here’s where we lean into the expertise for these **Homemade Lucky Charms Goodies**. When it comes to the cereal, if you can pick out some of the oat pieces that are just plain cereal and not the heavily oat-based clusters, your bars will be chewier and less crumbly. If you can’t, don’t stress! Just fold everything in gently.
For the chocolate, I highly recommend using melting wafers if you aren’t used to tempering chocolate. Wafers melt down into an incredibly smooth finish, which is perfect for our **Simple Chocolate Coating Guide**. If you use chips, adding just one teaspoon of coconut oil helps thin them out so they aren’t too thick when you dip your bars.
Step-by-Step Guide: How To Make Cereal Bars
This is the fun part, but you have to treat those marshmallows right! Don’t rush the melting; that’s the secret to really chewy bars. We’ve got about 15 minutes of prep time here, and then just 5 quick minutes of actual cooking before we let them chill out. Your hands might get a little sticky, but it’s worth it!
First things first, always prep that pan. I never skip lining my 9×13 inch pan with parchment paper, letting a bit hang over the sides. That overhang is my absolute favorite trick because it lets me lift the entire thing out once it’s set—no wrestling necessary!
Preparing the Base for Your Chocolate Covered Cereal Bars
Set your pan aside and grab the biggest saucepan you own. Melt that butter low and slow. Once it’s liquid, toss in the marshmallows. Stir constantly until they are a smooth, gooey waterfall. Seriously, keep stirring until there are zero lumps left! Take it off the heat right away—we don’t want any burning.
Stir in your vanilla, and then it’s time for the cereal. Add the 6 cups of Lucky Charms and fold gently with a rubber spatula. I mean *gently*. If you press too hard, you’ll crush those beautiful, colorful pieces, and we need them intact for the look and the texture!
Press the mixture evenly into your prepared pan. Butter some wax paper or your hands and just pat it down lightly. Don’t compact it too tightly or they get rock hard. Now, this is the hardest step: you have to wait! Let those bars set up for a full hour at room temperature.
Achieving the Best Chocolate Coating for Dipped Marshmallow Squares
Now comes the showstopper moment! These aren’t just cereal bars; they’re **Chocolate Dipped Lucky Charms Marshmallow Bars**, and that chocolate layer is non-negotiable. When melting, I swear by the microwave—but you have to be patient! Put your 12 ounces of chips (or wafers) in a bowl. Zap them for 30 seconds, stir well. Then another 30 seconds, stir well. Repeat until it’s almost totally smooth, then just keep stirring off the heat. That residual heat does the rest!
If you’re using regular chips, remember that teaspoon of coconut oil? That’s what helps us achieve a really gorgeous, glossy finish for our **Simple Chocolate Coating Guide**. It makes the final coating thinner and less likely to crack when you bite into it. This step is what turns a fun snack into a truly decadent bite!
Dipping Techniques for Decadent Cereal Bites
Before we even think about dipping, make sure those marshmallow bars are completely firm. If you want super sharp, clean edges—and who doesn’t?—take those cut squares and pop them in the fridge for about 30 minutes first. Chilling them makes them much easier to handle when they’re going into the chocolate bath.
For dipping, you can invert the bar and gently lower it into the melted pool, lifting it out quickly. Let the excess drip off back into the bowl. If dipping feels scary, just grab a spoon and drizzle that beautiful chocolate right over the top—that works just as well for making these **Dipped Marshmallow Squares**!
Lay the finished bars on parchment paper where they can harden. If you’re in a hurry, pop the tray into the fridge for about 15 minutes to speed things up, but room temperature works fine too!
Tips for Success with Your Chocolate Dipped Lucky Charms Marshmallow Bars
These **Chocolate Dipped Lucky Charms Marshmallow Bars** are nearly foolproof, but I’ve picked up a few tricks over the years to make sure they are absolutely perfect every time. The biggest piece of advice I can give you surrounds cutting and setting.
Remember that note about chilling the bars before you cut them? Please, please listen to me on that one! If the marshmallow base is totally warm or even room temperature, the knife drags and makes a huge mess. Chilling them for 30 minutes first lets you use a sharp knife to get those gorgeous, clean edges we talked about. Clean cuts mean professional-looking dips!
When it comes to that chocolate setting, make sure your parchment paper surface is flat and not touching anything else, otherwise the chocolate will stick weirdly to whatever it touches. If you are rushing the setting process in the fridge, just give them 15 minutes max, then bring them out to room temperature before you try to package or serve them. They will look gorgeous!
Storage and Reheating Instructions for Your Rainbow Cereal Desserts
These **Rainbow Cereal Desserts** are best enjoyed the day they’re made, naturally! But if you have leftovers (which you probably won’t, let’s be honest), storage is pretty simple. I rarely reheat mine because they’re great straight whether they are slightly warm or cool.
I always stick mine in an airtight container at cool room temperature. If your kitchen gets super hot, like summer in the south, you might need to use the fridge. Just put a layer of wax paper between any stacked layers, otherwise that lovely chocolate coating will stick to the layer above it. They’ll stay wonderfully chewy for about three days this way. Trust me, they won’t last that long!
Serving Suggestions for Easy Dessert Bars
When do you serve these beauties? Honestly, any time because they are **Easy Dessert Bars**! They pair perfectly with a big, cold glass of milk—that’s the classic combo.
If you’re setting up a holiday spread, especially for St. Patrick’s Day, these **St Patricks Day Desserts** are the centerpiece. I love putting them out on a tiered platter next to rich, dark coffee. The coffee tames the sweetness just a touch. They also make fantastic, unexpected addition to any potluck dessert table!
Frequently Asked Questions About Chocolate Dipped Lucky Charms Marshmallow Bars
I know you might have a few lingering questions before you dive headfirst into making these treats. That’s fair! Anytime you mix marshmallows, cereal, and chocolate, you want to make sure you have all the insider tips. If you still have questions after reading all my notes, feel free to reach out!
Can I use different types of chocolate for my Dipped Marshmallow Squares?
Oh, absolutely! That’s the fun part about making these **Dipped Marshmallow Squares**. I used semi-sweet because I like that touch of dark bitterness to balance the super sweet marshmallows. But white chocolate is fantastic if you want something sweeter or if you’re making them for Easter! Milk chocolate works great too if that’s what you have on hand. Just remember, the sweeter the chocolate, the sweeter the final bars will be!
How do I stop my bars from being too sticky when pressing them into the pan?
Trust me, sticky hands are the bane of my existence when making any kind of **Marshmallow Cereal Recipe**! The simplest trick is to lightly grease your hands with butter or cooking spray. Even better? Grab a big square of plastic wrap or wax paper and press the mixture into the pan using that as a barrier. That paper keeps you clean and you’ll be able to get a much more even top surface for when you add the chocolate later!
Are these considered Quick Holiday Recipes?
They are the definition of **Quick Holiday Recipes**! Since we’re talking about a **No Bake Sweet Treat** that only requires about 5 minutes of melting time, these are perfect when you realize you forgot to bring a dessert to a party. They are superstars for birthdays, school events, and yes, they are certainly a fan favorite when it comes to those bright, colorful **St Patricks Day Desserts**!
Nutritional Estimate for One Serving of Homemade Lucky Charms Goodies
I always get asked about the nutrition when I post pictures of these decadent treats. Now, keep in mind that because we’re dealing with melted marshmallows and chocolate, this is an estimate, not a lab result! I’ve worked up the numbers for one bar, yielding 24 servings from a 9×13 pan. For the full legal rundown, you can always check out my nutrition disclaimer page.
Per serving, you are looking at roughly 180 calories. It clocks in around 9 grams of fat and 24 grams of carbohydrates. They do have 18 grams of sugar, because, well, marshmallows and chocolate! But hey, you get about 2 grams of protein in every delicious bite of these **Homemade Lucky Charms Goodies**!
PrintChocolate Dipped Lucky Charms Marshmallow Bars
Make chewy, sweet marshmallow bars using Lucky Charms cereal, finished with a coating of melted chocolate.
- Prep Time: 15 min
- Cook Time: 5 min
- Total Time: 1 hour 20 min
- Yield: 24 bars
- Category: Dessert
- Method: No Bake
- Cuisine: American
- Diet: Vegetarian
Ingredients
- 6 tablespoons unsalted butter
- 1 (10 ounce) package miniature marshmallows
- 6 cups Lucky Charms cereal
- 1 teaspoon vanilla extract
- 12 ounces semi-sweet chocolate chips or melting wafers
- 1 teaspoon coconut oil (optional, for smoother dipping)
Instructions
- Lightly grease a 9×13 inch baking pan or line it with parchment paper, leaving an overhang for easy removal.
- In a large saucepan over low heat, melt the butter.
- Add the marshmallows to the melted butter and stir constantly until they are completely melted and smooth. Remove the pan from the heat.
- Stir in the vanilla extract.
- Add the Lucky Charms cereal to the marshmallow mixture. Fold gently until the cereal is evenly coated. Do not overmix.
- Press the mixture evenly into the prepared baking pan. Use buttered hands or wax paper to prevent sticking. Let the bars cool and set for at least 1 hour at room temperature.
- Once set, cut the mixture into squares or rectangles.
- Prepare the chocolate: Place the chocolate chips (and coconut oil, if using) in a microwave-safe bowl. Microwave in 30-second intervals, stirring well after each interval, until the chocolate is smooth and fully melted.
- Dip the bottom or top of each marshmallow bar into the melted chocolate, or drizzle the chocolate over the bars.
- Place the dipped bars on a sheet of parchment paper to allow the chocolate to set completely. This can be done at room temperature or in the refrigerator for faster setting.
Notes
- If you want a thicker chocolate coating, you may need to melt a second batch of chocolate.
- For cleaner cuts on the bars before dipping, chill the entire pan of set bars in the refrigerator for 30 minutes.
- Use high-quality melting wafers for the easiest, shiniest chocolate coating without tempering.
Nutrition
- Serving Size: 1 bar
- Calories: 180
- Sugar: 18
- Sodium: 95
- Fat: 9
- Saturated Fat: 5
- Unsaturated Fat: 4
- Trans Fat: 0
- Carbohydrates: 24
- Fiber: 1
- Protein: 2
- Cholesterol: 10