

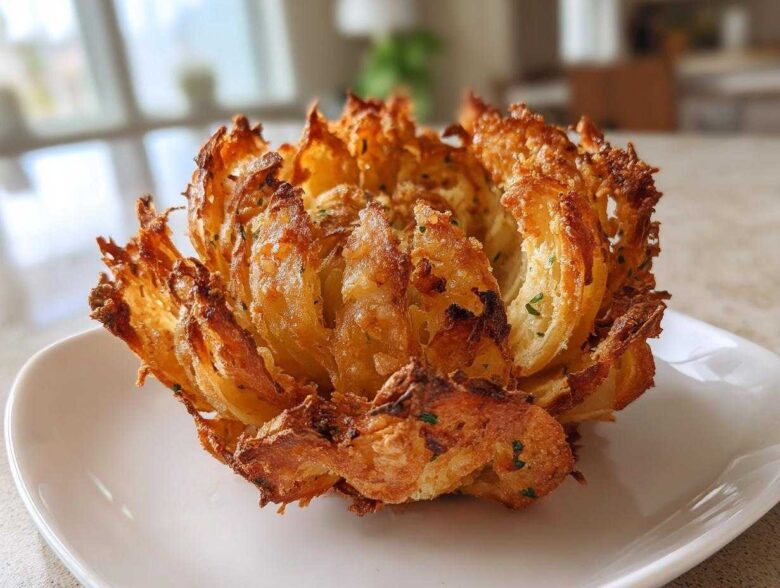
Oh my gosh, you know those huge, decadent blooming onions they serve at restaurants? I love the idea, but my waistline—and my deep fryer—do not! So, I spent way too many afternoons tinkering with my air fryer until I figured out how to get that incredible crunch without drowning everything in oil. Trust me, once you nail the technique, these become mandatory for any get-together. We’re talking about the ultimate party starter: the Air Fryer Crispy Mini Blooming Onions Golden Fun! These little guys open up perfectly, giving you that amazing texture and gorgeous golden brown crispiness for dipping.
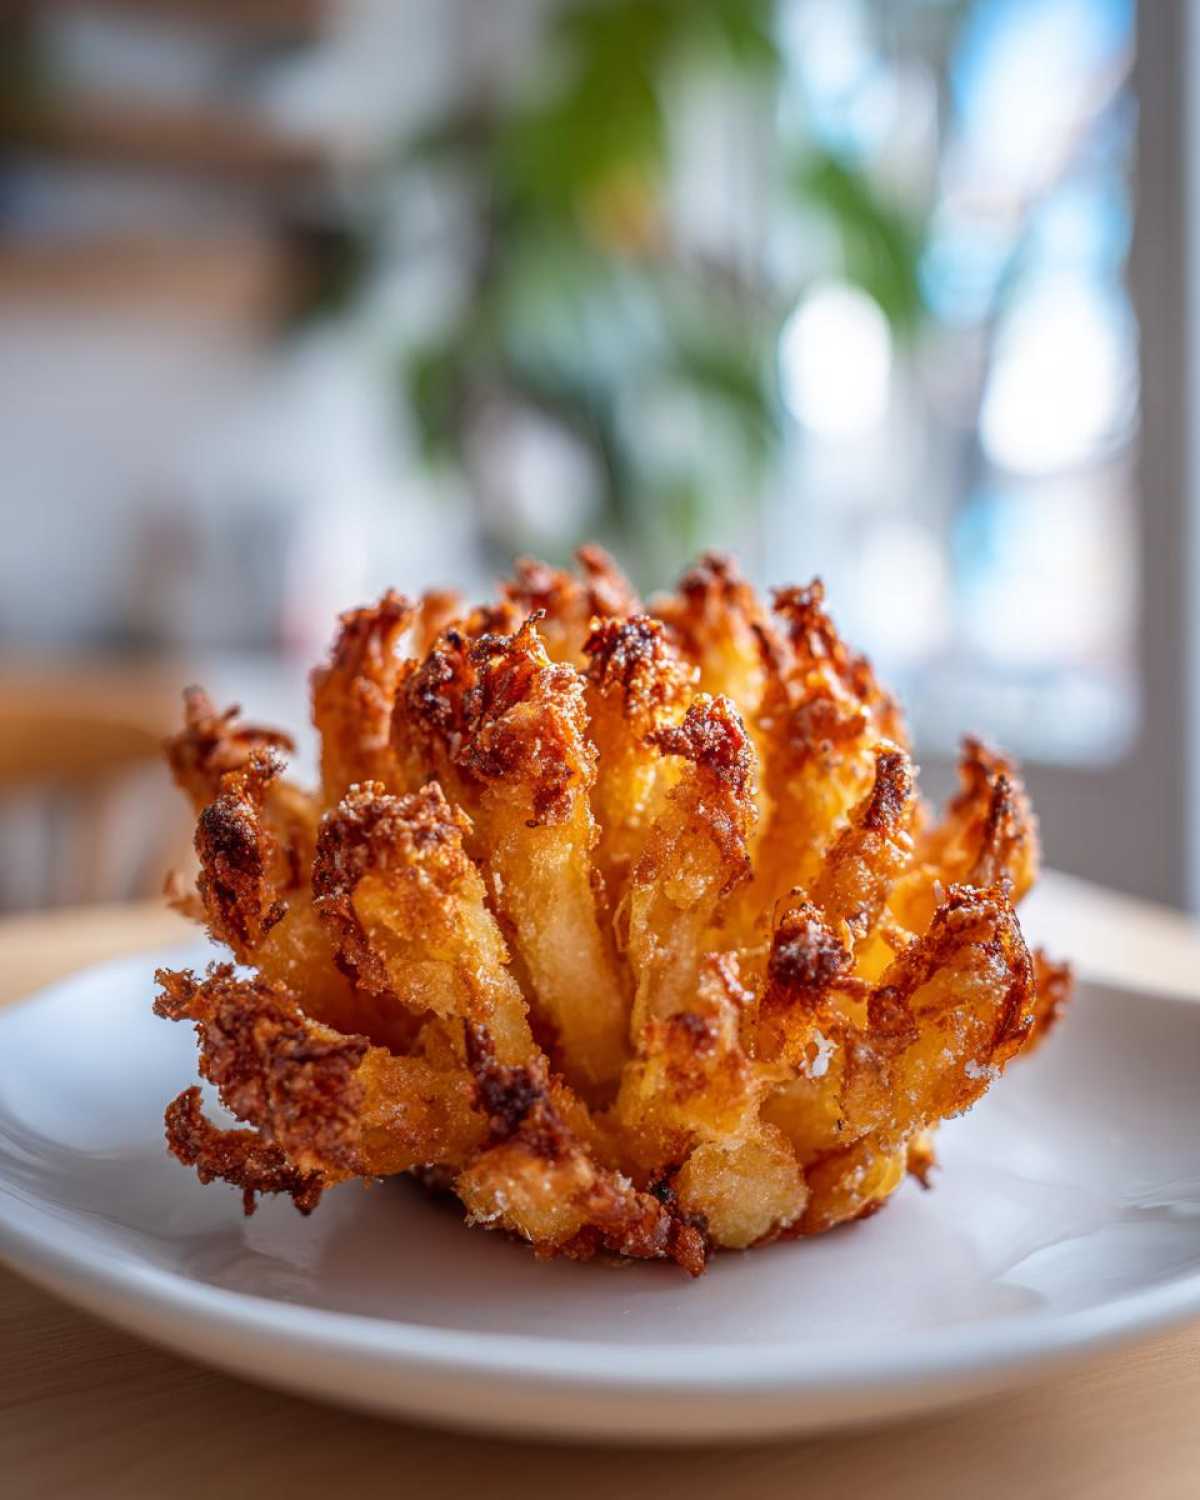
If you’re looking for fun snacks that disappear instantly, you have to check out my other party favorites in the snacks category. I guarantee these onions will be the star of the show!
Why You Will Love This Air Fryer Crispy Mini Blooming Onions Golden Fun Recipe
Seriously, these change the appetizer game. You get all the fun of the restaurant classic with none of the messy cleanup. Here’s why this recipe is going straight into your favorites folder:
- They achieve the most amazing, satisfyingly crispy texture, thanks to the Panko!
- The cooking time is fast, finishing off with that perfect golden color you hope for.
- We use mini onions, so everyone gets their own perfectly portioned serving.
- It’s an incredibly easy air fryer party snack—minimal oil, maximum payoff.
Essential Ingredients for Air Fryer Crispy Mini Blooming Onions
Okay, pay attention to the ingredients because this is where we lock in that crunch. You can’t fake the texture here; that’s why I’m super specific about a couple of things. First off, we need the right canvas: use only small white or yellow onions—I mean truly small, about 2 inches wide. If they’re too big, they won’t cook through before the coating burns, and that’s a disaster!
For the coating, you absolutely must use Panko breadcrumbs. Forget the standard stuff; Panko is what gives you the crunch factor we are aiming for. Here is exactly what you need to gather up:
- 4 small white or yellow onions (aiming for that 2-inch width maximum)
- 1 cup all-purpose flour
- 1 teaspoon salt
- 1/2 teaspoon black pepper
- 1/2 teaspoon paprika
- 1/4 teaspoon cayenne pepper (this gives a nice little kick!)
- 2 large eggs, beaten
- 1/2 cup milk
- 1 cup panko breadcrumbs
- Cooking spray (make sure it’s an oil-based spray, not just water!)
Having your dredging stations set up with these exact components is half the battle won. No substitutions on the Panko, please—that’s my golden rule for this appetizer!
Equipment Needed for Perfect Air Fryer Crispy Mini Blooming Onions
You don’t need a ton of fancy gear for this, but having the right tools makes the prep so much cleaner and organized. We are maximizing our appliance, so first up is your trusty air fryer, obviously. Make sure the basket is big enough so those mini onions aren’t crammed together; overcrowding is the enemy of crispiness!
Beyond the cooker, you’ll need three shallow dishes for our dredging setup. I usually grab pie plates, or even just sturdy paper plates if I don’t want to do extra dishes later, you know how it is!
The most important non-appliance tool is your knife. You absolutely need a super sharp paring knife for cutting the onions. Honestly, trying to saw through those layers with a dull blade is when they end up falling apart before they even hit the flour. A sharp blade makes clean, swift cuts that keep that root structure nice and tight, which is expertise you can buy with a good knife!
Lastly, you’ll want a pastry brush or silicone basting brush. We have to spray oil all over these little guys to get that golden brown air fryer appetizer look, and using a spray can directly can sometimes blow the delicate breading off. Brushing the oil on is much more controlled!
Mastering the Cut: How to Prepare Mini Blooming Onions for Air Fryer Crispy Mini Blooming Onions Golden Fun
This is the trickiest part, but stick with me, and you’ll be fine! If you mess up the cut, the onion might completely separate during cooking, and poof—no more blooming onion shape. We are dealing with mini blooming onion air fryer magic here, so the small size helps keep things together, but precision matters.
First, peel those little onions completely. Now, take your sharpest knife—remember what I said, sharp is key! You need to slice vertically from the top (the stem end) almost all the way down to the root end. But here’s the crucial rule: STOP cutting when you are about half an inch away from the root. Do not slice through the root! That little circular base is the anchor holding everything together, so treat it gently.
Once you have that first cut, turn the onion about 45 degrees and make another vertical cut to create a wedge. Keep going until you have cut the onion into eight equal sections. They should look like petals ready to spread. After you’ve made your four main cuts, give the onion a little press right on the cut end. They should start opening up slightly, but that root base needs to keep its grip tight! If any piece looks like it’s about to break free, just give that base a tiny nick with your knife to encourage it to open without snapping off. This prep ensures we get the perfect structure for our Air Fryer Crispy Mini Blooming Onions Golden Fun, ready for dredging!
If you want some extra flavor integrated right into the onion before the coating goes on, you can actually sprinkle a tiny bit of seasoning right into those crevices. If you like my recipe for air fryer ranch chickpeas, you can steal some of that powdered seasoning mix and dust it lightly over the open layers now. It really enhances the interior flavor!
The Perfect Breading Technique for Crispy Air Fried Onions
Now that the onions are beautifully opened up, it’s time to give them the armor they need to become the crunchiest appetizer known to humankind. We are following the classic three-step dredging method, but with a slight modification to ensure every nook and cranny of those petals gets covered and stays perfectly crisp!
First up is the flour mixture—that’s the base coating that helps the wet stuff stick. Make sure you dust off any major excess flour before moving to the next stage. Next, that egg wash you whisked up (eggs and milk) is our glue. Dip the onion in there completely, let the extra drip off, and now for the real secret weapon: the Panko!
When you move the onion to the Panko breadcrumbs, don’t just gently roll it around. You have to press! Use your clean hands to firmly press that Panko into every crevice where the onion layers have separated. If you press hard enough, the crumbs will really dig into those gaps, guaranteeing you get that incredible, shatteringly crispy air fried onions texture and the ‘golden brown’ finish we are obsessed with.
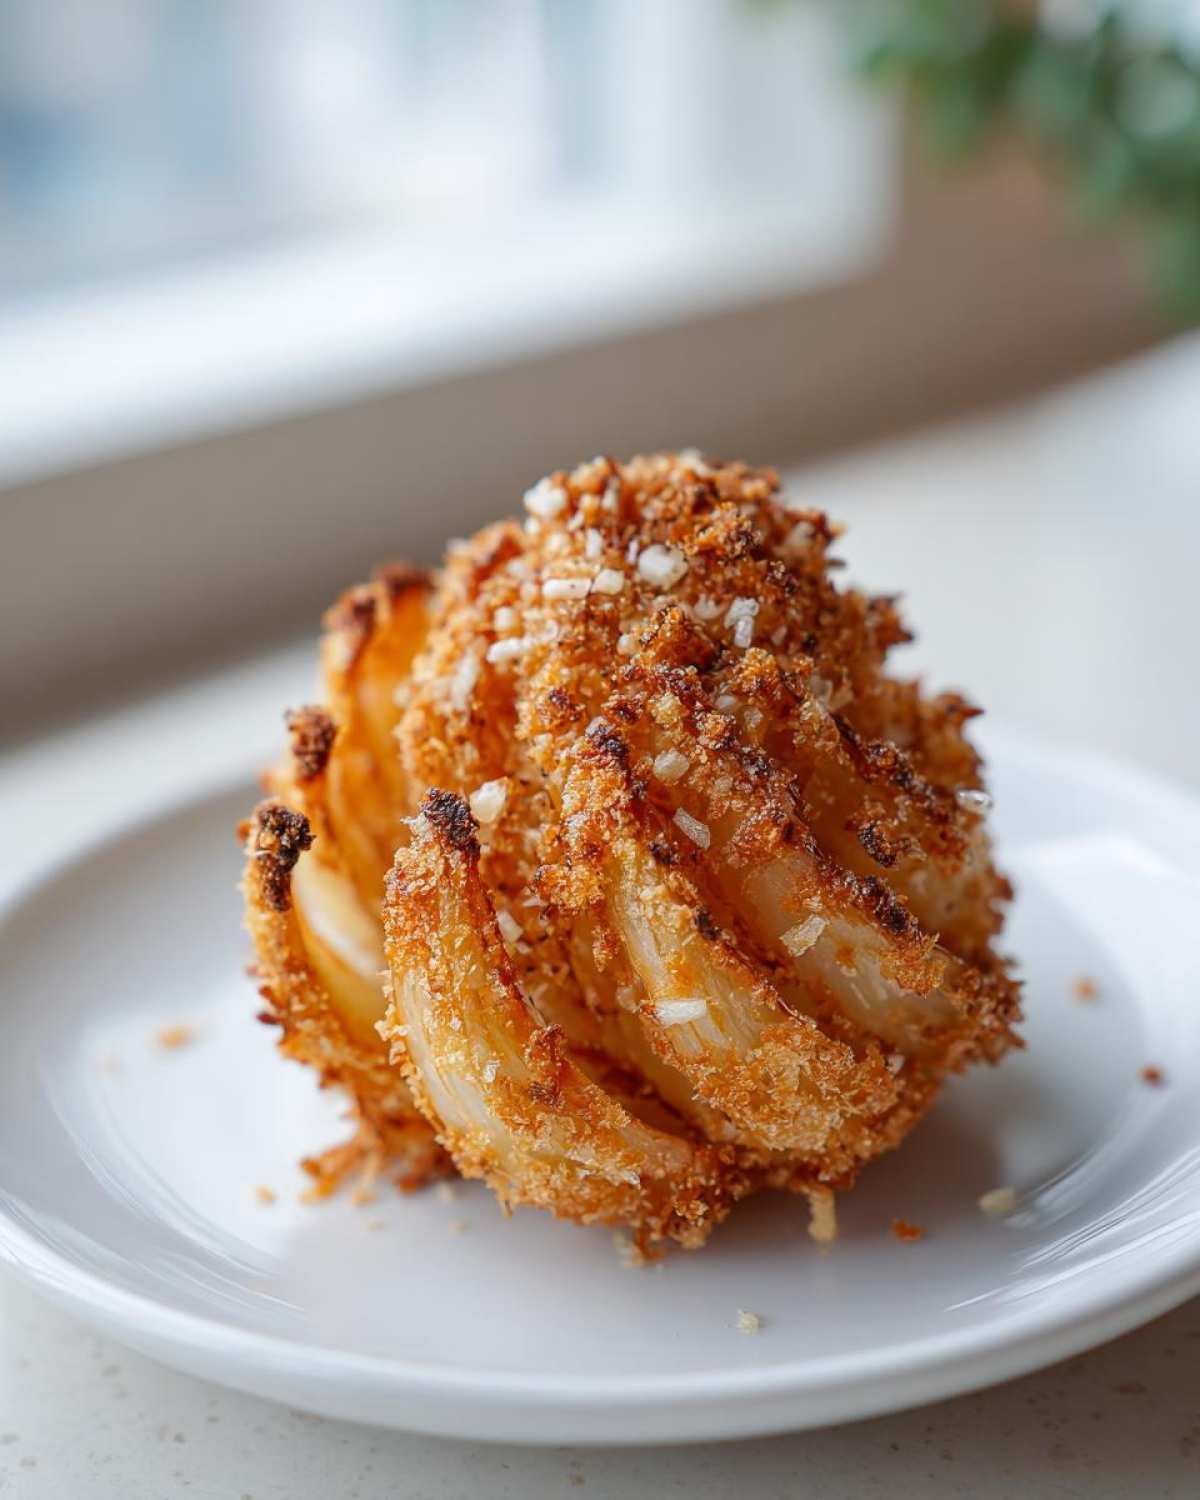
Here’s a real pro tip—this one separates the good results from the *great* results. Once you have fully coated all your mini blooming onions, place them on a baking sheet or plate lined with parchment paper and pop them into the fridge for about 15 minutes. This chilling time really helps the coating set up and adhere better, which prevents it from falling off when it hits the hot air fryer basket. It’s a small extra step, but trust me, it solidifies that perfectly crispy air fryer breading we want!
If you enjoyed the spice trick I mentioned earlier for flavoring the inside, you might also love the flavor profiles in my air fryer ranch chickpeas post. Same idea—flavor layering!
Step-by-Step Instructions for Air Fryer Crispy Mini Blooming Onions Golden Fun
Alright, the preparation is done, and believe me, that was the hard part! Now we get to the satisfying part: watching these little appetizers puff up and turn perfectly crisp in the air fryer. First thing’s first—we need that heat cranked up. Preheat your air fryer to 375 degrees Fahrenheit for a good five minutes. If you skip this, you risk the coating getting soggy before it crisps up!
Next, lightly spray the bottom of your air fryer basket with that cooking spray. We only want one or two of the coated onions in there at a time. Remember, they need space to ‘bloom’ and circulate that hot air around them. If you try to cram four in there, you’ll end up with sad, soggy bottoms, and we are aiming for Air Fryer Crispy Mini Blooming Onions Golden Fun, not the opposite!
Once your onion is nestled in there, you absolutely must spray the top of that beautiful Panko coating aggressively with your cooking spray. This oil is what helps it reach that gorgeous deep golden color we keep talking about. Pop it in and set your timer for 12 to 15 minutes.
Around the 7-minute mark, open the basket up carefully. You need to flip each onion over gently—seriously, be gentle, use tongs—and then spray the uncooked side with a little more oil spray. Closing it back up and letting it finish cooks the onion all the way through while making sure the bottom gets just as crispy and golden as the top. They are ready when they sound hollow when tapped and are deeply browned!
Air Frying Temperature and Timing for BestやResults
I stick religiously to 375°F for this recipe because it’s the sweet spot. Go much hotter, and you risk burning that delicate Panko crust before the center of the onion gets tender. Go cooler, and you’re just steaming it, and we definitely won’t get that satisfying crunch for our Air Fryer Blooming Onion Recipe.
Twelve minutes is usually the bare minimum if your onions are truly tiny, but most of the time, they need that full 15 minutes. Keep an eye on them after the 13-minute mark. Seriously, every air fryer model has a mind of its own. If yours runs hot, they might be done at 13 minutes and look beautifully deep golden brown. If yours is slow, give it the extra two minutes. Visual appeal is everything here—you want that perfect, even golden finish on all those craggy bits of breading!
Air Fryer Bloomin Onion Recipe Dipping Sauce Ideas
Honestly, eating a plain crispy onion, even a perfect one, is only halfway to happiness! These things *beg* for sauce, and you can’t just serve them naked. The dipping sauce is what elevates this from a snack to an event! When planning out those Air Fryer Bloomin Onion Recipe Dipping Sauce Ideas, you need something creamy and punchy to cut through the richness of the breading.
My absolute favorite pairing, and the one I mention in the notes, is a simple horseradish cream sauce. It has that sharp bite that pairs magically with the sweetness of the onion. It’s just sour cream, a little mayo, and then a good dollop of prepared horseradish, plus a squeeze of lemon juice to brighten it all up. It’s unbelievably good, folks!
But if horseradish isn’t your thing, or maybe you are serving a crowd with diverse tastes, you need a second option. A spicy ranch is an absolute winner for game day! My recipe for jalapeño cheddar dip is fantastic, but for something quicker, you can just mix your favorite ranch dressing with a dash of hot sauce—maybe Sriracha or even some smoked paprika for depth. That creamy, cool texture contrasting with that hot, crispy panko crust? You won’t regret serving both!
Tips for Success with Your Mini Blooming Onion Air Fryer Snack
You’ve mastered the cut and the coating, so let’s talk about troubleshooting before you serve these beauties. The secret to keeping them golden and never soggy comes down to three things. First, onion uniformity is huge; if you mix a 3-inch onion in with 1.5-inch ones, only one is going to brown correctly. Try to pick onions that look like they came from the same litter, okay?
Second, don’t skimp on the cooking spray during the cooking cycle! This is what gives you that crisp, golden brown air fryer appetizer finish. If the coating looks dry halfway through, spray it again. That oil in the hot environment is what creates the “fried” effect we’re after, ensuring that perfectly crispy air fryer breading.
Finally, remember batch sizing. If you see the onions touching in the air fryer basket, you need to stop and cook in the next batch. They need their own personal space to cook evenly and get fully crunchy. This makes the work last a little longer, but I promise, the payoff for this easy air fryer party snack is worth the small batch effort!
Storage and Reheating Instructions for Leftover Air Fryer Crispy Mini Blooming Onions
Now, I have to be honest with you—these are absolutely, one hundred percent designed to be eaten the second they come out of the air fryer. They scream “Eat me now!” when they are hot, deeply golden, and shatteringly crisp. Leftovers? What leftovers? (Tee hee, just kidding.)
If, by some miracle, you have any of these amazing little appetizers remaining, don’t even think about putting them in the fridge overnight in a sealed container if you want them to stay crispy. That trapped moisture turns the beautiful Panko crust into sadness city. If you plan to eat them within a few hours, you can leave them in an open bowl on the counter, but honestly, room temperature leftovers are not ideal for fried foods.
Freezing is a definite no-go for me. The texture will never reheat quite the same way once it’s been frozen, even if you bread them raw. Stick to making just what you plan to eat!
If you must reheat them the next day, use the air fryer again! It’s your best friend for bringing back the crunch. Set your air fryer to about 350 degrees Fahrenheit—a little lower than the cooking temp—and give them a quick blast for maybe three to five minutes. You just want to heat them through and crisp up the coating again. No microwave, okay? Microwaves are the absolute enemy of crispy goodness!
Frequently Asked Questions About Making Air Fryer Crispy Mini Blooming Onions Golden Fun
I know you might have a few lingering questions because making any kind of blooming onion feels like a high-stakes operation. Believe me, I’ve been there! Here are the things folks ask me most often when they are trying to achieve that perfect crunchy appetizer.
Can I make this a Healthy Air Fryer Appetizer?
That’s a great question! The whole reason we use the air fryer is to make this a much lighter option than deep-frying, so we are already winning there. However, you still have flour and breadcrumbs, which add carbs. If you want to lighten it up even more, you could try ditching the initial flour dip for some recipes, though I find it helps the egg stick better. For a slightly healthier bread, you could swap white Panko for whole wheat Panko, but honestly, it might make them a bit less crisp and they won’t get that beautiful golden hue as easily. The best thing you can do is just be mindful of the dipping sauce!
What is the best way to ensure my coating stays on?
This is all about technique, honey! You need three things working together. First, the onion must be cut cleanly so the root is intact—if the base breaks, the whole onion collapses later. Second, you need a good, solid coating of egg wash to act like glue. But the most important step is the Panko application. Remember how I told you to use your hands? You have to press that Panko onto the egg-soaked onion aggressively. Don’t just roll it; pat it down firmly everywhere, focusing on those open crevices. The chilling step I mentioned earlier also locks that coating in place for a much more robust final product!
If you have more recipe questions or need a fun dipping sauce idea, feel free to reach out through my contact page anytime!
PrintAir Fryer Crispy Mini Blooming Onions
Make crispy, golden mini blooming onions in your air fryer. This recipe provides simple steps for cutting and coating small onions for a fun, crunchy appetizer.
- Prep Time: 20 min
- Cook Time: 15 min
- Total Time: 35 min
- Yield: 4 servings
- Category: Appetizer
- Method: Air Frying
- Cuisine: American
- Diet: Vegetarian
Ingredients
- 4 small white or yellow onions (about 2 inches wide)
- 1 cup all-purpose flour
- 1 teaspoon salt
- 1/2 teaspoon black pepper
- 1/2 teaspoon paprika
- 1/4 teaspoon cayenne pepper
- 2 large eggs, beaten
- 1/2 cup milk
- 1 cup panko breadcrumbs
- Cooking spray (oil-based)
Instructions
- Prepare the onions: Peel the onions. Make one vertical cut from the top almost to the root, stopping about 1/2 inch from the bottom. Make three more cuts, spaced evenly, to create eight sections. Do not cut all the way through the root. Gently press the onion down to encourage the sections to open slightly.
- Set up the dredging stations: In one shallow dish, combine the flour, salt, pepper, paprika, and cayenne pepper. In a second dish, whisk together the eggs and milk. In a third dish, place the panko breadcrumbs.
- Coat the onions: Dip each onion first into the flour mixture, shaking off excess. Next, dip it into the egg wash, letting excess drip off. Finally, press firmly into the panko breadcrumbs, ensuring the crevices are coated.
- Preheat the air fryer to 375 degrees Fahrenheit for 5 minutes.
- Lightly spray the bottom of the air fryer basket with cooking spray. Place one or two coated onions in the basket, ensuring they do not touch. Spray the tops of the coated onions generously with cooking spray.
- Air fry for 12 to 15 minutes, flipping carefully halfway through. Continue spraying the tops lightly with cooking spray during the flip to promote even browning. The onions are done when the coating is deep golden brown and crispy.
- Remove carefully and serve immediately with your favorite dipping sauce.
Notes
- For best results, use onions that are uniform in size.
- If you want extra crispiness, chill the coated onions for 15 minutes before air frying.
- A horseradish cream sauce pairs well with these onions.
Nutrition
- Serving Size: 1 onion
- Calories: 280
- Sugar: 5
- Sodium: 350
- Fat: 12
- Saturated Fat: 2
- Unsaturated Fat: 10
- Trans Fat: 0
- Carbohydrates: 35
- Fiber: 3
- Protein: 9
- Cholesterol: 65