

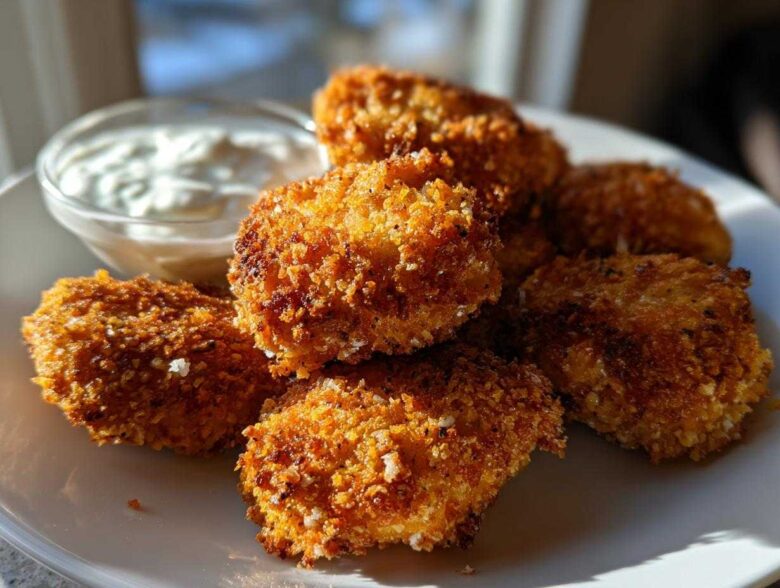
Oh my gosh, I finally cracked the code! Seriously, forget those soggy, sad little chicken patties you might have tried before. We are talking about the most outrageously crunchy, juicy-on-the-inside kind of bite. I spent almost an entire weekend just trying to keep the outside perfectly crisp while the inside stayed tender, and trust me, the secret ingredient is Panko. These Crispy Chicken Fritters with Garlic Yogurt Sauce are about to become your new favorite weeknight hero or potluck showstopper. You won’t believe how simple the process is to get that stunning crunch!
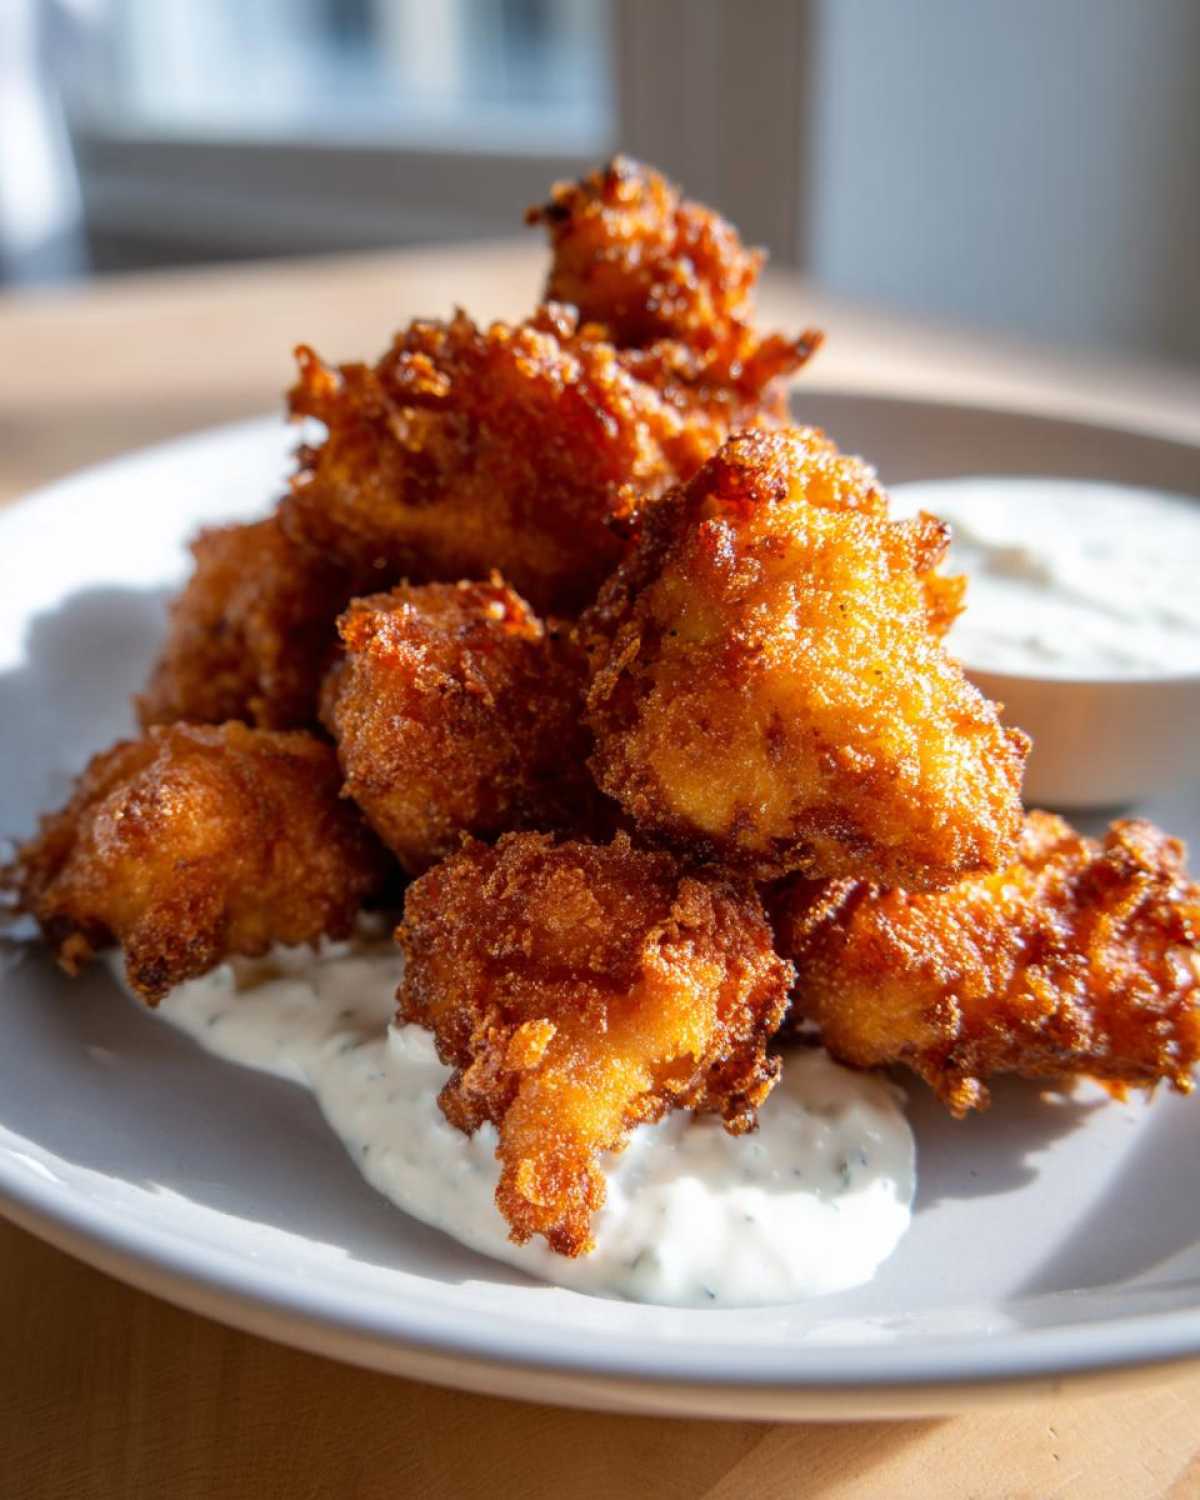
I remember the first time I tried to make these at home, they ended up steaming themselves in the oil. Disaster! But once I learned the trick—which involves three separate stations for breading and being *very* strict about oil temperature—it became foolproof. This recipe is my go-to for an easy chicken appetizer that always gets rave reviews. Just picture dipping that golden, crunchy fritter into the cool, zesty homemade garlic yogurt sauce. It’s pure magic, trust me. You can check out the full spoonswirl blog archives for more kitchen victories!
Why You Will Make These Crispy Chicken Fritters with Garlic Yogurt Sauce
Listen, I know you need meals that deliver big flavor without keeping you chained to the stove. That’s why these are winners!
- Lightning Fast Prep: Seriously, we are looking at about 30 minutes total time. Perfect for a busy Tuesday!
- Texture Heaven: That Panko crust means you get that incredible, shattering crunch every single time—no soggy messes here.
- The Perfect Partner: The accompanying creamy, tangy garlic yogurt sauce cuts through the richness of the fried chicken beautifully. It’s a match made in flavor heaven, and it’s so simple to whip up.
Essential Equipment for Perfect Crispy Chicken Fritters
To get that outside crispiness we are aiming for—that juicy inside, crispy outside chicken dream—you can’t just grab any old saucepan. It’s all about having the right tools ready to go before you even start shaping the meat!
When you’re frying, a heavy-bottomed skillet is your absolute best friend. I use my cast iron one because it holds the heat so consistently. If the heat drops even a little bit when you add the chicken, you start cooking the batter instead of immediately crisping it, and that’s how you end up with greasy fritters.
Here’s what you absolutely need stacked on your counter:
- A heavy-bottomed skillet or Dutch oven for even heating.
- A candy or deep-fry thermometer. Yes, you need this! Guessing the oil temperature is a rookie mistake that leads to doom.
- Three separate, wide and shallow dishes for your dredging station—one for flour, one for egg, and one for that glorious Panko.
- A wire cooling rack set over a baking sheet. Do NOT skip the rack! Placing the hot fritters directly on paper towels traps steam underneath, immediately making the bottom soggy. The rack lets the air circulate so they stay crunchy all over.
Having this setup ready means you can work fast when the chicken hits the oil, which keeps your cooking process smooth and your results perfectly crunchy.
Ingredients for Crispy Chicken Fritters with Garlic Yogurt Sauce
Okay, let’s get down to business! I’ve laid out exactly what you need below. The key to making these amazing pan fried crispy chicken bites is making sure you have fresh Panko and good quality yogurt. Don’t try to skimp here; these simple ingredients are what make the magic happen!
For the Crunchy Chicken Fritters
Remember, we are focusing on that fantastic crust, so the Panko breadcrumbs are our secret weapon here. You’ll need about a pound of ground chicken to make a good batch for four hungry people.
- 1 pound ground chicken (don’t worry, we keep it juicy!)
- 1/2 cup all-purpose flour
- 2 large eggs, just lightly beaten—we don’t want them foamy, just combined.
- 1 1/2 cups Panko breadcrumbs—these give you that superior, light crunch that regular breadcrumbs just can’t touch.
- 1 teaspoon salt
- 1/2 teaspoon black pepper
- 1/4 teaspoon garlic powder (This is for the interior flavor, folks!)
- Vegetable oil, enough to fill your skillet about 1 inch deep for frying.
For the Tangy Garlic Yogurt Sauce
This sauce is so good, you might end up just eating it with a spoon! It’s the perfect cooling counterpoint to the hot, savory fritters. Make sure you have thick, plain Greek yogurt—the Greek kind is essential for body and tang.
- 1 cup plain Greek yogurt (Trust me on the Greek stuff!)
- 2 cloves garlic, minced super-fine. If you have a microplane, use that for the best texture!
- 1 tablespoon lemon juice—freshly squeezed is always best.
- 1 tablespoon fresh parsley, chopped finely.
- 1/4 teaspoon salt (just for seasoning the sauce)
Go ahead and gather everything up. Once the prep stations are ready, the assembly line moves super fast!
Step-by-Step Instructions: How to Make Crispy Chicken Fritters with Garlic Yogurt Sauce
This is where the magic happens, and I promise you, paying attention to these small steps is what separates a good chicken fritter from the absolute *Best Chicken Fritters Ever*. We are building up layers of protection around that juicy ground chicken to guarantee a truly crispy exterior. When you’re ready, take a peek at my deep dive on how to make chicken fritters for any more troubleshooting tips!
Preparing the Breading Stations
Before you even form a patty, you need your assembly line set up. Get your three shallow dishes ready. Trust me, working this assembly line style is non-negotiable for great results!
- In the first dish, put your flour mixture—the seasoned flour with the garlic powder.
- In the second dish, pour in those lightly beaten eggs.
- In the third, spread out all that beautiful Panko breadcrumb goodness.
Also, make sure your oil is heating on the stove now. We want it to hit that perfect temperature right when you’re ready to fry, not before!
Coating the Chicken Patties for Maximum Crispiness
Take about a quarter cup of your ground chicken and gently form it into a small, flat patty, maybe half an inch thick. Don’t overwork this meat; we want it tender! Once formed, here’s the crucial dredging sequence:
- First, give it a good dusting in the seasoned flour. This is important! The flour helps the egg stick. Once floured, lift it up and give it a little shake—we only want a thin coat sticking.
- Next, dip that floured patty completely into the egg wash. Let the excess drip off naturally for a second or two.
- Finally, drop it into the Panko. Here’s the technique: press gently, rolling it around to get those Panko flakes stuck everywhere. If you press a little firmly, they adhere better, giving you that supreme crunch we are hunting for in these homemade chicken patties crunchy bites.
Place the coated fritters on a side plate while you finish shaping the rest. Remember, the oil should be ready right about now!
Frying the Crispy Chicken Fritters
This step separates the crispy from the sad. You must maintain your oil temperature! If it’s too cool, the coating soaks up oil and gets greasy. If it’s too hot, the outside burns before the inside of the chicken fritters cooks.
Heat your oil until it hits 350°F (175°C). Carefully lower the coated patties into the oil—don’t drop them! Fry them in small batches so you don’t drop the oil temperature. Seriously, don’t overcrowd the pan! They only need about 3 to 4 minutes per side. Use your thermometer to check that the inside has reached a safe 165°F (74°C).
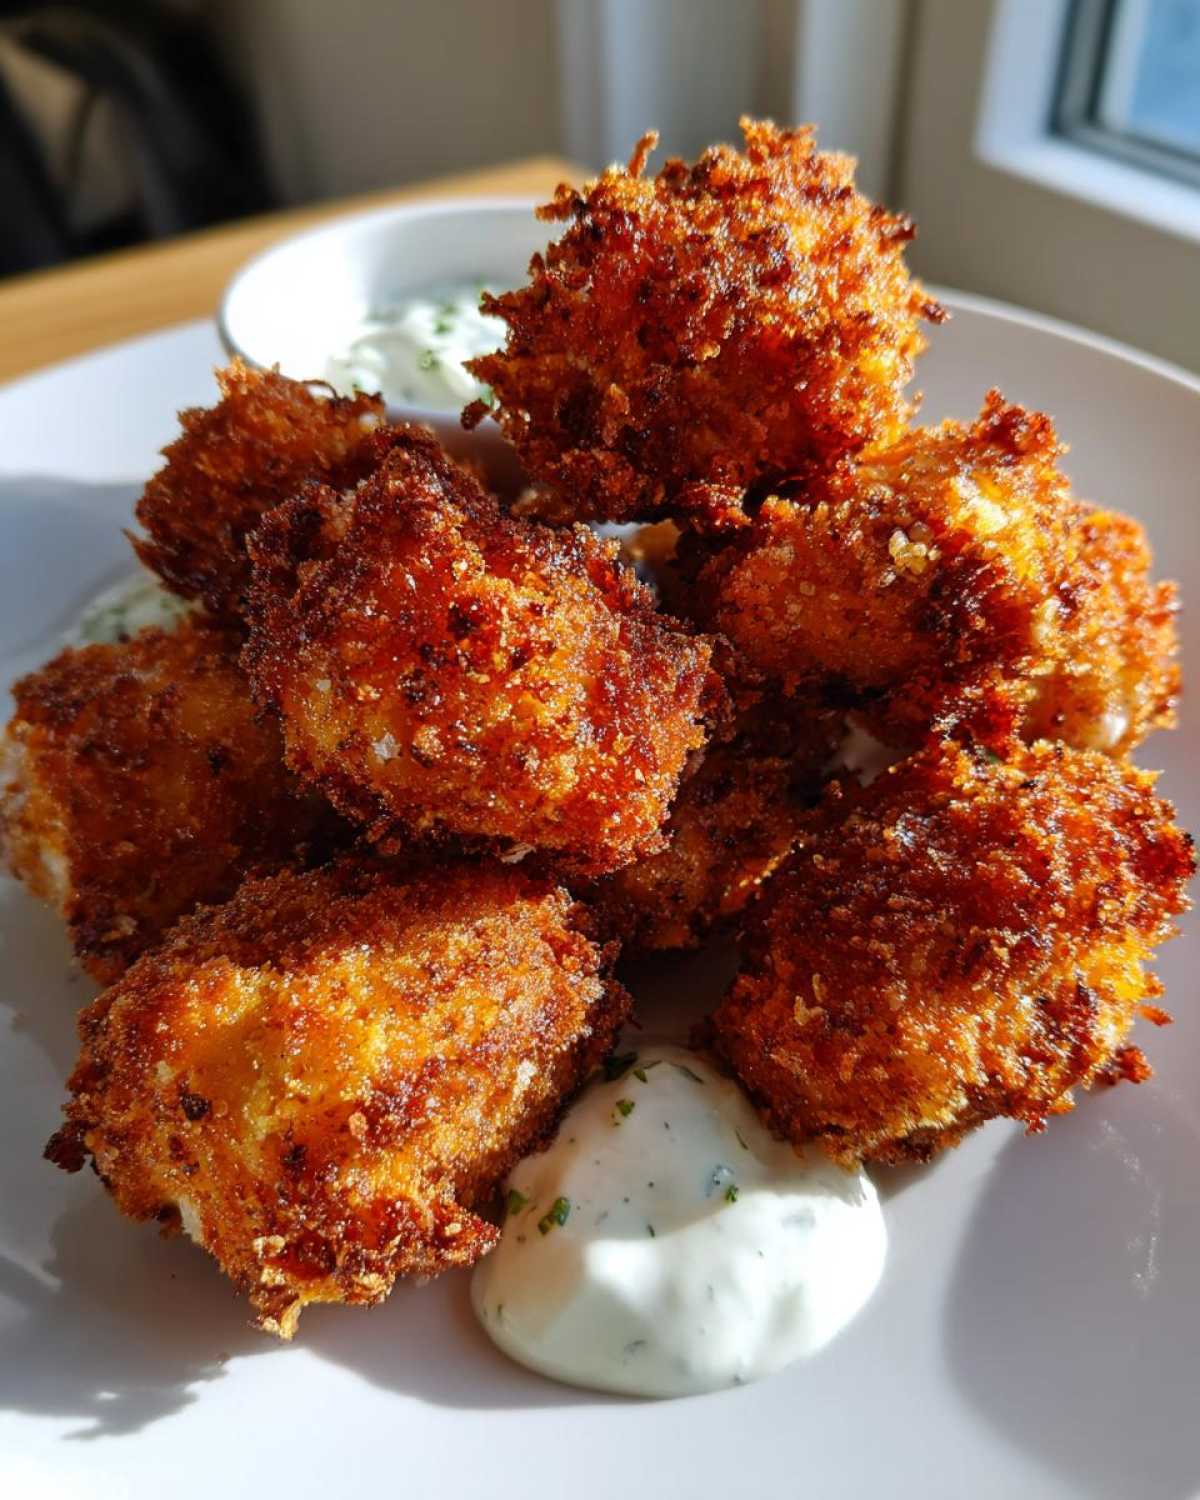
When they look perfectly golden brown, use tongs to lift them out and place them immediately on that wire rack. Sprinkle them with just a tiny pinch of salt while they are still piping hot. That finishing salt really boosts the flavor!
Making the Garlic Yogurt Sauce for Chicken
Look, you can’t serve these perfect fritters without the cooling contrast! While the last batch is frying or draining, mix up your sauce. This is so much better than store-bought ranch, and it takes about two minutes.
In a small bowl, just stir together the thick Greek yogurt, that finely minced fresh garlic—use fresh, please, it makes a huge difference here!—the bright lemon juice, the chopped parsley, and just a pinch of salt. Whisk it around until it looks uniformly creamy. If you want it a little looser, maybe add a teaspoon of water, but I like mine thick for dipping.
That’s it! Hot, savory, crunchy fritters meet cool, tangy, herby dip. Serve them up immediately!
Tips for the Best Crispy Chicken Fritters Ever
I’ve learned through a lot of trial and, frankly, a lot of greasy mistakes just what makes the difference between a decent fritter and one that truly earns the title of ‘crispy.’ If you want that perfect, shattering crust that stays crisp even after dipping, you need to pay attention to a couple of things right after they leave the hot oil!
First up, let’s talk about the ground chicken itself. If you’re worried about them tasting too heavy or falling apart, remember not to overwork the meat when you form the patties. You want the least amount of handling possible. Over-kneading ground meat makes it dense and tough, and we are aiming for tender and juicy here, not chicken jerky!
The biggest tip I can share, which I learned the hard way, is about draining them. I mentioned it above, but I need to drive this home: Never drain hot, freshly fried foods directly onto paper towels alone. Seriously, stop doing it! The steam rises right off the hot fritters and gets trapped between the bottom of the patty and the towel. That steam turns into condensation, and bam—the bottom of your beautiful Homemade Chicken Patties Crunchy exterior gets instantly steamed and soggy. You absolutely have to use a wire rack over a baking sheet so the air can circulate underneath the entire fritter. This simple change is a game-changer for maintaining crispiness.
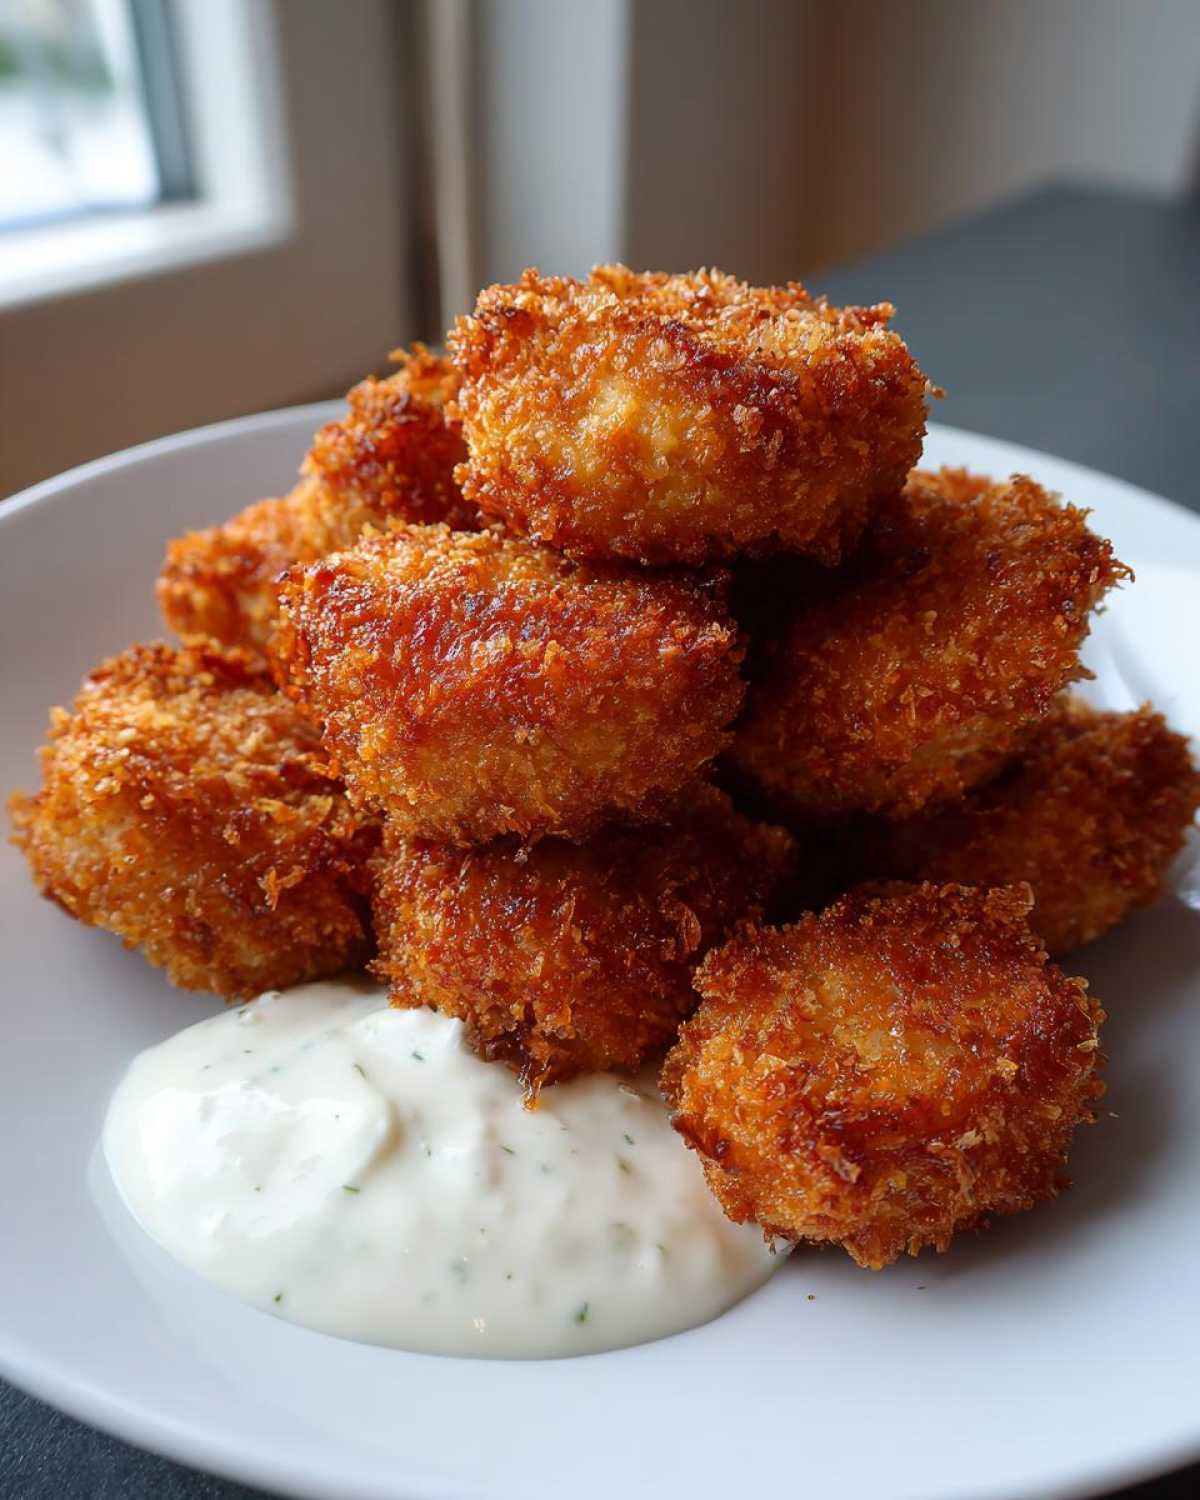
Also, if you’re trying to make a huge batch, don’t be tempted to crowd the pan. It lowers the oil temperature too much, and you’ll end up with greasy fritters that won’t brown properly. Cook in manageable batches, and if you need to keep the first batch warm while you finish the second, just toss them on a baking sheet in a low oven—say, 200°F. That keeps them warm without steaming them.
For more deep dives on fixing common cooking dramas, you can check out my post on chicken fritter batter secrets. Happy cooking!
Air Fryer Chicken Fritters Option
I get it, sometimes you want that crunch but maybe not the whole circus of deep frying. And honestly, I love my air fryer on busy weeknights! It’s a fantastic alternative for those who are trying to cut back on oil but still want something golden and satisfying. Making these fritters in the air fryer is super straightforward, but you need to adjust your game plan slightly because the heat source is completely different.
The most important thing to remember is that air fryers cook with intense, circulating hot air, so you absolutely have to spray or brush your coated fritters with a little oil. Without that fat, the Panko won’t brown up nicely; it’ll just dry out and maybe even burn! Think of spraying them as giving the coating a little hug so it crisps up instead of drying to a crisp.
Here is my quick guide for adapting this recipe:
- Prep the Same: Follow the dredging steps exactly as written. Get those patties beautifully coated in the Panko.
- Spray Them Down: Arrange your prepared fritters in a single layer inside the air fryer basket. Don’t overlap them at all! Overlapping leads to uneven cooking, and we want even crispness. Then, grab your cooking spray—I use avocado oil spray for this—and coat the tops lightly until they look slightly shiny.
- Set the Temperature: Set your air fryer to 380°F (195°C). This temperature gives you a nice, hot cook without burning the coating too fast.
- The Time Adjustment: Air Fryer Chicken Fritters Option usually takes between 10 to 12 minutes total. About halfway through—say, around the 5 or 6-minute mark—you need to pause the machine, carefully flip every fritter over, and give the second side another quick spritz of cooking spray.
They come out incredibly crispy and just perfect, without all that extra oil. When you pull them out, listen for that crunch! They might feel a tiny bit less dense than the deep-fried ones, but they are absolutely fantastic, especially when dunked into that cool yogurt sauce. It’s my favorite way to make an easy chicken appetizer when I’m short on time!
Serving Suggestions for Your Savory Fritters with Yogurt Dip
Okay, so you’ve got your pile of golden, perfectly crunchy chicken fritters, and that bowl of cool, garlicky yogurt sauce is sitting right there waiting. Wow! While the sauce is absolutely essential for dipping, sometimes you want to turn these amazing bites into a full-fledged meal or just add something fresh to balance all that savory fried goodness.
Since these fritters are fast, I always try to pair them with something that requires minimal cleanup or cooking time. We want to keep that “quick chicken dinner idea” vibe going strong!
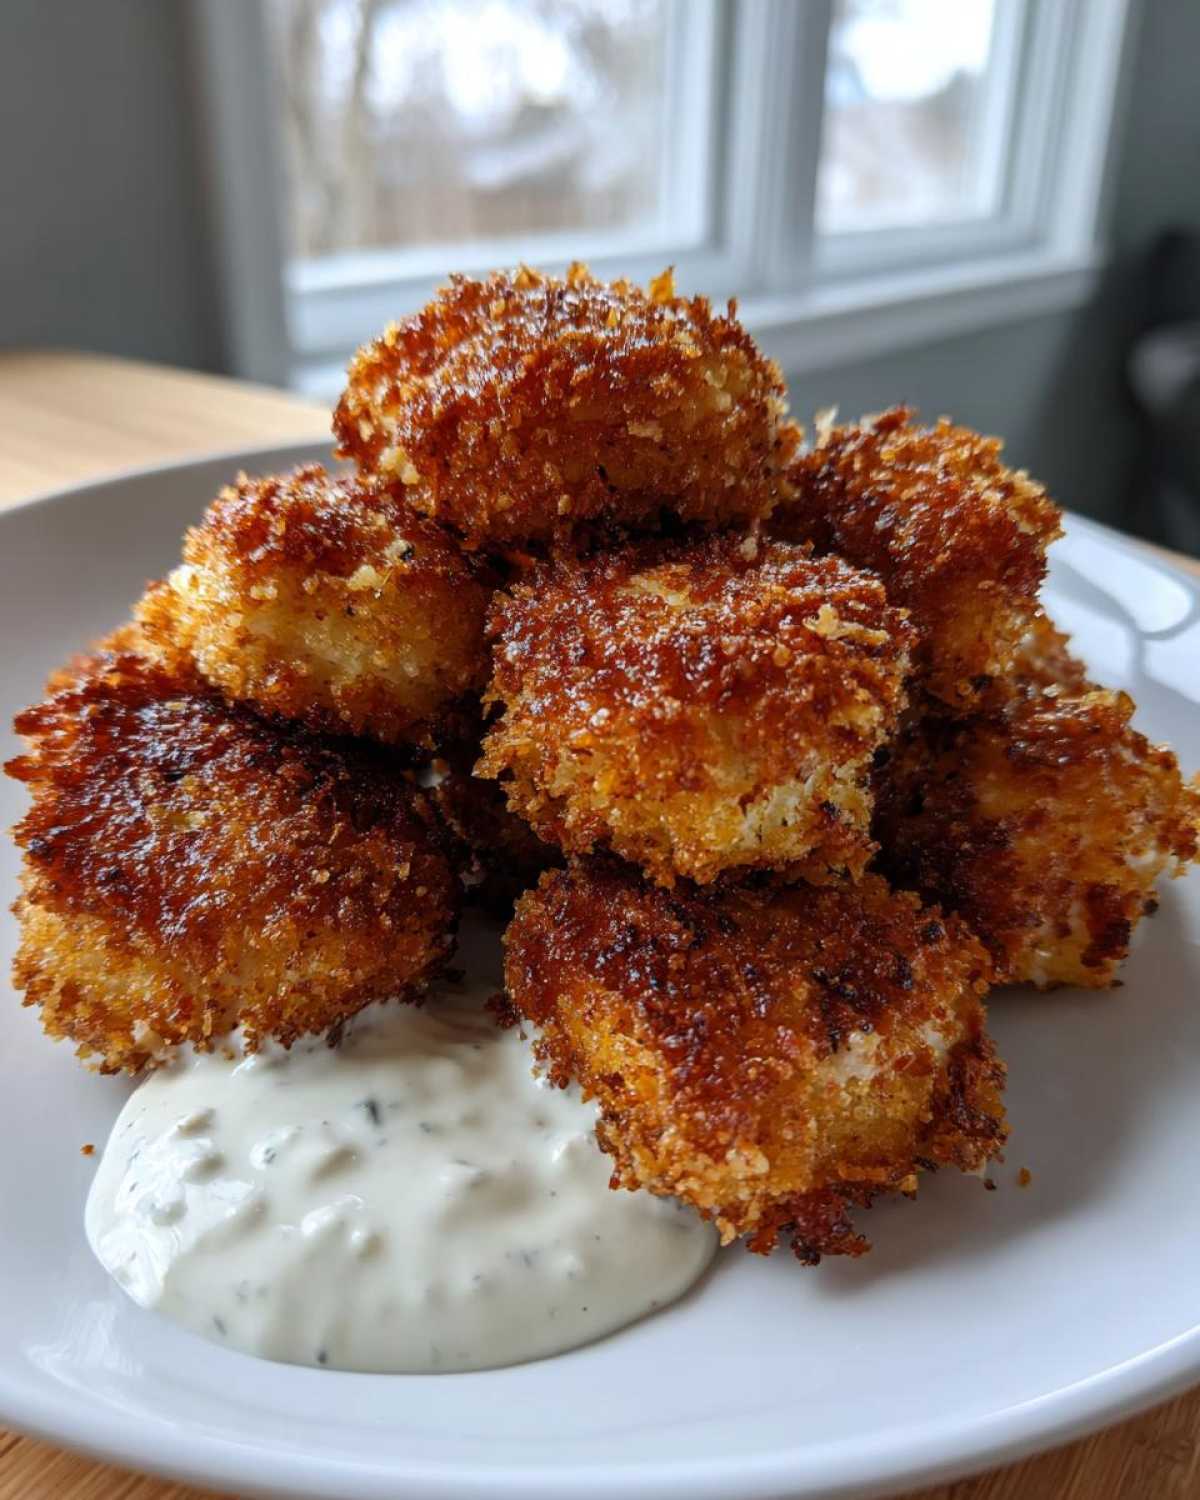
Here are a few things I love setting out when I serve these up:
- A Super Simple Green Salad: Don’t overthink this. A bag of mixed greens tossed with a bright vinaigrette—maybe balsamic or just lemon juice, olive oil, salt, and pepper. The acidity is wonderful next to the richness of the fritters.
- Quick Cucumber and Dill Relish: If you have five extra minutes, thinly slice a cucumber, toss it with a splash of white vinegar, a sprinkle of sugar, and some fresh dill. It has a crisp chill that mirrors the coolness of the yogurt dip.
- Roasted or Steamed Green Beans: If you’re going for a dinner plate, throw some green beans in the oven while the last batch of fritters is frying. A little salt and paprika are all they need. They roast up fast and offer a nice little snap.
Honestly, you don’t need much else! The focus here is the incredible texture of the fritter and that amazing dip. But if you’re serving these as a true appetizer spread, I’d put them right next to some crunchy carrot sticks and celery so people have variety for dipping into that wonderful yogurt sauce with garlic and herbs.
Storage and Reheating Instructions
So, you lucky people made too many, or maybe you just wisely saved a few for lunch tomorrow! Either way, we need to talk about keeping these savory fritters with yogurt dip tasting like they just came out of the fryer. The key here is separation and avoiding the microwave at all costs!
If you try to microwave these, I swear you’ll cry. They’ll turn into soft, chewy little sadness sponges. We learned the hard way that the enemy of crispiness is trapped steam, and the microwave is basically a steam machine on steroids. So, we treat the fritters and the sauce completely differently.
Storing the Leftover Garlic Yogurt Sauce
This is the easy part! The garlic yogurt sauce is super robust. Just scoop any leftovers into an airtight container. Because it’s made with Greek yogurt and has all that lemon juice, it’s pretty forgiving. It should keep beautifully in the fridge for a solid three to four days. When you pull it out, give it a quick stir, maybe add a tiny splash of water if it looks too stiff, and it’s ready to go again!
Storing the Crispy Chicken Fritters
For the fritters, the goal is to keep the air flowing around them. Place any cooled leftovers in a single layer on a plate or baking sheet, and then cover it loosely with plastic wrap, or better yet, put them in a large Ziploc bag, but leave the top slightly unsealed.
I find they hold up best if they spend maybe 24 hours in the fridge this way. If you leave them much longer than that, even stored properly, you’re risking a slight loss of that intense Panko snap. They are truly best eaten the day you make them, but they are definitely salvageable for the next day!
The Only Way to Reheat for Maximum Crunch
If you want that crispy chicken fritters recipe texture back, you have two great options, and both involve dry heat. Skip the pan frying because it can easily burn the crust before the center is warm.
- The Oven Method: This is my preferred way for a larger batch. Preheat your oven to 375°F (190°C). Lay the fritters in a single layer directly on the wire rack—yes, use the rack again!—that’s sitting over a baking sheet. Bake them for about 8 to 10 minutes. This dries out the exterior and crisps up the crust again perfectly.
- The Air Fryer Reheat: If you used the air fryer option before, use it again! It’s faster. Place the fritters back in the basket in a single layer. Set the temperature to 350°F (175°C) for just 4 to 6 minutes. Keep an eye on them! They heat up fast, and you want them hot, not browned further.
As long as you reheat them using one of these dry heat methods, you’ll be enjoying almost-fresh, super-crunchy chicken bites with your reserved garlic yogurt sauce!
Frequently Asked Questions About Crispy Chicken Fritters
I know you might have a few lingering questions, especially if you’re trying to bake these for the first time or planning ahead. It’s totally normal! When I started getting obsessed with making the best chicken fritters ever, I had about a million questions myself. Here are some of the things I hear most often about getting that perfect crunch and serving them right.
Can I use chicken breast instead of ground chicken?
You absolutely can, but you have to change how you prep the chicken! Since we are aiming for a dense, patty-like texture to hold up to the breading, you can’t just use raw, cubed breast meat. If you use breast meat, you need to finely chop it or pulse it in a food processor until it resembles rough ground meat, almost like a chunky hamburger. Don’t over-process it into a paste, though, or it will be too tough!
If you are looking for something different for an appetizer, check out my tips on making an easy chicken appetizer that uses diced chicken instead of ground, which offers a different texture profile entirely!
What oil is best for frying my homemade chicken patties crunchy?
This question is critical for crispiness! You want an oil with a high smoke point, meaning it can get really hot without starting to burn and smoke right away. For my deep frying, I always reach for standard vegetable oil, canola oil, or peanut oil. They are neutral in flavor, which means they won’t compete with the garlic powder and salt in the fritters.
Whatever you choose, just make sure you use enough of it—about an inch deep in the pan—and bring it up to that magic 350°F (175°C) mark before those Panko-coated cuties even think about hitting the heat. That immediate high heat is what seals the crust and keeps the inside juicy!
How far ahead can I make the yogurt sauce for chicken?
The good news is that the Garlic Yogurt Sauce for Chicken is actually one of the best make-ahead components of this whole meal! Yogurt sauces are great because they don’t really change flavor overnight. I usually make mine the morning of, or sometimes even the night before.
Just mix everything—yogurt, garlic, lemon, parsley—and keep it tightly covered in the fridge. The only thing I sometimes notice is that the garlic flavor gets a little bit stronger when it sits, which I personally love! If you’re using very strong fresh garlic, you might want to hold back just a tiny bit of the raw garlic if you are making it more than 24 hours ahead, and then stir in a little fresh pinch right before serving.
Can I use dipping sauce other than the yogurt one?
While my heart belongs to the creamy, tangy yogurt dip, you certainly aren’t restricted! If you’re serving these for a party, offering a selection of creamy dipping sauce recipes is always smart. People love variety. I often serve a side of simple honey mustard alongside my garlic yogurt sauce. A sweet chili sauce also works wonders if you want to kick up the heat factor slightly against the savory fritters.
PrintCrispy Panko-Crusted Chicken Fritters with Tangy Garlic Yogurt Dip

Make crunchy chicken fritters using a panko crust for maximum crispiness. Serve these easy chicken bites with a simple, cool garlic yogurt sauce.
- Prep Time: 15 min
- Cook Time: 15 min
- Total Time: 30 min
- Yield: 4 servings
- Category: Appetizer
- Method: Pan Frying
- Cuisine: American
- Diet: Low Fat
Ingredients
- 1 pound ground chicken
- 1/2 cup all-purpose flour
- 2 large eggs, lightly beaten
- 1 1/2 cups Panko breadcrumbs
- 1 teaspoon salt
- 1/2 teaspoon black pepper
- 1/4 teaspoon garlic powder
- Vegetable oil, for frying (about 1 inch deep)
- 1 cup plain Greek yogurt
- 2 cloves garlic, minced
- 1 tablespoon lemon juice
- 1 tablespoon fresh parsley, chopped
- 1/4 teaspoon salt (for sauce)
Instructions
- In a shallow dish, combine the flour, 1/2 teaspoon salt, 1/4 teaspoon pepper, and garlic powder.
- In a second shallow dish, place the beaten eggs.
- In a third shallow dish, place the Panko breadcrumbs.
- Form the ground chicken into small, flat patties, about 1/2 inch thick.
- Dredge each chicken patty first in the flour mixture, shaking off excess.
- Dip the floured patty into the egg mixture, allowing excess to drip off.
- Coat the patty thoroughly in the Panko breadcrumbs, pressing gently so the crumbs adhere well.
- Heat about 1 inch of vegetable oil in a large, heavy-bottomed skillet over medium-high heat until it reaches 350°F (175°C).
- Carefully place the fritters into the hot oil, working in batches to avoid overcrowding. Do not let the oil temperature drop significantly.
- Fry for 3 to 4 minutes per side until golden brown and cooked through (internal temperature of 165°F or 74°C).
- Remove the fritters and place them on a wire rack set over a paper towel-lined baking sheet to drain excess oil. Season immediately with remaining salt and pepper.
- To make the sauce, combine the Greek yogurt, minced garlic, lemon juice, parsley, and 1/4 teaspoon salt in a small bowl. Stir until smooth.
- Serve the hot, crispy chicken fritters immediately with the garlic yogurt sauce for dipping.
Notes
- For an air fryer option, spray the coated fritters lightly with cooking spray and cook at 380°F (195°C) for 10 to 12 minutes, flipping halfway through.
- If you prefer a thinner sauce, add 1 teaspoon of water to the yogurt mixture.
- You can substitute ground turkey for the ground chicken if desired.
Nutrition
- Serving Size: 4 fritters
- Calories: 350
- Sugar: 3
- Sodium: 450
- Fat: 18
- Saturated Fat: 4
- Unsaturated Fat: 14
- Trans Fat: 0
- Carbohydrates: 20
- Fiber: 1
- Protein: 28
- Cholesterol: 95