

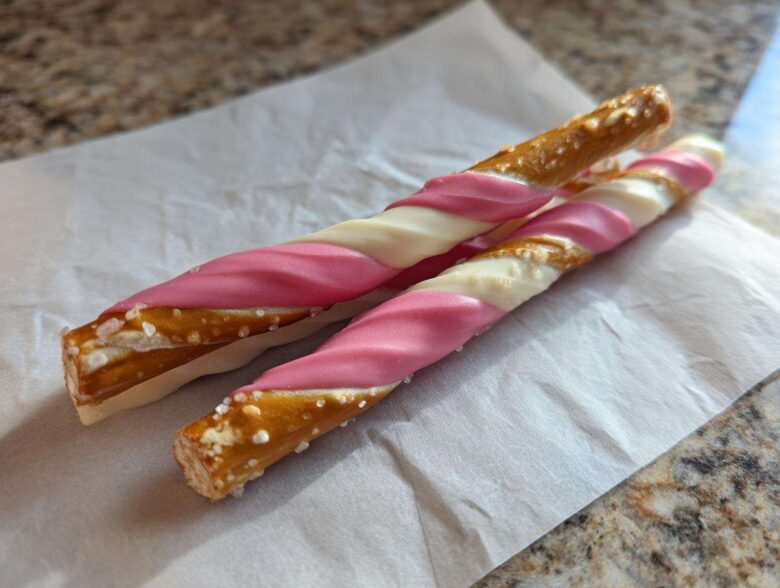
Oh, I am so excited you stopped by today! If you’re anything like me, sometimes you need a show-stopping treat that takes absolutely zero oven time. Seriously, the best party favors are the ones that look like you spent all day fussing over them, but actually took, like, twenty minutes. That’s exactly what we are making today: the most gorgeous, totally customizable Pink White Chocolate Dipped Pretzel Rods.
The real game-changer here isn’t just dipping; it’s the simple way we swirl the colors together. It gives them that lovely, professional marble effect without needing any fancy tools. I whip these up for everything—baby showers, fun birthdays, or just because I need a little pink happiness lying around the house. Trust me, these homemade candy dipped pretzels disappear faster than anything else on the table!
Why You’ll Love This Easy Pink White Chocolate Dipped Pretzel Rod Recipe
Honestly, you’re going to keep this recipe forever. It’s my secret weapon when I need something pretty, fast, and delicious. What’s not to adore?
- They are totally No Bake Pink Desserts! Get them done when the weather is too hot to turn on the oven.
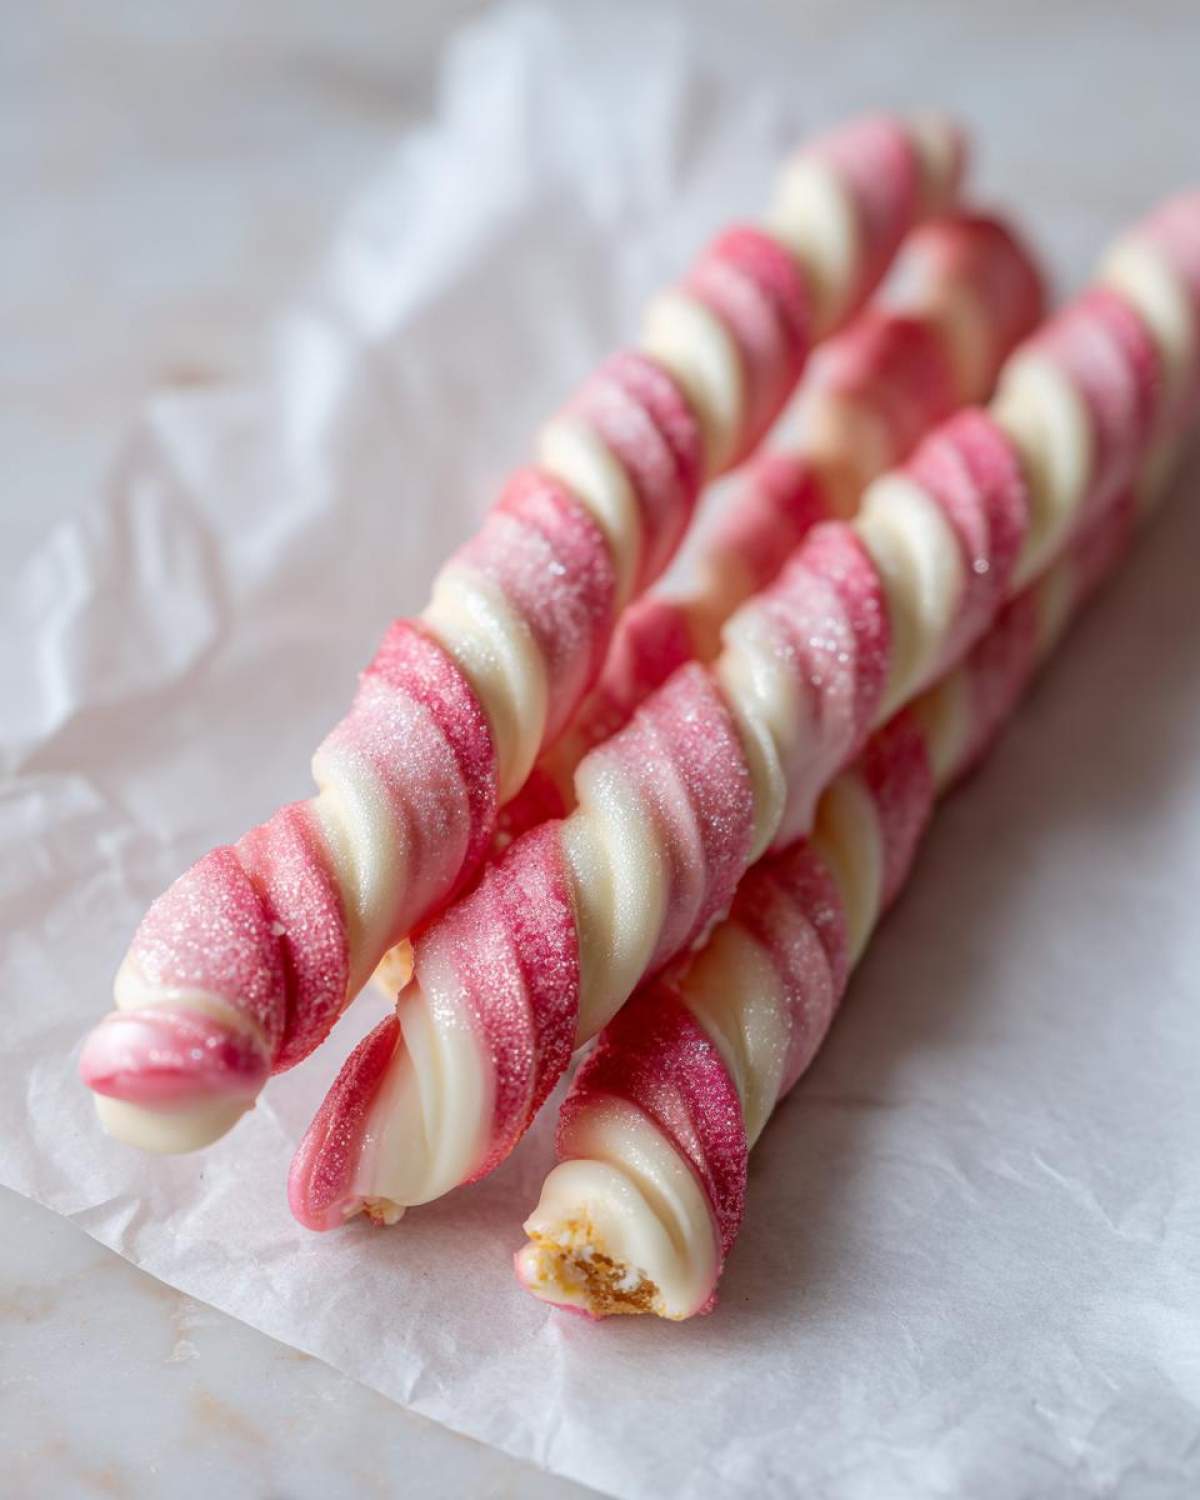
- Maximum visual impact. They seriously look professionally made, especially those Pink White Chocolate Dipped Pretzel Rods with the swirl.
- Easy Dipped Pretzel Rod Recipe means cleanup is a breeze.
- Endless customization! You change the base color and the sprinkles for any holiday or theme.
Essential Ingredients for Perfect Pink White Chocolate Dipped Pretzel Rods
Getting the ingredients right is the first step toward making pretzel rods that look smooth and taste incredible. We don’t want any grainy, seized chocolate here! For this recipe, you only need a few things, but the quality really shines through, especially with the chocolate.
- 12 standard pretzel rods – make sure they’re fresh and crisp!
- 8 ounces of white chocolate melting wafers or a good quality white chocolate that you chop yourself.
- 4 ounces of pink candy melts, or if you prefer regular white chocolate, you’ll need about 4 ounces plus some pink, oil-based food coloring.
- 1 teaspoon of coconut oil or shortening if you think you need to thin the chocolate just a touch for easier dipping.
See? Super simple pantry staples, but remember: good chocolate makes the difference between a messy snack and real Chocolate Covered Pretzel Rods for Parties.
Ingredient Notes and Substitutions for Pink and White Chocolate Dipped Pretzels
Let’s talk chocolate choices because this is where most people get hung up. If you use regular white baking chocolate chips, you *must* chop them finely, otherwise, they don’t melt evenly. Melting wafers are generally smoother and more forgiving—I often lean on them for speed!
If you decide to use white chocolate instead of pink candy melts, you have to use oil-based food coloring. I learned this the hard way! Water-based coloring is the arch-nemesis of melted chocolate; it makes it seize up and turn into gritty paste instantly. A few drops of the oil coloring mixed into the melted white chocolate give you that perfect soft pink color every single time.
Equipment Needed for How to Dip Pretzels in Chocolate
You don’t need a huge specialized setup for making these Pretty Chocolate Dipped Snacks! I use what’s already in my standard utensil drawer. Keep it simple so you can get back to enjoying your snacks faster!
Here is the bare minimum that I always pull out:
- A good sturdy baking sheet. This is how we catch the drips!
- Parchment paper or wax paper to line that sheet. This is non-negotiable—you don’t want to scrape chocolate off your pan later.
- Two microwave-safe bowls—one for the white chocolate and one for the pink chocolate. Keep ’em separate!
- A nice sturdy spatula or spoon for stirring the melted chocolate. Something silicone is great because cleanup is easier.
- A toothpick. Yes, just a regular toothpick! It’s perfect for swirling the colors together right on the rod, and I also use it to gently tap the rod to shake off any big drips.
Step-by-Step Instructions for Swirled Chocolate Pretzel Rods
Now we get to the fun part! This whole process moves really quickly once the chocolate is melted, so have your sprinkles ready and your parchment paper laid out before you even start heating up the bowls. We are making Swirled Chocolate Pretzel Rods, so speed is our friend.
Melting Chocolate for Dipping Pretzels Properly
This technique applies to both your white chocolate and your pink chocolate, so pay attention! You absolutely cannot rush this or you’ll ruin the texture. Put your white chocolate in a bowl and microwave it for 30 seconds. Take it out, stir it really well—even if it doesn’t look melted yet! Then, pop it back in for another 30 seconds. Keep doing 30-second bursts and stirring until it’s almost all smooth. You want a tiny lump or two left when you pull it out for the last time.
The residual heat will melt the last bits when you stir. If things look a little thick, stir in half of your coconut oil now. Repeat the exact same process for the pink chocolate in the second bowl. Remember that warning I gave about water-based coloring? That’s why we are using oil here to keep everything silky smooth. Don’t overheat it—a slightly thin coating is much better than a seized, grainy mess!
Achieving the Perfect Dip and Swirl on Your Pink White Chocolate Dipped Pretzel Rods
Okay, time to make these beauties! Grab one rod, holding it near the dry end. Dip it straight down into the white chocolate, coating only about two-thirds of the way up. Lift it out slowly, holding it over the bowl, and gently rotate it. Then, give the rod a little tap against the side of the bowl; this shakes off the big, heavy drips. You want a nice, even coat.
This next part is key for our Pink White Chocolate Dipped Pretzel Rods: while that white chocolate is still totally wet, immediately take your rod over your pink chocolate bowl. You can either dip the tip lightly into the pink or just use a spoon to drizzle some of that melted pink right over the white section. Then, grab a clean toothpick and gently run it through the intersection of the two colors just once or twice. That gentle drag creates a gorgeous, marbled, professional swirl. Immediately place the rod onto your parchment paper. If you’re adding any sprinkles, do it right now before that chocolate skin starts to set!
White Chocolate Pretzel Rod Decorations and Finishing Touches
The actual dipping process is fast, but the decorating window? That’s crucial! You only have a few seconds after the chocolate sets slightly for your toppings to really stick. If you wait too long, they just fall off when you move the rod, and we definitely don’t want sad, naked pretzels!
For these Chocolate Dipped Pretzels, I usually have two or three little bowls ready to go nearby. Have everything accessible before you start dipping!
Simple Toppings for Maximum Wow Factor
The beauty of this snack is in its simplicity, so don’t go crazy unless you want to. My go-to move for a classic look is sanding sugar. You know, those coarse, sparkly sugar crystals? They catch the light beautifully against the soft pink and white background. Just dump a small, light handful right over the wet chocolate area. It sticks instantly and looks so festive!
If you’re making these for a specific holiday, use themed sprinkles. For Valentine’s pretzels, I use tiny red and pink heart sprinkles. They look so charming!
Adding a Contrasting Drizzle
Sometimes, if I’m feeling extra fancy, I’ll do a contrasting drizzle on top of the swirl pattern. This works best if you let your initial white and pink swirl set almost completely first—we don’t want them mixing too much!
If you want a deep pink drizzle, melt a small amount of the pink chocolate on its own. Then, grab a fork or use a piping bag with the *very* tip snipped off. Drizzle back and forth quickly over the set pink and white area. You can even use a tiny bit of dark chocolate if you have any left over for a super sophisticated look. Remember, the drizzle needs to go on **after** the initial dip has hardened a bit, unlike the first set of sprinkles which go on wet!
Tips for Success When Making Pretty Chocolate Dipped Snacks
Look, candy making looks complicated, but it’s really just about respecting what chocolate wants to do. If you follow these small rules, your snacks will turn out perfect every single time. I’ve learned these the hard way over many frustrating batches, so please learn from my chaos!
Letting the Chocolate Set Naturally (If You Can!)
I know you want to stick these beauties in the fridge immediately because waiting is the worst, right? But resist the urge! If you chill the dipped rods right away, the temperature shift can cause the chocolate to contract too quickly, which often leads to that annoying white film called “bloom.”
It’s better to let them set up for 20 or 30 minutes right there on the counter at a cool room temperature. If your kitchen is super warm, then a quick 10-minute trip to the fridge is fine, but truly, room temp setting gives you a shinier, prettier finish for your homemade candy dipped pretzels.
Never Let Water Near Your Chocolate
This is the biggest rule in all of confectionery, and I mean it! If even one drop of water gets into your melted white chocolate or your pink coloring, it will seize up. What does that mean? It turns instantly grainy, thick, and totally unusable. It’s heartbreaking when it happens!
So, make sure your bowls are bone dry and that you aren’t melting chocolate over a double boiler that has any residual steam. If you are using the microwave method, make sure your stirring utensil isn’t damp from washing dishes either. It’s all about keeping the chocolate dry!
Batch Dipping vs. The Single Rod Method
Because we are swirling two colors, I really recommend the single-rod method. You dip in white, transfer immediately to pink, swirl, sprinkle, and set. If you try to dip three rods at once, the first one will start to set before you even get the third one dipped, and then you’re just making lumpy messes.
Plan to work in small batches of maybe three to five rods at a time, letting that batch set up completely before starting the next few. This keeps your chocolate flowing nicely and makes sure every single one of your Holiday Pretzel Rod Treats looks just as good as the first one you made.
Storage and Serving Suggestions for Pink White Chocolate Dipped Pretzel Rods
Once you’ve perfected those beautiful Pink White Chocolate Dipped Pretzel Rods, the last thing you want is for them to go soft or sticky, right? Luckily, since this is a no-bake situation, storage is super easy, provided you keep a couple of simple rules in mind. The lifespan on these is wonderful too!
You want to store your finished pretzels in a single layer inside an airtight container. I avoid stacking them if I can, just in case the chocolate is still slightly soft, but if you have to stack, use a piece of parchment paper between each layer. Keep that container somewhere cool and dry. Think pantry or cupboard, not on top of the fridge!
If they are stored properly, these treats will stay perfectly good—crisp pretzel, firm chocolate—for at least two weeks. Honestly, mine rarely last that long because they are such a hit!
Great Occasions for Serving These Sweet Snacks
These aren’t just for emergencies, though they are great for those! The pink and white theme is so universally cheerful. They make fantastic party favors, especially because they look so pretty bundled up in cellophane bags tied with a ribbon.
They are a staple for me when things need to look pastel-perfect. Think of them as amazing Baby Shower Pretzel Sticks—you can easily swap the pink for baby blue if you need to match themes!
And, of course, they are the ultimate easy treat for romance. A batch of these cuties makes the best homemade gifts for the school bake sale or when you’re whipping up some quick Valentine Pretzel Rods. Everyone loves getting something sweet that didn’t come from a box!
Frequently Asked Questions About Homemade Candy Dipped Pretzels
I know you might have a few lingering questions, especially if this is your first time making candy-dipped treats. Don’t worry, I’ve gathered the most common things people ask me when they try this recipe for the first time. We’ve covered the big ones like what to do if your chocolate gets weird!
Why did my chocolate seize up when I tried to make my Pink White Chocolate Dipped Pretzel Rods?
Oh, that dreaded seize! It almost always happens because of moisture. Did even a tiny bit of water or steam sneak into your bowl when you were melting? That’s the number one culprit. Also, make sure that bowl you use to melt the pink chocolate is absolutely spotless before you start. A little bit of water makes the sugar crystals clump up instantly, and sadly, there’s no coming back from it once that happens with white chocolate.
What’s the trick to getting a super smooth coat over the pretzel?
The secret to a beautiful, thin layer—instead of a thick, clumpy mess—is all in the dipping utensil and the exit strategy. You want to dip the rod slowly, coating just the area you want covered. Then, instead of shaking the rod wildly, hold it over the bowl and gently tap the *handle* of the pretzel rod against the side of the bowl. That light vibration shocks the excess chocolate right off. Less is more when it comes to that coating!
Can I make these ahead of time for a big party?
Absolutely! Making these ahead is half the fun because you can focus on the rest of your party prep. As long as you let the chocolate set completely at room temperature (or chill for 10 minutes, but then bring back to room temp if your kitchen is cold), they are excellent for storage. Just put them in that airtight container I mentioned in the fridge. I promise these Homemade Candy Dipped Pretzels taste amazing up to two weeks later!
Estimated Nutritional Data for Pink White Chocolate Dipped Pretzel Rods
Okay, so let’s be real—these are treats, not health food, but I always get asked about the numbers! Since we’re using rods, some salt is going to be involved, but the rest really depends on exactly how thick you dip the rods and which type of chocolate melts you splurge on. I put together a best-guess estimate based on the standard amounts in the recipe.
Remember, this is just a fun guide! If you find yourself dipping these for every gathering, you’re going to want to swap out some of the ingredients for lower-sugar versions, but for a party, this classic approach is the way to go.
- Serving Size: 1 rod
- Calories: 180
- Sugar: 18g
- Sodium: 250mg (That’s the pretzel coming through!)
- Total Fat: 10g
- Saturated Fat: 6g
- Carbohydrates: 20g
- Protein: 2g
Quick Disclaimer: Please know that this data is just an estimate based on the common ingredients listed. If you use premium Belgian chocolate versus standard candy melts, or if you load up on extra sprinkles, those numbers are going to shift. This is strictly to help you keep track for planning purposes; it isn’t official lab data!
PrintPink White Chocolate Dipped Pretzel Rods
A simple guide to making attractive pretzel rods coated in swirled pink and white chocolate, perfect for parties or gifts.
- Prep Time: 15 min
- Cook Time: 0 min
- Total Time: 15 min
- Yield: 12 servings
- Category: Dessert
- Method: Dipping
- Cuisine: American
- Diet: Vegetarian
Ingredients
- 12 standard pretzel rods
- 8 ounces white chocolate melting wafers or high-quality white chocolate, chopped
- 4 ounces pink candy melts or white chocolate tinted with pink oil-based food coloring
- 1 teaspoon coconut oil or vegetable shortening (optional, for thinning)
- Assorted sprinkles or sanding sugar (optional, for decoration)
Instructions
- Prepare your workspace by lining a baking sheet with parchment paper or wax paper.
- Melt the white chocolate: Place the white chocolate in a microwave-safe bowl. Microwave in 30-second intervals, stirring well after each interval, until smooth. Do not overheat. If using, stir in half of the coconut oil.
- Melt the pink chocolate: Place the pink candy melts or colored white chocolate in a separate microwave-safe bowl. Microwave in 30-second intervals, stirring until completely smooth. Stir in the remaining coconut oil if needed.
- Dip the rods: Hold one pretzel rod near the end. Dip it into the melted white chocolate, rotating it to coat about two-thirds of the rod. Lift the rod and let excess chocolate drip back into the bowl.
- Create the swirl: Immediately after dipping in white chocolate, dip the coated section lightly into the pink chocolate, or drizzle the pink chocolate over the white chocolate while it is still wet. Use a toothpick to gently swirl the two colors together for a marbled effect.
- Decorate: While the chocolate is wet, immediately sprinkle with your chosen decorations, if using.
- Set the chocolate: Place the dipped pretzel rod on the prepared baking sheet. Allow the chocolate to set completely at room temperature for about 30 minutes, or speed up the process by chilling in the refrigerator for 10 minutes.
- Repeat the process for all remaining pretzel rods.
Notes
- Use oil-based food coloring if you tint white chocolate; water-based coloring will cause the chocolate to seize.
- For a thinner coating, add a small amount of coconut oil to the melted chocolate.
- Store finished pretzel rods in a single layer in an airtight container at cool room temperature.
- These treats are excellent for Valentine’s Day, baby showers, or birthday parties.
Nutrition
- Serving Size: 1 rod
- Calories: 180
- Sugar: 18
- Sodium: 250
- Fat: 10
- Saturated Fat: 6
- Unsaturated Fat: 4
- Trans Fat: 0
- Carbohydrates: 20
- Fiber: 0
- Protein: 2
- Cholesterol: 5