

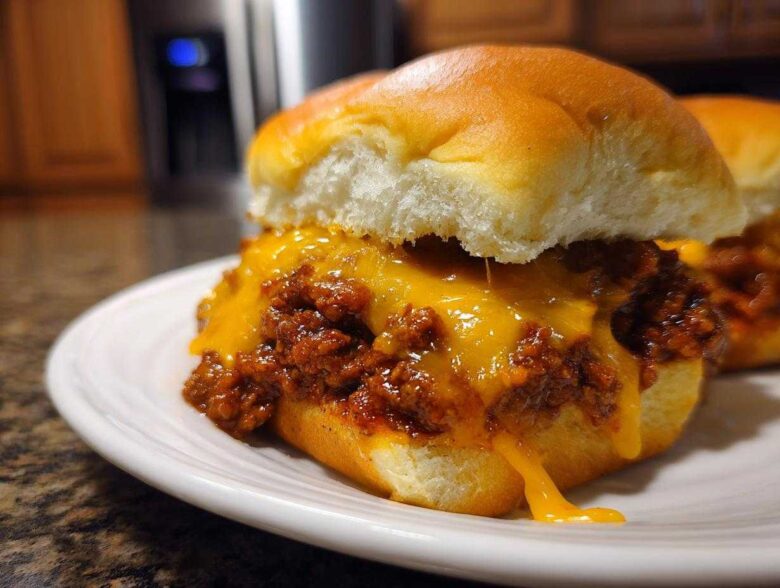
Listen, if you are looking for comfort food that screams ‘easy’ but tastes like you spent way more time on it, stop scrolling right now. I’m telling you, my recipe for Sloppy Joe Sliders with Melted Cheddar is about to become your weeknight savior and your go-to for any party. Forget those sad, lukewarm stovetop versions! Baking these sliders is the game-changer.
When you bake them all together on those soft rolls, everything melds—the tangy-sweet sauce, the juicy beef, and that gooey, sharp cheddar—in one amazing, handheld package. Seriously, the baking process ensures every single slider gets that perfect blanket of melted cheese that holds everything together. Trust me, once you try these, you won’t go back. They are pure magic!
If you want to learn a little more about who is sharing these glorious secrets with you, feel free to check out my story here!
Why You Will Make These Sloppy Joe Sliders with Melted Cheddar Often
I know you want quick food that tastes good, and that’s exactly what these sliders deliver. They are just so darn satisfying!
- Because they bake all at once, cleanup is unbelievably easy—just one dish to wash!
- They are genuinely crowd-pleasing; who doesn’t love cheesy, saucy beef on a soft roll?
- Prep takes barely ten minutes, making them one of my favorite Quick Weeknight Dinner Ideas.
- Using those soft, sweet rolls means you don’t even need extra sauces on the side to make them great.
Assembling Your Sloppy Joe Sliders with Melted Cheddar Ingredients
Okay, the best part about this recipe is that you probably have 90% of these things in your pantry right now. However, since we are baking these beauties, quality does matter! A good foundation makes the final product sing, especially the cheese—you want sharp cheddar here for that perfect tang against the sweet sauce.
Here’s what you’ll need to gather up before we even think about turning on the stove. Measure everything out—it makes the assembly process go so smoothly, trust me!
- 1 pound ground beef (we’ll talk substitutions in a second!)
- 1 small onion, chopped fine
- 1/2 cup ketchup
- 1/4 cup brown sugar, packed in tight
- 2 tablespoons yellow mustard
- 1 tablespoon Worcestershire sauce (don’t skip this!)
- 1 teaspoon chili powder
- 1/2 teaspoon garlic powder
- 1/4 teaspoon salt and 1/4 teaspoon black pepper
- 12 slider buns, preferably those soft, slightly sweet ones—Hawaiian rolls are my absolute favorite here.
- 1 cup shredded sharp cheddar cheese (not pre-shredded if you can help it!)
- 2 tablespoons butter, melted (for brushing the tops)
Ingredient Notes and Substitutions for Your Sloppy Joe Sliders with Melted Cheddar
If you aren’t keen on ground beef, this filling works surprisingly well with ground turkey or even ground chicken, though you might need a splash more Worcestershire to boost the savory flavor. If you want a real kick, throw in that finely chopped green bell pepper along with the onion; Mom always added a tiny bit, and it adds great texture!
For the cheese, sharp cheddar is key for cutting through the sweetness of the sauce. If you’re making these for adults and want something a little milder, Pepper Jack would be amazing, but make sure it’s shredded well so it melts evenly across all those little sandwiches.
Mastering the Homemade Sloppy Joe Mixture for Your Sliders
Alright, let’s get serious about the filling. Making the ground beef mixture is where we establish our flavor base, and honestly, it’s the most important part of getting those perfect Cheesy Ground Beef Sliders.
First, you need a good, heavy skillet over medium heat. Get that ground beef and the chopped onion sizzling away together. I like to break up the meat pretty fine as it cooks, making sure those onion pieces soften up nicely. Once the meat is totally browned—and I mean *totally* browned—you absolutely must drain off every last bit of grease.
This step is non-negotiable, especially for sliders! Excess fat pooling at the bottom of the baking dish will make your rolls soggy instead of perfectly toasted. Once drained, toss in all those wonderful sauce components: the ketchup, that packed brown sugar, the mustard, Worcestershire, and your spices.
Stir it all together until everything looks lovely and coats the meat. Then, we let it simmer gently for about five minutes. This short simmer time is vital because it allows the sauce to reduce just enough. You want it thick enough to cling to the beef, not so liquidy that it dissolves your buns later on! It’s just enough time to get that deep, tangy-sweet flavor going before we move on to the assembly fun. You can even check out my contact page if you have any cooking questions while you simmer!
The Assembly Process for Baked Sloppy Joe Sliders with Melted Cheddar
Now for the truly fun part: turning that rich, homemade sloppy joe mixture into perfectly portable little sandwiches! We are aiming for maximum cheese coverage and zero soggy bottoms here. Get your 9×13 inch baking dish—lightly greased, remember?—ready by the stove.
First things first, slice your slider buns completely in half horizontally, but here’s the trick: keep the tops and bottoms attached to each other in one unit if you can. This keeps the whole bake neat! Place the bottom layer of buns snugly into your prepared dish. Now, take that thick sloppy joe filling and spread it out evenly right over those bottom buns. Don’t be shy, but make sure the meat is distributed right to the edges of the bread.
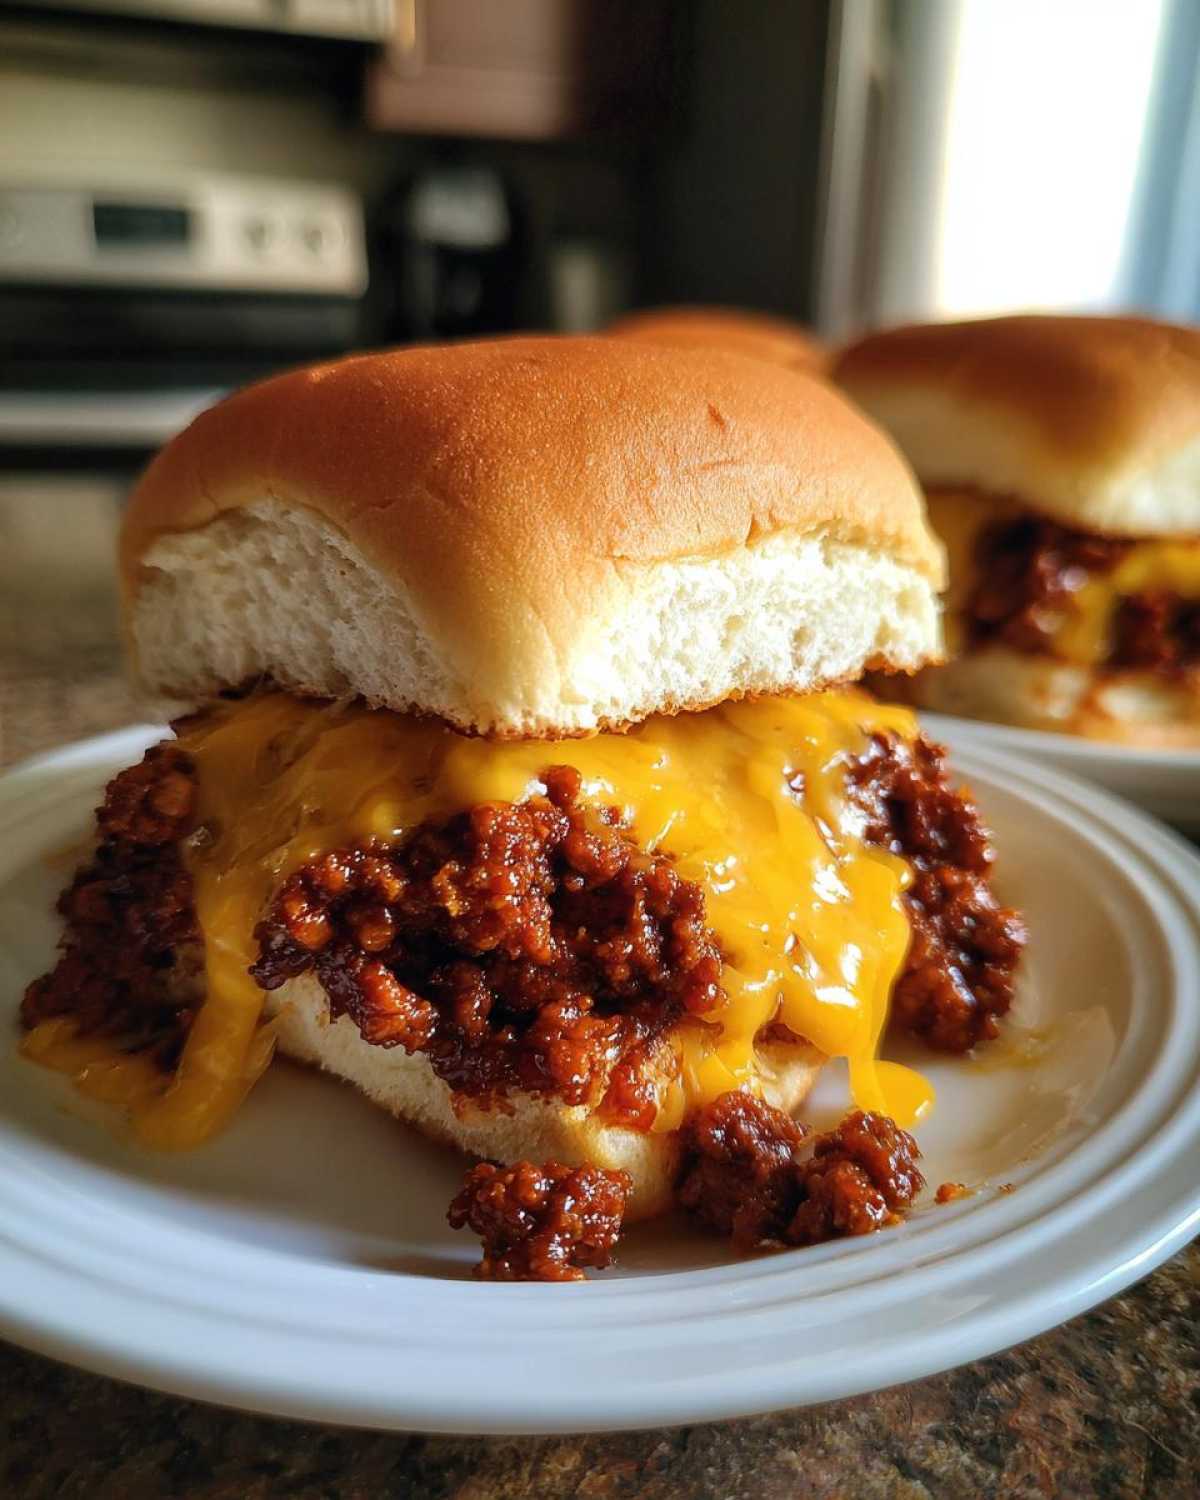
Next up is the star topping: the cheese! Sprinkle that cup of sharp cheddar evenly all over the meat layer. When it melts, you want every single slider square to get a nice, thick, gooey hug. Once your cheese is spread, gently place the top buns right back on top. We are almost ready for the oven!
Preparing the Buns for Optimal Baking
Don’t just throw those tops on naked! This is crucial. Take your two tablespoons of melted butter and lightly brush the entire top surface of the connected buns. This butter coating is your defense against dry bread; it toasts them ever so slightly and keeps them soft underneath.
Once buttered, cover that entire dish tightly with aluminum foil. The initial bake needs that steamy environment to really heat the meat through and start melting that cheese without burning the tops of the rolls. That foil does most of the heavy lifting before we uncover them for that final little crisp!
Baking Instructions for Perfect Sloppy Joe Sliders with Melted Cheddar
This is where all that careful assembly pays off! Get your oven preheating to 350 degrees Fahrenheit. We’re using that moderate temperature so we heat everything through without scorching those sweet rolls.
Once your oven is ready, pop that covered baking dish in. We let it bake tightly covered with the foil for a solid 15 minutes. This traps the steam, ensuring the meat filling gets piping hot and that cheddar starts to soften nicely around the edges.
After those 15 minutes, carefully take off the foil—watch out for the steam escaping! Then, we let them bake uncovered for another 5 to 7 minutes. You are looking for two things here: the cheese should be completely melted and gooey, bubbling slightly, and the tops of those buns should be shining a beautiful, light golden brown. Don’t walk away during this uncovered time; they go from perfect to burnt awfully quickly!
Once they look exactly how you dream cheesy sliders should look, pull them out. Let them sit for just two minutes—it helps them firm up slightly—and then slice them right between the buns. Serve them immediately while that cheese is stretchy!
Tips for Success with Cheesy Ground Beef Sliders
Even with an easy recipe, sometimes you need that little extra nudge to guarantee success, especially when dealing with ground meat. If your homemade sloppy joe mixture turns out looking a little too liquidy after simmering, don’t panic! That extra liquid is what makes those gorgeous Cheesy Ground Beef Sliders soggy. My trick? Take the meat out, put the tops on the rolls, and let the mixture sit uncovered for five minutes so some of the steam evaporates before you layer on the cheese.
Here’s a huge time-saver tip: you can make that flavorful filling mixture a whole day ahead of time! Just cook the beef and sauce, let it cool, and store it tightly covered in the fridge. When you’re ready to serve, heat it up gently on the stove for a few minutes before assembling and baking as directed. This makes them perfect for when company drops by unexpectedly!
Storage and Reheating Instructions
If, by some miracle, you have any of these amazing sliders left over—which I doubt!—storage is straightforward. Pop any remaining sandwiches into an airtight container right away. They should last about three or four days tucked away in the fridge.
Now, reheating is where you need to be careful. I know the microwave is fast, but it turns those beautiful buns rubbery! For the best leftover experience, reheat them right back in the oven at about 325 degrees. You can cover them with foil again for about 10 minutes to warm everything through, and they’ll taste almost brand new.
Alternatively, if you only made extra meat filling and froze that separately, thaw it overnight first. Then, you just proceed right back to the layering and baking steps as if you were making them fresh!
Frequently Asked Questions About These Party Slider Bakes
I always have questions when I try a slightly new twist on an old favorite! Since these Party Slider Bakes are so popular, here are a few things folks often ask when they are getting ready to make them.
Can I use ground turkey or chicken instead of beef in these sliders?
Oh, absolutely! You can swap out the ground beef for ground turkey or chicken, no problem. Since those meats are usually leaner, I sometimes sneak in an extra splash of Worcestershire sauce or a tiny bit of oil when browning just to keep things moist. The flavor profile changes slightly, but they are still delicious as Family Friendly Dinner options!
What if I can’t find Hawaiian rolls? What is the best substitute?
Don’t worry about hunting down specific brands; any soft slider bun will work great! If you grab regular small dinner rolls or those plain white pull-apart rolls, just slice them carefully. The important thing is that they are soft enough to soak up that sauce a little bit and hold up to the baking process. They still make fantastic Best Baked Slider Sandwiches!
I hate cheddar. Can I skip the cheese or use something else?
You can definitely skip it if cheese isn’t your jam, but honestly, the cheddar is what elevates these into true Melted Cheese Sandwich Ideas! If you don’t like cheddar, Monterey Jack melts beautifully and is much milder, or Colby-Jack gives you that nice classic look. Just make sure whatever you choose is shredded well!
Can the sloppy joe mixture be made ahead of time for easy party prep?
Yes! This is one of my favorite things about these recipes. You can cook the meat mixture completely, cool it down, and store it in an airtight container in the fridge for up to two days. When it’s party time, just reheat it gently on the stovetop, layer it on your buns with the cheese, and bake! It saves so much stress.
If you want to dig into the technical side of using this site, you can always review my Terms and Conditions.
Estimated Nutritional Data for One Slider
Now, nobody is breaking out the calipers when they make comfort food like this, right? But since we want to keep things transparent—that’s just good cooking etiquette—here are the general numbers. Remember, these figures are just estimates based on using standard ingredients, like regular ground beef and the specified sharp cheddar.
If you swap out the beef for a leaner meat or use reduced-fat cheese, the numbers will shift, so take this as a helpful guide rather than gospel! I always check my full site disclaimer if I’m tracking nutrition closely for specific reasons.
- Serving Size: 1 slider
- Calories: 320
- Fat: 15g
- Saturated Fat: 7g
- Carbohydrates: 30g
- Protein: 18g
- Sugar: 12g
- Sodium: 650mg
Sloppy Joe Sliders with Melted Cheddar
Make easy, crowd-pleasing Sloppy Joe Sliders baked with melted cheddar cheese on soft rolls.
- Prep Time: 10 min
- Cook Time: 25 min
- Total Time: 35 min
- Yield: 12 sliders
- Category: Lunch
- Method: Baking
- Cuisine: American
- Diet: Low Fat
Ingredients
- 1 pound ground beef
- 1 small onion, chopped
- 1/2 cup ketchup
- 1/4 cup brown sugar, packed
- 2 tablespoons yellow mustard
- 1 tablespoon Worcestershire sauce
- 1 teaspoon chili powder
- 1/2 teaspoon garlic powder
- 1/4 teaspoon salt
- 1/4 teaspoon black pepper
- 12 slider buns (Hawaiian rolls work well)
- 1 cup shredded sharp cheddar cheese
- 2 tablespoons butter, melted
Instructions
- Preheat your oven to 350 degrees Fahrenheit. Lightly grease a 9×13 inch baking dish.
- Brown the ground beef and chopped onion in a large skillet over medium heat. Drain off any excess grease.
- Stir in the ketchup, brown sugar, mustard, Worcestershire sauce, chili powder, garlic powder, salt, and pepper. Cook for 5 minutes, stirring occasionally, until the mixture thickens slightly.
- Slice the slider buns horizontally, keeping the tops and bottoms connected in two halves. Place the bottom halves of the buns in the prepared baking dish.
- Spread the entire sloppy joe mixture evenly over the bottom layer of buns.
- Sprinkle the shredded cheddar cheese evenly over the meat mixture.
- Place the top halves of the buns over the cheese.
- Brush the tops of the buns lightly with the melted butter.
- Cover the baking dish tightly with aluminum foil. Bake for 15 minutes.
- Remove the foil and bake for an additional 5 to 7 minutes, or until the cheese is fully melted and the tops are lightly golden.
- Slice the sliders apart and serve immediately.
Notes
- For extra flavor, add 1/4 cup of finely chopped green bell pepper with the onion.
- If you do not have slider buns, you can use small dinner rolls cut in half.
- You can prepare the sloppy joe filling up to one day ahead and store it in the refrigerator.
Nutrition
- Serving Size: 1 slider
- Calories: 320
- Sugar: 12
- Sodium: 650
- Fat: 15
- Saturated Fat: 7
- Unsaturated Fat: 8
- Trans Fat: 0.5
- Carbohydrates: 30
- Fiber: 1
- Protein: 18
- Cholesterol: 55