

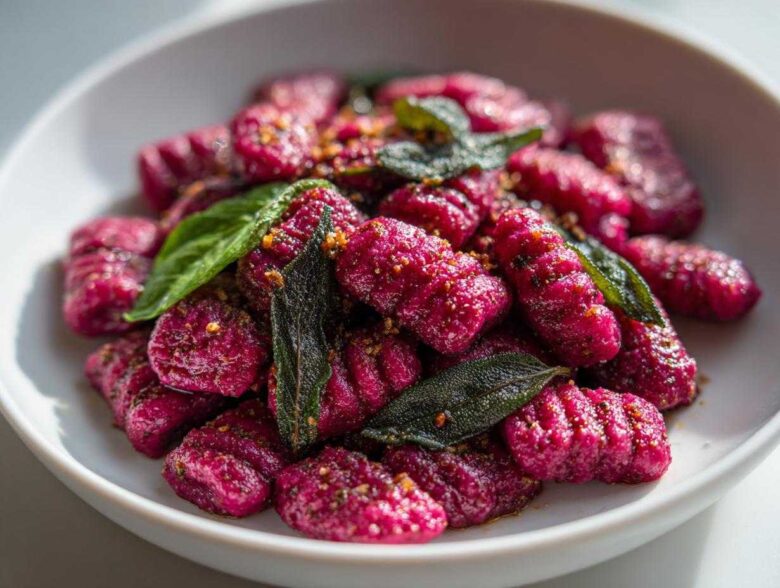
Oh my goodness, are you ready for a pasta dish that absolutely shouts “Autumn Harvest” but still feels incredibly elegant? Forget those pale, boring potato dumplings you see sometimes! When I first started playing around with vegetable purées in my gnocchi dough, I knew I was onto something special, but nothing prepared me for the color this recipe achieves. We are talking about the most stunning, earthy pink pasta you’ve ever made. Mastering the texture takes a little finesse, I won’t lie, but let me tell you, making this Roasted Beet Gnocchi with Sage Butter from scratch is totally worth the effort. It elevates a simple comfort food into something truly memorable for any dinner party.
Why You Will Love This Roasted Beet Gnocchi with Sage Butter
Honestly, sometimes you just want a showstopper meal that doesn’t require hours of fussing with meat, right? This recipe delivers stunning results with simple Italian magic. Here is why I think this dish is going straight into your favorites rotation:
- That Incredible Color: The roasted beets don’t just add flavor; they turn the pasta this gorgeous, vibrant magenta. It looks like something from a high-end restaurant—perfect for impressing guests!
- The Texture Dream: When you get the dough right, these are fluffy, light little pillows that practically melt in your mouth. They are miles better than anything you buy pre-packaged.
- Earthy Meets Nutty Flavor: The deep, sweet earthiness of the roasted beets is perfectly balanced by that simple, browned sage butter sauce. It’s savory, warm, and completely addictive. Trust me on this pairing!
- A True Gourmet Vegetarian Dinner: You never have to apologize serving this dish to vegetarians (or meat-eaters, for that matter!). It feels luxurious and special without relying on heavy creams or complicated techniques.
- It’s Seasonal Comfort: This is the ultimate *Fall Pasta Dish*. It uses root vegetables harvested right when they taste their absolute best, making it cozy yet bright.
Essential Components for Roasted Beet Gnocchi with Sage Butter
Okay, to pull off this truly show-stopping *Vegetable Gnocchi Recipe*, we need to focus on quality right from the start. The key is getting the beet purée right, which is why we roast them first—it concentrates that gorgeous color and sweetness. It’s a simple list, but precision matters here, especially when measuring the flour!
Ingredients for the Roasted Beet Gnocchi with Sage Butter
- 2 medium beets
- 1 pound russet potatoes, skin on
- 1 large egg yolk
- 1 cup all-purpose flour, plus more for dusting
- 1/2 teaspoon salt
- 1/4 teaspoon black pepper
- 6 tablespoons unsalted butter
- 12 fresh sage leaves
- 1/4 cup grated Parmesan cheese, for serving
Mastering the Beet Roasting for Your Roasted Beet Gnocchi with Sage Butter
The secret to that vibrant pink color, the one that screams gourmet, starts entirely with the roasting process. We toss the beets in foil—don’t skip the foil, it steams them perfectly—and send them to a 400-degree oven. They need a good 45 to 60 minutes until they feel completely tender when you poke them. If you have to wrestle a fork through them, they aren’t ready yet! This time ensures they lose some water content; we want flavor, not swampy dough.
Once they’re cool enough to handle, peeling is the messy but crucial part when *Using Fresh Beets in Pasta*. Don’t use a peeler! Just grab a paper towel—the skins slip right off when the beets are warm. Seriously, you just rub them gently, and all the skin comes away, leaving that gorgeous magenta flesh underneath. Then, you blend them until you have exactly 1/2 cup of smooth, colorful purée. That concentrated flavor is what separates this from any other vegetable dumpling.
From Scratch Gnocchi Tutorial: Creating the Dough for Roasted Beet Gnocchi with Sage Butter
Now we move onto the true heart of this dish—creating those delicate little pillows. This step is why learning an actual From Scratch Gnocchi Tutorial is so rewarding! First things first: those potatoes. They need to be cooked with their jackets on, which keeps them from soaking up too much water. Once they are *fork-tender*, drain them fast and let them steam dry for just five minutes. You absolutely must peel them while they are still hot—use an oven mitt so you don’t burn yourself! The hot potato then needs to go right through a ricer or a fine-mesh sieve; we want them fluffy, not gluey.
Once you have about a cup-and-a-half of that warm, fluffy potato, you bring in the color! Mix in the beet purée, the single egg yolk, salt, and pepper. Here’s where you have to think gently. You’re just combining things, not kneading bread! Now, add the flour, cup by cup. As soon as it looks *just* combined into a shaggy mass, stop mixing with your scraper. Overworking the dough is the number one killer of light gnocchi; gluten develops quickly, and suddenly, your pillows will be tough little rocks. Seriously, if my hands start getting warm and the dough gets sticky? I slide my hands under cold water for thirty seconds—that keeps the dough cool and manageable. We want soft, slightly forgiving dough, not rock solid! You can read about my philosophy on kitchen timing over at my thoughts on kitchen philosophy.
For the shaping, take one-fourth of the dough at a time onto a well-floured surface. Roll it gently between your palms into a rope about three-quarters of an inch thick. Slice those easy ropes into little, bite-sized pieces, about three-quarters of an inch wide. I like to run mine over the tines of a dinner fork, pressing gently and rolling them down. This creates those signature ridges. These ridges are essential because they grab onto the amazing Sage Butter Sauce for Gnocchi we’re making later. If you’re making these for a party and need a break, place the finished pieces on a tray dusted heavily with flour and stick them in the fridge. Just try not to leave them too long!
Shaping and Preparing the Gnocchi Pillows
Don’t stress too much about perfect uniformity, especially with this *Roasted Beet Pasta* dough; rustic is beautiful! Think of uniformity in thickness more than perfect shape. If your ropes are uneven, your cook times will be uneven, which means some gnocchi will be mushy while others are underdone. Keep the dough ropes consistent in thickness for even cooking. When you roll it over the fork—or even the back of a cheese grater if you are feeling vintage—you are creating little valleys where the brown butter and crisp sage can settle in beautifully. A little dusting of flour on the sheet pan prevents sticking, and then they’re ready for their quick boil!
Cooking the Gnocchi and Preparing the Easy Sage Brown Butter Sauce
We are so close to eating this gorgeous *Roasted Beet Pasta*! First, bring that big pot of water to a full, rolling boil—you have to have a happy, vigorous boil for gnocchi. Salt it generously; it should taste like the sea! Drop your little pink pillows in gently, working in batches so you don’t crowd the pot and shock the water temperature. They cook so fast, which is part of the joy here. They are done the second they float up to the surface. Don’t leave them floating like tiny magenta buoys for too long, or they get gummy! Scoop them out with a slotted spoon and let them drain slightly.
Now for my favorite part: the sauce! This is where the flavors truly marry. Get your butter (it has to be unsalted, please!) melting in a large skillet over medium heat. Tossing in those whole sage leaves right alongside it is the key to flavor infusion. You need to watch this step like a hawk. It starts foaming, and then, slowly, the foam calms down, and you’ll see little brown specks start to form at the bottom. That’s the milk solids caramelizing—that toasted, nutty aroma is exactly what you’re aiming for, the signature of a great Sage Butter Sauce for Gnocchi. Swirl the pan gently to keep it even. The moment it smells nutty, add those drained gnocchi directly into the pan!
Toss everything together carefully right there in the skillet, just coating every little pillow in that fragrant brown butter and the now-crispy sage. That’s it! No heavy cream, no extra soupiness, just pure, rich flavor coating the delicate dough. It’s the perfect finish for this elegant vegetarian main course.
Finishing Your Roasted Beet Gnocchi with Sage Butter
This is the grand finale, folks, and trust me, you want to move fast once the gnocchi hits the pan! Remember, the texture of homemade dumpling is always most tender right after it’s cooked and tossed. As soon as you transfer the boiled gnocchi straight into that skillet whispering with nutty brown butter and crisp sage, you need to toss them gently but decisively. I use two wooden spoons for this, lifting and turning until every vibrant pink surface is glistening with that sauce. Don’t let them sit alone in the pan for more than thirty seconds before serving, or they can start to stick together and lose that beautiful lightness we worked so hard to achieve.
When plating this Roasted Beet Gnocchi with Sage Butter, think simple elegance—it really doesn’t need much dressing up because the color does all the heavy lifting! I serve mine piled high in warm, shallow bowls.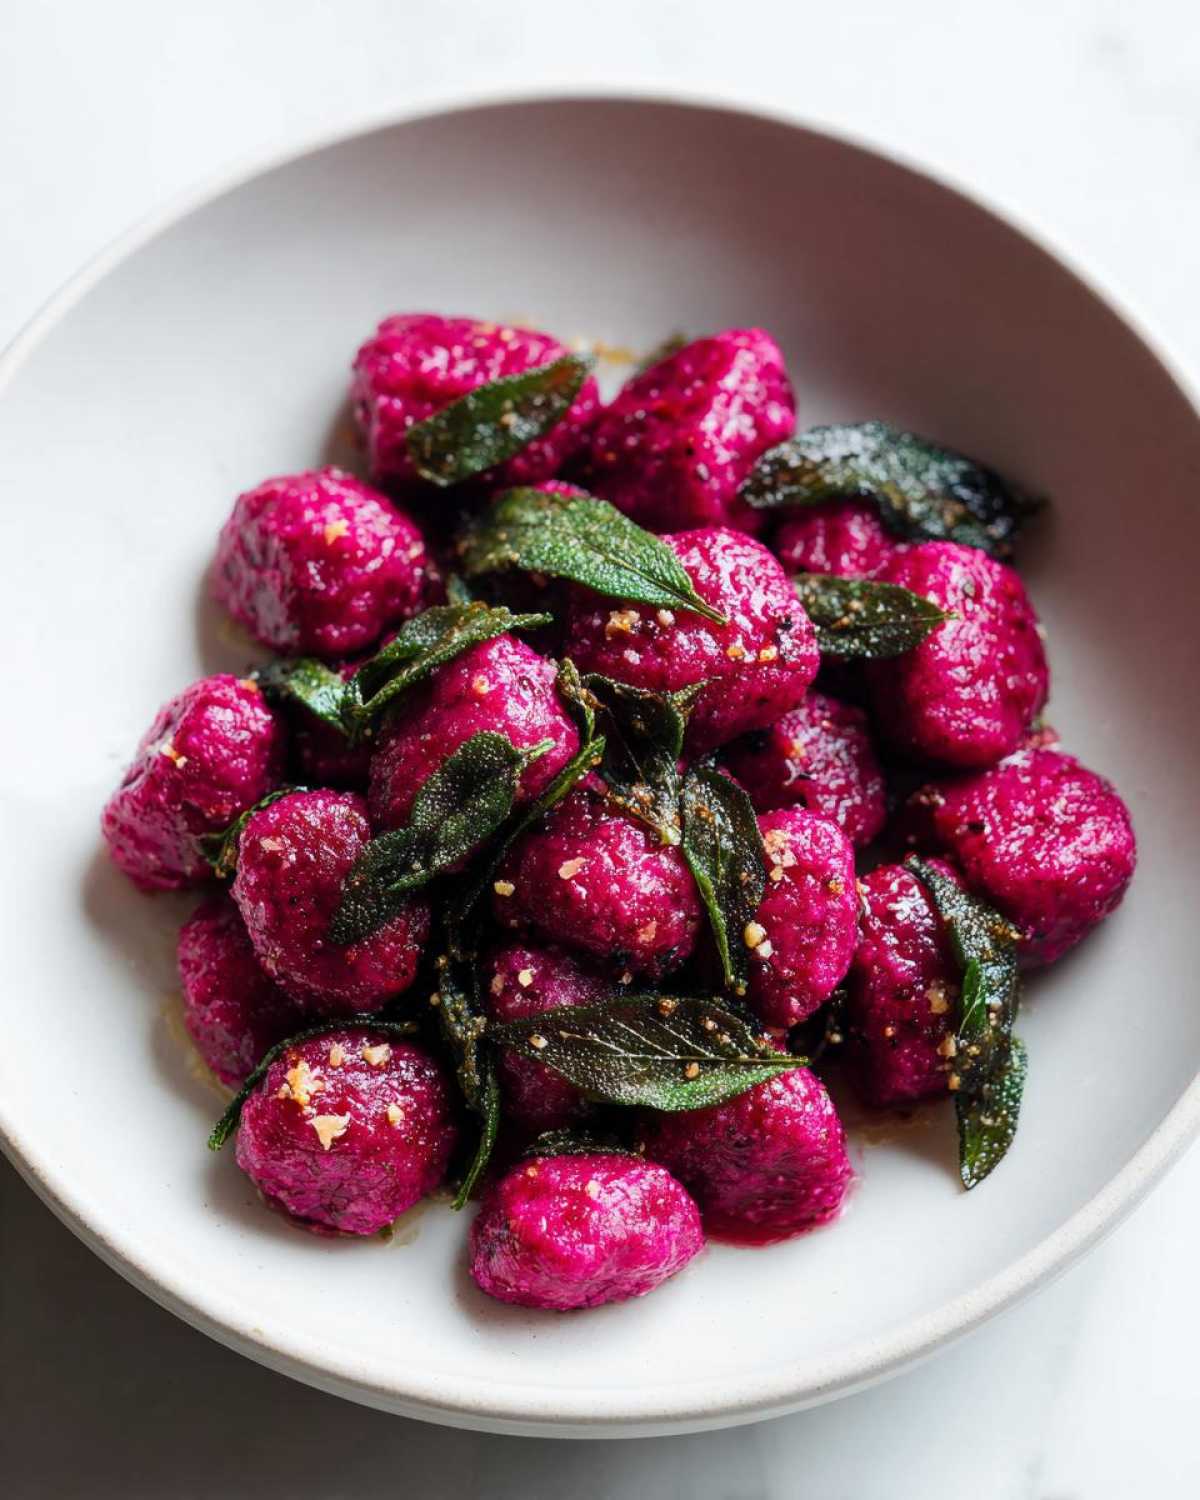 Immediately after plating, hit it with a generous shower of salty, freshly grated Parmesan cheese. The cheese melts just a tiny bit into the warm butter, creating this incredible salty, savory topping that contrasts beautifully with the sweet beet base.
If you’re serving this as part of a meal, this dish screams *Italian Dinner Party Ideas*. It’s bright enough to be a starter but substantial enough to be the main event for a vegetarian crowd. For an extra touch, try crumbling a little toasted hazelnut over the top—that crunch against the soft gnocchi? Perfection. Just remember, once it’s plated, bring it straight to the table. That fresh-from-the-pan magic is what makes this dish shine!
Ingredient Notes and Substitutions for Your Vegetable Gnocchi Recipe
I know sometimes digging through the pantry reveals you’re missing that one specific thing, so let’s talk about flexibility! Since this is a recipe relying on texture—especially for our *Handmade Potato Dumplings*—some swaps are better than others. The most important thing I need you to know revolves around the potato choice. Please, stick to starchy potatoes like Russets or Idahos. If you try to use waxy potatoes, like Yukon Golds or new potatoes, you end up with less fluffy flour and more water absorption. Waxy potatoes hold too much moisture, and you’ll end up adding tons of flour just to get the dough to hold up, which guarantees tough gnocchi. It’s the number one way to sabotage the lightness!
Speaking of shortcuts: Listen, I love making things from scratch, I really do, but sometimes life happens, and you need a quick fix. If you just can’t manage the potato boiling and ricing, don’t feel bad! You can absolutely use good quality store-bought potato gnocchi. Just make sure you buy the potato kind, not ricotta-based. When you use the pre-made stuff, just skip all the mixing and boiling instructions. You boil it until it floats, drain it, and toss it *immediately* into that sizzling brown butter sauce we made in the previous step. It works beautifully!
And about the cheese—Parmesan is my go-to because it melts slightly and adds that perfect salty kick. However, if you want to elevate this dish even further and explore a great *Beet and Cheese Pairing*, definitely try crumbling some fresh goat cheese or maybe even a salty Ricotta Salata over the top after you plate it all up. The slight tang of the goat cheese cuts through the earthiness of the beet and the richness of the butter. It’s fantastic when you’re aiming for an *Elegant Vegetarian Main Course* instead of just simple comfort food!
Tips for Success with Handmade Potato Dumplings
Making *Handmade Potato Dumplings*, whether they are plain or vibrantly pink like ours, often boils down to fighting against your environment and being super gentle with the dough. If you follow these three little rules I’ve picked up over the years, I promise your gnocchi will be light and airy rather than those awful hockey pucks.
First, let’s talk about the kitchen atmosphere. Humidity is your enemy! If it’s a rainy, thick summer day—which isn’t ideal for any pasta making, honestly—the flour is going to absorb moisture from the air before it even touches your dough. This means you’ll automatically try to add more flour just to correct the stickiness, which leads to tough gnocchi. If it’s a humid day, try working quickly and perhaps even cutting your flour measurement by a tablespoon to start. If you start with your beet puree being cold, it helps keep the final dough colder longer, which slows down gluten development.
Second, the rule of Gnocchi Handling: Think of that dough like a fragile baby you are trying to get to sleep. You want the absolute minimum amount of kneading or squishing necessary to bring it together. Once you start rolling it out into ropes, roll gently! If you press down too hard, you are compacting all those beautiful, steamy air pockets we created when we riced the potatoes. Use your fingertips more than the whole palm of your hand when you’re bringing the flour in. Gentle handling equals fluffy dumplings, period.
And finally, if you decide you want to make a huge batch of this *Homemade Beet Gnocchi Recipe* now, but plan to eat it later in the week—you need to freeze them properly! Never just toss a tray of fresh gnocchi into the freezer. They will clump into one solid pink ice brick. Lay your finished, shaped dumplings out on a baking sheet lined with parchment paper, making absolutely sure none of them are touching. Freeze them flat like this until they are solid—they should feel rock hard. Once frozen solid—which takes maybe an hour or two—you can scoop them off the tray and store them in a sealed zip-top bag. Then, when you cook them later, you drop them straight from the freezer into that rolling salted water!
Frequently Asked Questions About Roasted Beet Gnocchi
You’ve made it! You’ve successfully tackled making your own pink pasta clouds. It’s totally normal to have a few lingering worries once you start making things from scratch, especially with dough. Think of these as little speed bumps we can easily avoid next time when we’re whipping up our favorite *Dinner Ideas Using Root Vegetables*!
Can I make the beet puree ahead of time? Absolutely, and I highly recommend it! Roasting and pureeing the beets can be done a couple of days in advance. Just store that vibrant puree in an airtight container in the fridge. When you’re ready to bake, remember that cold puree will make your dough a little stiffer, so you might need to let the dough sit at room temperature for 5 minutes before rolling it out. It definitely helps speed up the process if you’re short on time.
Why does my gnocchi taste tough instead of light? Oh, that’s the million-dollar question when it comes to starch dumplings! Nine times out of ten, it means you added too much flour, or you overworked the dough when you mixed the flour in. Remember what I said about mixing gently? The dough should feel soft and slightly tacky, but it should *just* hold together. If you manhandle it like regular bread dough, you develop all the gluten, and you end up with chewy little rubber balls instead of delicate clouds.
What pairs best with this dish? Because the **Roasted Beet Gnocchi with Sage Butter** is so earthy and savory from the root vegetable and the nutty browned butter, you want something crisp and bright to cut through the richness. I’m a huge fan of a lighter pinot noir; it complements the earthy notes without overpowering the sage. If you prefer white wine, try a dry, crisp Pinot Grigio or a slightly minerally Sauvignon Blanc. Avoid anything too oaky!
I saw some recipes used different cheeses—can I swap the Parmesan?
Yes! Parmesan is traditional for that salty finish, but I adore breaking the rules sometimes. Since you have that beautiful sweetness from the beet, a sharp, crumbly cheese cuts right through. Try crumbling some fresh goat cheese over the top right before serving. The slight tang is amazing alongside the earthiness. You can also use crumbled ricotta salata if you want something firm but slightly saltier than standard Parmesan. It’s a beautiful variation on the classic pairing.
Estimated Nutritional Data for Roasted Beet Gnocchi with Sage Butter
Please remember that since this is homemade, the final counts can change based on how much flour your potato actually absorbed or the exact size of your butter scoops! This data is an estimate based on the recipe as written above. You can always find more details on proper food logging over at my official disclaimer page.
Here is a rundown of what one serving (about 1/4 of the recipe) looks like:
- Serving Size: 1 serving
- Calories: 450
- Fat: 20g
- Saturated Fat: 12g
- Carbohydrates: 58g
- Fiber: 6g
- Protein: 14g
- Sugar: 8g
- Sodium: 350mg
Roasted Beet Gnocchi with Sage Butter

A recipe for homemade gnocchi colored and flavored with roasted beets, served in a simple sage brown butter sauce.
- Prep Time: 45 min
- Cook Time: 40 min
- Total Time: 85 min
- Yield: 4 servings
- Category: Dinner
- Method: Boiling and Pan-Frying
- Cuisine: Italian
- Diet: Vegetarian
Ingredients
- 2 medium beets
- 1 pound russet potatoes
- 1 large egg yolk
- 1 cup all-purpose flour, plus more for dusting
- 1/2 teaspoon salt
- 1/4 teaspoon black pepper
- 6 tablespoons unsalted butter
- 12 fresh sage leaves
- 1/4 cup grated Parmesan cheese, for serving
Instructions
- Preheat your oven to 400 degrees Fahrenheit (200 degrees Celsius). Wrap the beets tightly in foil and roast them for 45 to 60 minutes, or until tender when pierced with a fork. Let the beets cool slightly, then peel and finely puree them. You need 1/2 cup of beet puree.
- While the beets roast, place the potatoes (unpeeled) in a pot, cover with cold water, and bring to a boil. Cook until tender, about 20 to 25 minutes. Drain the potatoes immediately and let them steam dry for 5 minutes. Peel the hot potatoes and pass them through a potato ricer or mash them thoroughly until smooth.
- On a clean work surface, combine 1 1/2 cups of the riced potato, the 1/2 cup of beet puree, the egg yolk, salt, and pepper. Mix gently.
- Gradually add the flour, mixing with a bench scraper or your hands until a soft, slightly sticky dough forms. Do not overmix.
- Divide the dough into four sections. Lightly flour your work surface and roll each section into a rope about 3/4 inch thick. Cut the ropes into 3/4-inch pieces. You can leave them as pillows or roll them over the back of a fork to create ridges. Place the finished gnocchi on a lightly floured baking sheet.
- Bring a large pot of salted water to a rolling boil. Drop the gnocchi into the water in batches. They are done when they float to the surface, usually 2 to 3 minutes. Remove them with a slotted spoon.
- While the gnocchi cooks, prepare the sauce. Melt the butter in a large skillet over medium heat. Add the sage leaves. Cook, swirling the pan occasionally, until the butter foams, turns golden brown, and smells nutty (about 3 to 5 minutes). The sage leaves will become crisp.
- Add the cooked gnocchi directly to the skillet with the sage butter. Toss gently to coat.
- Serve immediately, topped with grated Parmesan cheese.
Notes
- For lighter gnocchi, use less flour. The dough should be soft, not stiff.
- If you want a shortcut, you can substitute 1 pound of store-bought potato gnocchi, boiling it according to package directions before adding it to the sage butter sauce.
- This dish pairs well with goat cheese or ricotta salata crumbled on top instead of Parmesan.
Nutrition
- Serving Size: 1 serving
- Calories: 450
- Sugar: 8
- Sodium: 350
- Fat: 20
- Saturated Fat: 12
- Unsaturated Fat: 8
- Trans Fat: 0.5
- Carbohydrates: 58
- Fiber: 6
- Protein: 14
- Cholesterol: 80