

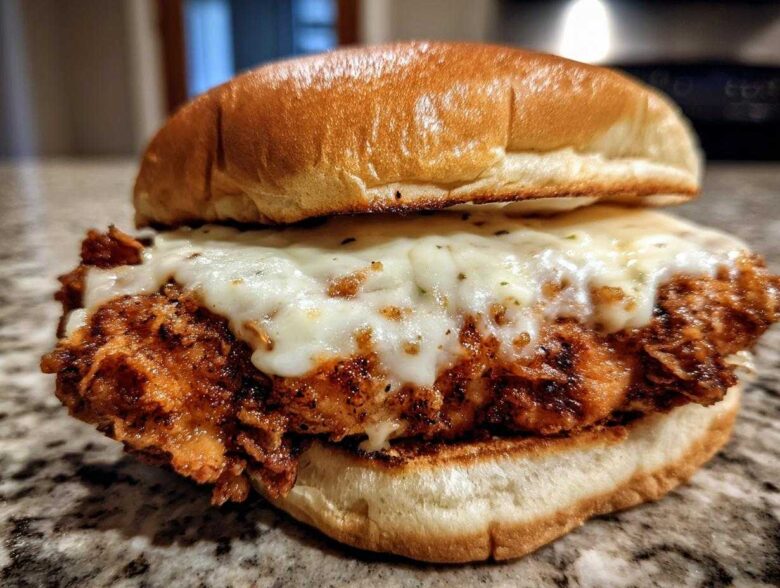
I swear, every time I see those fast-food commercials, I get this massive craving for that perfect crunch, you know? That golden, crackly crust hugging the juiciest piece of chicken you can imagine. Well, forget the drive-thru! I finally cracked the code to making the ultimate Crispy Chicken Sandwich with Garlic Parmesan Sauce right here in my own kitchen. This isn’t just another fried chicken recipe; we’re locking in moisture with buttermilk and then giving it the most incredible, savory, creamy coating you’ve ever dipped a sandwich into. Trust me when I say perfecting the dredge took me about four ruined batches, but now? We’ve got restaurant-style perfection that’s easier than you think. I’m so excited to share my secrets with you!
If you want to see what else we’re cooking up this week that’s just as fun, you can always pop over to my main recipe page to browse around a little!
Why This Crispy Chicken Sandwich with Garlic Parmesan Sauce Stands Out
So many recipes promise crispy chicken, but they end up soggy by the time you take your first bite. That’s not happening here! Our Crispy Chicken Sandwich with Garlic Parmesan Sauce is different because we focus on three major things that lock in flavor and texture. You get that audible crunch every single time, the inside stays incredibly juicy, and that rich sauce ties everything together beautifully.
Here’s what makes my go-to recipe the best:
- Superior Crispiness: We use a blend that maximizes surface area for that addictive crust.
- Juicy Interior: The buttermilk soak tenderizes the meat before it even hits the oil.
- Balanced Sauce: The garlic isn’t harsh, and the Parmesan adds salty depth without being greasy.
Achieving Maximum Crunch: The Secret to the Crispy Chicken Sandwich recipe
The crunch is everything, right? The first little trick is the buttermilk. Letting that chicken breast hang out in the buttermilk bath for even 30 minutes starts breaking down those tough proteins, meaning a more tender result. But the real magic for the Crispy Chicken Sandwich recipe is the triple threat coating!
We use flour mixed with cornstarch. Cornstarch is key—it helps the crust set harder and faster when it hits the hot oil. Don’t just pat the coating on, though. You need to press it on firmly, almost massaging it in there so it sticks for dear life. And if you really want to go pro? Use that expert tip from my notes: dip the dredged chicken *back* into the buttermilk for a quick second, and then give it one final, firm press into the dry mix. That double-dredge is the secret sauce for a true shatteringly crisp crust!
Ingredients for the Ultimate Crispy Chicken Sandwich with Garlic Parmesan Sauce
Okay, getting the right stuff ready is half the battle, right? You can’t cheat quality here, especially when you’re aiming for that restaurant-style flavor. Make sure you have everything set up assembly-line style before you even think about turning on the fryer. Having everything portioned out prevents that frantic feeling when you’re trying to handle hot oil and cold chicken!
I broke it down by component so you can easily see what goes where. Trust me, having your proper setup makes preparing this amazing Crispy Chicken Sandwich with Garlic Parmesan Sauce a breeze!
Components for the Chicken and Breading
This is what we need to get that perfect texture and flavor locked into the meat before frying. Remember, those chicken breasts need to be halved horizontally and pounded thin—that’s important for cooking evenly and getting a good crust-to-meat ratio!
- 2 boneless, skinless chicken breasts, halved horizontally
- 1 cup buttermilk
- 1 teaspoon salt
- 1/2 teaspoon black pepper
- 1 cup all-purpose flour
- 1/2 cup cornstarch (Don’t skip this for crisp!)
- 1 teaspoon paprika
- 1/2 teaspoon garlic powder
- Vegetable oil for frying (about 2 inches in the pan)
Crafting the Best Garlic Parmesan Sauce recipe
This sauce is seriously decadent; it’s creamy, sticky, and packed with that savory punch. I always recommend using freshly grated Parmesan cheese if you can manage it—the pre-grated stuff tends to clump up weirdly when melted into sauces, and we want creamy perfection for the Best Garlic Parmesan Sauce recipe!
- 1/2 cup unsalted butter
- 4 cloves garlic, minced (Use fresh garlic, please!)
- 1/2 cup heavy cream
- 1/2 cup grated Parmesan cheese
- 1 tablespoon fresh parsley, chopped
- 1/4 teaspoon salt
- Pinch of black pepper
For assembly, don’t forget the sandwich essentials! You’ll need 4 sandwich buns and, if you like that gooey cheese pull, 4 slices of provolone or your favorite melting cheese.
Step-by-Step Instructions for Your Crispy Chicken Sandwich with Garlic Parmesan Sauce
Alright, let’s get cooking! This is where all that prepping pays off. We need clear steps here, because timing is everything when you’re frying. You want that crunchy coating to set up perfectly while the inside stays tender. Follow these steps closely for the absolute best Crispy Chicken Sandwich with Garlic Parmesan Sauce you’ve ever made.
Preparing and Dredging the Chicken
First things first: evenness! Take those halved chicken breasts and pound them gently until they are all about a half-inch thick. This is crucial for quick, even cooking. Now, they need a bath. Pop them into the buttermilk mix with your salt and pepper and let them chill for at least half an hour. Seriously, don’t rush this soak; it’s what makes the inside so tender!
While they’re soaking, mix up your flour, cornstarch (don’t forget that secret ingredient!), paprika, and garlic powder. When you’re ready to coat, pull the chicken straight from the buttermilk—let the excess drip off, but don’t wipe it clean. Then, dredge it in the dry mix. This is the most important part of the coating: press that flour mixture firmly onto every nook and cranny of the chicken. You want that crust to really adhere well!
Frying for a Juicy Crispy Chicken Sandwich
Time for the heat! You need oil in a deep, heavy skillet, about two inches deep, heated up to exactly 350°F (that’s 175°C). If you use a thermometer, great, but if you don’t, drop a tiny pinch of flour in—if it sizzles immediately and lightly, you’re good to go. Don’t crowd the pan; give those cutlets space to crisp up! Fry them for about 4 to 6 minutes on each side until they are deeply golden brown. Always check the middle with a thermometer—we need 165°F (74°C) to be safe, but pull them out right when they hit that mark so they don’t dry out. Place the cooked pieces on a wire rack so the bottoms don’t steam.
For more tips on getting that perfect fried texture, I wrote a whole piece on how to make crispy chicken that might help!
Making and Applying the Parmesan Garlic flavors Sauce
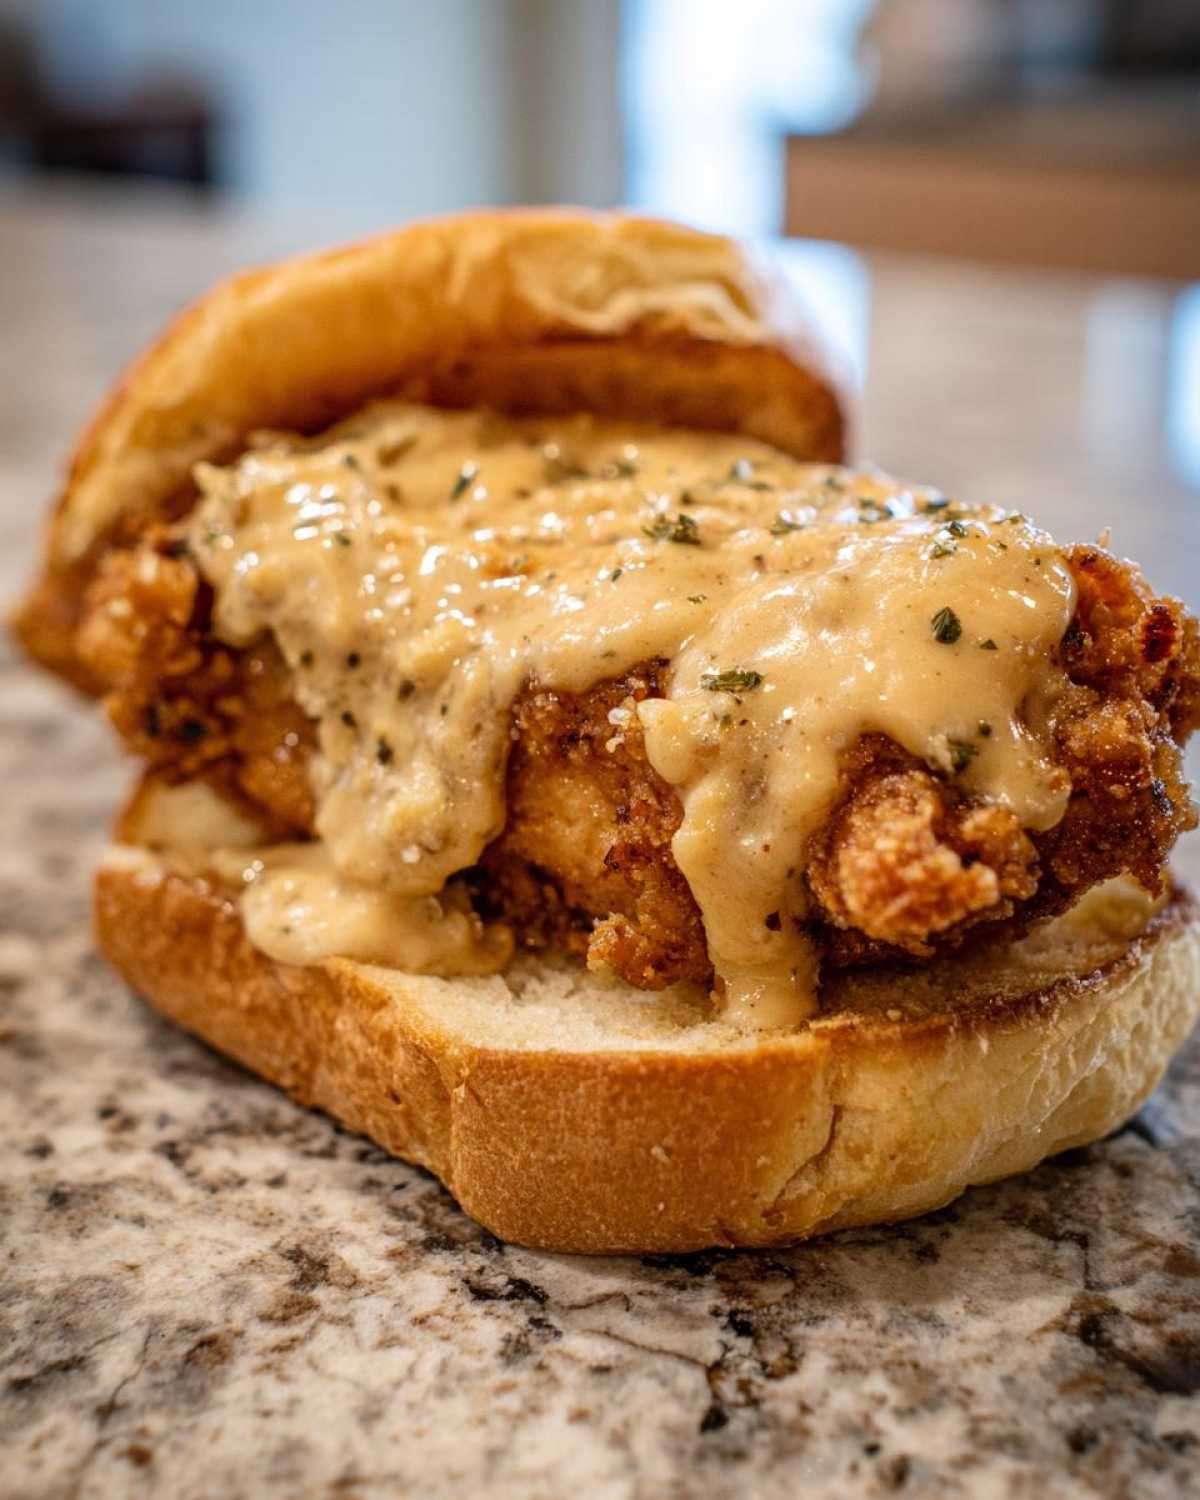
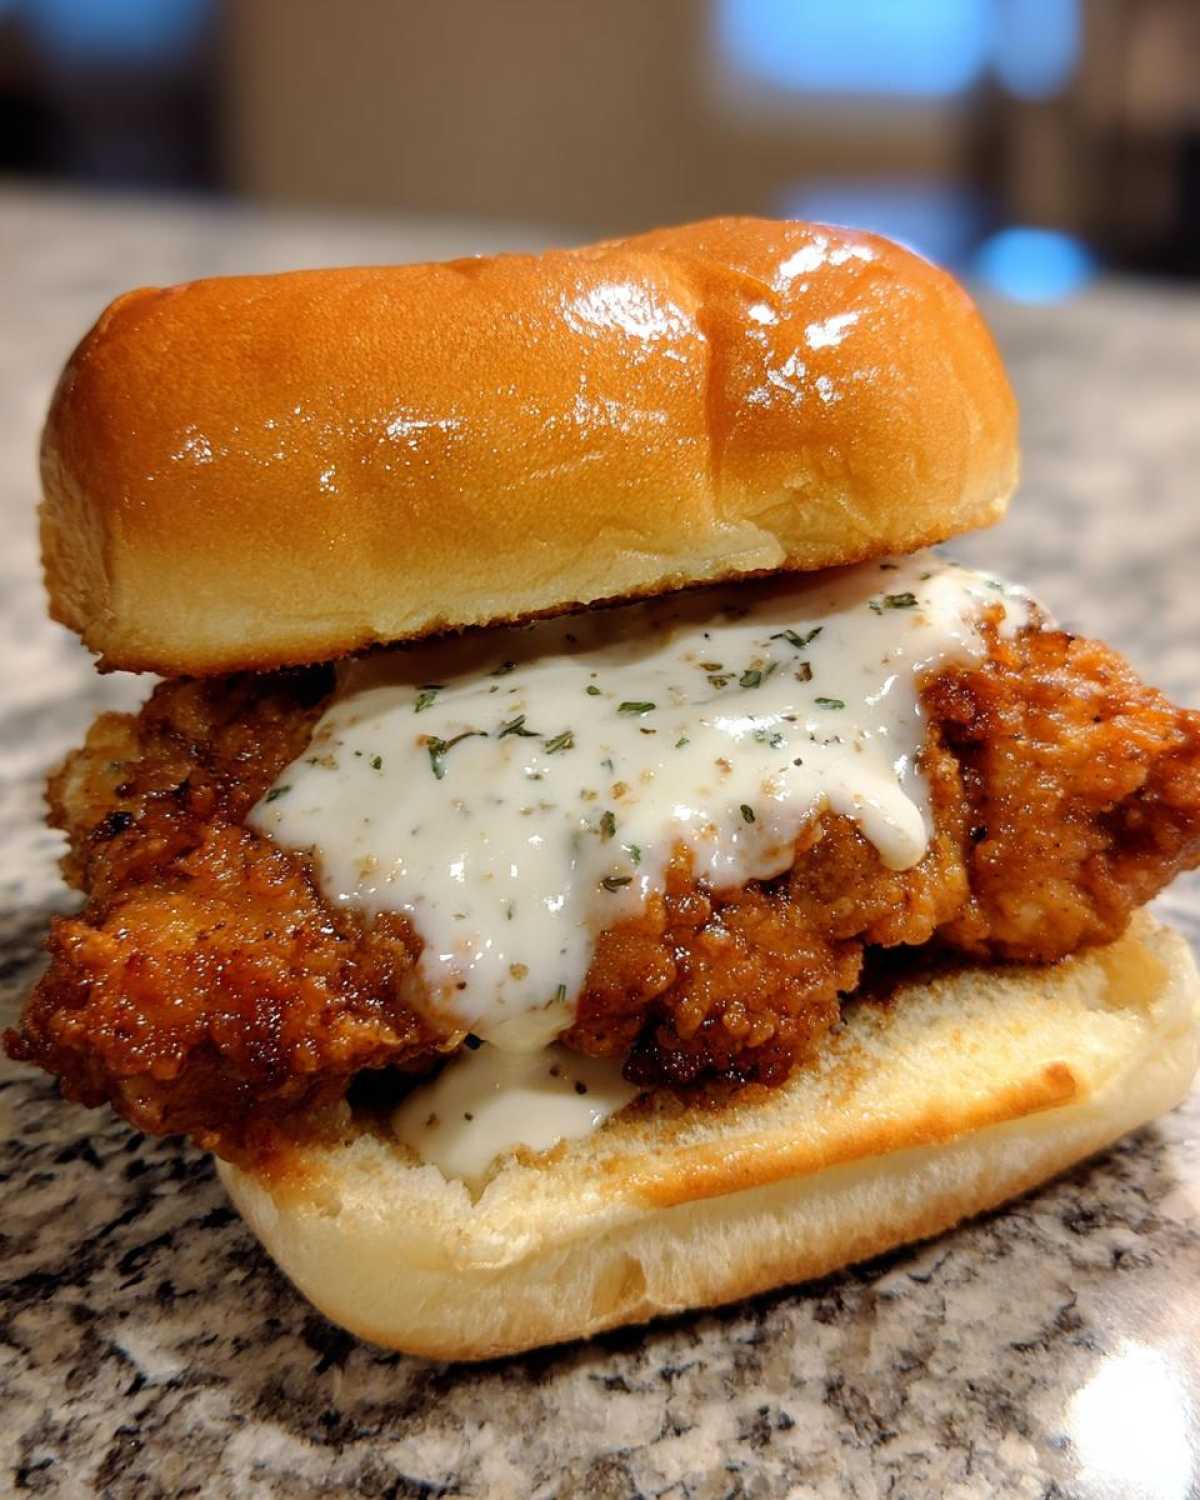
While your chicken is resting for a minute, let’s make the star of the show! In a small saucepan, melt that half-cup of butter over medium heat. Toss in your minced garlic—just let it get fragrant for about 60 seconds; watch carefully so it doesn’t burn, or it’ll taste bitter! Slowly whisk in the heavy cream and let it simmer just slightly. Then, turn that heat way down to low and whisk in the grated Parmesan until the sauce is silky smooth. Stir in your fresh parsley, salt, and pepper. Keep this gorgeous sauce warm, but don’t let it boil once the cheese is in there, or it might get weird.
Right before assembly, toast those buns! Place a slice of provolone on the hot chicken right off the rack so it melts down perfectly. Then, generously brush or spoon that creamy Parmesan Garlic flavors sauce all over the top. Stack it high and enjoy your creation immediately!
Tips for a Restaurant style Chicken Sandwich Success
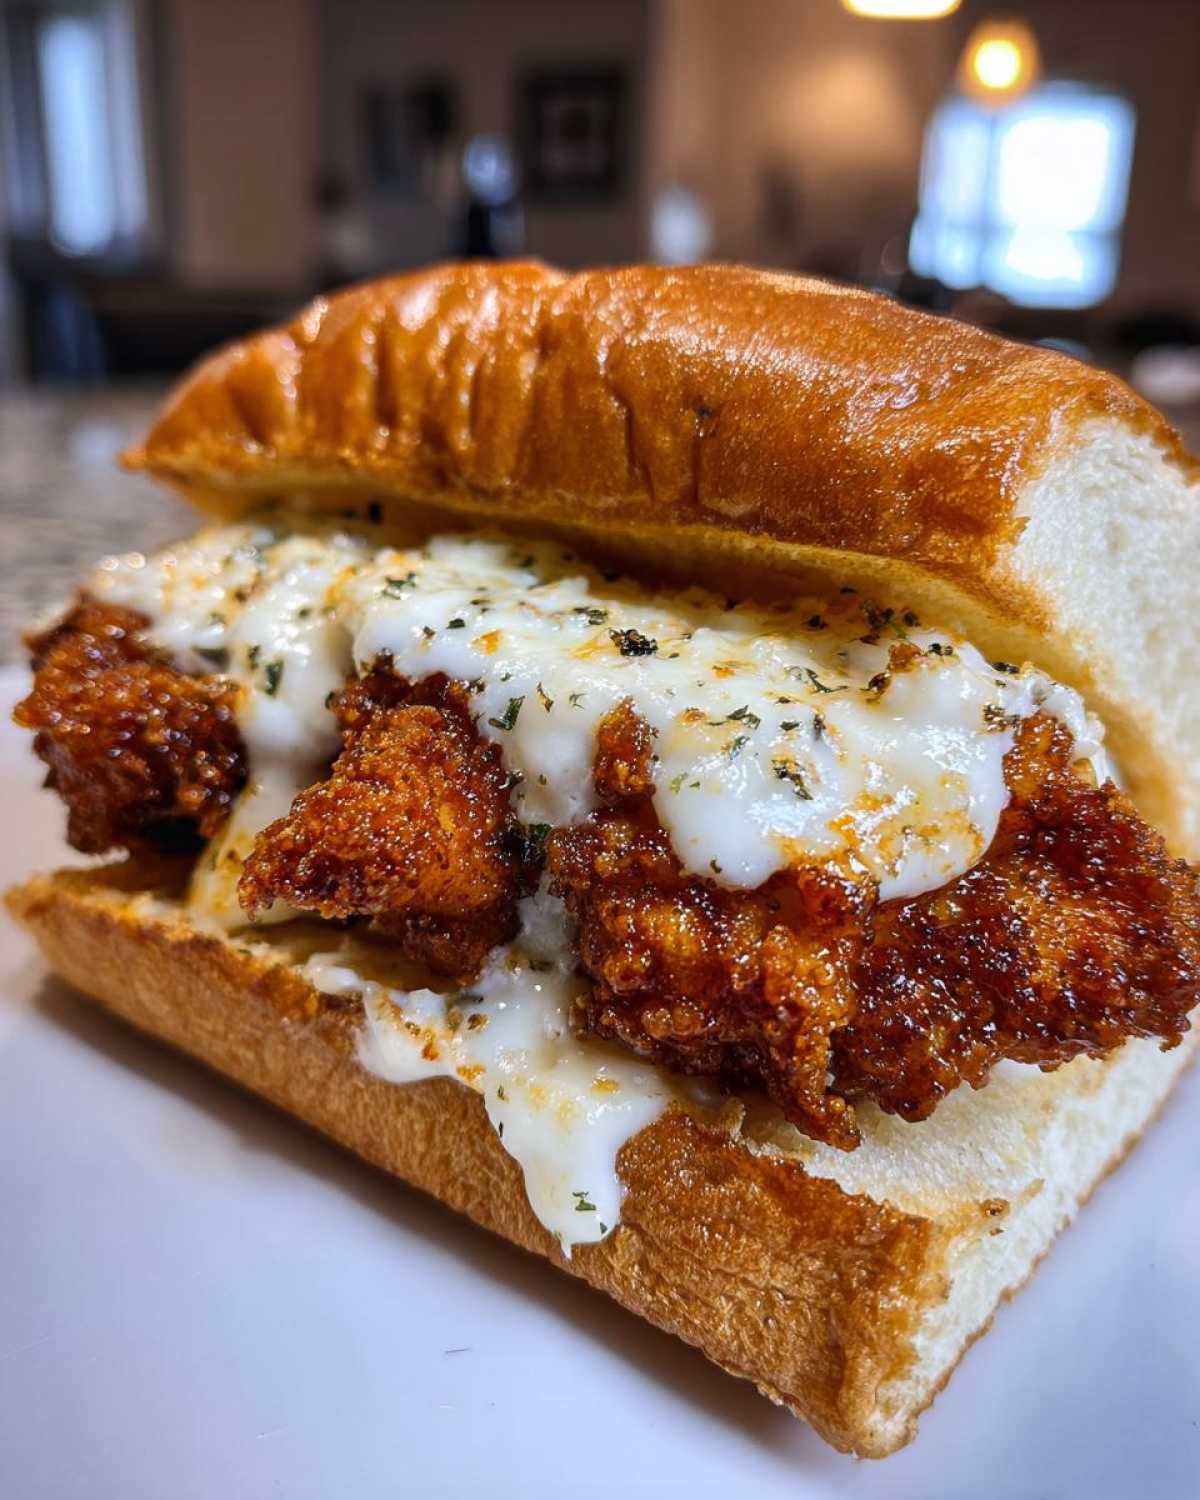
I’ve learned a few tricks over the years that really elevate this from a simple weeknight fry-up to a true restaurant style Chicken Sandwich experience. Remember that double-dredge I mentioned? It’s the #1 way to guarantee that beautiful, craggy crust on your Crispy Chicken Sandwich with Garlic Parmesan Sauce. Don’t be lazy; really press that coating on!
Now, what if you don’t want to deal with the oil? I totally get it! If you have an air fryer, you can absolutely get great results. Just follow the method in the notes: spray those beautiful crusted pieces lightly with cooking spray, and pop them into the air fryer at 380°F (195°C) for about 12 to 15 minutes, flipping them halfway through. They come out fantastic, though maybe not quite as ruggedly textured as the deep-fried version. For more air fryer tips (though this recipe is specific!), check out my thoughts on air frying other great things!
Also, make sure you don’t let that chicken sit on the plate after frying. Assemble right away! You want that warmth from the chicken hitting the cheese and then being coated in the warm Garlic Parmesan Sauce immediately. That’s how you get the best melting action!
Ingredient Notes and Substitutions for Your Chicken Sandwich with Garlic Parmesan Sauce
I always get questions about the details, and that’s okay! Baking and frying recipes are much stricter than, say, soups, so knowing what you can switch up without ruining the whole thing is important when making your Chicken Sandwich with Garlic Parmesan Sauce. Most swaps are fine, but there are a couple of spots where I say, just stick to the plan!
For instance, the buttermilk is non-negotiable for that tender interior, but if you don’t have any, you can fake it! Just mix a cup of regular milk (or even almond milk if you’re worried about lactose) with one tablespoon of white vinegar or lemon juice. Let it sit on the counter for five minutes until it looks slightly curdled—that acidity does the work of the buttermilk!
Choosing Your Best Sandwich Bread
Listen, a great crispy chicken deserves a great foundation. You can’t drown a masterpiece in a soggy bun! When making your Homemade Fried Chicken Sandwich, I insist on a brioche bun or maybe a potato roll. They’re soft enough to bite through easily but sturdy enough to handle the chicken, the melted cheese, and all that glorious Garlic Parmesan Sauce without collapsing into a puddle.
Avoid those very thin, cheap white buns; your filling will push right through the bottom. Toasting the buns, as I mentioned in the assembly steps, is also mandatory! Toasting creates a slight barrier against moisture seeping up from the bottom bun.
Spice Level Adjustments and Cheese Swaps
The original recipe for the sauce is savory and rich, but some folks like a little heat, right? If you’re craving that kick, this is where you get to play! Remember that little pinch of red pepper flakes in the notes? That’s my go-to for adding a subtle warmth to the Garlic Parmesan Sauce. Stir those flakes in with the parsley at the end. It gives you that nice little punch without overpowering the Parmesan flavor.
As for cheese, provolone is fantastic because it melts beautifully and has a mild flavor that doesn’t compete with the sauce. But if provolone isn’t around, mozzarella or a thin slice of Monterey Jack would work perfectly. The goal here is meltiness, not sharp flavor, since we already have so much flavor going on with the coating and the sauce!
Serving Suggestions for Your Homemade Fried Chicken Sandwich
Now that you’ve mastered the ultimate Homemade Fried Chicken Sandwich, we have to talk about what goes on the plate next to it! Because this chicken is so rich, salty, and smothered in that creamy Parmesan Garlic Sauce, you want sides that can cut through that richness. Think bright, acidic, or crunchy things to give your palate a little reset between bites. If you just pile on fries, you’re going to feel overwhelmed by the richness pretty fast, believe me!
My favorite pairing is always something fresh. I love a quick, vinegar-based slaw—the vinegar is amazing at balancing out the butter in the sauce. You want something that pops!
For something really unexpected that leans fresh, you absolutely have to try a variation of the salsa I made recently. If you take a look at my strawberry cucumber salsa recipe, just leave out the strawberries, and you have this incredibly refreshing cucumber and lime dip that works like a charm on the side. It’s cool, tangy, and just perfect against the warm, savory chicken.
Of course, you can never go wrong with simple pickles! Thick-cut dill chips served right on the side are mandatory in my house. They give you that sour, salty bite that just cleanses the mouth perfectly before you dive back in for another messy, wonderful piece of that saucy, crispy goodness. What sides do you love with your fried chicken? Let me know in the comments below!
Storage and Reheating Instructions for Leftover Crispy Chicken Sandwich
The worst tragedy is having leftover crispy chicken and then realizing microwave reheating makes it taste like a sad sponge. We absolutely cannot let that happen to this masterpiece! The best advice I can give you upfront is to store the components separately. Seriously, keep the sauced chicken away from the buns, and if you have leftover sauce, keep that in its own little container too. Storing the sandwich fully assembled is a recipe for a soggy disaster!
If you plan on having leftovers, try to only sauce the piece of chicken you plan on eating *right then*. Leftover plain, coated chicken will keep much better than sauced chicken. Wrap the dry, cooled chicken pieces tightly in plastic wrap or put them in an airtight container and keep them in the fridge for up to three days.
When the craving hits and you need that crunch back, throwing it in the microwave is totally forbidden! It’ll ruin the hard work you put into that beautiful crust. You have two much better options to bring back the crispiness.
First up is the oven. Preheat your oven to about 375°F (190°C). Place the leftover chicken directly onto a wire rack set over a baking sheet. This allows the hot air to circulate all around the cutlet. Bake for about 8 to 10 minutes. You might want to check it around the 6-minute mark. This method gives you a really even reheat and crisps up the outside beautifully.
My absolute favorite way, though, is using the air fryer if you have one. It’s faster and usually gives you a slightly better crunch than the oven. Set your air fryer to 375°F (190°C) and cook the chicken for about 5 to 7 minutes, flipping halfway through. It gets that great texture back almost instantly.
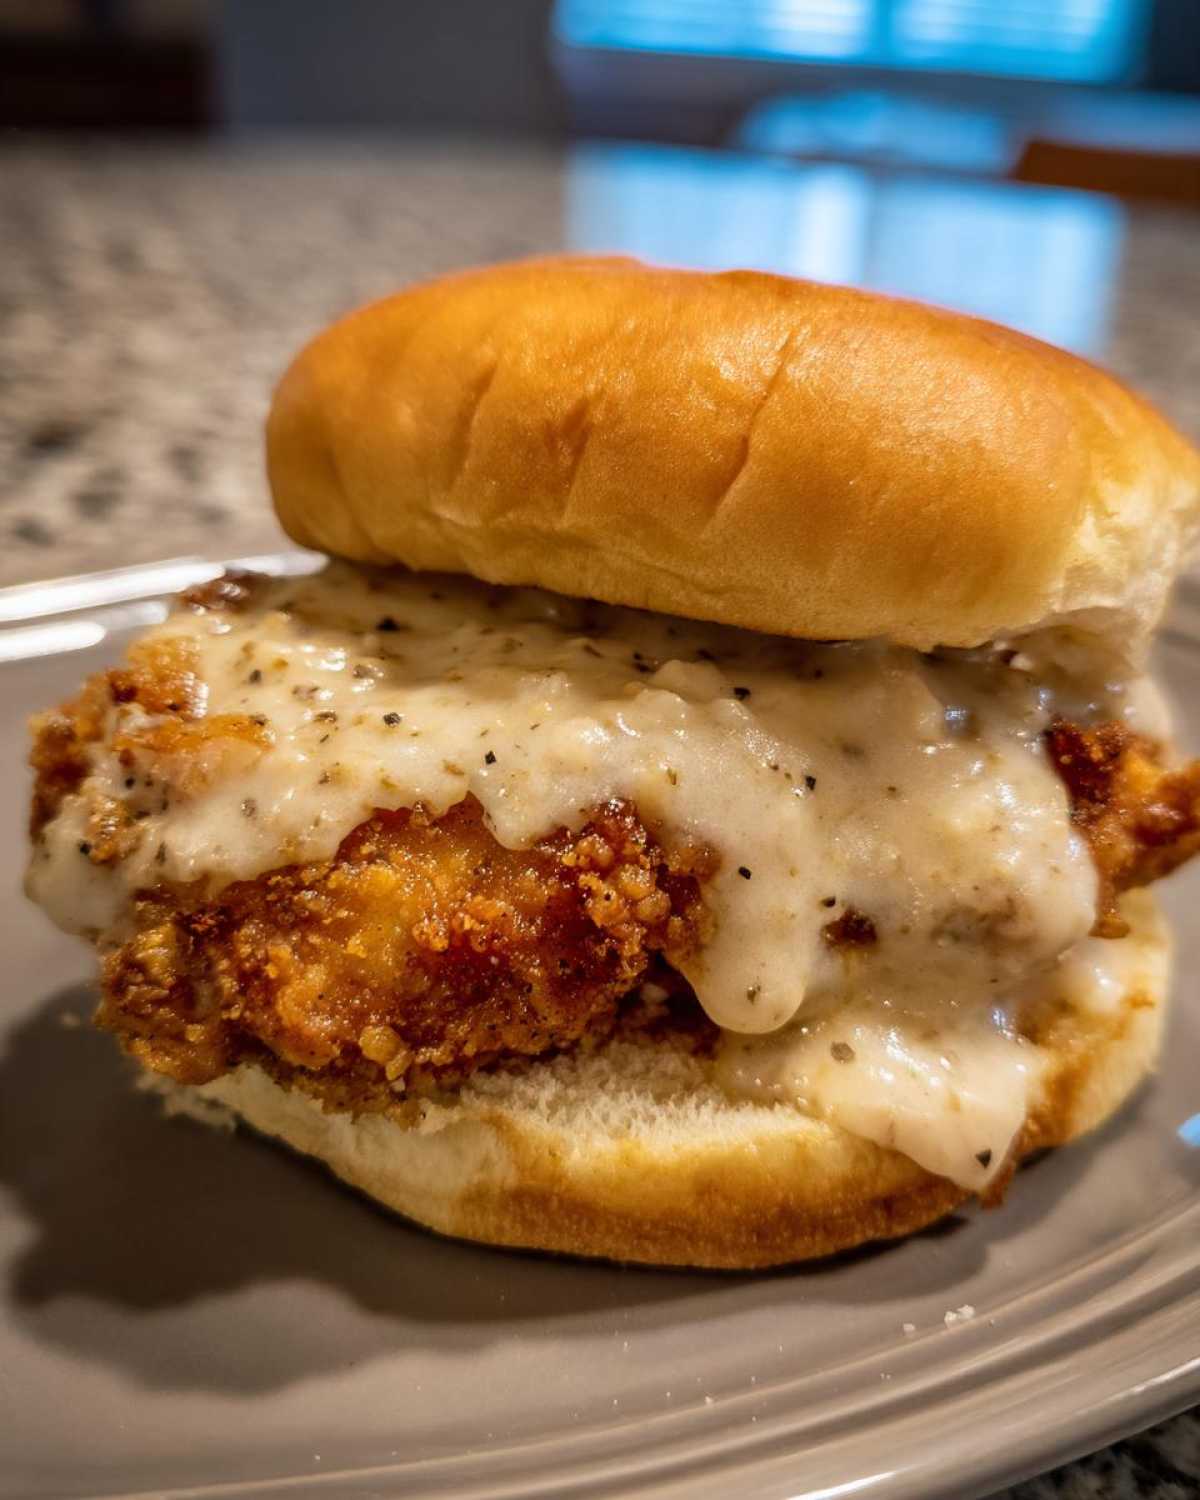
If you saved the Garlic Parmesan Sauce separately, just gently warm it on the stovetop over low heat until it’s pourable again. Then, after you’ve crisped your chicken, put it on a toasted bun, top it with cheese (if you like), and spoon that warm, creamy sauce right over the top. It tastes almost as good as fresh—maybe even better the next day when the flavors have settled a bit!
Frequently Asked Questions About This Chicken Sandwich with Creamy Sauce
I always get DMs and emails from people who are trying the recipe for the first time, and that’s wonderful! Usually, the questions circle back to texture—how to get it just right, or how to handle the sauce. It’s totally normal to have questions when you’re trying to copy that perfect, restaurant-style bite at home. Here are some of the most common things folks ask about making this amazing Chicken Sandwich with Creamy Sauce!
Can I make the Garlic Parmesan Sauce ahead of time?
Yes, you absolutely can! I sometimes make a double batch of the sauce because it’s just that good. You can store the finished Garlic Parmesan Sauce recipe in an airtight container in the fridge for up to four days. When you’re ready to eat, just pull it out, put it in a small saucepan, and warm it gently over very low heat. Whisk it constantly as it heats up—you might need to add just a tiny splash of milk or water if it gets too thick as it cools down, but usually, stirring it well does the trick! Don’t boil it, or the Parmesan might get grainy again.
What is the best way to ensure the chicken stays juicy inside?
This is the number one concern for any Homemade Fried Chicken Sandwich maker! It all comes down to evenness and cooking time. First, make sure you pound those chicken breasts to that consistent half-inch thickness. If one side is thick and the other is paper-thin, the thin part will dry out before the thick part is even done cooking. That pounding step is non-negotiable!
Second, watch your heat and your time. You want that oil around 350°F (175°C). If the oil is too hot, the outside burns before the inside finishes. If it’s too cool, the crust soaks up too much oil and gets heavy instead of crispy. Stick to the 4 to 6 minutes per side, check that internal temperature of 165°F (74°C), and pull it immediately. Don’t let it sit in the oil staring at the pan—over-frying is the quickest way to dry out your perfectly seasoned meat!
We all want that beautiful contrast, so if you have more questions about getting your Parmesan Garlic flavors just right, feel free to reach out via my contact form!
Share Your Crispy Chicken Sandwich with Garlic Parmesan Sauce Creations
Whew! You made it! Now you’ve got the tools, the technique, and that insane Garlic Parmesan Sauce coating your very own Crispy Chicken Sandwich with Garlic Parmesan Sauce. Believe me, the best part of my kitchen is seeing you all recreate these recipes and make them your own!
I really, truly want to know how it turned out. Did you manage that perfect crunch? Did your first bite make one of those satisfied, happy noises? Don’t be shy!
Please take a minute to leave a comment down below. Tell me what you thought! Did you serve it with something surprising? Did you try adding those red pepper flakes for a little heat? Your feedback helps other readers get excited and tackle this recipe with confidence.
And if you took a picture—which I hope you did, because this thing is gorgeous—tag me on social media! Seeing your gorgeous, saucy, crunchy sandwiches makes all my hard work worth it. I can’t wait to see what deliciousness you fried up today!
PrintCrispy Chicken Sandwich with Garlic Parmesan Sauce
Make a restaurant-style crispy chicken sandwich featuring juicy chicken coated in a rich garlic parmesan sauce.
- Prep Time: 20 min
- Cook Time: 20 min
- Total Time: 40 min
- Yield: 4 servings
- Category: Dinner
- Method: Frying
- Cuisine: American
- Diet: Low Lactose
Ingredients
- 2 boneless, skinless chicken breasts, halved horizontally
- 1 cup buttermilk
- 1 teaspoon salt
- 1/2 teaspoon black pepper
- 1 cup all-purpose flour
- 1/2 cup cornstarch
- 1 teaspoon paprika
- 1/2 teaspoon garlic powder
- Vegetable oil for frying
- 4 sandwich buns
- 4 slices provolone cheese (optional)
- For the Sauce: 1/2 cup unsalted butter
- 4 cloves garlic, minced
- 1/2 cup heavy cream
- 1/2 cup grated Parmesan cheese
- 1 tablespoon fresh parsley, chopped
- 1/4 teaspoon salt
- Pinch of black pepper
Instructions
- Pound the chicken pieces to an even 1/2-inch thickness. Place chicken in a bowl and cover with buttermilk, salt, and pepper. Marinate for at least 30 minutes or up to 4 hours in the refrigerator.
- In a shallow dish, whisk together the flour, cornstarch, paprika, and garlic powder.
- Remove chicken from buttermilk, letting excess drip off. Dredge the chicken thoroughly in the flour mixture, pressing firmly to coat well.
- Heat about 2 inches of vegetable oil in a deep skillet to 350°F (175°C).
- Carefully place chicken pieces into the hot oil, ensuring not to overcrowd the pan. Fry for 4 to 6 minutes per side until golden brown and cooked through (internal temperature of 165°F or 74°C). Remove chicken and place on a wire rack to drain.
- While the chicken rests, prepare the sauce. Melt the butter in a small saucepan over medium heat. Add minced garlic and cook until fragrant, about 1 minute.
- Stir in the heavy cream and bring to a gentle simmer. Reduce heat to low. Whisk in the grated Parmesan cheese until the sauce is smooth. Stir in parsley, salt, and pepper. Keep warm.
- Lightly toast the sandwich buns. Place a slice of cheese on each hot chicken cutlet, if using, and let it melt slightly.
- Brush or spoon the garlic parmesan sauce generously over the top of each chicken cutlet.
- Assemble the sandwich: place the sauced chicken on the bottom bun and top with the other half of the bun. Serve immediately.
Notes
- For extra crispiness, double dredge the chicken: dip coated chicken back into the buttermilk, then back into the flour mixture.
- If you prefer an air fryer method, spray the coated chicken with cooking spray and air fry at 380°F (195°C) for 12-15 minutes, flipping halfway.
- Add a pinch of red pepper flakes to the sauce for a slight spicy kick.
Nutrition
- Serving Size: 1 sandwich
- Calories: 650
- Sugar: 5
- Sodium: 850
- Fat: 35
- Saturated Fat: 15
- Unsaturated Fat: 20
- Trans Fat: 0
- Carbohydrates: 40
- Fiber: 2
- Protein: 45
- Cholesterol: 150