

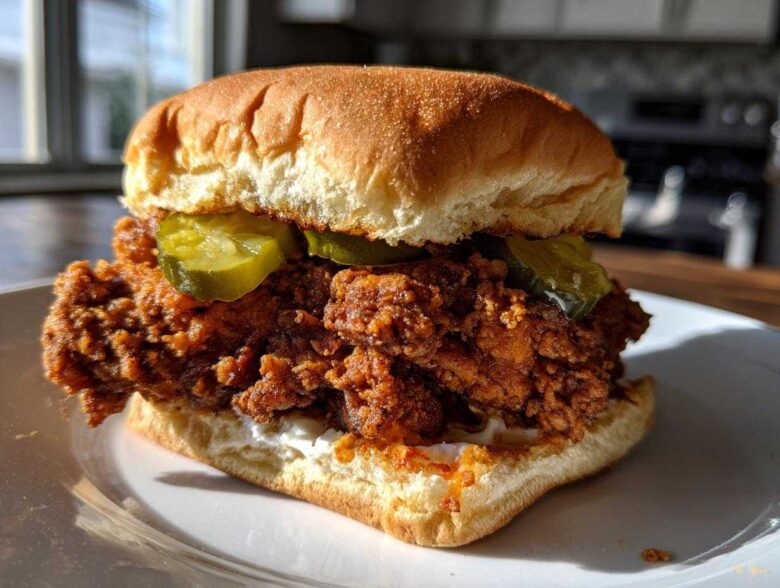
I cannot tell you how many soggy, sad attempts I made before cracking the code on fried chicken sandwiches. Seriously, I wasted so much oil trying to get that legendary, craggy crunch you get at the best spots. But guess what? Those days are over, my friends! I finally locked down the Ultimate Crispy Chicken Sandwich recipe, and I’m practically bouncing off the walls to share it. It’s all about combining a long buttermilk brine with my signature double-dredge technique. After years of testing my flour-to-cornstarch ratios, I promise this method gives you a crunchy chicken sandwich at home that actually stays crisp. Forget flimsy coatings; we are building armor for these fillets!
Why You Will Make the Best Crispy Chicken Sandwich Recipe
Just look at the promise of that crunch—you deserve perfection on a bun! This isn’t just any fried chicken recipe; it’s engineered for success. Here’s why picking up this recipe means you’re about to conquer the perfect handheld meal:
- Insane, Lasting Crunch: The cool buttermilk soak followed by the crucial double-dredge creates those insanely crispy, craggy edges that hold up even against the sauce. Trust me, they stay crunchy!
- Juicy Interior Guaranteed: The overnight buttermilk bath pre-seasons the meat and locks in all the moisture. You get that satisfying contrast of shattering crust over tender, never-dry chicken.
- Simple Brine, Big Flavor: You don’t need a complicated spice rack for the brine! Just buttermilk, a little heat, salt, and pepper—that’s it. It’s the easiest way to tenderize chicken fast.
- It’s Perfect for Meal Prep Adjustments: We talk about swapping out breasts for thighs, or even baking it later. This method is robust enough that it stays fantastic no matter how you choose to finish it off.
- Restaurant Quality in Your Kitchen: You are no longer beholden to takeout! This turns simple chicken breasts into a truly show-stopping homemade crispy chicken fillet.
Ingredients for Your Ultimate Crispy Chicken Sandwich Guide
Okay, gathering your supplies is half the battle, right? I’ve broken down exactly what you need into three simple piles. Don’t skip getting the cornstarch—seriously, that’s our secret weapon for a coating that stays crunchy forever. You want everything prepped and ready before the chicken comes out of the fridge!
For the Buttermilk Brine
- 2 boneless, skinless chicken breasts (about 6 oz each), halved horizontally
- 2 cups buttermilk
- 1 tablespoon hot sauce
- 1 teaspoon salt
- 1 teaspoon black pepper
For the Perfectly Battered Chicken Sandwich Coating
This blend is heavy on the flour, but that cornstarch is lifting everything up and making it light and shatteringly crisp. For more cooking tips and tricks, you can always check out the main recipe archive here on the site!
- 1 cup all-purpose flour
- 1/2 cup cornstarch
- 1 teaspoon paprika
- 1/2 teaspoon garlic powder
- 1/4 teaspoon cayenne pepper
For Assembly and Toppings
- Vegetable oil, for frying
- 4 brioche buns
- 4 slices dill pickle
- Mayonnaise, for serving
How to Make Extra Crispy Chicken Cutlets: Step-by-Step
This is where the magic happens! Making the Crispy Chicken Sandwich isn’t hard, but it definitely demands focus during these few crucial steps. Get your setup ready—your dry mix bowl, your buttermilk, and your chicken—before you heat the oil. The entire process moves fast once you start frying, and that’s okay because we want speed!
Brining the Chicken for Juiciness
Step one is patience, which is the hardest part for me! You take those chicken breasts and let them soak in that spiced buttermilk. I insist on covering them and letting them chill for at least four hours, but honestly, overnight is where they become truly tender and flavorful. This step tenderizes the meat so it’s juicy even after deep frying.
Building the Crunchy Chicken Coating
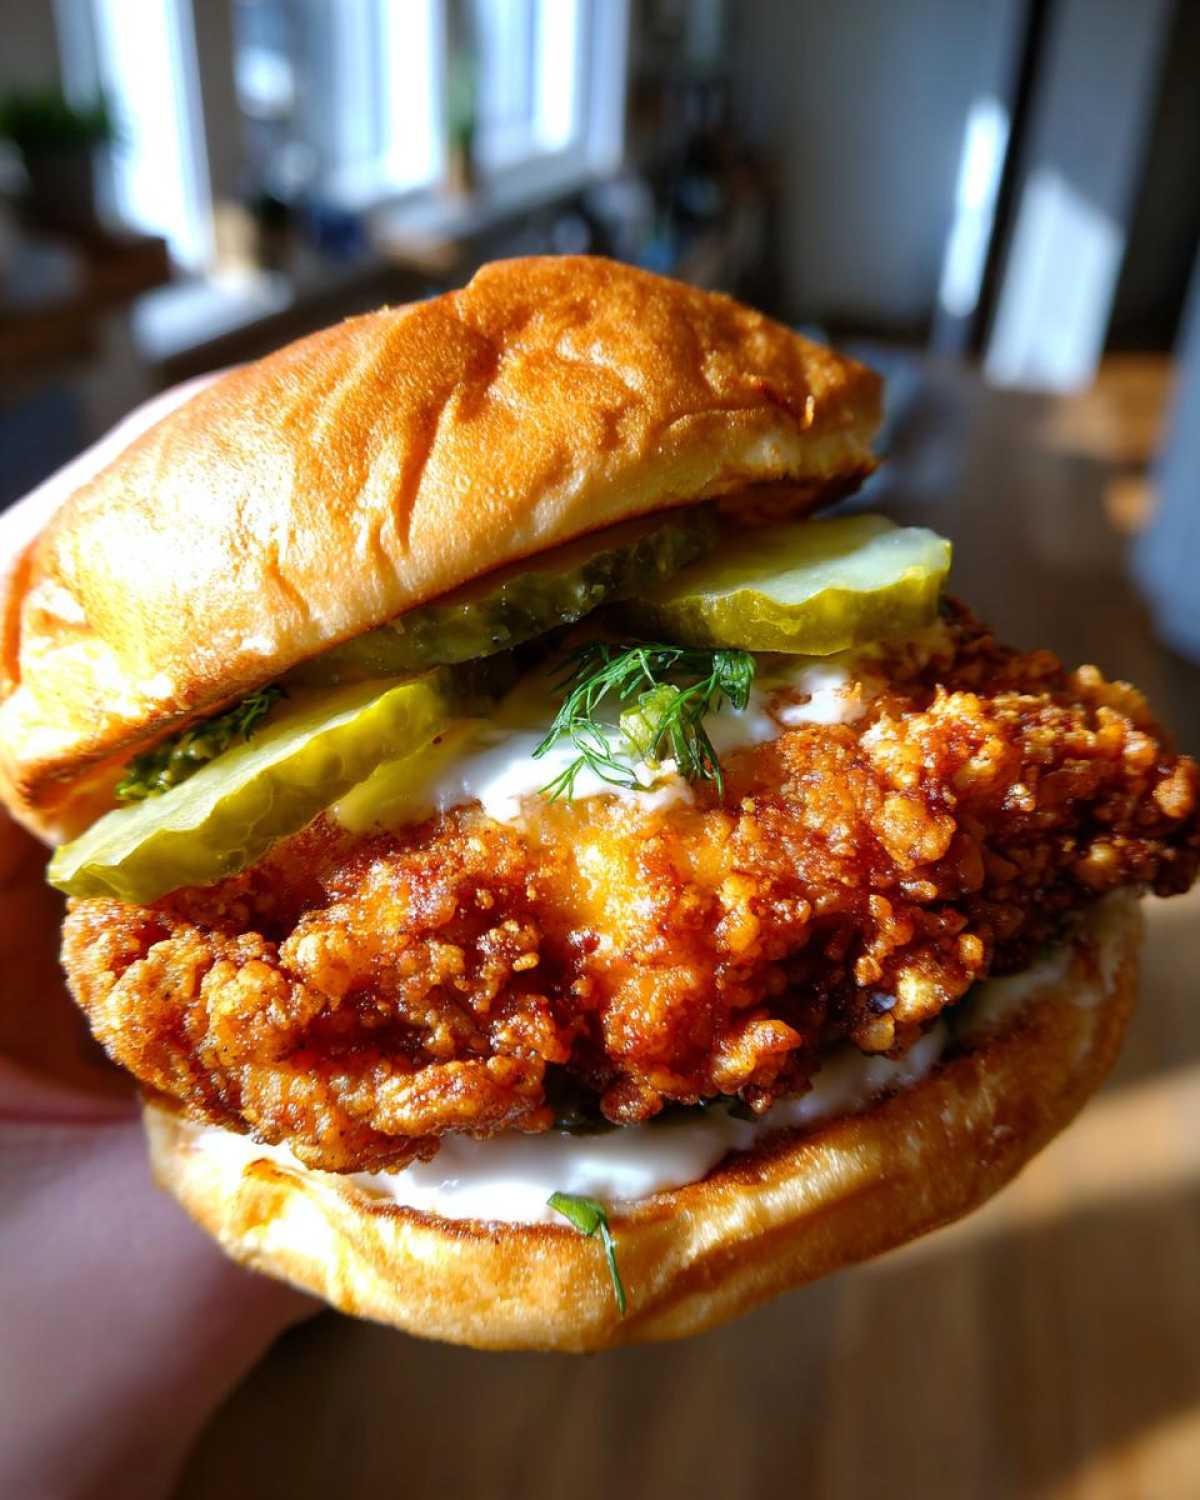
Once brined, you pull the chicken out and let the excess buttermilk drip off—don’t wipe it dry! Shake it first, then press it *hard* into the flour mixture. This is my expert tip: make sure you really push the flour onto the chicken to create those bumpy, rough spots. Then, you do the double dip! Quick dip back into the wet buttermilk, then one last firm press into the dry mix. This double dredge is how we build that amazing, craggy crust. For more details on how I managed to lock down the secret to crispy fried chicken coating, check that post out! Seriously, don’t let that floured chicken sit around! You have to fry it right away, or that moisture starts to soften the coating before we get it hot.
Frying the Crispy Chicken Sandwich Fillet
Get your vegetable oil heated up to 350°F (175°C). That temperature control is everything! Carefully drop the coated chicken in—don’t crowd the pan or the oil temp will drop. You’re looking for 5 to 7 minutes per side until they hit 165°F internally. When they come out looking deep golden brown, immediately place them on a wire rack over a baking sheet. Never use paper towels for draining, or the bottom will steam and get soft! A quick sprinkle of salt while they’re hot seals the deal for flavor.
Tips for Success with Your Crispy Chicken Sandwich
I know you want to make these perfect on the first try, which is why I always share the little things that make a difference between good and legendary crunch. Focus on these key points, and you won’t go wrong!
Achieving Maximum Crunch: The Secret to Crispy Fried Chicken Coating
Listen, the absolute biggest thing that ruins a Crispy Chicken Sandwich is letting that coated chicken sit before it hits the oil. Moisture is the enemy of crispness! You must dredge it, press that final crust on hard, and immediately lower it into the hot fat. If you plan on making a huge batch, fry them in shifts, just don’t let them hang out on the counter while waiting for their turn.
Alternative Cooking Method: Air Fryer Crispy Chicken Sandwich
I get it, not everyone wants to deep fry, and that’s totally fine! If you want to try the Air Fryer Crispy Chicken Sandwich variation, it works beautifully and saves on cleanup. After you do the double dredge, you need to spray those coated fillets vigorously with cooking spray—don’t skimp here! Then, pop them into your air fryer basket. Set the temperature to 400°F (200°C) and cook them for about 20 to 25 minutes, flipping them halfway through. They won’t have the exact same deep-fried texture, but they still get incredibly crispy. For other quick, healthier snacks, check out my recipe for Air Fryer Ranch Chickpeas!
Ingredient Spotlight: Thigh vs Breast Crispy Sandwich
This is a question I get asked constantly whenever I share the Best Crispy Chicken Sandwich Recipe: what cut of meat should I use? If you follow the recipe as written, you’ll see I list the chicken breasts halved horizontally. Breasts are lean, they cook fast, and when brined correctly, they are fantastic!
But let’s be real, if you want the absolute juiciest, most forgiving cut for frying, you should really reach for chicken thighs. The natural fat content in thighs makes it almost impossible to dry them out, even if you accidentally leave them in the oil 30 seconds too long. Thigh meat is darker and richer, which some people prefer anyway for that Southern Style Crispy Chicken Sandwich vibe.
I stick to breasts here because they slice into a perfect, uniform shape for the bun, but if you swap them out for boneless, skinless thighs, make sure you trim any excess fat off. The brine and the double dredge work equally well on either cut, it’s just the final texture that shifts slightly. Thighs stay a little more tender on the inside, while breasts feel a bit more substantial.
Assembly: Building the Restaurant Style Crispy Chicken Sandwich
Whew! The chicken is golden, perfectly salted, and draining on the rack—it smells absolutely heavenly. Now we move onto the final, crucial stage: assembly. The order matters when you’re trying to capture that perfect Crispy Chicken Sandwich experience. You don’t want a cold, sad bun holding that beautiful fillet, so start toasting!
I like to lightly toast my brioche buns in a dry skillet or under the broiler until they just turn golden brown around the edges. Toasting provides a textural barrier against the moisture from the sauce and the meat, which is a small step that pays off huge in the fight against sogginess. Think of it as your first line of defense!
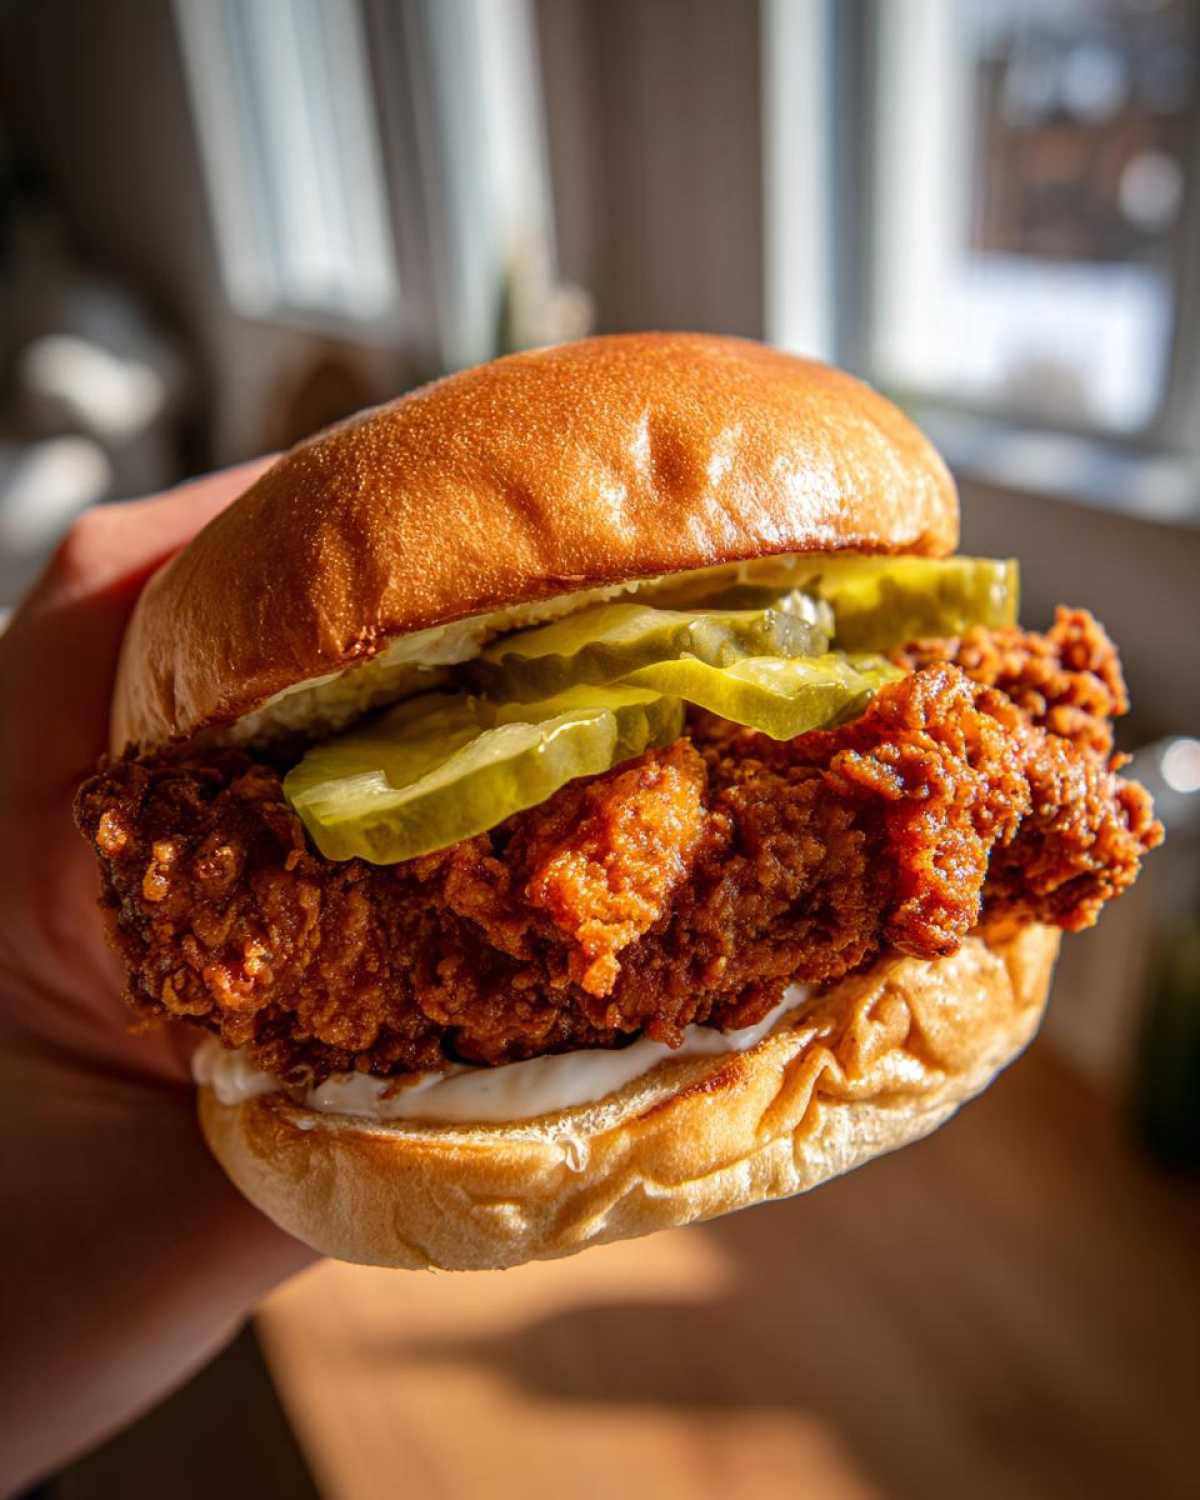
Next up: sauce application. I stick to a generous smear of mayonnaise on both the top and bottom bun halves. Simple is best here because we want that crunch and the pickle tang to be the stars. If you’re feeling adventurous for a sauce upgrade, you could whip up a batch of something creamy and zesty—maybe a spicy mayo, similar to the profile in my cheeseburger quesadillas, but kept much simpler here.
Layer everything up fast! Bottom bun, my glorious, crunchy chicken fillet, and then top that with the dill pickle slices. They need to sit right on top of that hot crust for that perfect, vinegary flavor injection. Cap it off with the top bun. And here’s the final, mandatory instruction: Serve this immediately! I mean it. That sandwich is at its absolute peak texture the moment it leaves your cutting board. Don’t let it sit on a plate while you search for napkins!
Serving Suggestions for Your Crispy Chicken Sandwich
Now that you’ve conquered the frying process and built the most satisfying, crunchy chicken sandwich imaginable, what do you serve alongside it? These sandwiches are rich and totally satisfying on their own, but sometimes you need that perfect counterpart to round out the meal. Honestly, I like to keep the sides bright so they cut through the richness of that fried coating.
A classic might be some perfectly seasoned fries, the kind that are seasoned with just a tiny bit of smoked paprika and garlic powder right after they come out of the oil. But if you’re looking to add some fresh vegetables to the plate, I highly recommend something light. A crisp, tart slaw or even a simple green salad works wonders.
If you want to keep things feeling light but incredibly flavorful, try making a vibrant salad on the side! A recipe like my Strawberry Quinoa Salad gives you that necessary fresh fruit sweetness and bright dressing to balance out the savory, salty fried flavor of the chicken. It makes the whole plate feel less heavy, which is always a win in my book!
Whatever you choose—whether it’s something tangy or something salty—just make sure you serve it up fast while that coating is still singing its crunchy song!
Storage & Reheating Instructions for Homemade Crispy Chicken Fillet
Finding leftovers of this incredible Homemade Crispy Chicken Fillet is always a treat, but the reheating process is where things get tricky. If you must store them, please use an airtight container and keep them in the fridge for no more than three days. Here’s the golden rule: never reheat fried chicken in the microwave! You’ll instantly lose all that hard-earned crispness.
For the best results, you want the oven or an air fryer. Pop the chicken fillets onto a wire rack set over a baking sheet and reheat at about 375°F (190°C) for 8 to 10 minutes. This lets the hot air circulate all around the coating, crisping it back up nicely. If you use the air fryer, 350°F for about 6 minutes usually does the trick!
Frequently Asked Questions About This Crispy Chicken Sandwich
I always get so many questions after people try this recipe for the first time—and usually, they all start with, “How is it still so crunchy?!” It’s a great sign, honestly! People want to know the little secrets for making a truly top-tier fried chicken sandwich at home. Here are a few of the things I hear most often!
Can I make this a Spicy Crispy Chicken Sandwich?
Oh, you absolutely can! If you want to ramp up the heat for a proper Spicy Crispy Chicken Sandwich, you have two easy routes. For a subtle warmth that permeates the meat, add an extra teaspoon of cayenne pepper right into your dry dredge mix. If you want serious fire, add a dash more of whatever hot sauce you use into the buttermilk brine itself. That heat soaks right into the chicken fibers while it rests!
What is the minimum brining time for the Buttermilk Brined Chicken Sandwich?
While I preach that overnight is the goal for flavor saturation and maximum tenderness—seriously, the Buttermilk Brined Chicken Sandwich is worlds better after 8 to 12 hours—you can get away with a minimum soak time. If you’re in a huge rush, pull the chicken out of the fridge and let it brine for at least 2 hours. Just make sure you press that flour coating on extra hard after the final dredge, since the meat won’t be quite as saturated with flavor!
Why did my coating fall off during frying?
That’s usually a sign that you either patted the chicken too dry after the buttermilk bath, or you let the dredged chicken sit for too long before it hit the oil. Remember, the moisture from the buttermilk needs to react with the dry flour right away to form that signature crust! The moment that chicken is double-dredged, it needs to go straight into the 350°F oil. It’s a timing game when you are going for maximum crunch!
Nutrition Estimate for This Crispy Chicken Sandwich
Look, when you’re deep-frying something this delicious, you know it’s going to be a treat rather than an everyday staple, right? I always get asked about the numbers, so I did my best to run the figures for what you see here. These are just estimates based on the ingredients we used—like the brioche buns and the amount of oil used for frying—so take them as a general guideline for this incredible Crispy Chicken Sandwich.
You get a huge payoff in protein and flavor for the calories, but be mindful of the sodium since we are salting the brine and sprinkling extra salt right after frying!
- Serving Size: 1 sandwich
- Calories: 650
- Fat: 35g
- Protein: 40g
- Carbohydrates: 45g
- Sodium: 950mg
If you ever want to check out the full testing notes or general health disclaimers we post for all our recipes, you can find that information on our recipe disclaimer page. But seriously, enjoying food is just as important as knowing the numbers, so dig in!
Share Your Crunchy Chicken Sandwich at Home Experience
Whew! That’s everything you need to know to pull off the most spectacularly crispy chicken sandwich of your dreams. I’ve shared all my secrets on the brine, the double dredge, and how to keep that coating from getting instantly soggy. Now, the success of this recipe rests in your hands!
I really, truly want to know how it turned out for you! Did you stick to the breasts, or did you swap in thighs? Did you add extra cayenne for a real kick, or did you follow my advice and serve it up immediately? Tell me all about your experience making this Crunchy Chicken Sandwich at Home in the comments below.
If you loved the results, please consider leaving a rating—it helps other home cooks find this recipe and ditch soggy chicken forever. Happy frying, and sending you all the crunchiest vibes!
PrintUltimate Crispy Chicken Sandwich Recipe

Follow this guide to make an extra crispy chicken sandwich featuring a buttermilk brine and a crunchy double-dredge coating.
- Prep Time: 20 min
- Cook Time: 15 min
- Total Time: 4 hr 35 min
- Yield: 4 servings
- Category: Main Course
- Method: Deep Frying
- Cuisine: American
- Diet: Low Fat
Ingredients
- 2 boneless, skinless chicken breasts (about 6 oz each), halved horizontally
- 2 cups buttermilk
- 1 tablespoon hot sauce
- 1 teaspoon salt
- 1 teaspoon black pepper
- 1 cup all-purpose flour
- 1/2 cup cornstarch
- 1 teaspoon paprika
- 1/2 teaspoon garlic powder
- 1/4 teaspoon cayenne pepper
- Vegetable oil, for frying
- 4 brioche buns
- 4 slices dill pickle
- Mayonnaise, for serving
Instructions
- Place the halved chicken breasts in a bowl. Pour buttermilk, hot sauce, salt, and pepper over the chicken. Cover and refrigerate for at least 4 hours, or preferably overnight.
- In a shallow dish, whisk together the flour, cornstarch, paprika, garlic powder, and cayenne pepper. This is your dry dredge mix.
- Remove chicken from the buttermilk, letting excess drip off, but do not pat dry.
- Dredge each piece of chicken thoroughly in the dry mix, pressing the flour onto the chicken to create a thick coating.
- For extra crispiness, dip the floured chicken back into the leftover buttermilk mixture for just a second, then immediately return it to the dry dredge mix. Press firmly again to build a thick, craggy crust.
- Heat 2 inches of vegetable oil in a deep skillet or Dutch oven to 350°F (175°C).
- Carefully place the coated chicken into the hot oil, ensuring not to overcrowd the pan. Fry for 5 to 7 minutes per side, until golden brown and the internal temperature reaches 165°F (74°C).
- Remove the chicken and place it on a wire rack set over a baking sheet to drain excess oil. Sprinkle lightly with salt immediately after removing from the oil.
- Lightly toast the brioche buns.
- Assemble the sandwich: Spread mayonnaise on both halves of the bun, place the crispy chicken fillet on the bottom bun, top with pickle slices, and place the top bun on. Serve immediately.
Notes
- For the best crust, use chicken thighs instead of breasts; they stay juicier.
- To prevent sogginess, do not let the dredged chicken sit before frying; cook it immediately after the second dredge.
- If you prefer baking, spray the dredged chicken with cooking spray and bake at 400°F (200°C) for 20-25 minutes, flipping halfway.
Nutrition
- Serving Size: 1 sandwich
- Calories: 650
- Sugar: 8
- Sodium: 950
- Fat: 35
- Saturated Fat: 8
- Unsaturated Fat: 27
- Trans Fat: 0
- Carbohydrates: 45
- Fiber: 2
- Protein: 40
- Cholesterol: 140