

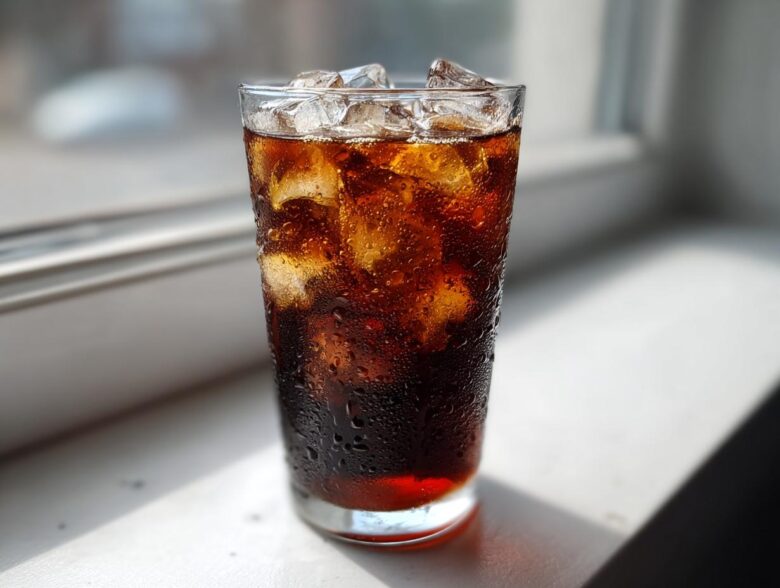
If you’re anything like me, that first sip of coffee in the morning has to be perfect. Forget that harsh, acidic bite you sometimes get from a hot brew—we’re talking smooth, chocolatey, rich flavor that goes down like silk, especially when summer hits. That’s why mastering **Cold Brew Coffee** at home has been my obsession for years. Honestly, I threw out so many failed, muddy batches learning the ropes, but I cracked the code!
I’m here to tell you the absolute easiest way to make what I call my ‘Liquid Gold’ concentrate. This method requires almost zero fuss and no fancy gadgets—just a jar and some patience. Trust me, once you see how simple it is to get that low-acid magic, you’ll never look back! I’ve been tweaking this ratio until it’s idiot-proof.
Why You’ll Love This Easy Homemade Cold Brew Recipe
Seriously, ditch the coffee shop routine for a minute; this recipe changes everything. You’re going to see why people rave about this method for **Cold Brew Coffee**.
- It’s incredibly smooth! That whole chemical process lowers the acid so much, meaning no more tummy trouble.
- It’s pure concentrate—a tiny bit of prep gives you up to two weeks of ready-to-go coffee in the fridge.
- Forget specialized brewers. If you have a big jar, you have everything you need right now!
I keep telling everyone! You can check out some of my other kitchen hacks over on my main blog page while your first batch is steeping.
Gathering Supplies for Your Cold Brew Coffee Concentrate
You don’t need one of those expensive glass contraptions to make incredible **cold brew coffee**. Honestly, most of the time, I just grab the biggest glass jar I can find—a standard quart Mason jar is perfect for a starter batch. The main thing you need to remember is water quality. Always, always use cold, filtered water. Tap water just ruins that beautiful, smooth flavor we’re chasing.
Next, you need something to stir with—a long wooden spoon works great—and your filtering setup, which is where we get a little resourceful for cleanup.
Essential Equipment for Making Cold Brew in a Mason Jar
If you’re rocking a Mason jar, you’ll need that jar, your favorite scoop for the grounds, and something to strain with. I use a fine-mesh sieve, but you must line it! I always double-line mine with a piece of cheesecloth or a sturdy paper coffee filter. This helps keep the sediment out so you don’t end up drinking sludge later. That’s the key to keeping it clean!
The Best Coffee Grind Size for Cold Brew Coffee
Okay, listen up, because this is where most people mess up their **cold brew coffee** and end up with something bitter or weak. It’s all about the grind size! You absolutely need a coarse grind, folks. Think chunky sea salt or breadcrumbs—not the fine powder you use for a pour-over. If you go too fine, the water over-extracts the bad stuff during that long soak, and you get bitterness. I learned this the hard way when I tried using my regular espresso grind once; my kitchen smelled great, but the resulting concentrate was basically sludge!
When you use that coarse grind, it allows for just the right slow extraction over 12 plus hours. This slow process extracts all those fantastic, smooth coffee flavors without ripping out the harsh acids. It’s pure science, but it feels like magic when you nail it.
Understanding the Coffee to Water Ratio for Cold Brew Concentrate
For this specific recipe, we stick to a classic 1-to-4 ratio by volume—one part coffee to four parts water. This gives you a strong concentrate that’s perfect for cutting with ice and water later. If you taste it and decide you want it even *stronger* next time—maybe you like serving it over milk—simply bump that up to a 1-to-3 ratio. Just remember, you are making concentrate here, not ready-to-drink coffee!
Step-by-Step Cold Brew Preparation Methods
Now comes the fun part, and honestly, it barely requires you to lift a finger! Making fantastic **cold brew coffee** is truly a waiting game. We have our coarse grounds, we have our cold water (remember filtered!), and now we just mix it up properly. Get everything into your big pitcher or jar, give it a gentle stir—we don’t want to break up those grounds too much—and cover it loosely. You don’t need a fancy vacuum seal here; just stop dust from falling in!
The actual process is incredibly hands-off. Once it’s mixed, it’s waiting time. You can leave it on the counter if your kitchen isn’t scorching hot, or pop it into the fridge. Either way, you’ve started the magic! Check out some breakfast ideas you can have ready while you wait for this to brew!
Determining the Correct Cold Brew Steeping Time Guide
This is where patience pays off. For this 1:4 concentrate recipe, you should aim for anywhere between 12 to a solid 18 hours. That’s the sweet spot where you pull out all the wonderful chocolate and nutty flavors. Do *not* push it past 20 hours, seriously, I beg you! Once you cross that 20-hour mark, you’re just pulling out harsh acids and bitter stuff. If your first batch seems a little weak, next time push it toward 16 hours. If it’s too strong, pull it back to 14!
Filtering Your Cold Brew Coffee Concentrate
Once that time is up, it’s time to separate the liquid from the sludge. Grab your fine-mesh sieve and line it completely. I always use a folded piece of cheesecloth because it’s super sturdy, but a regular paper filter works too. Now, pour slowly! Don’t rush this. A fast pour will push fines right through your filter, and you’ll end up with cloudy coffee. Let gravity do the work so you end up with that crystal-clear **cold brew coffee concentrate** ready for the fridge.
Tips for Success Making Smooth Cold Brew at Home
I’ve learned so much about what *not* to do over the years, which honestly makes the successful batches taste that much better! Getting that perfectly smooth **cold brew coffee** comes down to two main things we’ve already talked about, but let me really emphasize them.
First, that coarse grind again is your absolute best friend. I remember one disastrous attempt—I was in a rush and used a mediocre pre-ground bag that was probably meant for a drip machine. Big mistake! The resulting liquid was muddy, gritty, and just so astringent. I ended up pouring half of it down the drain. So, if you have a grinder, take the extra minute to get that chunky texture.
Second, don’t be afraid to play with the ratio once you master the basic 1:4. If you’re planning on making lattes or using a lot of milk, try moving to that 1:3 ratio next time. You want to tailor this concentrate just for *you*! You can always find me over on the ‘About Me’ page if you ever want to chat more brewing secrets!
Serving Suggestions for Refreshing Cold Coffee Drinks
So, you’ve got your jar of glorious, cold, strong concentrate chilling in the fridge—what now? This stuff is potent! The general rule of thumb that works for everyone is the 1-to-1 ratio. Pour one part concentrate into your glass, then add one part cold water or milk, depending on how you take your coffee.

But we don’t always want plain old coffee, right? We want refreshing drinks! Try blending that concentrate with a handful of ice and just a splash of vanilla syrup until it’s slushy smooth. Wow, that’s summer in a glass. If you’re really feeling adventurous, skip the milk and try swapping it for something fruitier. I recently tried something similar to my Watermelon Mint Refresher but used the coffee concentrate instead of tea; the slight bitterness of the coffee pairs surprisingly well with mint.

You can even use it for cocktails! Seriously, just a small shot in something creamy or boozy elevates it immediately. Once you’ve mastered the concentrate, you’re basically a beverage genius—no boiling required!
Storing Homemade Cold Brew and How Long Does Cold Brew Last
You did the hard work, you waited patiently, and now you have this incredible **cold brew coffee** concentrate. We absolutely cannot let that precious liquid go to waste or get weird flavors!
The single most important tip here is making sure your storage container is airtight. That means a proper lid on your glass jar or popping the concentrate into a sealed bottle. Coffee is notorious for absorbing smells in the fridge—you do *not* want your cold brew tasting like that leftover onion dip from last week, trust me.
The good news is that this concentrate keeps really well because of how it’s brewed (low acid means fewer things grow fast!). Following the recipe, you should find that your homemade **cold brew coffee** concentrate remains excellent quality and tastes totally fresh for up to two full weeks when stored in the refrigerator. If you need to check my policy ramblings on food safety, you can pop over to the privacy policy page, but honestly, just taste test it around day 14!
If you feel like that two-week window is too short, you can always try freezing small batches in ice cube trays and dropping those strong cubes into your glass when you want a chilly fix later. It’s a game-changer for morning rush hour!
Cold Brew Coffee Troubleshooting Common Issues
So, what happens if your first batch of **cold brew coffee** isn’t quite right? Don’t panic and definitely don’t dump it all out! Remember, we learned by trial and error, and fixing a steeping issue is usually super simple, it just means the time was off for your specific setup.
If your **cold brew coffee** tastes weak, watery, or just… meh, it means you didn’t pull enough flavor out. For the next batch, you can play with the coffee-to-water ratio, maybe adding a little more coffee, but the quickest fix is extending the steeping time. Next time, try pushing it to 16 or even 18 hours instead of only 12. That extra couple of hours makes a huge difference in body and strength!
Now for the opposite problem: bitterness. If your brew tastes slightly sour or harsh—like that slightly metallic bite you get when coffee burns—it means you steeped it too long! This is usually what happens if you leave it for 22 or 24 hours. For the next round, pull it back! Try stopping at 14 hours instead of 18. For the batch you already have, shaking it up and immediately filtering it might rescue it slightly, but honestly, if it’s truly bitter, use it for watering plants or just start a fresh, shorter steep.
Another little hiccup I see sometimes is sediment, even after careful filtering. If you see tiny coffee specks at the bottom of your jar, you probably used a grind that was too fine. Next time, make sure that grinder is set to its coarsest setting. That’s what creates that clear, smooth finish we’re aiming for!
Nutritional Estimates for Cold Brew Concentrate
Sometimes people ask if making their own **cold brew coffee** concentrate is healthier than grabbing something already made. Well, since this recipe is so pure—just coffee and water—the nutrition facts are super straightforward! We aren’t adding any syrups or fancy flavorings upfront, which is awesome for keeping things clean.
Keep in mind that these numbers are just a baseline estimate for the concentrate straight out of the jar, before you add your milk, sweetener, or ice. The nutritional breakdown changes totally once you start mixing it up for that 1:1 serving. You can see my full thoughts on how we calculate these general estimates over on the disclaimer page.
For an estimated 4-ounce serving of pure concentrate:
- Calories: Around 5
- Sugar: 0 grams (Yes! Zero!)
- Fat: 0 grams
- Carbohydrates: About 1 gram
It’s basically just caffeine and flavor, which is exactly what I want in my morning pick-me-up! Flavor enhancers like vanilla syrup or creamy oat milk will obviously add to this, so track those additions separately if you’re counting calories or sugar.
PrintSimple Cold Brew Coffee Concentrate Recipe

Follow these steps to make smooth, low-acidity cold brew coffee concentrate at home using a simple steeping method.
- Prep Time: 5 min
- Cook Time: 0 min
- Total Time: 12 hr 5 min
- Yield: About 3 cups concentrate
- Category: Beverage
- Method: Steeping
- Cuisine: American
- Diet: Vegetarian
Ingredients
- 1 cup coarse ground coffee beans
- 4 cups cold filtered water
- Ice cubes (for serving)
- Milk or sweetener (optional, for serving)
Instructions
- Combine the coarse ground coffee and cold water in a large jar or pitcher.
- Stir gently to ensure all grounds are saturated with water.
- Cover the container loosely.
- Let the mixture steep at room temperature or in the refrigerator for 12 to 18 hours. Do not steep longer than 20 hours to avoid bitterness.
- Line a fine-mesh sieve with cheesecloth or a paper coffee filter. Place the sieve over a second container.
- Slowly pour the coffee mixture through the lined sieve to separate the grounds from the liquid concentrate. Discard the grounds.
- Store the resulting cold brew concentrate in an airtight container in the refrigerator.
- To serve, mix the concentrate with water or milk at a 1:1 ratio, or to your preferred strength, over ice.
Notes
- Use a coarse grind setting; a finer grind can lead to over-extraction and sediment.
- For a stronger concentrate, use a 1:3 coffee-to-water ratio by volume instead of 1:4.
- If the brew tastes weak, increase the steeping time slightly on your next batch. If it tastes bitter, reduce the steeping time.
- Homemade cold brew concentrate keeps well in the refrigerator for up to two weeks.
Nutrition
- Serving Size: 4 oz concentrate
- Calories: 5
- Sugar: 0
- Sodium: 2
- Fat: 0
- Saturated Fat: 0
- Unsaturated Fat: 0
- Trans Fat: 0
- Carbohydrates: 1
- Fiber: 0
- Protein: 0
- Cholesterol: 0