

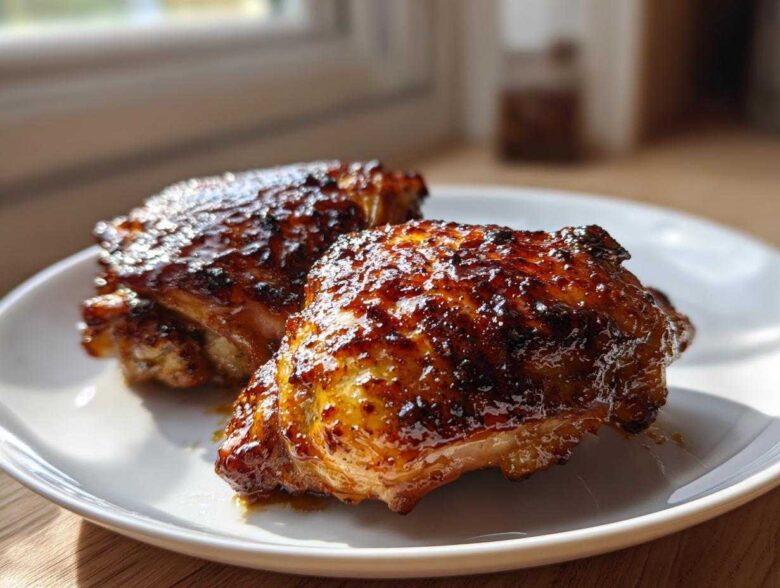
If you’re constantly chasing that perfect, messy, fall-off-the-bone chicken experience where the sauce is practically cemented onto the skin, then stop what you’re doing right now. I have cracked the code for the ultimate Sticky BBQ Chicken Thighs with Honey Glaze, and trust me, it’s a game-changer for weeknights. Forget those watery excuses for barbecue; we are building a thick, caramelized coat here. For years, I messed up glazes—either they ran off or they burned before the chicken cooked through. But after obsessively testing ratios of honey to vinegar, I finally figured out the secret to a glaze that sets up beautifully tacky. This isn’t just chicken; it’s sticky perfection!
The reason this recipe stands head and shoulders above the rest is how we treat the glaze application. We use two coats, which is key. The first layer soaks in and builds flavor deep inside, and the second layer caramelizes on top when the heat is highest—that’s when the magic happens and you get that irresistible look. We’re aiming for sweet, smoky, and seriously sticky. Ready to make the best BBQ chicken of your life?
Why This Sticky BBQ Chicken Thighs with Honey Glaze Recipe Works (E-E-A-T)
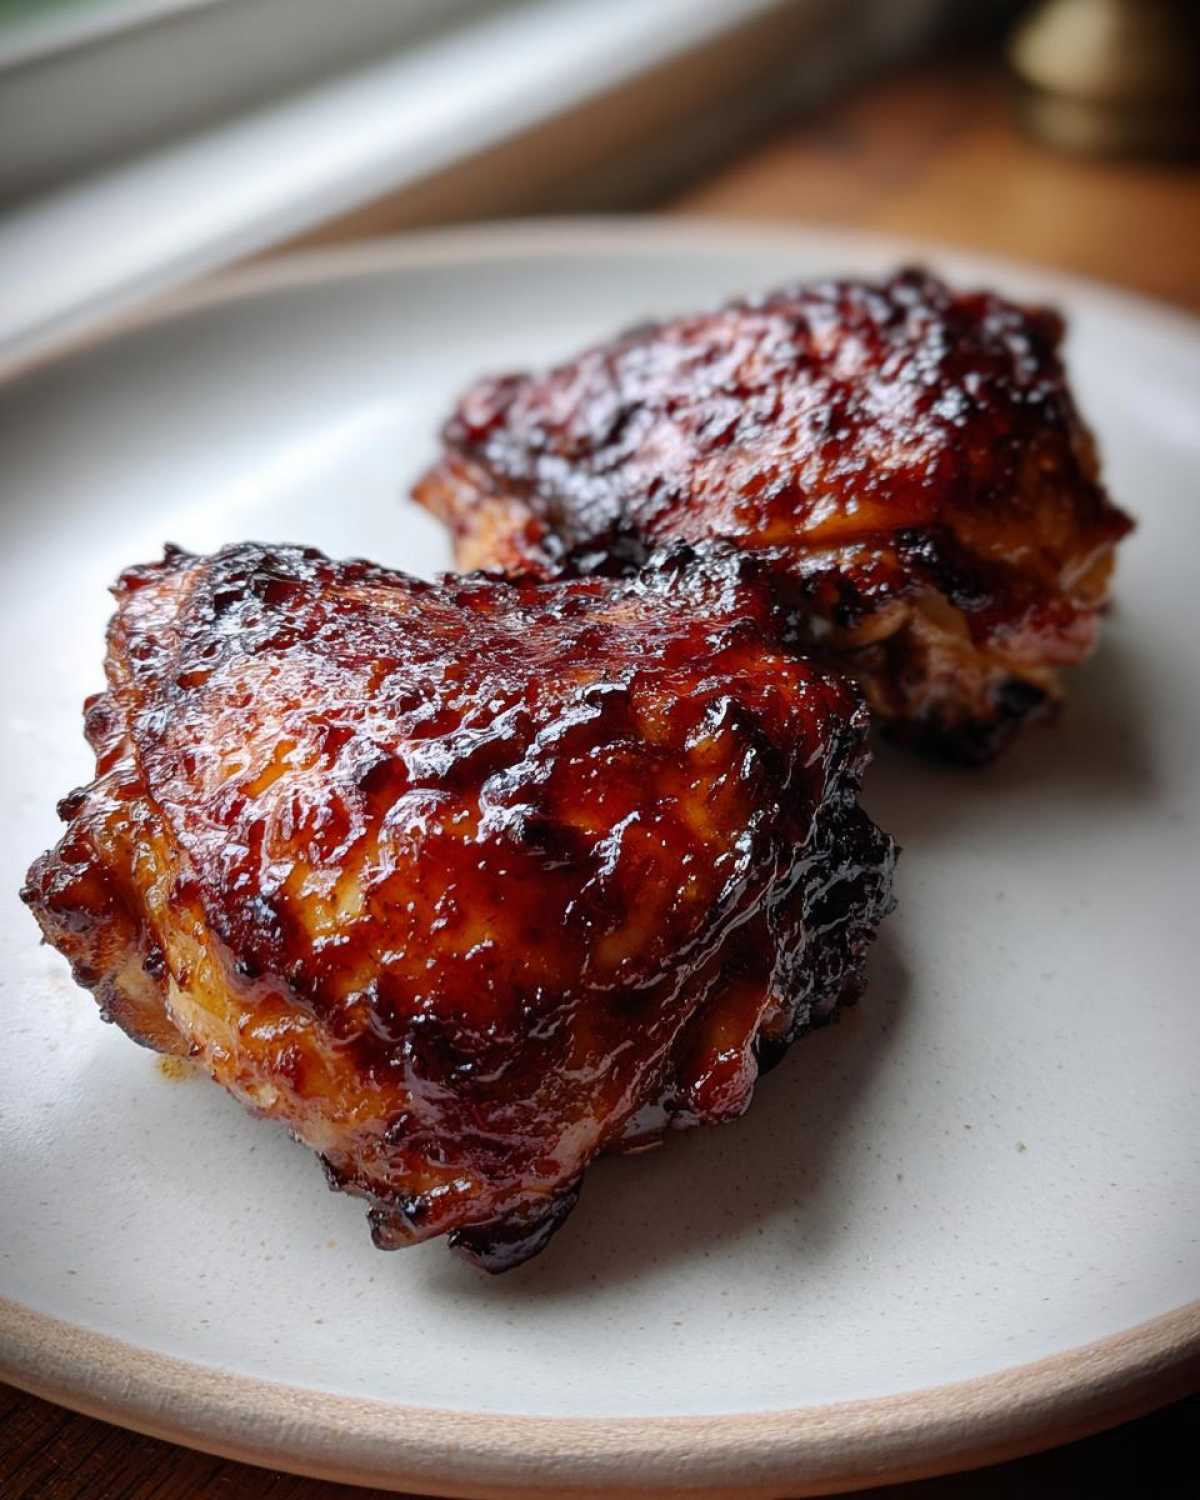
People ask me all the time, “How do you get chicken that’s juicy inside but has that killer crust?” Honestly, it all comes down to prep work and glazing timing. If you skip the initial steps, you end up with flabby skin and sauce that just runs off. We want Crispy Skin Chicken Thighs here, folks! That’s why I insist you dry those thighs off like they owe you money.
Patting the skin bone-dry with paper towels before you even touch them with oil or seasoning is my number one rule for great oven-baked results. This expert move helps the skin render fat properly, securing a beautiful texture. When you follow that with two distinct layers of that heavenly honey glaze, you guarantee yourself a truly Juicy Chicken Thigh Recipe that tastes like it came off a championship grill.
Essential Ingredients for Sticky BBQ Chicken Thighs with Honey Glaze
Okay, let’s talk about what actually goes into making this amazing coating. You don’t need a thousand spices for this, just the right foundational flavors to support that sweet honey. For this recipe, I’m using eight bone-in, skin-on chicken thighs. Seriously, don’t shy away from the bone-in ones; that bone keeps things super moist while the skin gets brown and crispy underneath the glaze!
The glaze itself is dead simple but potent: you need quality BBQ sauce (use the one you actually like!), real honey—this is non-negotiable for that sticky texture—apple cider vinegar for tang, Worcestershire for depth, smoked paprika, and garlic powder. Don’t skimp on the BBQ sauce here; it’s the foundation of the whole smoky flavor profile.
Ingredient Notes and Substitutions for Your Honey Glaze
If you’re out of apple cider vinegar, don’t panic! White distilled vinegar works in a pinch, but you might need to cut back just a tiny bit because it’s sharper than the cider version. If you absolutely have to use boneless, skinless thighs instead of the bone-in beauties, just remember you’ll need to pull them out of the oven about 10 minutes sooner. Keep that internal temp checker handy!
And about the honey? It needs to be liquid honey. Maple syrup is a decent swap if you’re in a pinch, but the final texture won’t have that same exact glossy caramelization that pure honey provides. Remember, the honey and BBQ sauce are what form that beautiful, thick crust we’re after!
Step-by-Step Instructions for Perfect Sticky BBQ Chicken Thighs with Honey Glaze
Alright, this is where we bring that glorious sweet and smoky flavor profile to life! Don’t rush any of these steps, especially the initial drying. This entire method is designed to give you amazing Oven Baked BBQ Chicken that is cooked perfectly all the way through, holding all those wonderful juices inside.
Preparing the Chicken and Oven Setup
First off, get your oven cranked up to 400°F (200°C). It needs to be hot! While that’s heating, line a baking sheet with foil—this saves you scrubbing off burnt sugar later, I promise. Now, take those thighs and use paper towels until the skin feels dry to the touch. Seriously, press hard! Next, you’ll toss them in a bowl with just a drizzle of olive oil, salt, and pepper. Don’t add the main BBQ sauce yet! Arrange them skin-side up on your prepared sheet.
Mixing the Homemade BBQ Glaze for Chicken
Time to whip up that star of the show, the Homemade BBQ Glaze for Chicken. In a separate little bowl—mine is always my favorite small ceramic one—whisk together the BBQ sauce, the honey (the stickiness agent!), the apple cider vinegar for that crucial tang, Worcestershire sauce, smoked paprika, and garlic powder. Mix it until it looks beautifully uniform and glossy. Here’s a big trick for maximizing that gooey texture: take about a quarter of this glaze mixture out *before* you touch the chicken with the first layer. That reserved amount is saved just for the final, super-sticky coat!
Baking and Achieving the Sticky Finish on Your Glazed Chicken Thighs
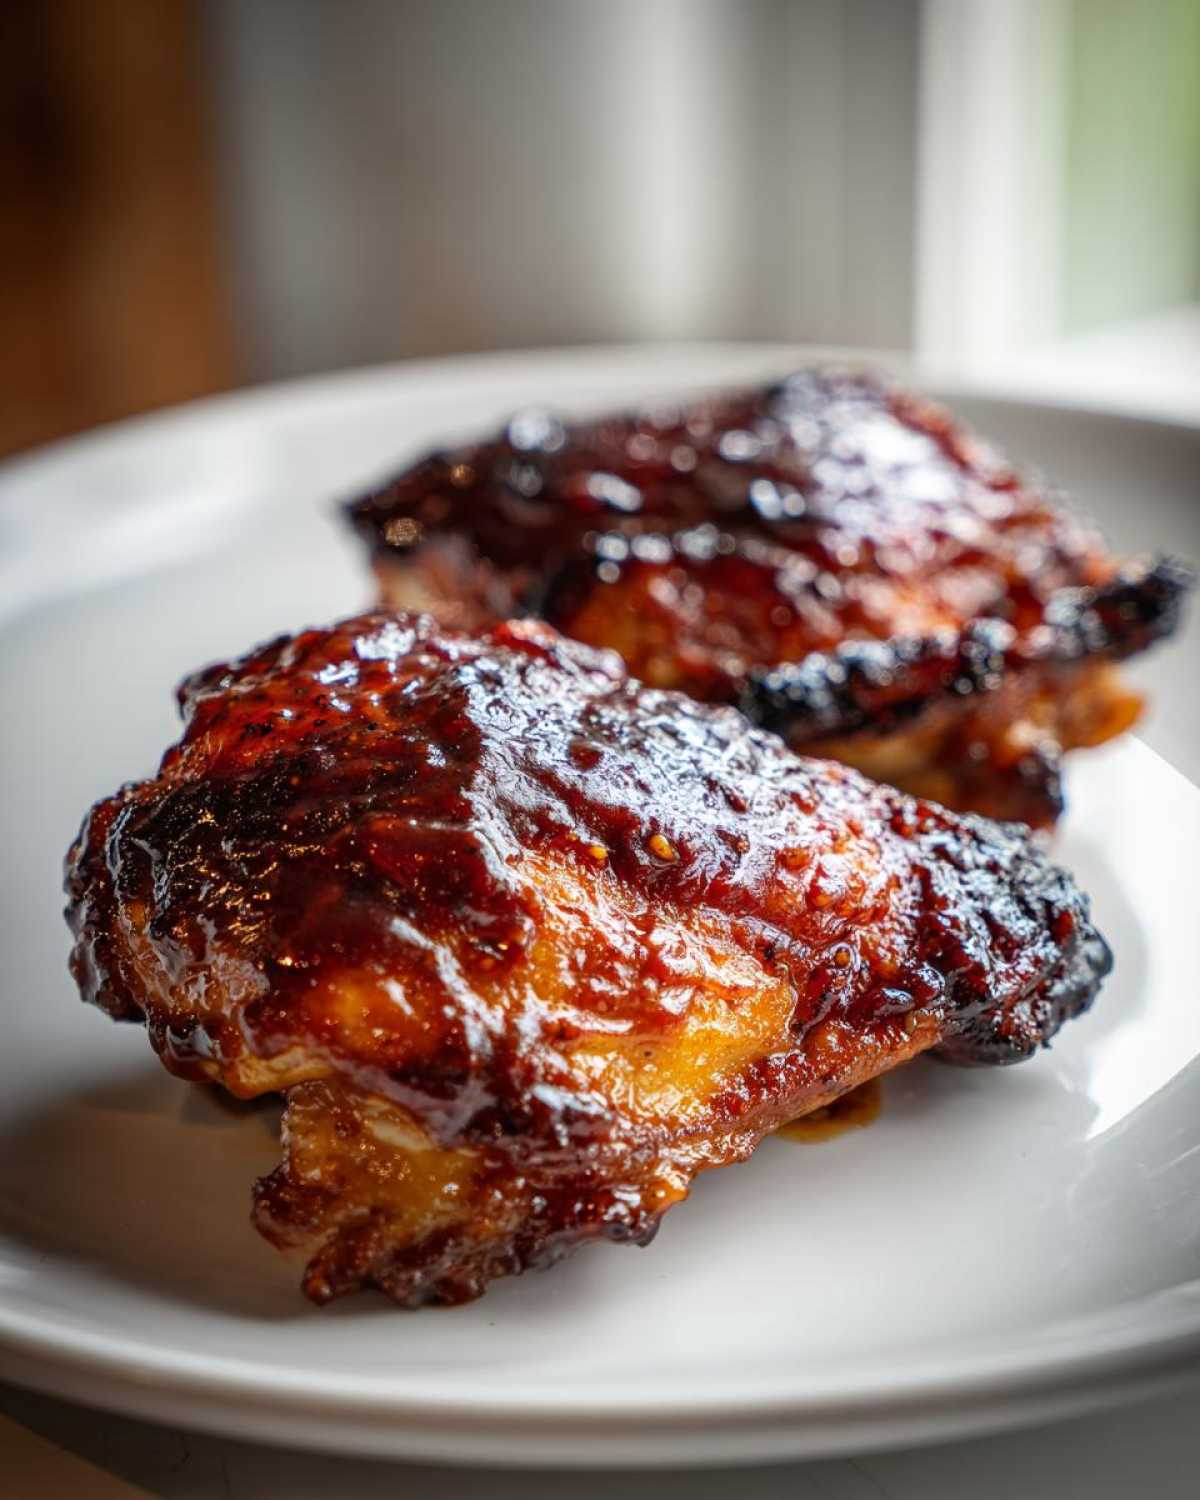
Take that first half of your glaze and brush it evenly over all the exposed chicken skin. Pop them in the preheated 400°F oven for 25 minutes. When that timer goes off, pull them out carefully. Now, use the second half of the *first* glaze batch to brush another layer over the tops. Back into the oven they go for another 15 to 20 minutes. You’re looking for the internal temperature to hit 165°F. For the grand finale—and this is where the real caramelization happens—switch your oven to broil for just the last 2 or 3 minutes. You MUST watch them like a hawk here! If you see it burning, pull it out immediately. The skin should be dark mahogany, bubbly, and incredibly sticky. Let them sit for five minutes to rest before you dive in. You’ll never make sticky chicken any other way!
Tips for Maximum Stickiness on Your Sticky Chicken Thighs Recipe
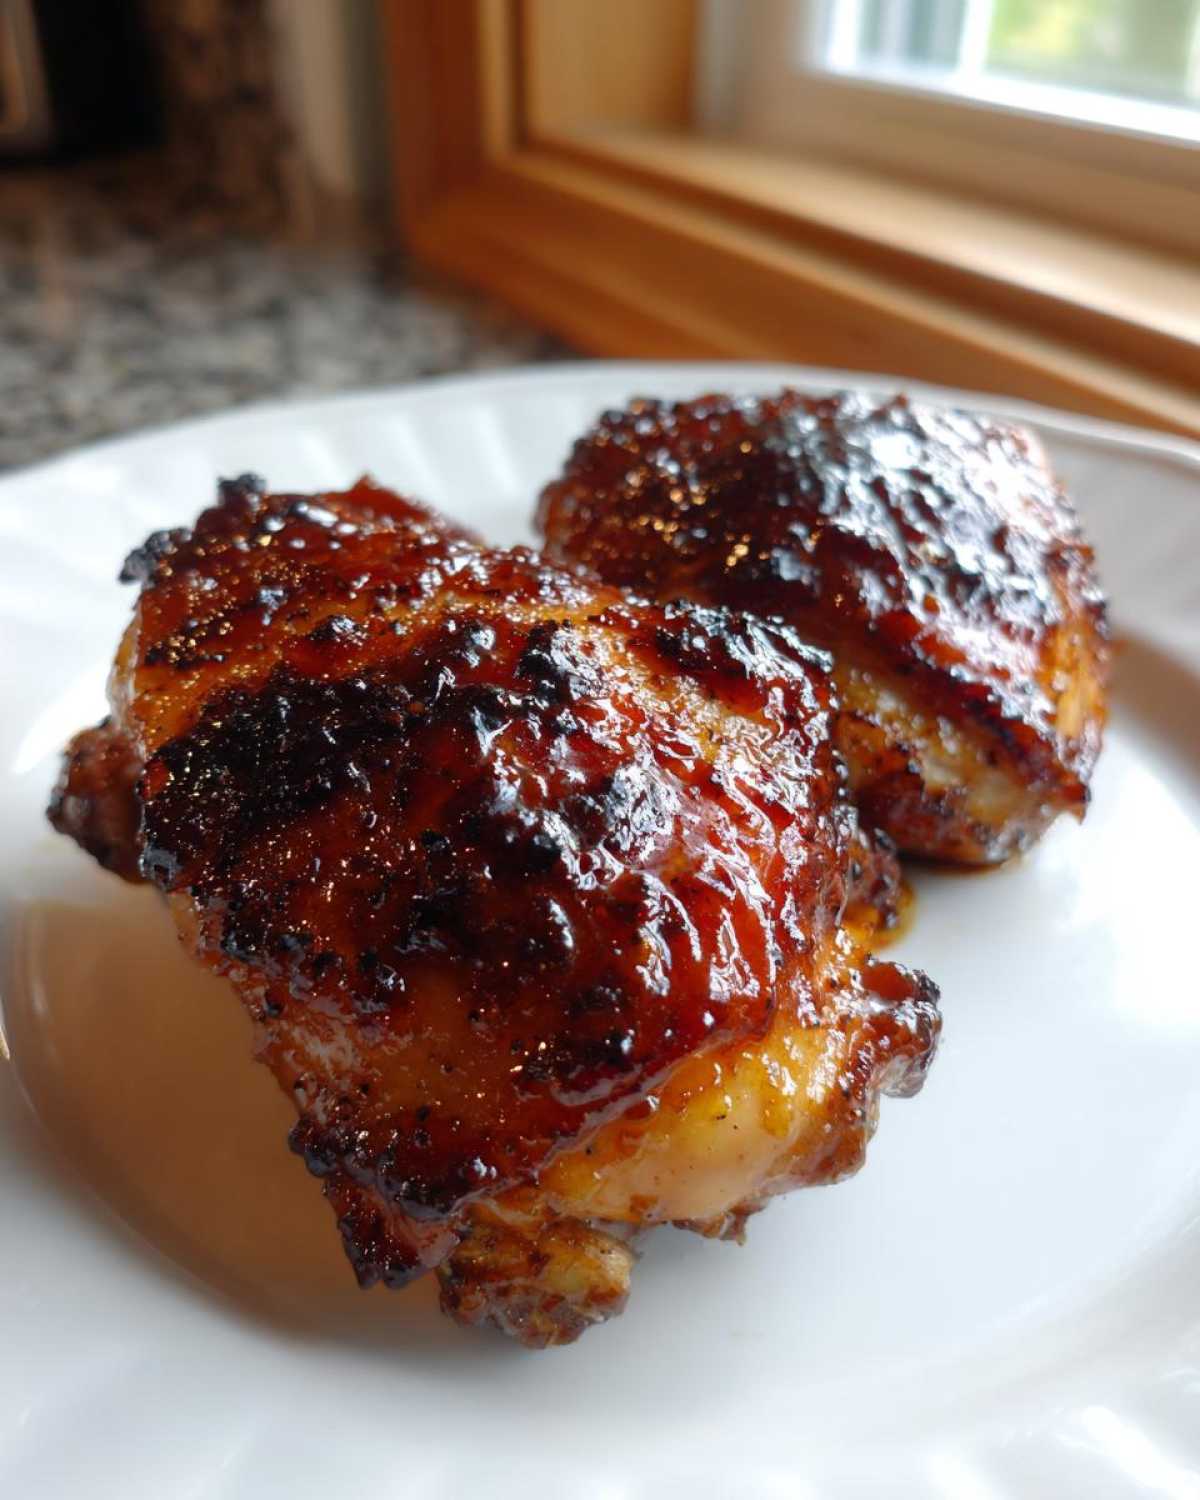
So you’ve followed the steps, but you’re yearning for that ultra-gooey, almost lacquered shine? Listen up, because getting that perfect final texture on your Sticky Chicken Thighs Recipe is all about managing the sugar content near the end. The most important thing I told you earlier was to reserve some of that *initial* glaze mixture before you even brushed the first coat on? That’s your secret weapon for the *final* coat.
When you pull that chicken out for the second glazing—right before it goes into the high heat—use the reserved glaze. Since it hasn’t been introduced to raw chicken juices yet, it stays pure and concentrated. Then, that final 2-3 minutes under the broiler is non-negotiable for setting that shine. That quick blast of concentrated heat turns that sugary glaze into the ultimate sticky coating. Seriously, if you want to know How to Make Sticky Chicken that demands extra napkins, it’s all in that final, careful blast of heat!
If you find your glaze still seems a tiny bit thin, you can very quickly whisk in half a teaspoon of cornstarch mixed with a teaspoon of cold water right before you use that final layer. It thickens up almost instantly under the heat. Enjoy getting delightfully messy with these sweet and sticky chicken thighs!
Alternative Cooking Methods for Sticky BBQ Chicken Thighs with Honey Glaze
I know not everyone wants to turn their kitchen into a sauna by using the oven, especially when the weather is beautiful! Good news—these Sticky BBQ Chicken Thighs with Honey Glaze adapt really nicely to the outdoors, too. You get a slightly smokier flavor when you grill, which pairs amazingly well with the sweetness of the honey.
Using the Grill for Perfectly Glazed Chicken Thighs
If you’re going for that classic barbecue taste and want to make some amazing Grilled Honey Chicken, you need to focus on two things: indirect heat and patience! Start by getting your grill going so you have one side hot (direct heat) and one side medium. We don’t want to burn that sugar right away, right?
Sear the chicken skin-side down over the direct heat for just a minute or two per side to get some initial color, but then move them over to the indirect heat section. Cook them partly through there—about 25 minutes. Only during the last 10 minutes of total grilling time do you start brushing on that homemade glaze. You’ll brush it every few minutes until it gets thick and gorgeous. Remember, direct flame on high sugar is a fast track to charcoal!
A Slow Cooker Modification for Easy Weeknight Meals
If you need something where you can set it and forget it until dinner time, we can tweak this for the slow cooker, too. This won’t give you that crunchy skin, but it makes for incredibly tender, fall-apart meat—a really fantastic Easy Chicken Thigh Dinner option. Now, here’s the kicker on the glaze: you can’t really build up the sticky coat in the slow cooker itself.
Cook the chicken thighs on low for about 5 or 6 hours with just a tiny splash of liquid (maybe a tablespoon of the apple cider vinegar) but *no* initial glaze. Once they are cooked through, pull them out of the slow cooker juices. Then, you absolutely must transfer them to a foil-lined baking sheet or an oven-safe dish. Brush them generously with the full glaze mixture and hit them under the broiler for 3 to 5 minutes until that sauce bubbles up thick and sticky. It’s a two-step process, but it gets the job done beautifully!
Serving Suggestions for Your Flavorful Chicken Dinner Ideas
Now that you’ve made this incredible, messy masterpiece, you need sides that can stand up to the richness! Because these Sticky BBQ Chicken Thighs with Honey Glaze are so intensely sweet and smoky, you want things that offer coolness, crunch, or something simple to soak up that extra sauce.
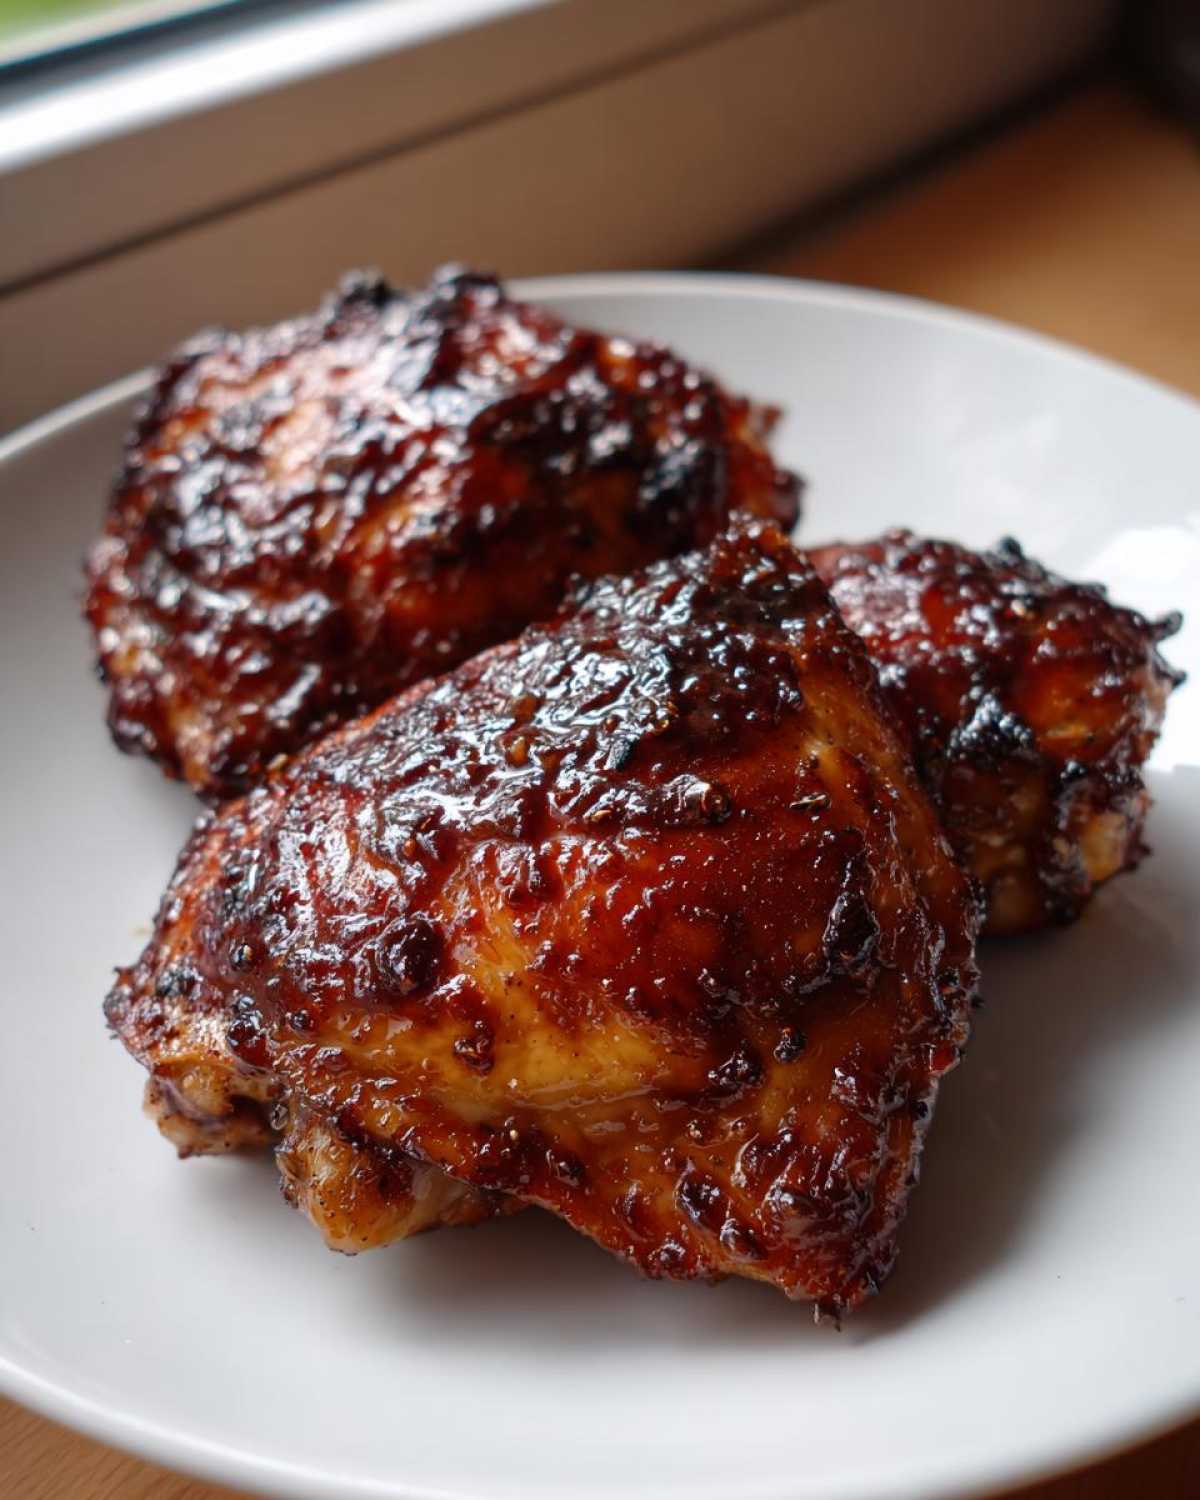
My absolute favorite pairing is a creamy, slightly sharp coleslaw. The crunch and coolness are the perfect counterpoint to the sticky coating. Cornbread is another must-have; I love using leftover pieces to dip into the pan drippings! For something lighter, a sharp, vinegar-based green salad cuts right through the richness. These are truly some of the best Flavorful Chicken Dinner Ideas you can whip up when you want everyone at the table reaching for seconds!
If you’re looking for something a little different but still in that comforting zone, you could try the BBQ flavors in a totally different format with some loaded potato skins. But usually, slaw and cornbread win the day around here!
Storage and Reheating Instructions for Glazed Chicken Thighs
Don’t you hate when leftovers lose their magic? We fought hard to get that perfect sticky coating on these chicken thighs, so we aren’t letting them turn dry in the fridge! The good news is that because this glaze has so much sugar, it actually acts as a bit of a preservative on the chicken itself. Store any leftovers in a good, airtight container. Seriously, seal it up tight! They should last you a good three to four days in the refrigerator.
Now, for the crucial part: reheating. If you throw these straight into the microwave, that beautiful honey glaze is going to turn into a greasy, sad puddle. That’s a hard pass for me. We need that glaze to re-caramelize, not steam.
For the best result, you want to use dry heat. Pop those sweet and sticky bits onto a small baking sheet lined with foil (because cleanup, right?) and stick them back into about a 350°F oven for about 10 to 12 minutes. This lets the heat penetrate slowly, warming the meat through while reactivating that glossy, sticky layer on the skin. If you happen to have an air fryer—which I highly recommend for reheating leftovers—even better! Five minutes at 350°F and they come back almost exactly like they were fresh out of the oven. Resist the microwave urge, and you’ll have a fantastic second meal!
Frequently Asked Questions About Sticky Chicken Thighs
I totally get it; when you see a recipe that looks this delicious, naturally, you’re going to have questions! When I first started experimenting with glazes, I worried constantly about things burning or the chicken not being safe to eat. Don’t worry, I’ve covered all the bases you might be thinking about here. These answers should give you the confidence to tackle this recipe head-on and produce a truly fantastic Glazed Chicken Thighs dinner!
Can I use a different type of sugar instead of honey in this recipe?
That is a fair question, as honey is pretty crucial here! Honey isn’t just sweet; its specific chemical makeup contributes massively to the ‘stick’ factor because of how it caramelizes when heated. It creates a softer, glossier set than granulated sugar would. If you are totally out of honey, the absolute best substitute you can use is pure maple syrup. It acts similarly under heat. I would try to avoid straight brown sugar as a 1:1 swap for the honey component because it can result in a grittier texture rather than that smooth stickiness we are aiming for. Stick to honey or maple syrup for the best results!
How do I ensure the skin stays crispy while getting the glaze sticky?
This is the million-dollar question for any glazed chicken recipe, really! You have to separate the cooking time from the glazing time. Remember how I told you about using two different coats? That’s step one: bake the chicken for a good 25 minutes *before* the first glaze application. This gives the skin time to render its fat and start crisping up on its own.
Step two is the heat management at the end. You wait until the chicken is almost done cooking, then you apply the final, thick layer of glaze, and that’s when you switch the heat up to broil for just a couple of minutes. The high, direct heat caramelizes the sugars in the glaze quickly without steaming the skin underneath. It’s a delicate dance, but entirely worth the effort for that perfect texture!
Is this an Easy Chicken Thigh Dinner option for beginners?
Yes, absolutely, I consider this a fantastic, high-reward recipe for beginners! The prep work is really just drying the chicken, sprinkling seasoning, and whisking a sauce—super approachable stuff. It’s actually much more forgiving than, say, trying to pan-sear a cutlet!
The only part where you need to pay close attention is that final 2 to 3 minutes under the broiler when you are setting that final sticky coat. That’s the only place an error can happen quickly. But honestly, if you just stand there and watch it—and I mean really watch it—you’ll get perfect results. It’s such a great confidence booster for anyone learning to make a great Easy Chicken Thigh Dinner!
Nutritional Estimates for Sticky BBQ Chicken Thighs with Honey Glaze
Now, I know some of you are tracking macros or just curious about what’s in this amazingly flavorful meal, so here are the estimates for these Sticky BBQ Chicken Thighs with Honey Glaze. Just remember, these are rough calculations based on my specific ingredient amounts! I use standard store-bought BBQ sauce, and since we are using bone-in, skin-on thighs, the fat content will vary depending on how much skin you choose to eat.
We are calculating this based on a serving size of two thighs. Overall, it’s a hearty meal that packs a serious punch of protein!
- Serving Size: 2 thighs
- Calories: 450
- Protein: 35g
- Fat: 22g (Note: This includes the skin fat, which you can trim!)
- Carbohydrates: 30g (Mostly from that wonderful honey and BBQ sauce, obviously!)
- Sugar: 25g
- Sodium: 650mg
A Note on My Nutritional Estimates
I always feel like I have to give this little disclaimer because I’m a home cook, not a lab technician! These numbers are based on the ingredients listed, but they can swing wildly depending on what brand of BBQ sauce you choose—some are surprisingly high in sodium or sugar. Also, if you decide to snack on a little extra skin while glazing (and who hasn’t?), your total fat content will go up a bit.
For the most accurate reading for your own diet, you can always check the labels of the specific products you bought. For my full breakdown on ingredient sourcing and how I approach recipe testing transparency, you can check out my disclaimer page here: details on nutritional reporting. But for a solid, delicious weeknight dinner, I think these results are fantastic for getting a satisfying, sweet, and savory meal on the table!
PrintSticky BBQ Chicken Thighs with Honey Glaze
Make flavorful, sticky BBQ chicken thighs coated in a sweet honey glaze. This recipe works well for baking or grilling.
- Prep Time: 10 min
- Cook Time: 45 min
- Total Time: 55 min
- Yield: 4 servings
- Category: Main Course
- Method: Baking
- Cuisine: American
- Diet: Low Fat
Ingredients
- 8 bone-in, skin-on chicken thighs
- 1 tablespoon olive oil
- 1 teaspoon salt
- 1/2 teaspoon black pepper
- 1/2 cup quality BBQ sauce
- 1/4 cup honey
- 2 tablespoons apple cider vinegar
- 1 tablespoon Worcestershire sauce
- 1 teaspoon smoked paprika
- 1/2 teaspoon garlic powder
Instructions
- Preheat your oven to 400°F (200°C). Lightly grease a baking sheet or line it with foil for easy cleanup.
- Pat the chicken thighs completely dry using paper towels. Rub the chicken with olive oil, then season evenly with salt and pepper. Place the thighs skin-side up on the prepared baking sheet.
- In a small bowl, whisk together the BBQ sauce, honey, apple cider vinegar, Worcestershire sauce, smoked paprika, and garlic powder to create the glaze.
- Brush half of the glaze mixture evenly over the chicken thighs.
- Bake for 25 minutes.
- Remove the chicken from the oven and brush the remaining glaze over the thighs.
- Return the chicken to the oven and bake for another 15 to 20 minutes, or until the internal temperature reaches 165°F (74°C) and the glaze is dark and sticky. For extra crispiness, switch the oven to broil for the last 2-3 minutes, watching closely to prevent burning.
- Let the chicken rest for 5 minutes before serving.
Notes
- For grilling, cook over medium indirect heat, brushing with glaze during the last 10 minutes of cooking.
- To make the glaze extra sticky, reserve a small amount of the glaze mixture before brushing the first time, and use it for the final coat.
- If using boneless, skinless thighs, reduce the total cooking time by about 10 minutes.
Nutrition
- Serving Size: 2 thighs
- Calories: 450
- Sugar: 25
- Sodium: 650
- Fat: 22
- Saturated Fat: 7
- Unsaturated Fat: 15
- Trans Fat: 0
- Carbohydrates: 30
- Fiber: 1
- Protein: 35
- Cholesterol: 120