

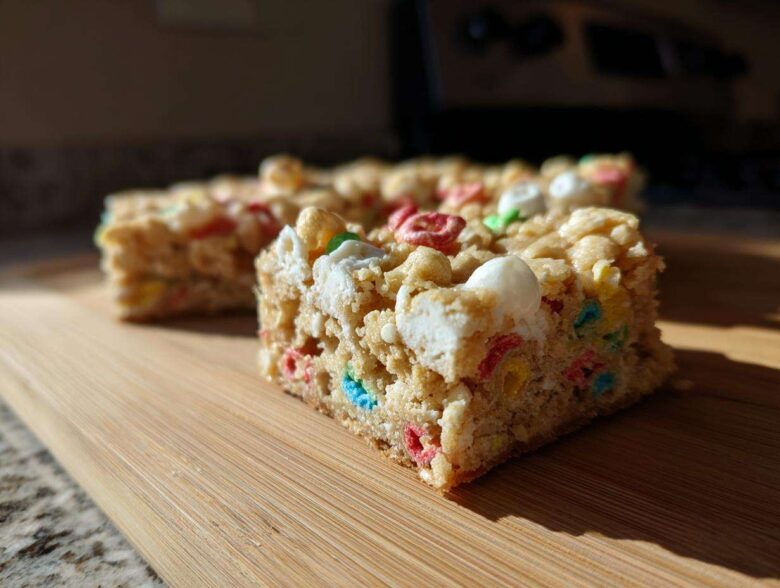
If you’re anything like me, you sometimes just need a dessert that screams, “I am having fun today!” Forget sad, boring squares; we are diving headfirst into color and pure, unadulterated sweetness. That’s why I’ve perfected my recipe for the ultimate chewy Lucky Charms White Chocolate Blondies. Seriously, the combination of that rich, vanilla-packed blondie base, the creamy white chocolate, and those bright little marshmallow clusters is just magic. I love making these when the weather is gray because they instantly brighten up my whole kitchen. Trust me, once you try these sweet and chewy bars, they’ll become your go-to unique dessert bar!
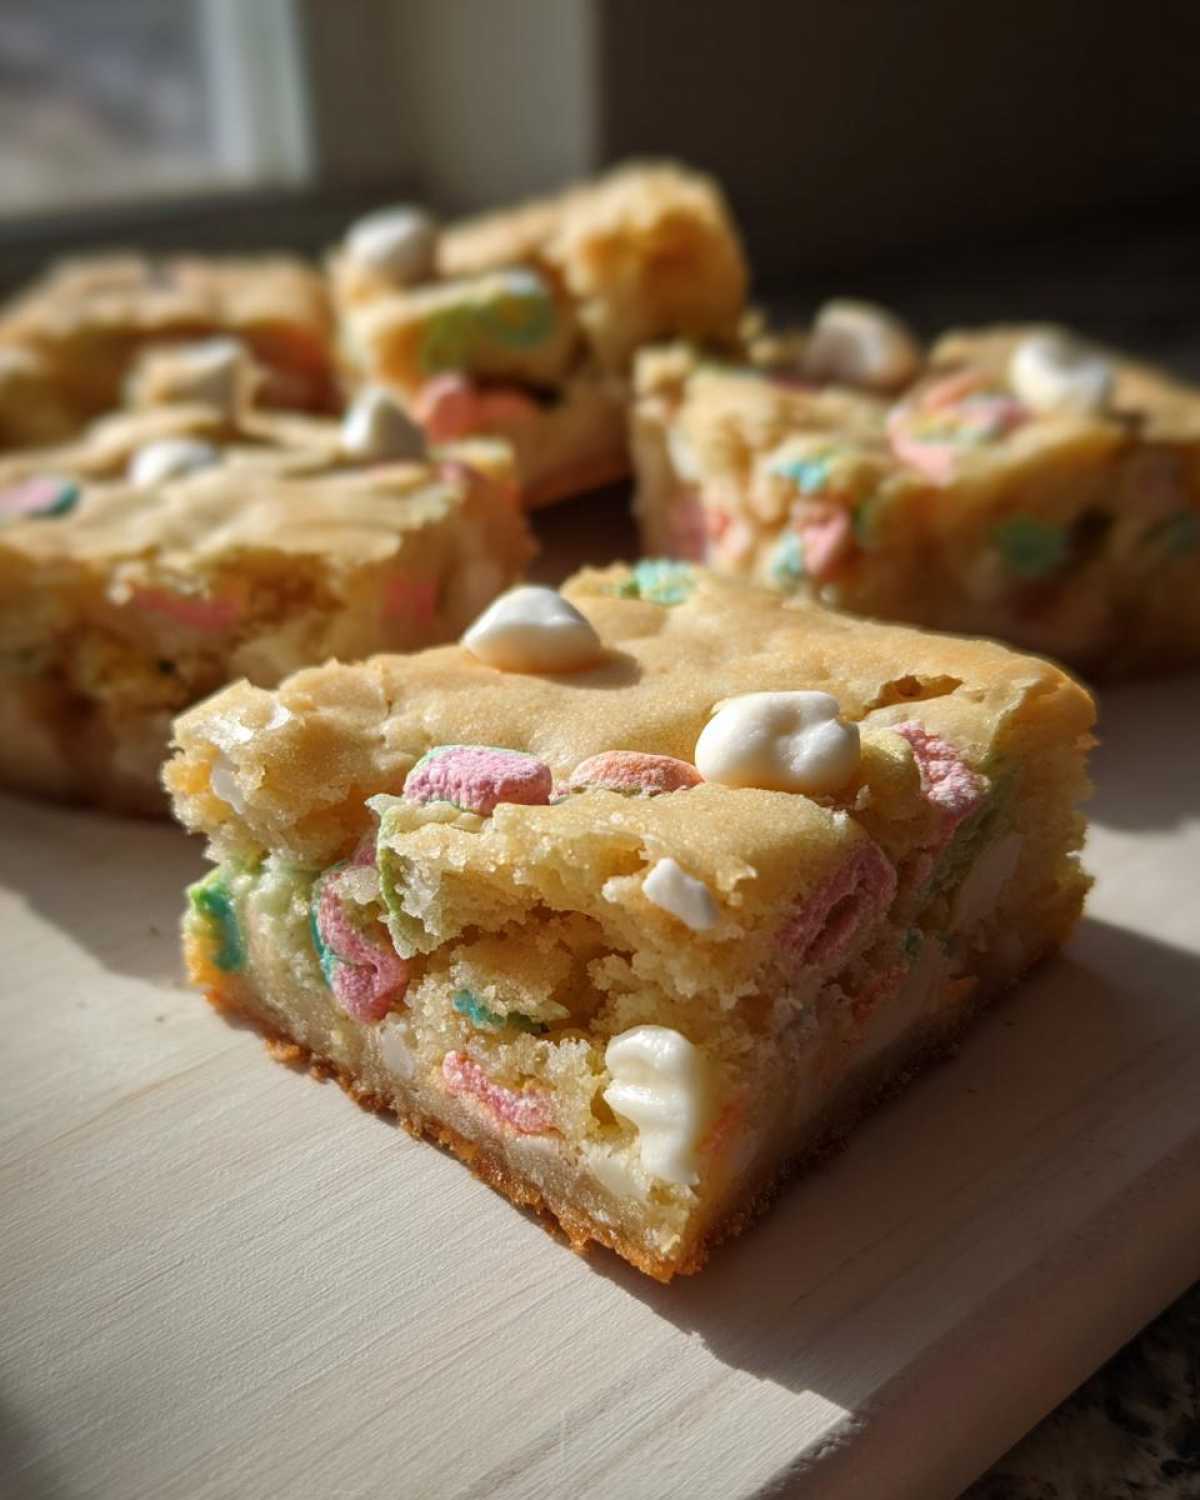
It really is all about balancing that buttery base with the mix-ins. While you’re here checking out this fun recipe, I highly recommend taking a peek at who we are to see why baking traditions like this are so important to us!
Why You Will Love These Lucky Charms White Chocolate Blondies
I’ve made a lot of desserts in my life, but these are the bars everyone fights over. They’re simple enough for a weeknight bake but exciting enough for a party! Here’s why you absolutely need to try this batch:
- The Ultimate Chew: We nail down that perfect texture. These aren’t cakey or dry; they are wonderfully chewy all the way through, thanks to the brown sugar base.
- Super Quick Prep: This is one of those easy blondie recipes that comes together faster than calling for takeout. You are looking at maybe 15 minutes of actual work before it hits the oven.
- Unbeatable Color Pop: Those little green, pink, and orange cereal pieces look fantastic, making these my go-to for any festive baking adventure.
- Creamy White Chocolate Bliss: The white chocolate chips melt just enough to create ribbons of sweetness throughout the bar.
- Simple & Familiar Ingredients: Apart from the cereal, everything else in this wonderful Lucky Charms White Chocolate Blondies recipe is something you likely already have in your pantry.
- Perfect for Kids (and Adults!): They are fun, nostalgic, and easy to handle, making them the best dessert idea for school bake sales or casual get-togethers.
- Great for St. Patrick’s Day: While they look great anytime, the colors make them a showstopper for St. Patrick’s Day Blondies celebrations!
Essential Ingredients for Lucky Charms White Chocolate Blondies
Okay, listen up, because the ingredients here are what separates a good bar from a truly chewy, spectacular bar. I made sure to write down *exactly* how Grandma would write it, which means specificity matters! For instance, using light brown sugar isn’t just a choice; the molasses content is crucial for that deep, caramelized flavor you associate with the best blondies.
When you look at this list, keep the concept of ‘divided’ in mind, especially when it comes to that colorful cereal. It’s important we don’t dump it all in at once if we want that beautiful colored topping!
- One cup (that’s two full sticks!) of unsalted butter that needs to be fully melted before we start whisking.
- One and a half cups of light brown sugar, and trust me, it needs to be packed tightly into the measuring cup!
- Two large eggs, straight from the fridge is fine since we mix them right away.
- One tablespoon of lovely, pure vanilla extract. Don’t skimp here!
- One and three-quarter cups of all-purpose flour. We’ll treat this gently later on.
- Half a teaspoon of salt to balance out all that sugar.
- One cup of white chocolate chips. They melt beautifully into the batter.
- One and a half cups of Lucky Charms cereal, but remember, this is divided—we use most of it in the batter and save some for garnish!
Gathering Your Equipment for Perfect Lucky Charms Blondies Recipe
You don’t need a fancy stand mixer for these, which is another reason I love this recipe so much. It’s truly a beginner-friendly bake! Having the right containers and essentials ready before you melt the butter makes the process seamless. If you are ready, grab these things from your cupboards!
First off, the vessel for baking is key. You absolutely must use a 9×13 inch baking pan. Anything smaller and your blondies will bake up too thick and might get a raw middle, and anything much bigger and they’ll be too thin and crispy—we want chewy, remember?
Here’s the rundown on what you’ll need to assemble these sweet bars:
- Two sturdy mixing bowls—one large for the main batter and one medium for dry ingredients.
- A reliable whisk for incorporating the sugar and eggs, and maybe a rubber spatula for the folding part later on.
- Your 9×13 inch baking pan.
- Crucially, parchment paper! This is non-negotiable for easy removal. You want big sheets so you can make little handles that stick up over the sides.
- Measuring cups and spoons, obviously, for accuracy.
- A cooling rack so the bottom doesn’t steam itself soggy while it cools down.
Once all your gear is out, you can focus entirely on mixing the batter, and that’s when the fun really starts!
Step-by-Step Instructions for Making Lucky Charms White Chocolate Blondies
Alright, this is where the real magic happens! Baking these bars is super straightforward, but following the order I’ve laid out here is the secret sauce that keeps them chewy and stops them from turning into crumbly rocks. We need focus for this part, but it moves fast! Remember that contact is important for any questions you have, so feel free to reach out via our contact page if you get stuck.
We’ll tackle preheating first, then the wet ingredients, then dry, and finally, we fold everything together. Pay close attention to when we add the cereal because that’s a two-part process for these Lucky Charms White Chocolate Blondies!
Preparing the Pan and Oven for Your Lucky Charms White Chocolate Blondies
First things first: get that oven cranked up to 350°F (175°C). Preheat time is crucial, honestly! Next, grab your 9×13 inch pan. I insist you line this completely with parchment paper. Don’t just use a little square in the middle—you need the paper long enough to create little handles sticking up over the shorter sides of the pan. This lets you lift the entire cooled slab out later! This simple step is a lifesaver when it comes to cutting clean squares.
Mixing the Wet and Dry Components of the Blondie Batter
Grab your big bowl! Whisk that melted butter and the packed brown sugar together until they look smooth and gorgeous. Now beat in your two eggs one by one, mixing well after each addition. Don’t forget the vanilla! In a separate bowl, just quickly whisk the flour and salt together so they’re evenly blended. Now, here’s the rule: add the dry stuff to the wet stuff gradually. Mix it *just* until you see no more dry streaks of flour. Stop mixing there! Overmixing develops gluten, and that gives you a cake, not a chewy bar.
Folding in Mix-Ins and Baking Your Rainbow Cereal Dessert Squares
This is the fun part! Gently fold in your cup of white chocolate chips along with one cup of the Lucky Charms cereal. Remember, we are saving that last half-cup for later! Spread this thick batter evenly into your prepared pan. Now, take that final 1/2 cup of cereal and sprinkle it lightly all over the top. That beautiful garnish gets baked right in! Pop it into the preheated oven for 25 to 30 minutes. You’re looking for set edges, and when you test the center with a toothpick, it should have moist crumbs clinging to it, not wet batter. Cool it completely before lifting it out and slicing!
Expert Tips for Chewy White Chocolate Cereal Bars
I’ve learned a few things over the years about making sure these bars hit that perfect sweet spot between gooey and sturdy. Baking, especially with mix-ins like cereal, isn’t always a straight line, so I want to save you from any potential baking headaches!
The number one tip, and I mean this with my whole heart, is related to time. Don’t walk away from the oven in the final five minutes of baking! Because we are aiming for those famously chewy bars, we actually want them slightly underbaked. If you pull them out when the toothpick test shows just a few moist crumbs attached—not wet batter, mind you—they will keep cooking on the hot pan as they cool. This stops them from drying out.
Another trick I adore for flavor enhancement is managing those marshmallows. The cereal marshmallows tend to get a little hard or dissolve entirely while baking, which is okay, but if you want that extra burst of gooey, sugary flavor, try this: save about half of the actual marshmallow pieces from your cereal. During the last five minutes of baking, just sprinkle those reserved marshmallows right on top. They’ll puff up slightly and stay soft, giving you a wonderful surprise in every bite of your White Chocolate Cereal Bars.
Finally, patience during the cooling phase is serious business. You have to let them cool completely—and I mean *completely*—in that pan before you even attempt to lift them out. If you try to cut them warm, they will smear and lose all their gorgeous structure. If you’re struggling to wait (and trust me, I always struggle!), pop the whole pan into the fridge for about an hour. That chilling process sets the white chocolate and makes slicing them into neat little dessert squares so much easier!
Customizing Your Lucky Charms Blondies Recipe
Part of the joy of baking something fun like this is making it exactly how *you* want it, right? While these Lucky Charms Blondies are phenomenal as written, they are just a fantastic base for experimentation! Think of this recipe as your canvas for making unique dessert bars. Don’t be afraid to get creative with your mix-ins!
I’ve played around with this recipe more times than I can count trying to find the next great combination. Here are a few easy swaps and additions that I absolutely love for when you want to switch things up.
Swapping Out the White Chocolate Chips
If white chocolate isn’t your absolute favorite, don’t panic! The structure of this blondie recipe is so solid that it handles richer flavors really well. My favorite modification is trading the white chocolate chips for milk chocolate chips. Milk chocolate adds a familiar, creamy sweetness that still complements the vanilla base perfectly, though it might muddy the colors just a tiny bit.
Alternatively, if you like a bit of a textural challenge, use an equal amount of dark chocolate chunks instead. You get those nice sharp, slightly bitter edges that cut through the sweetness of the cereal—it’s delicious!
Adding Some Extra Crunch or Nuttiness
If you want to turn these into an even heartier bar, you have to consider nuts. I usually stick to about a half cup of chopped pecans or walnuts. Make sure they are lightly toasted first! Toasting draws out the oils and really deepens their flavor, which is a huge improvement. Just fold them in right alongside the white chocolate chips and the first cup of cereal.
For a completely different kind of crunch, you can try swapping out half of the white chocolate chips for butterscotch chips. Butterscotch and cereal are surprisingly good friends!
Experimenting with Cereal Variations
If you can’t find Lucky Charms, or maybe you just want a new flavor profile for next time, you can absolutely try other cereals here. Think about texture and color balance. Cinnamon Toast Crunch works amazingly well if you want a warmer spice note instead of the rainbow fruitiness.
For holidays other than St. Patrick’s Day, try using certain seasonal marshmallows if you can snag them. For example, Valentine’s Day heart marshmallows are fantastic stirred in! Just remember, any cereal you use should ideally have some sort of dried marshmallow element, as those marshmallows are what give you that essential *pop* when you bite into your Rainbow Cereal Dessert Squares.
Storing and Serving Your Homemade Blondies with Mix Ins
We’ve made it through the hard part—the baking! Now comes the test of willpower: waiting for them to cool down. Seriously, don’t touch these bars when they come out of the oven, or you’ll end up with a sticky, collapsed mess. You absolutely must let them cool down completely before you even think about slicing them. I know it’s hard, especially when that sweet smell of white chocolate and marshmallow is filling your kitchen, but trust me on this one.
I usually like to let them cool on the counter for about an hour first, just to let that initial heat dissipate. Then, use those parchment paper handles you made earlier to lift the entire slab out of the 9×13 pan and move it onto a sturdy cutting board or a wire rack. Let it finish cooling there until it’s room temperature all the way through.
Cooling Completely for the Cleanest Cuts
The key to getting those gorgeous, sharp squares for your Homemade Blondies with Mix Ins is patience and temperature control. If you try to slice them warm, the melted white chocolate will act like glue, pulling the sides inward, and the centers will just squish out. When they are fully cool, the structure is set. If you are really struggling to wait, pop the whole thing (still on the parchment) into the fridge for an hour or two. Chilling makes them firm up beautifully, and you can slice them cleaner than a whistle!
Keeping Them Fresh with the Right Storage for Up to Four Days
These bars really do stay fantastic for several days, which is great because they make amazing leftovers! The best way to store them is in a single layer in an airtight container. If you stack them, you need to put a tiny square of parchment paper or wax paper between each layer. This stops the tops of the bottom layer from sticking to the bottoms of the top layer, especially since we have gooey white chocolate in here.
Keep them stored at room temperature. Putting these in the fridge can sometimes make them a bit too firm and stiff, and while they will still taste good, they won’t be quite as delightfully chewy as they should be. If you store them properly, they should taste just as fresh on day four as they did the day you made them.
Wonderful Ways to Serve Your Rainbow Cereal Dessert Squares
While they are perfect just on their own for a quick snack, these Rainbow Cereal Dessert Squares scream for an accompaniment when you’re serving them after dinner. Because they are so sweet and chewy, they pair perfectly with something cold and creamy to balance the richness.
My absolute favorite serving suggestion is a small square warmed up just slightly in the microwave for about 10 seconds, served alongside a scoop of vanilla bean ice cream. The contrast between the warm, gooey blondie and the cold, melting ice cream is heaven! If you’re feeling extra fancy, a tiny drizzle of chocolate sauce on top never hurts, either, but honestly, they are so flavorful they don’t really need anything else!
Frequently Asked Questions About Lucky Charms White Chocolate Blondies
I get so many questions every time I post these colorful bars, and that’s totally fair because there are a few little nuances in making sure they come out perfectly chewy instead of cakey! I’ve pulled together some of the things people ask most often about this Lucky Charms Blondies Recipe. Before we jump in, please remember to review our terms and conditions if you have any legal questions about using recipes online!
How can I cut these bars the neatest way possible?
This is my biggest pet peeve! Warm bars that smear everywhere when you try to cut them. Honestly, the trick comes down to cooling them totally—and I mean *totally* cool. If you are in a rush, chilling the entire uncut slab in the fridge for at least an hour makes a world of difference. Once chilled, use a long, sharp knife and wipe the blade clean between every single cut. That prevents that sticky white chocolate residue from dragging across the next slice!
Can I skip the brown sugar and use white sugar?
Oh, please don’t! If you want that deep, buttery, classic blondie flavor, you need that molasses from the light brown sugar. If you used only white sugar, you’d end up with something much closer to a sugar cookie bar, and it wouldn’t have the signature chewiness we are going for in these Sweet and Chewy Bars. The brown sugar holds onto moisture better, which is key!
What if I don’t have Lucky Charms cereal? Can I substitute?
You absolutely can substitute, but you’ll lose some of that signature look and flavor! If you’re making these for a non-St. Patrick’s Day occasion and just want the rainbow cereal look, you can buy those dried marshmallows separately online or sometimes in large craft/baking stores. If you’re just looking for a cereal swap, like for general White Chocolate Recipes with Cereal, Froot Loops or even generic rainbow swirl cereal works in a pinch. Just make sure whatever you use has some sort of dehydrated marshmallow element mixed in if you can!
My blondies seem a little too soft in the middle. Should I bake them longer?
This really depends on when you tested them! If you tested them right out of the oven, they will always seem underbaked—that’s the secret to success! If you test them after they’ve rested for an hour and they are still sloppy, then yes, put them back in the oven for 3 to 5 minutes max. Remember, a perfect blondie, even an Easy Blondie Recipe like this one, should pull out with moist crumbs, not wet batter. They firm up as they cool down on the rack!
How do I keep these fresh if I need to make them ahead of time?
For the best results as Festive Baked Goods, store them airtight at room temperature for up to four days. I like to put parchment paper between layers if I stack them, just to keep that colorful topping from sticking to the layer underneath. They don’t actually need refrigeration, and actually, chilling them can make them too hard, so room temp is best for maintaining that chewy center!
Nutritional Estimates for This Festive Baked Goods Recipe
Now, I know what you’re thinking! With all that butter, sugar, and delicious cereal mixed in, these aren’t exactly salad material. And you’d be right! These Lucky Charms White Chocolate Blondies are truly a celebration dessert, meant to be enjoyed fully and without guilt.
I want to be super clear here, just like my disclaimer page mentions (you can read our full disclaimer here), these numbers are just estimates calculated based on standard ingredient amounts. Your exact counts might vary based on how much brown sugar you pack or the exact brand of white chocolate you use, so take these as a good general guideline!
When you look at the breakdown, you see that the fat and sugar are on the higher side—that’s what makes them so incredibly flavorful and chewy, folks! But hey, they are small squares, and a little bit of pure joy goes a long way.
- Serving Size: 1 square (You might want two, I won’t judge!)
- Calories: Approximately 280
- Total Fat: 16 grams (with 10g of that being saturated fat from butter and chocolate—worth it!)
- Cholesterol: Around 55 milligrams
- Carbohydrates: 33 grams
- Sugar: About 25 grams (this is where the magic happens!)
- Protein: 3 grams
- Sodium: 150 milligrams
Think of this as one of those Festive Baked Goods that you enjoy with your coffee or save for a special treat. Portion control is easiest when you make sure to cool them completely before cutting them neatly, as I mentioned before!
PrintLucky Charms White Chocolate Blondies
Make these chewy blondies featuring white chocolate chips and colorful Lucky Charms cereal pieces. This recipe provides a simple method for a fun, sweet bar dessert.
- Prep Time: 15 min
- Cook Time: 30 min
- Total Time: 45 min
- Yield: 16 servings
- Category: Dessert
- Method: Baking
- Cuisine: American
- Diet: Vegetarian
Ingredients
- 1 cup (2 sticks) unsalted butter, melted
- 1 1/2 cups packed light brown sugar
- 2 large eggs
- 1 tablespoon vanilla extract
- 1 3/4 cups all-purpose flour
- 1/2 teaspoon salt
- 1 cup white chocolate chips
- 1 1/2 cups Lucky Charms cereal, divided
Instructions
- Preheat your oven to 350°F (175°C). Line a 9×13 inch baking pan with parchment paper, leaving an overhang on the sides for easy removal.
- In a large bowl, whisk the melted butter and brown sugar together until smooth.
- Beat in the eggs one at a time, then stir in the vanilla extract.
- In a separate bowl, whisk together the flour and salt. Gradually add the dry ingredients to the wet ingredients, mixing until just combined. Do not overmix.
- Fold in the white chocolate chips and 1 cup of the Lucky Charms cereal.
- Spread the batter evenly into the prepared baking pan.
- Sprinkle the remaining 1/2 cup of Lucky Charms cereal over the top of the batter.
- Bake for 25 to 30 minutes, or until the edges are set and a toothpick inserted near the center comes out with moist crumbs attached.
- Let the blondies cool completely in the pan on a wire rack before lifting them out using the parchment paper overhang.
- Cut into squares and serve.
Notes
- For extra chewiness, slightly underbake the blondies by about 2 minutes.
- If you want a stronger marshmallow flavor, reserve some cereal marshmallows to press onto the top halfway through baking.
- Store leftovers in an airtight container at room temperature for up to four days.
Nutrition
- Serving Size: 1 square
- Calories: 280
- Sugar: 25
- Sodium: 150
- Fat: 16
- Saturated Fat: 10
- Unsaturated Fat: 6
- Trans Fat: 0
- Carbohydrates: 33
- Fiber: 1
- Protein: 3
- Cholesterol: 55