

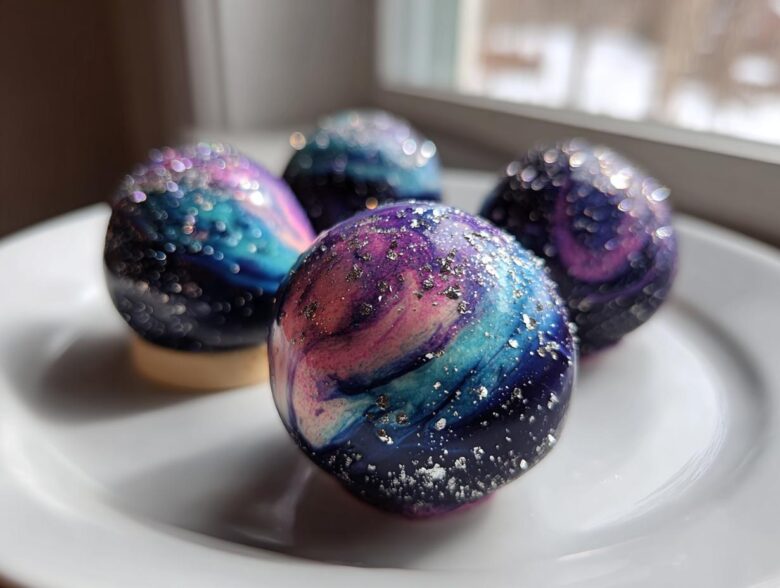
Forget boring, plain chocolate-dipped fruit! If you’ve ever scrolled through incredible photos of edible art and thought, “There is no way I can make that,” then I have good news for you. These White Chocolate Galaxy Painted Strawberries are far easier than they look. I’ve definitely ruined more than a few batches playing around with luster dust and swirling techniques, but I finally cracked the code for that perfect, deep-space shimmer.
We’re not just dipping and sprinkling here; we’re painting a tiny universe onto a piece of fruit! This recipe breaks down everything you need to know, from keeping your white chocolate perfectly smooth to mastering the splatter so you get those beautiful ‘starlight dessert ideas’ without covering the whole kitchen in purple. Get ready to create some truly cosmic dessert decoration that will wow everyone at your next party!
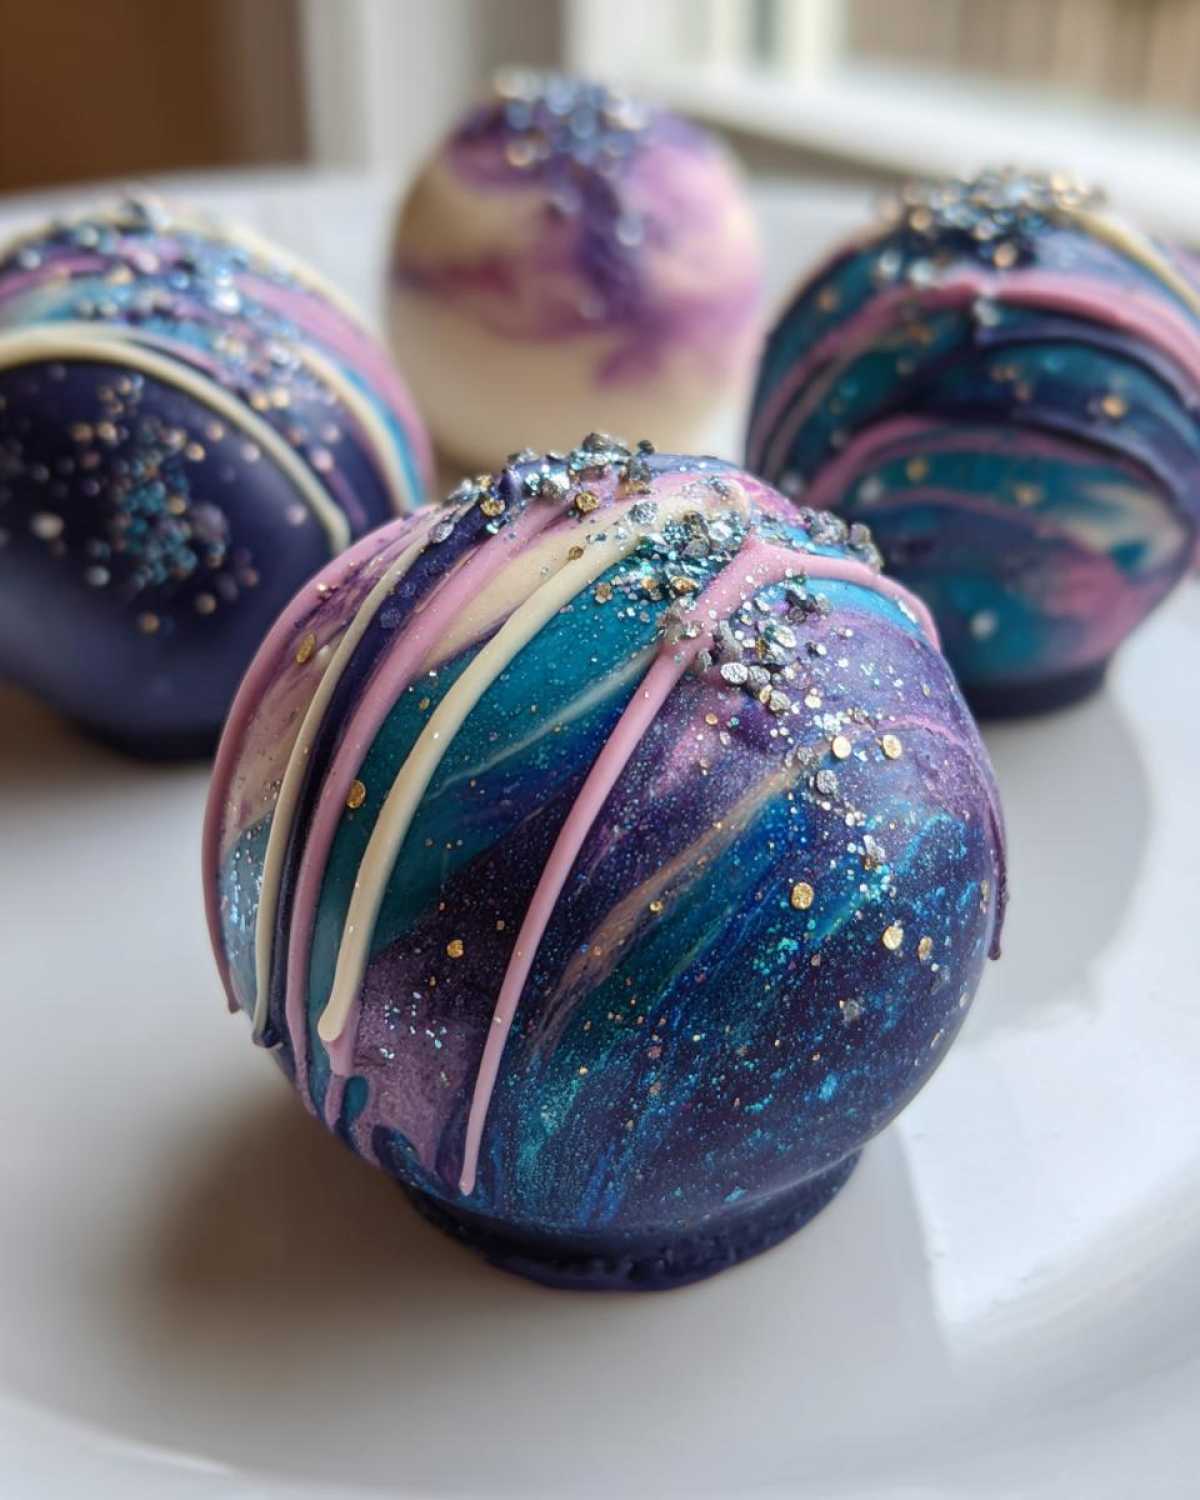
Why You Will Love These White Chocolate Galaxy Painted Strawberries
Seriously, these aren’t your average fruit platter additions. When you serve these, people stop talking just to stare for a second, and that’s exactly what you want!
- They are showstoppers! Truly unique chocolate covered strawberries that look like they came from an artisan bakery.
- The white chocolate base means the colors pop dramatically—you get that intense, deep space vibe.
- The required sparkle uses edible luster dust, giving you the professional ‘starlight’ shine without needing fancy equipment like an airbrush.
- While the design is advanced, the actual painting process uses simple brushes and layering, which is very forgiving once you get the hang of it.
- They are unbelievably fun to make! It feels less like baking and more like painting, which is so relaxing after a long day.
Gathering Supplies for White Chocolate Galaxy Painted Strawberries
Okay, before we even think about melting chocolate, we need to talk supplies. This is where most people go wrong when they try to make these unique white chocolate strawberries. Since we are working with chocolate art, the quality of your extras matters a *ton*. Don’t skimp on the white chocolate; cheap stuff seizes up faster than you can blink! Trust me, I learned that the hard way during one disastrous batch.
Essential Ingredients for White Chocolate Galaxy Painted Strawberries
You’ll need a few key items for that vibrant, cosmic dessert decoration. Remember, we need things that play nicely with the fat in the chocolate. That means no watery extracts!
- Fresh strawberries, of course! You need about a pound, but the real secret here is that they absolutely have to be washed and then patted bone-dry with paper towels. Moisture is the enemy!
- High-quality white chocolate—I mean the good kind that’s high in cocoa butter. You’ll need about 12 ounces, chopped up so it melts evenly.
- A tiny bit of coconut oil or shortening never hurts if you want a smoother dipping experience, but it’s optional.
- For the colors, you MUST use gel food coloring. We specifically need navy blue, violet, pink, and maybe a nice teal for our nebulas.
- The real magic makers are the edible luster dusts—silver and gold are perfect for that starry night look.
- And for mixing those dusts into usable paint, you’ll need a splash of vodka or some clear, food-grade alcohol. It evaporates super fast, leaving just color behind.
Specialized Equipment for Advanced Chocolate Decorating
This part is less about big machinery and more about making sure every single thing touching the chocolate is perfectly clean. Water contamination means chocolate misery, so pay attention here!
You’ll need:
- A microwave-safe bowl, totally clean and dry.
- Baking sheets lined with parchment paper. You need a safe, flat surface for setting these beauties.
- Several very small, clean bowls to hold your different colors and your edible paint mixture. You don’t want blue streaks in your gold shimmer!
- A set of clean, small paintbrushes. Look for food-safe ones. You’ll want a wider, softer one for laying down the base wash of color, and a stiffer, smaller one for flicking on the stars.
- Keep some paper towels handy for blotting brushes, but keep them away from the bowls!
Mastering the White Chocolate Dipping Guide for White Chocolate Galaxy Painted Strawberries
Okay, trust me on this one: Before you even get to the fun painting part, you have to nail the dip. If your white chocolate shell turns out soft or grainy, all that cosmic artistry will just slide right off or crack! This whole process hinges on two things: perfectly dry fruit and perfectly melted chocolate. If you want these to look like those artisan decorated fruit pieces you see online, pay close attention to these foundational steps.
I remember one time I thought I dried the strawberries well enough, but a tiny bit of water trapped near the cap made the entire side of my dipped strawberry ripple. Ugh! We don’t want that! For all the nitty-gritty details on how to get in touch with me if you have questions, check out my contact page, but first, let’s make sure your technique is solid!
Strawberry Preparation: The Key to Perfect Adhesion
This step isn’t optional; it’s the absolute gateway to success for these Painted Chocolate Strawberries Tutorial. Wash your strawberries gently, but then you have to treat them like they are about to go into space—they need to be dried completely!
Pat every single berry down with a paper towel. Seriously, go around the little leafy tops where water loves to hide. If there is even a whisper of moisture left, the white chocolate won’t stick properly. It will either slide off once dipped, or you’ll get streaks and bumps on your base coat. Dry, dry, dry!
How to Properly Melt White Chocolate for Dipping
Melting white chocolate requires patience because it scorches way faster than milk or dark chocolate. We are aiming for silky smooth, not seizing and chunky!
Chop your high-quality white chocolate into uniform pieces. Pop it in your dry bowl and microwave it only in 30-second bursts. After every 30 seconds, take it out and stir, stir, stir. You’ll feel it relaxing and smoothing out. Stop warming it when there are still just a few tiny lumps left; the residual heat will melt those lumps when you keep stirring!
If it feels a little too thick—and only if it seems stiff—stir in just a tiny dash of coconut oil. That bit of extra fat helps keep it liquid longer, which is amazing when you’re coating a bunch of fruit!
Step-by-Step Instructions for White Chocolate Galaxy Painted Strawberries
Alright, here’s where the magic really happens and we transform simple white chocolate strawberries into cosmic masterpieces! The key is patience—you absolutely cannot rush the setting time between coats. If you try to paint while the base is even slightly tacky, you’ll just smear everything into a sad, muddy mess. Trust me, I have seen the muddy messes. We’re aiming for defined layers here for that amazing painted chocolate strawberries tutorial result.
Once your chocolate is perfectly melted and your strawberries are bone-dry, we’ll move into the dipping. Hold the stem end gently, dip the berry down into the smooth chocolate, swirling it just enough to get great coverage. Lift it straight up and let the excess drip back into the bowl—a little wiggle helps release those drips. Place them on the parchment paper and then, this next part is vital, you let them sit. If you rush, you ruin the galaxy. Let them firm up completely! If your kitchen is warm, pop them in the fridge for maybe 15 minutes, but room temperature usually works great if you wait patiently.
Dipping and Setting the Base Coat
Once the white chocolate base coat is hard to the touch—meaning you can lightly tap it without leaving a fingerprint—it’s time to bring out the colors! Remember, we are painting relatively light layers. If your base is too thick, the subsequent painting steps will just feel heavy and cakey.
Make sure all your brushes are clean and dry before you start loading them up. You want a nice, solid, slightly opaque white shell beneath your colors. Getting that first layer perfect means the rest of the galaxy painting process is basically foolproof. Wait for that shell to set rock solid before moving on to step two!
Creating the Cosmic Dessert Decoration Effect
Now for the fun part: making your own little slice of the cosmos! Lay out tiny dabs of your gel colors—the navy blue and the violet—on separate little plates. Using the wider, softer brush, start lightly washing the colors over the set white chocolate. I don’t try to cover the whole thing; you want patches of the white base to look like distant light peeking through the space clouds.
As you lay down the base blue and purple, immediately grab your pink and teal. Don’t wait for the blue to dry! While the chocolate is still workable (which isn’t long, so move smartly!), use a clean, separate brush to gently dab or swirl the brighter colors right into the edges of the blue. This overlapping blurs the lines just enough to create those gorgeous, fluffy nebula clouds we see in deep space photos. Since gel colors are super pigmented, a little bit goes a very long way here. For more on what works best in the kitchen, check out my Terms and Conditions page, but remember: gel is king for chocolate art!
Adding Starlight Dessert Ideas with Luster Dust
Every galaxy needs stars! This is where your silver or gold luster dust comes in. You never paint the dust directly onto the chocolate; it’s too thick. Instead, mix just a tiny pinch of your chosen dust with a few drops of vodka or clear alcohol in a tiny dish. This thins it right down into a beautiful, shimmery, fast-drying paint.
Grab your stiffer brush, dip it lightly into your ‘star paint,’ and then aim it over the strawberry. Now, gently tap the handle of the brush against your finger or another tool. *Tap, tap, tap!* Tiny little dots of shimmer will spray out onto your painted areas, looking exactly like a million distant stars. Don’t go overboard! It’s always better to do a light splatter, wait five minutes, and then decide if you need another, slightly heavier splatter in one area. Practice that splatter motion on a piece of scrap parchment paper first so you control the size of your dots!
Tips for Success with Your White Chocolate Galaxy Painted Strawberries
I want your experience making these gourmet white chocolate strawberries to be as flawless as what you see in the pictures, so let’s talk troubleshooting for a minute. Mastering this cosmic dessert decoration really comes down to respecting two things: the temperature of your chocolate and the type of coloring you use. If you get these two elements right, I promise you’ll get those vibrant, non-streaky colors every time.
You already know I’m obsessed with using the gel food coloring, but it bears repeating—liquid food coloring is a total disaster for this project. It adds too much water volume, and that water will fight with your white chocolate, making it seize up into a grainy paste instead of staying smooth and shiny. That’s a lesson I learned the hard way when I was trying to rush a batch for a friend’s birthday party; I added blue food dye that I thought was ‘gel’ but was actually a water-based liquid, and boom! Instant ruined chocolate. I had to start over completely!
When it comes to temperature, remember that white chocolate continues to cook in its own heat after you take it out of the microwave. If you let your base coat get too hot, it won’t hold the colors well once you start painting. Aim for lukewarm, not hot! If you’re working slowly on a big batch, don’t hesitate to pop the bowl back into the microwave for a quick 10-second refresh just to keep that perfect dipping consistency. Keeping the chocolate properly tempered will ensure the final layer of luster dust paint adheres beautifully.
Also, clean tools are non-negotiable! Make sure those soft paintbrushes are scrubbed clean and completely dry before you dip them into your alcohol/luster dust mixture. If you bring any residue or moisture into that paint, it won’t splatter correctly, and you’ll end up with gloppy messes where your stars should be. You can review my full Privacy Policy if you want to read more about how seriously I take kitchen clean-up—it’s serious business when you’re doing advanced chocolate decorating like this!
Storage and Presentation for Your Gourmet White Chocolate Strawberries
Once you’ve spent all that time creating your edible galaxy masterpieces, the last thing you want is for the art to start sweating or melting! Storing these unique white chocolate strawberries correctly is just as important as getting that perfect splatter effect.
Here’s the deal with keeping them fresh: You generally want to keep them out of the main refrigerator if you can. The humidity inside a fridge is the enemy of shiny chocolate! That dampness causes the chocolate to ‘weep’ or bloom, which dulls your beautiful galaxy paint finish. It drives me crazy when I see shiny chocolate turn matte gray overnight!
The best place for your finished gourmet white chocolate strawberries is in a cool, dry spot. Keep them on that parchment-lined tray you used for setting, and cover them loosely with plastic wrap, or better yet, place them in a single layer inside an airtight container. If you must stack them (which I don’t recommend, but sometimes you have to!), put a thin sheet of parchment paper between layers so the luster dust doesn’t transfer.
Keeping the Chocolate Shiny and Crisp
If your house is super warm, you might have to use the fridge, but if you do, here’s my trick: Pop them in the fridge for just an hour or two to firm them up before a party, but pull them out about 30 minutes before serving. That gives the chocolate time to warm slightly so it doesn’t look sweaty when guests start admiring them.
Also, try to eat these within about 48 hours. Chocolate-covered fruit is best when it’s fresh! The fresher it is, the better the structural integrity of the shell and the brighter your cosmic colors stay.
Presenting Your Special Occasion Fruit Centerpiece
These aren’t the kind of strawberries you just leave scattered on a cutting board! When you’re making something this detailed, you need a proper display. Think about creating a real special occasion fruit centerpiece!
I love using simple white platters or a tiered serving stand to let the dark, starry colors really pop. You can surround the strawberries with a bed of fresh dark green mint leaves—the deep green makes the blues and purples of the galaxy look even richer. For birthdays or anniversaries, setting them around the base of a cheesecake or next to a plain white cake elevates the whole dessert table instantly.
Just keep them away from direct sunlight or heat sources. They are tiny edible artworks, and you want to show them off right before they get devoured!
Frequently Asked Questions About Making Galaxy Treats
I know when you tackle something as detailed as these cosmos-themed strawberries, you’re going to have a few questions pop up. That’s totally normal! I’ve compiled the things I get asked most often, especially when people try this advanced chocolate decorating for the first time. Don’t worry, we’ll tackle those common pitfalls so you end up with perfect edible galaxy strawberries!
Can I use regular food coloring instead of gel for these painted chocolate strawberries?
Oh gosh, please don’t! If you want shiny, perfect white chocolate, you have to use gel or powdered coloring. Regular liquid food coloring is mostly water, and as we talked about, water makes white chocolate immediately seize up on you. It turns into this crumbly, gritty mess that you can’t dip anything into—it’s heartbreaking!
Gel coloring is highly concentrated, so you only need a tiny smear of it to get deep color, and critically, it adds barely any actual moisture to the chocolate. If you are painting, you want that thick, vibrant color payoff without compromising the shell. For the ultra-sparkly bits, you must use the luster dusts dissolved in alcohol, which also evaporates quickly!
How long do these edible galaxy strawberries last?
Since these are fresh fruit dipped in chocolate, they aren’t meant for super long-term storage, even with the pretty coating. For the very best texture and artistic integrity, I recommend eating them within 24 hours. That said, if you store them properly—and remember, that means cool and dry, not necessarily the main part of the fridge—you can usually get away with 48 hours.
After two days, the strawberries naturally start releasing juice, and that moisture can eventually affect the chocolate coating, making it weep or look dull, which totally ruins the whole cosmic effect. So, make them when you need them, and definitely don’t try to freeze these—the texture of the fresh berry won’t survive!
What is the best way to clean the food-safe paintbrushes?
Cleaning these brushes properly is important, especially since you’re switching between dark blues and bright gold dusts! Since we mixed the luster dusts with vodka or clear alcohol, a quick clean is actually pretty easy.
First, immediately wipe off excess color onto a paper towel while the paint is still wet. Then, run the brush under warm water with a little bit of mild dish soap, rinsing thoroughly until the water coming off is clear. Don’t let them sit soaking with alcohol in them! Alcohol can sometimes dry out the bristles if left for days. After rinsing, shake out as much water as possible and lay them flat to dry. If you used them for the dust paint, make sure they are completely dry before storing them away near any other chocolate tools, as residue can sometimes cling.
For any deep-dive questions on kitchen ethics and how we handle ingredient sourcing, feel free to check out my disclaimer, but honestly, my best cleaning advice always involves warm water and a little soap for those specialized brushes!
Nutritional Estimates for White Chocolate Galaxy Painted Strawberries
I know, I know. When something looks this gorgeous and tastes like it should be served only at royal galas, worrying about nutrition feels a little silly. But since people always ask, I pulled together the general estimates for one of these amazing **White Chocolate Galaxy Painted Strawberries**. Remember, these numbers are just a rough guide!
My rule of thumb is that since the base is fresh fruit, it’s better than a regular candy bar, but that white chocolate shell definitely adds up! The nutrition really depends on how thick you dip them and how much of that glorious gold luster dust you manage to eat (which is an unknown variable, frankly, because it’s the best part!). For all the technicalities on how we calculate these figures on the site, you can peek at our Cookie Policy, but here’s the quick breakdown per strawberry based on the recipe volume:
- Serving Size: 1 strawberry
- Calories: About 150
- Sugar: Roughly 18g (mostly from the white chocolate, naturally!)
- Fat: Around 9g (That’s that rich cocoa butter doing its work!)
- Protein: Just a couple of grams, maybe 2g.
You’ll see the numbers look better than many other party desserts, which is great when you’re serving something this rich. Just don’t count on them being super low in carbs, thanks to that delicious white chocolate shell we worked so hard to paint so perfectly!
Share Your Artisan Decorated Fruit Creations
Now it’s your turn! I’ve given you all my secrets for achieving that stellar, cosmic look with these White Chocolate Galaxy Painted Strawberries. Honestly, seeing your final results is my absolute favorite part of sharing these recipes. It takes creativity to pull off this kind of advanced chocolate decorating, and I want to see what crazy color combinations you come up with!
Did you stick with the classic dark blue and gold stars? Or did you decide to go rogue with deep greens and shocking magenta nebulas? Don’t be shy—I love seeing new ways people interpret these edible galaxy strawberries!
Please, please, please leave a rating down below! Five stars if your strawberries looked like they belonged in a planetarium! And if you shared a photo on Instagram or TikTok of your final creation, tag me so I can cheer you on! You can also save this recipe for later reference by hopping over to my bookmarks page. Happy painting, cosmic chefs!
PrintWhite Chocolate Galaxy Painted Strawberries
Follow these steps to create visually stunning strawberries covered in white chocolate decorated to look like a cosmic galaxy.
- Prep Time: 30 min
- Cook Time: 5 min
- Total Time: 35 min
- Yield: Approximately 12-15 servings
- Category: Dessert
- Method: Dipping and Painting
- Cuisine: American
- Diet: Vegetarian
Ingredients
- 1 lb fresh strawberries, washed and completely dried
- 12 oz high-quality white chocolate, chopped
- 1 teaspoon coconut oil or vegetable shortening (optional, for smoother dipping)
- Gel food coloring (navy blue, violet, pink, teal)
- Edible luster dust (silver, gold, or pearl)
- Small, clean paintbrushes (food-safe)
- Vodka or clear food-grade alcohol (for mixing dusts)
Instructions
- Prepare the strawberries: Remove the green tops. Pat each strawberry completely dry with paper towels; moisture prevents chocolate from adhering.
- Melt the white chocolate: Place chopped white chocolate in a microwave-safe bowl. Microwave in 30-second intervals, stirring well after each, until smooth. Stir in coconut oil if using. Do not overheat.
- Dip the strawberries: Hold the strawberry by the stem area. Dip it into the melted white chocolate, rotating to coat evenly. Lift and let excess chocolate drip off. Place the dipped strawberry on a parchment-lined baking sheet. Allow the base coat to set completely at room temperature or briefly in the refrigerator (about 15 minutes).
- Prepare the colors: Place small amounts of gel food coloring onto separate small plates or in tiny bowls. Mix a small amount of luster dust with a few drops of vodka or alcohol in a separate small dish to create edible paint.
- Create the galaxy base: Once the white chocolate is set, use a clean, wide brush to lightly paint broad areas of navy blue and violet over the surface of the strawberry. Work quickly before the chocolate fully hardens.
- Add nebula colors: Use a separate brush to lightly dab or swirl pink and teal colors into the blue base to create a nebula effect. Blend the edges slightly while the chocolate is still workable.
- Add stars: Dip a stiff, clean brush into the silver or gold luster dust paint mixture. Hold the brush over the strawberry and gently tap the handle to splatter tiny dots onto the surface, creating a starlight effect.
- Set the design: Let the painted strawberries set completely at room temperature until the chocolate is firm.
- Store: Keep finished strawberries in a single layer in an airtight container in a cool, dry place for up to 2 days.
Notes
- For best results, use gel or powdered food coloring, as liquid coloring adds too much moisture to the chocolate.
- Ensure your dipping tools and bowls are completely free of water.
- Practice the splatter technique on parchment paper first to control the size of your ‘stars’.
Nutrition
- Serving Size: 1 strawberry
- Calories: 150
- Sugar: 18
- Sodium: 15
- Fat: 9
- Saturated Fat: 5
- Unsaturated Fat: 4
- Trans Fat: 0
- Carbohydrates: 17
- Fiber: 1
- Protein: 2
- Cholesterol: 10