

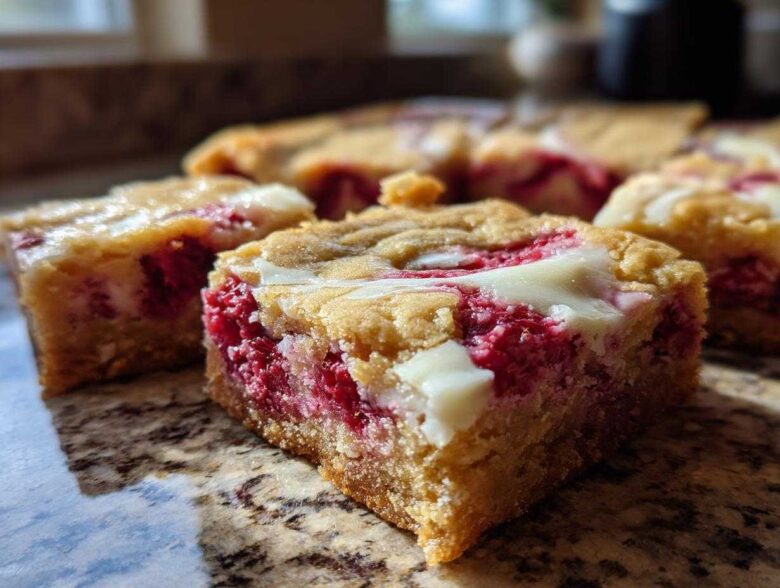
Oh my goodness, friends, I have cracked the code! You know how most blondies are either too cakey or just fall apart? Not these. I spent weeks trying to nail the perfect ratio—that sweet spot where you get those wonderfully crisp edges but the center stays undeniably gooey. These White Chocolate Raspberry Blondies are it. I swear! The tartness of the raspberry is the absolute perfect partner for that creamy, rich white chocolate. Seriously, once you try this recipe, you’ll toss every other square bar recipe you have. Get your parchment paper ready; we’re making magic!
Why You Will Love These White Chocolate Raspberry Blondies
Truthfully, this recipe makes me giddy every time I pull the pan out of the oven. These aren’t just any dessert bars we’re talking about; these are truly special. If you love that crackly top and chewy middle, stick with me. Here’s what makes whipping up a batch of these Chewy Baked Squares totally worth it:
- They nail that elusive texture: crispy edges that give way to a buttery, melt-in-your-mouth center.
- The flavor balance is spot-on—sweet white chocolate perfectly cuts through the bright, tart pop of fresh raspberries.
- You get that incredible, rich flavor only achieved when you start with melted butter; it’s a game changer!
- They are so quick to put together—seriously, you can be eating these tonight if you get moving!
- They give you that wonderful, satisfying feeling of having made real Bakery Style Blondies at Home, without needing any complicated steps.
- They look gorgeous! The little pink swirls against the golden batter just scream ‘gourmet treat.’
Essential Ingredients for Rich and Buttery Blondies
If you want that perfect, rich, buttery base that makes a blondie legendary, you have to start with quality ingredients handled the right way. Don’t rush the prep here; paying attention to temperature and form is half the battle for getting that amazing texture we talked about. I always lay my eggs out early because they need to be at room temperature—it just helps them blend so much smoother into the sugar mixture. We use a lot of sugar, yes, but trust me, the combination of brown and white is what locks in that chewiness.
Ingredient Notes and Substitutions for White Chocolate Raspberry Blondies
Okay, let’s talk specifics because the details really matter when we’re trying to make the Best Blondie Recipe Ever. First off, room temperature eggs are a must; they incorporate air much better, which is vital for that chewy set. For the chocolate in these White Chocolate Raspberry Blondies, you can use chips, but I actually prefer chopping up a nice bar of white chocolate! It melts into those gorgeous, buttery pools. If you really want to step up the game, try browning the butter first—it adds this incredible, nutty depth. Oh, and don’t worry about frozen raspberries; just toss them in straight from the freezer, don’t thaw them, or you’ll get too much liquid!
Step-by-Step Instructions for the Best Blondie Recipe Ever
Alright, let’s get this show on the road! Getting the structure right is what separates a good blondie from a great one. Preheat your oven to 350°F right away, and grab that 9×13 pan. You absolutely must line it with parchment paper, letting the edges hang over the sides—this is your built-in handle! Trust me, you’ll thank me later when you lift these beauties out. Remember what I said about not overmixing? That’s key in step five!
First, we whisk the melted butter with both sugars until they look happy together. Then, in go the eggs, one by one, until everything is smooth as silk, followed by that bit of vanilla. Now, mix your dry goodies—flour, salt, baking powder—separately. Gently fold the dry stuff into the wet mixture. I mean gently! Just until you don’t see white streaks anymore. Then, fold in those white chocolate chips.
Here’s the fun part for our White Chocolate Raspberry Blondies: take half the batter and smooth it on the bottom. Scatter those tart raspberries all over that layer. If you’re making these using my tips from my favorite baking tricks, you already know not to thaw the fruit! Top it with the rest of the batter and gently coax it over the berries. Into the oven they go for about 28 to 35 minutes. Don’t peek too early!
Achieving Perfect Blondie Edges and Chewy Centers
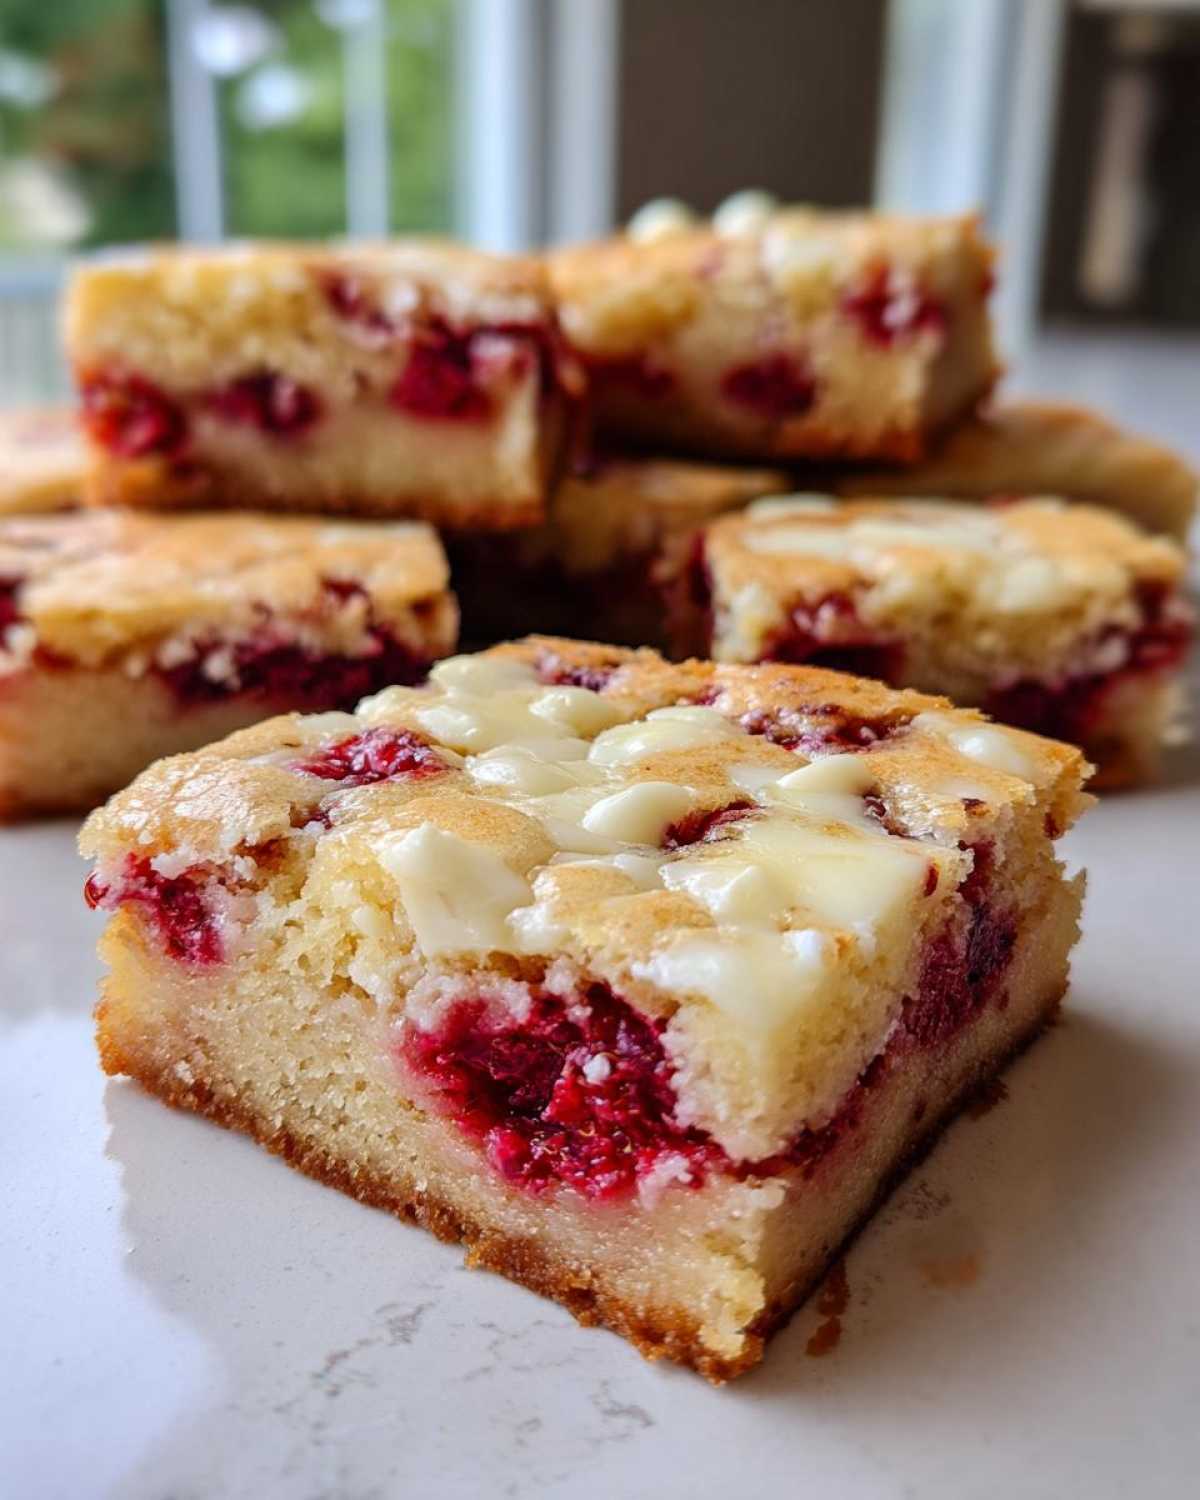
This timing is everything for achieving chewy centers. You are looking for edges that look set and just starting to kiss gold. When you do the toothpick test, you want moist crumbs attached—never wet batter, never clean! That slight dampness is your promise of gooeyness later. The biggest secret to the final texture, though? You HAVE to let these babies cool completely in the pan on the rack. Seriously, wait until they are totally, completely cool before you use those parchment handles to lift them out. If you cut them warm, they will fall apart! Waiting ensures your White Chocolate Raspberry Blondies achieve that perfect, firm, chewy texture.
Tips for Success Making White Chocolate Raspberry Blondies
I’ve made these so many times now that I know exactly where people usually trip up, so I want to save you the grief! Getting that chewy, rich result in your White Chocolate Raspberry Blondies really comes down to a few tiny details that make a huge difference. If you follow these little tricks, I promise you’ll get that perfect result every time.
First, let’s talk about mixing. When you add the dry ingredients, you have to show restraint! Seriously, stop mixing the second you don’t see any more streaks of flour left. If you keep going, you’re developing gluten, and that’s how you end up with a tough, cakey blondie instead of the gooey square we are aiming for. It’s okay if the batter looks a little lumpy when you stop; that lumpy texture is your friend!
Next is the layering technique, which helps create those beautiful ribbons of color. When you put the first half of the batter in the pan, smooth it down, but don’t press too hard. Scatter your raspberries evenly, and then just dollop the rest of the batter on top. Use a spatula to gently nudge the top batter layer until it mostly covers the fruit. If you try to smooth it perfectly, you might push the berries too far down, and they’ll just bleed color everywhere and potentially make the bottom layer soggy. We want a slight swirl, not a uniform pink mess!
Finally, don’t skip the parchment overhang! This sounds so simple, but I see so many people skip it, and then they struggle to get the cooled bars out of the pan without breaking them. When they are perfectly cooled, pull up on those paper ‘handles’ like you’re pulling a tablecloth out from under china. It lifts the entire block of perfect White Chocolate Raspberry Blondies cleanly out, ready for slicing!
Variations for Your White Chocolate Raspberry Dessert Bars
Okay, once you master the basic recipe—which you totally will, because it’s foolproof—you might start thinking about playing around a little bit! That’s what I love about baking things from scratch; you can totally customize them to whatever mood you’re in. These White Chocolate Raspberry Dessert Bars are perfect canvases for experimentation.
If raspberries aren’t quite your thing, or if you just want to mix it up for the summer, try swapping them out! Blueberries work beautifully if you use them sparingly. Or maybe you want a bit of crunch? Toss in about half a cup of chopped pecans or walnuts along with the white chocolate chips. My favorite addition when I want something really bright, though, is adding the zest of one whole lemon into the wet ingredients. It just wakes up the flavors of the vanilla and the tartness of the fruit. Isn’t that fun? It takes these rich, buttery blondies just slightly into a different realm!
Creating Raspberry Cheesecake Blondies Texture
Now if you want to take things from ‘amazing’ to ‘holy moly, what IS that’ territory, you need to try the cream cheese swirl. This is for when you want that little bit of tanginess, kind of like a fancy Fudgy Blondies with Fruit that got dressed up for dinner. You only need about four ounces of cream cheese, softened up (make sure it’s soft!).
The trick here is dolloping it right on top of that second layer of batter—the one that goes over the fruit. Don’t mix it into the batter; just drop little spoonfuls all over the surface. Take a butter knife or a thin skewer and gently swirl it through the top layer of batter just a few quick figure eights. You don’t want to disturb the bottom layer too much! When it bakes, that cream cheese puffs up slightly and then settles into this lovely, slightly dense, tangy layer that really mimics that creamy dreaminess you get in a cheesecake. It’s genius, honestly, and so easy to do!
Storage and Reheating Instructions for Chewy Baked Squares
Okay, so you managed to resist eating the whole pan in one sitting—bravo! Now we need to make sure these gorgeous Chewy Baked Squares last more than one day, because, let’s be honest, they probably will. The great news is that because these blondies have such a high sugar and fat content from all that butter and white chocolate, they actually stay wonderfully moist for quite a while if you store them correctly.
The absolute best way to keep them tasting fresh is to make sure they are completely cool—I mean stone cold—before you even think about wrapping them up. If there’s any residual warmth, you’re going to end up with condensation inside your container, and that guarantees sogginess. No thank you!
Once cooled, you want to store them airtight. I usually cut them into squares first, which makes them easy to stack. Place a small piece of parchment paper or wax paper between the layers if you’re stacking them, just so the white chocolate bits don’t stick everything together. Store them in a good quality, airtight container at room temperature. They are fantastic this way for about three to four days. Honestly, mine rarely make it that long, but they should last that long!
Now, what if they accidentally dry out a tiny bit on day five, or you just want them to taste like they just came out of the oven? Reheating is your friend! Pop one of your Chewy Baked Squares onto a microwave-safe plate for about 10 to 15 seconds on medium power. That little bit of warmth reactivates that butter and melts the white chocolate just enough to bring back that amazing gooey texture you love so much. Trust me on this reheating tip; it’s a lifesaver for a late-night craving!
Frequently Asked Questions About White Chocolate Raspberry Blondies
I know you probably have a few questions buzzing around in your head once you see how many ingredients go into this recipe! That’s totally normal! When you’re aiming for the perfect texture on something like this, the little details really do matter. I tried to answer the most common things people ask me when they’re baking these for the first time. Don’t let any small hurdle scare you off; these are truly forgiving bars if you keep the main rules in mind!
Can I use fresh instead of frozen raspberries in the White Chocolate Raspberry Blondies?
Oh yes, absolutely! Fresh ones are wonderful, especially when they are perfectly in season. If you use fresh raspberries, though, you just need to be a little more careful when layering them in the pan. Remember how I said with frozen ones you don’t want to press them down? That rule is even more important with fresh fruit. Place them gently on top of that first layer of batter. If they are super juicy, gently pat them dry with a paper towel first. We want that nice pink swirl, but we definitely want to avoid excessive color bleeding all over our golden batter, so handle them tenderly!
How do I ensure my blondies are gooey and not cakey?
This is the million-dollar question, isn’t it? The secret to avoiding cakey blondies and getting that amazing, dense, gooey texture is really a two-part secret. First, look at the sugar ratios; we are using way more brown sugar than white sugar here, and that brown sugar is what keeps things moist and chewy because of the molasses. Second, and this is crucial, DO NOT BAKE THEM ALL THE WAY THROUGH! I know it feels wrong, but you have to pull them when that toothpick comes out with visible, moist crumbs attached. If the toothpick is clean, you’ve gone too far, and they will set up hard while cooling. That slight dampness on the toothpick is the promise of perfection in your finished White Chocolate Raspberry Blondies!
Estimated Nutritional Data for Homemade White Chocolate Treats
Now, I know we aren’t exactly making these bars because they are diet food—I mean, they have a cup and a half of white chocolate in them! But for those of you who like to keep track, I did run the numbers based on a standard serving size. Remember these figures are just estimates, though, based on the way I measure everything out. If you start using loads of extra butter or go heavy on the chocolate bar versus the chips, your numbers might shift a little bit.
This information assumes you cut the recipe into the 16 squares we planned for. For a single serving of these rich and buttery Homemade White Chocolate Treats, here is what you are looking at:
- Serving Size: 1 square
- Calories: 320
- Sugar: 30 grams
- Fat: 19 grams (with 12 grams of that being saturated fat—yum!)
- Carbohydrates: 35 grams
- Protein: 4 grams
- Sodium: 150 mg
See? Totally worth it for the payoff! These are meant to be a little indulgence. Enjoy every bite of your perfect, chewy squares!
Share Your Perfect Blondie Edges
Whew! Now that you’ve got that pan of absolute perfection cooling on the counter, I really, really want to know what you think! Baking is always better when you can share the joy (and the results), right?
Please, please come back and leave a rating below! Tell me how they turned out—did you nail that perfect crisp-to-gooey ratio? I live for hearing that someone else finally achieved their dream of making Perfect Blondie Edges right in their own kitchen. Don’t be shy about sharing your triumphs!
And if you took a picture—and I know you did, because these look incredible—tag me on social media! Seeing my favorite readers enjoying these White Chocolate Raspberry Blondies is the best part of my day. If you have any last-minute thoughts, questions, or just want to share how quickly you inhaled them, pop over to my contact page and let me know. Happy baking!
PrintChewy White Chocolate Raspberry Blondies
A recipe for rich, buttery blondies featuring melted white chocolate and tart raspberries, resulting in chewy centers and slightly crisp edges.
- Prep Time: 15 min
- Cook Time: 35 min
- Total Time: 50 min
- Yield: 16 squares
- Category: Dessert
- Method: Baking
- Cuisine: American
- Diet: Vegetarian
Ingredients
- 1 cup (2 sticks) unsalted butter, melted
- 1 1/2 cups packed light brown sugar
- 1/2 cup granulated sugar
- 2 large eggs, room temperature
- 1 tablespoon vanilla extract
- 1 3/4 cups all-purpose flour
- 1 teaspoon salt
- 1/2 teaspoon baking powder
- 1 1/2 cups white chocolate chips or chopped white chocolate
- 1 cup fresh or frozen raspberries
Instructions
- Preheat your oven to 350°F (175°C). Line a 9×13 inch baking pan with parchment paper, leaving an overhang on the sides for easy removal. Lightly grease the paper.
- In a large bowl, whisk the melted butter with the brown sugar and granulated sugar until fully combined.
- Whisk in the eggs one at a time until the mixture is smooth. Stir in the vanilla extract.
- In a separate bowl, whisk together the flour, salt, and baking powder.
- Gradually add the dry ingredients to the wet ingredients, mixing only until just combined. Do not overmix the batter.
- Gently fold in the white chocolate chips.
- Spread half of the batter evenly into the prepared pan. Scatter the raspberries over the batter layer. If using frozen raspberries, do not thaw them first.
- Dollop the remaining batter over the raspberries and gently spread it out to cover as much of the fruit as possible.
- Bake for 28 to 35 minutes. The edges should look set and lightly golden, and a toothpick inserted near the center should come out with moist crumbs attached, not wet batter.
- Let the blondies cool completely in the pan on a wire rack before lifting them out using the parchment overhang and cutting them into squares. Cooling fully helps achieve the best chewy texture.
Notes
- For a richer flavor, brown the butter before measuring and melting it for the recipe.
- If you prefer a slight tang, substitute half of the white chocolate chips with cream cheese dollops swirled into the top layer before baking.
- Using room temperature eggs helps the batter emulsify better, leading to a smoother texture.
- If using frozen raspberries, avoid pressing them down into the batter too much to prevent excessive bleeding of color.
Nutrition
- Serving Size: 1 square
- Calories: 320
- Sugar: 30
- Sodium: 150
- Fat: 19
- Saturated Fat: 12
- Unsaturated Fat: 7
- Trans Fat: 0
- Carbohydrates: 35
- Fiber: 1
- Protein: 4
- Cholesterol: 60