

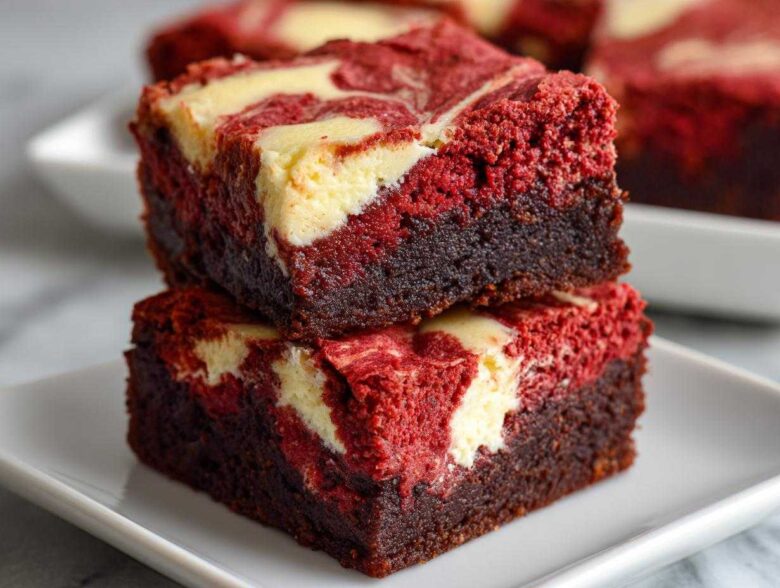
Oh, my dears, if you think you know brownies, buckle up! I’m obsessed with anything that walks that perfect line between cake and pure fudge, and I’ve finally nailed the absolute showstopper. Forget plain chocolate for a minute; we’re elevating things into gourmet territory today. This recipe brings together the slight, wonderful tang of red velvet with a gooey, decadent river of homemade salted caramel, all baked into a dense brownie square. Trust me when I say these Salted Caramel Red Velvet Brownies are what dreams are made of. It took me about four tries to get that chewiness just right—I needed them to hold up to the sauces but still totally melt in your mouth. I’m so excited to share my little secrets with you! You can sneak a peek at how we test our recipes here, but get ready, because this is the best thing you’ll bake all year.
Why You Will Love These Salted Caramel Red Velvet Brownies
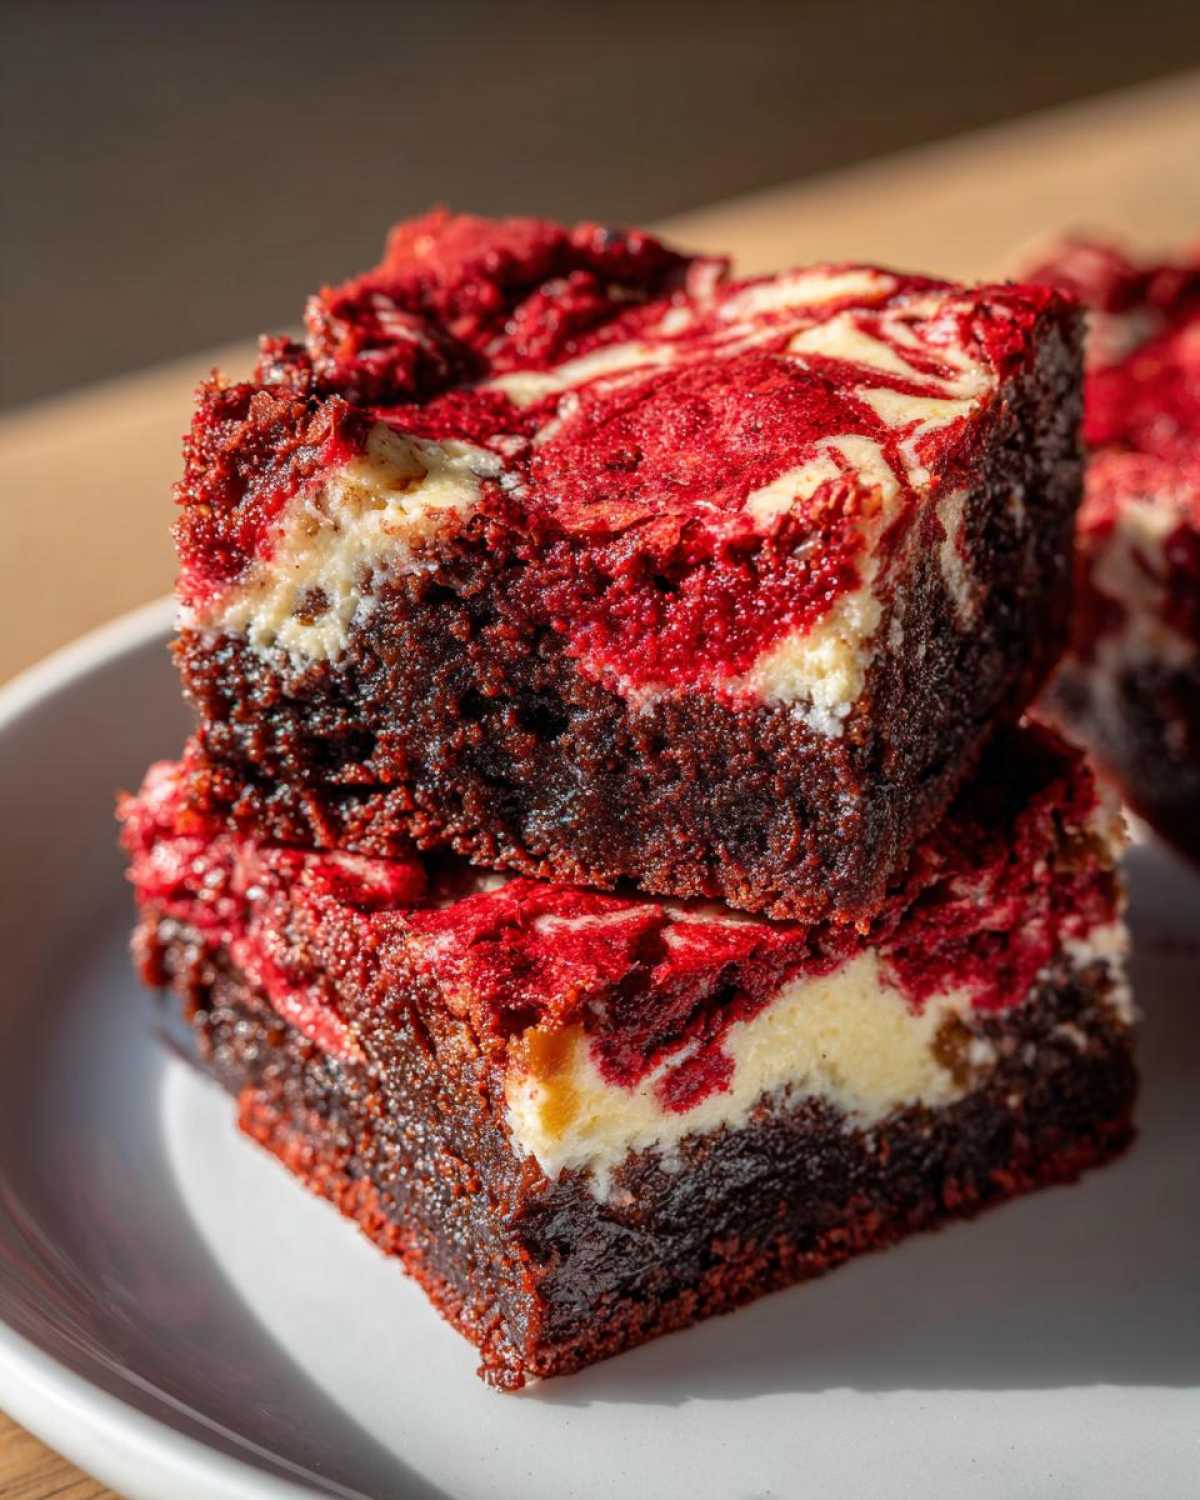
Seriously, these aren’t your average bake sale squares; they are an experience! We managed to pack three incredible things into one perfect, sliceable bar. Why are they the best? Well, you get that beautiful contrasting color that makes red velvet so iconic, paired with the salty punch of homemade caramel.
- They are incredibly decadent—perfect for special occasions or just when you need a serious chocolate fix.
- The texture is exactly what you want: gloriously fudgy in the middle with just the right amount of chew around the edges.
- The flavor profile hits every note: deep chocolate, sweet vanilla, and that perfect salty finish.
Texture Perfection: Fudgy Red Velvet Brownies Recipe
Listen, I cannot stand a cakey brownie. If you’re after that dense, borderline underdone center that makes you close your eyes when you take a bite, you’ve found it. Our Fudgy Red Velvet Brownies Recipe hits that mark because we lean heavy on the melted butter and just barely introduce the flour. We keep the cocoa and flour ratio precise so the chocolate dominates, leaving zero crumbly cakes behind. That’s the secret to a truly gooey bar!
Essential Ingredients for Perfect Salted Caramel Red Velvet Brownies
Okay, gathering supplies! Look, you can’t cut corners when you’re making something this magnificent. Every single ingredient plays a role in getting that intense flavor and that impossibly chewy texture. We need structure from the cocoa, tang from the vinegar, and color! Don’t skimp on that red coloring; I swear by the high-quality gel versions because liquid dye just waters down my precious fudge batter way too much. I’ve broken down what you need into three groups below so nothing gets missed.
For the main brownie base, here is what you’ll pull out:
- 1 cup (2 sticks) unsalted butter, melted (Don’t skip melting it!),
- 2 cups granulated sugar,
- 4 large eggs,
- 1 tablespoon vanilla extract,
- 1 teaspoon white vinegar (shhh, this is crucial for the red velvet tang!),
- 1 teaspoon red food coloring (gel only, trust me!),
- 1 1/4 cups all-purpose flour,
- 1/2 cup unsweetened cocoa powder,
- 1/2 teaspoon salt.
Ingredients for the Salted Caramel Swirl Dessert
This homemade topping is what takes these from ‘great’ to ‘legendary.’ We need a few things to make that thick, drippy puddle of heaven. The most important part here is the salt—we use flaky sea salt right at the end so you get those little bursts of saltiness when you bite into the Salted Caramel Swirl Dessert. It’s amazing!
- 1/4 cup heavy cream (keep this handy!),
- 1 cup granulated sugar (for the actual caramelization),
- 6 tablespoons unsalted butter,
- 1/2 teaspoon flaky sea salt.
Cream Cheese Component for Rich Red Velvet Dessert Ideas
This little addition gives us that classic red velvet zip beneath the chocolate and caramel. It keeps things moist and adds a beautiful visual contrast when we swirl it in. When you are measuring this out, make sure your cream cheese is utterly soft! If it’s cold, you’ll end up with little white chunks in your batter, and nobody wants that in their Rich Red Velvet Dessert Ideas swirl.
- 1/2 cup cream cheese, softened perfectly,
- 1/2 cup powdered sugar.
Step-by-Step Instructions for Salted Caramel Red Velvet Brownies
Alright, this is where the magic happens—turning all those gorgeous ingredients into the ultimate chocolate payoff! First things first, get that oven cranking to 350°F (175°C). I always pre-line my 9×13 inch pan with parchment paper with a little overhang on the sides. This is a non-negotiable step for me; it lets you pull the whole slab out later without stressing about breaking a corner off. Seriously, thank yourself later for doing this prep work!
- We start with the base. In a big bowl, whisk your melted butter and the 2 cups of sugar together until they feel happy.
- Now, beat in those four eggs, one by one. Don’t rush this part; make sure each one is fully incorporated before adding the next. Then, stir in your vanilla, the white vinegar, and that vibrant red food coloring until the entire mix is that shocking, beautiful shade of red.
- In a separate spot, whisk your dry things: flour, cocoa powder, and salt. Now, here’s that huge tip for that fudgy texture I love so much: add the dry stuff to the wet stuff gradually, and stop mixing the second you barely see the last streak of flour disappear. You do not want to overmix! We are aiming for chewy, not tough!
While the batter rests, get your two special toppings ready to go. Remember those tubs of cream cheese mix and the caramel we talked about earlier? Time to assemble the layers!
Making the Homemade Salted Caramel Sauce for Baking
Making caramel from scratch sounds scary, I know, but it’s so easy once you see it happen! Put that 1 cup of sugar in a medium saucepan on medium heat and just watch it. Don’t even touch it with a spoon until it starts melting around the edges. Once it gets that beautiful, deep amber color—like fancy, dark tea—pull it off the heat immediately. Safety first! When you whisk in the 6 tablespoons of butter, it’s going to bubble up like a volcano, so step back a little and whisk gently. Then, slowly pour in the heavy cream while still whisking like mad until it smooths out. Finally, stir in that flaky sea salt for your Homemade Salted Caramel Sauce for Baking. Let this cool down for about 10 minutes—we need it pourable, not scorching hot, or it will just sink straight through our batter.
Assembling and Baking Your Chewy Brownie Recipe
Now for my favorite layering technique. Pour about two-thirds of that gorgeous red batter into your parchment-lined pan and spread it out evenly. Next, drop spoonfuls of your cream cheese mixture right on top. Then, drizzle about half of that slightly cooled salted caramel over that. Take a knife or a skewer and make just a few lazy swipes—you want a swirl, not a unified pink-brown blob! Cover that beautiful mess with the remaining red velvet batter. Top that with your remaining cream cheese dollops and caramel drizzle. Swirl just lightly again to create those gorgeous ribbons that make these Chewy Brownie Recipe bars look like they came from a fancy bakery.
Pop it into the oven for 30 to 35 minutes. Watch closely! You aren’t looking for a clean toothpick; you want the toothpick to come out with moist, clingy crumbs attached. That’s the sign of ultimate fudgy perfection!
The absolute hardest part is next: let them cool completely in the pan on a rack. If you try to cut them warm, you’ll get goo everywhere, and we need those clean, photo-perfect squares!
Tips for Achieving Bakery Style Brownies with Topping
You’ve done the hard work, and now we need to finish these off so they look just as amazing as they taste! Getting those clean lines you see in bakeries when you cut them is all about patience—and I know patience is hard when something smells this good! If you cut them while even slightly warm, the caramel runs everywhere, and the fudgy center turns into a sticky flood. Don’t do it!
My best advice for presentation is to grab those sides of the parchment paper (remember we left those flaps hanging over the edge?) and gently lift the entire cooled slab right out of the pan. Place it on a cutting board. Then grab your biggest, sharpest knife and gently press straight down for each cut. Wipe the knife clean between slices if you want those crisp edges! This is how we get those stunning, photogenic results for your Bakery Style Brownies with Topping.
Ingredient Notes and Substitutions
Just a couple of quick notes while you’re prepping for the next time you bake these incredible bars. If you somehow forgot to buy the red gel coloring, don’t panic! The white vinegar is there to help bring out the slightest reddish tone from the cocoa, but honestly, if you can’t find the gel, you can swap that teaspoon of vinegar for a teaspoon of fresh lemon juice. It gives that same little bit of acid needed for the red velvet flavor profile to pop, without changing the texture.
Also, remember what I said about the gel coloring? Please use the gel pastes! Liquid coloring, even if you use the same amount, adds unnecessary water to a recipe that is designed to be super fudgy. We want all the density we can get from that melted butter and eggs, not extra liquid weighing us down. Stick to the strong gel colors for the deepest red shade possible!
Storage and Reheating Instructions
Now that you’ve managed to wait for these beauties to cool (which is honestly half the battle), we need to talk about keeping them perfect! These Gooey Red Velvet Bars keep really well because of all that fat and sugar, which acts as a natural preservative. You definitely want to store them in an airtight container.
You can absolutely keep them on the counter at room temperature for about two or three days. They stay wonderfully soft there, especially since they have that lovely caramel swirl. If you made a truly massive batch and need them to last longer—maybe even up to a week—pop that airtight container into the fridge. Just know that the caramel and the frosting parts might firm up a tiny bit when cold.
So, how do we get that ‘just baked’ texture back? It’s super simple! If they’re cold from the fridge, let one sit out for about 20 minutes. But if you’re impatient (and I usually am!), just take one square and microwave it on a plate for about 10 to 15 seconds. That little burst of heat melts the chocolate just enough to bring back that glorious, gooey center. It’s like getting a fresh brownie straight from the oven every single time. Don’t you just love little baking hacks like that?
Frequently Asked Questions About This Decadent Chocolate Caramel Brownies
I always get so many questions when I post a new bake, especially when it involves multiple layers like this one! People want to know everything about getting that perfect caramel and that rich red hue just right. Since these are such a showstopper, I wanted to answer the common things that pop up right here before you dive in. You can also check out our official site disclaimer if you have ingredient questions or allergy concerns.
Can I skip the cream cheese swirl?
Oh, you absolutely can! If cream cheese isn’t your favorite thing, you can certainly leave it out. However, I really encourage you to replace that volume with something else so you don’t mess up the structure of the batter. Since the cream cheese and powdered sugar add structure and a tiny bit of moisture, if you skip it, just boost your regular brownie batter slightly. I recommend adding an extra tablespoon of that melted butter and maybe another tablespoon of cocoa powder to keep that deep flavor profile strong in your overall Decadent Chocolate Caramel Brownies.
How do I ensure my brownies are gooey and not cakey?
This is the most important question for any brownie lover! If you want those supremely Gooey Red Velvet Bars, you have to listen to your batter—don’t overbake! Seriously, pull them when that toothpick comes out with moist crumbs clinging to it, not wet batter dripping off, but definitely not perfectly dry. If you bake them until they are totally dry, you’ve got cake, my friend, and we don’t want cake here!
Also, remember what I preached about mixing in the main section? Don’t feel like you need to beat that flour mixture into submission. As soon as you add the flour, stop the mixer or put down the whisk. Mixing flour too much develops the gluten, and gluten means structure, which means cakey. We want the opposite! Keep it minimal for ultimate chewiness.
Nutritional Estimate for Your Indulgent Treat
Now, I hate to bring up boring stuff when we should only be thinking about chocolate and caramel swirls, but I know some of you are tracking things, so here are the rough estimates for one brownie square. Please take this with a huge grain of salt, okay? Because these are homemade, and the exact fat content of your butter or the sugar you used for the caramel can change things wildly!
This is the general snapshot based on the recipe as written, yielding 16 slices:
- Serving Size: 1 brownie
- Calories: 380
- Sugar: 45g
- Fat: 21g (That’s the richness right there!)
- Protein: 4g
- Carbohydrates: 48g
- Sodium: 210mg
This is definitely an indulgent treat, not an everyday snack, but my goodness, is it worth every single calorie! I’ve tried to keep the saturated fat down by balancing it with all the other components, but honestly, when you’re eating something this rich, you just have to embrace it. I’d rather eat one of these incredible things than three mediocre ones, wouldn’t you agree?
Share Your Ultimate Chocolate Red Velvet Combination
Wow, you made it through the whole recipe! I am so happy and honestly a little proud of you for tackling a recipe this decadent. Now that you have pulled those incredible, fudgy, ruby-red squares out of your oven, I really, really want to see them! The visual contrast between the dark chocolate base and those swirls of gooey caramel is just stunning—I need to know how yours turned out.
Don’t forget to come back here and leave a rating! Five stars if they melted in your mouth like I promised, but tell me honestly how long you baked them for. Those tiny adjustments really help the next person who tries this recipe. Did you manage to cut them without making a total caramel mess? Spill the details!
Seriously, tag me in your photos if you post them online, especially if you decide to dust them with extra flaky salt on top like I sometimes do. Sharing these amazing bakes is my favorite part about being in the kitchen. Happy eating, and thank you for joining me on this journey to create the Salted Caramel Red Velvet Brownies!
PrintSalted Caramel Red Velvet Brownies
A recipe for rich, fudgy brownies featuring a vibrant red velvet base swirled with homemade salted caramel.
- Prep Time: 25 min
- Cook Time: 35 min
- Total Time: 60 min
- Yield: 16 brownies
- Category: Dessert
- Method: Baking
- Cuisine: American
- Diet: Vegetarian
Ingredients
- 1 cup (2 sticks) unsalted butter, melted
- 2 cups granulated sugar
- 4 large eggs
- 1 tablespoon vanilla extract
- 1 teaspoon white vinegar
- 1 teaspoon red food coloring (high-quality gel recommended)
- 1 1/4 cups all-purpose flour
- 1/2 cup unsweetened cocoa powder
- 1/2 teaspoon salt
- 1/2 cup cream cheese, softened
- 1/2 cup powdered sugar
- 1/4 cup heavy cream (for caramel)
- 1 cup granulated sugar (for caramel)
- 6 tablespoons unsalted butter (for caramel)
- 1/2 teaspoon flaky sea salt (for caramel)
Instructions
- Preheat your oven to 350°F (175°C). Line a 9×13 inch baking pan with parchment paper, leaving an overhang on the sides for easy removal.
- In a large bowl, whisk together the melted butter and 2 cups of granulated sugar until combined.
- Beat in the eggs one at a time, mixing well after each addition. Stir in the vanilla extract, white vinegar, and red food coloring until the batter is uniformly red.
- In a separate bowl, whisk together the flour, cocoa powder, and salt. Gradually add the dry ingredients to the wet ingredients, mixing only until just combined. Do not overmix.
- Prepare the cream cheese swirl: Beat the softened cream cheese and powdered sugar together until smooth. Set aside.
- Prepare the salted caramel: In a medium saucepan over medium heat, melt 1 cup of granulated sugar without stirring until it turns a deep amber color.
- Remove the caramel from the heat. Carefully whisk in the 6 tablespoons of butter until melted. Slowly pour in the heavy cream while whisking constantly (the mixture will bubble vigorously). Stir in the flaky sea salt. Let the caramel cool slightly.
- Pour about two-thirds of the red velvet batter into the prepared pan and spread evenly.
- Dollop spoonfuls of the cream cheese mixture over the batter. Drizzle half of the cooled salted caramel over the top. Use a knife or skewer to gently swirl the layers together.
- Pour the remaining red velvet batter over the top and spread gently to cover. Dollop the remaining cream cheese mixture and drizzle the remaining caramel. Swirl again lightly.
- Bake for 30 to 35 minutes, or until a toothpick inserted near the center comes out with moist crumbs attached, not wet batter.
- Let the brownies cool completely in the pan on a wire rack before lifting them out using the parchment overhang and cutting into squares.
Notes
- For a fudgier texture, slightly underbake the brownies by about 2 minutes.
- Use high-quality gel food coloring for the most intense red color without thinning the batter.
- If you prefer a thicker caramel topping, allow the caramel to cool longer before drizzling.
Nutrition
- Serving Size: 1 brownie
- Calories: 380
- Sugar: 45
- Sodium: 210
- Fat: 21
- Saturated Fat: 13
- Unsaturated Fat: 8
- Trans Fat: 0
- Carbohydrates: 48
- Fiber: 2
- Protein: 4
- Cholesterol: 105