

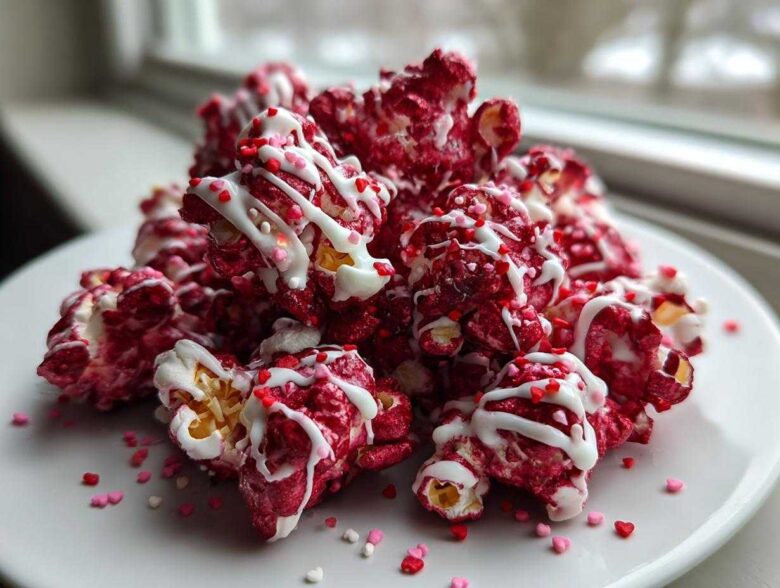
Oh my gosh, you have to try this! When the mood strikes for something sweet, salty, and just a *little* over-the-top festive, nothing beats a big bowl full of Red Velvet Popcorn. I’m talking about turning simple popped corn into the vibrant, tempting flavor explosion we call Cupid’s Crunch right in your own kitchen. Seriously, don’t be intimidated by the color—it’s so easy! This recipe is special because it perfectly balances the chocolatey depth of red velvet with that satisfying snap only great popcorn gives you. You’ll see why I’m obsessed!
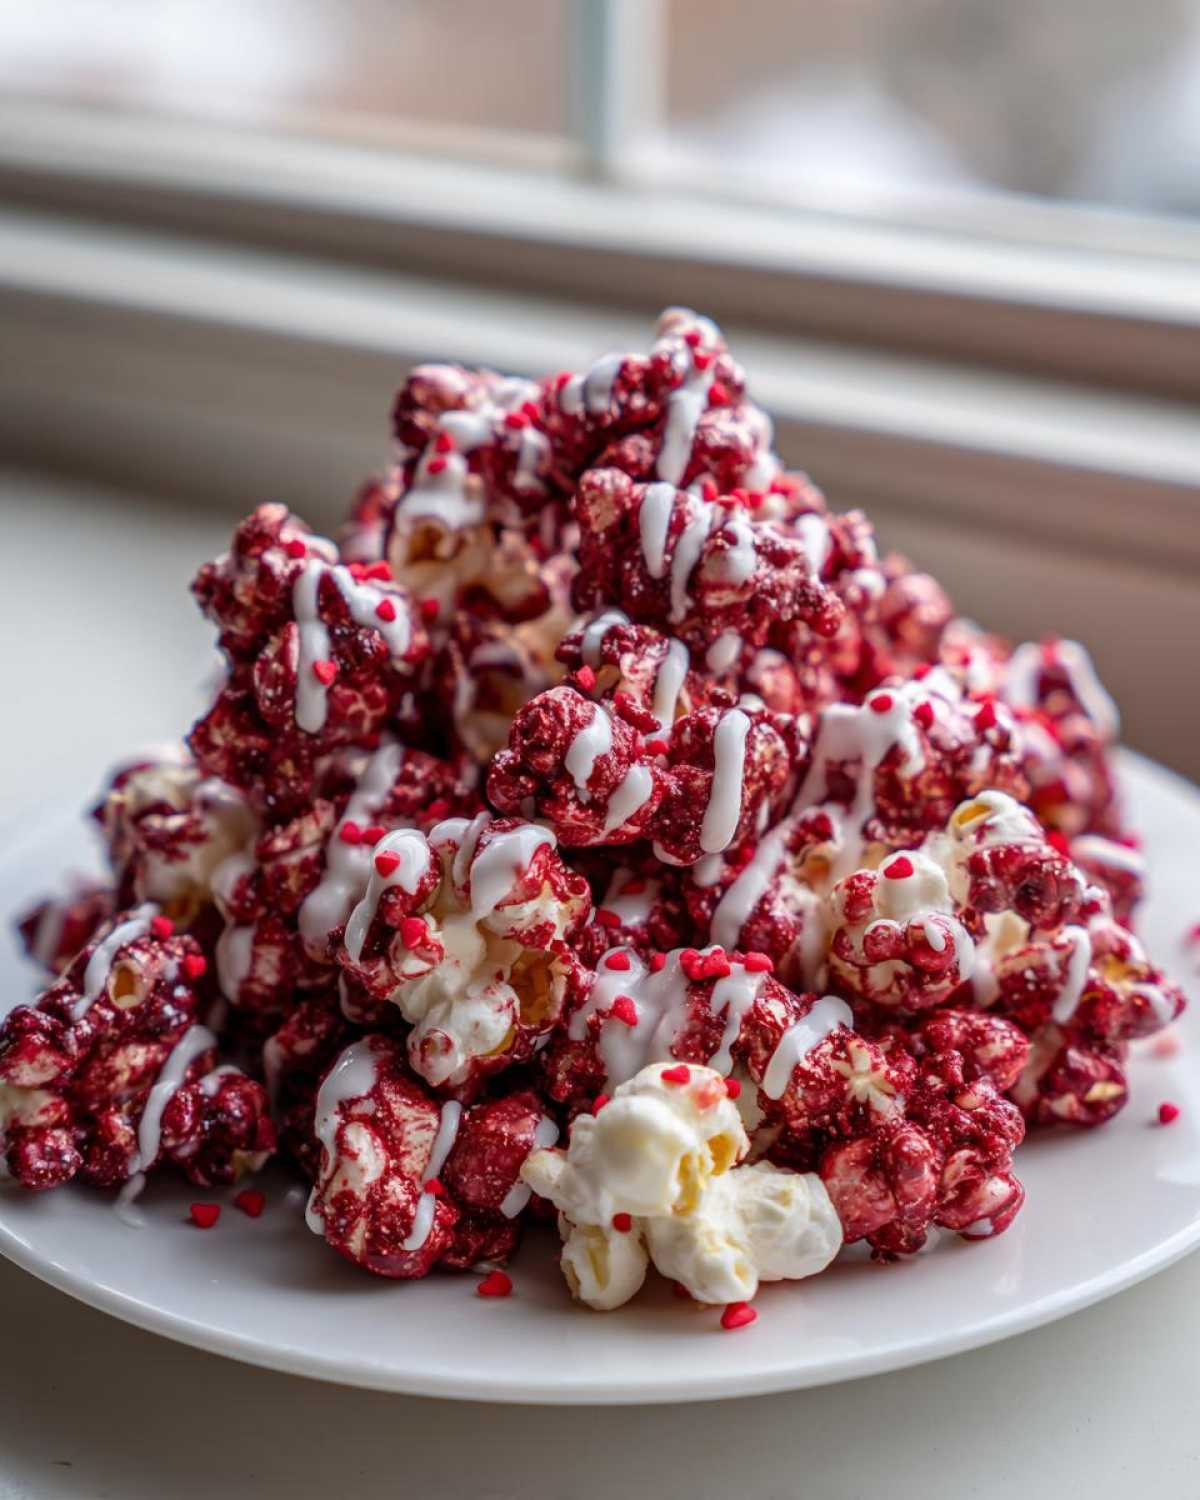
If you want to learn more about how we develop these foolproof, fun recipes around here, check out my About Us page. Trust me, this snack is guaranteed to disappear fast at any party!
Why This Red Velvet Popcorn (Cupid’s Crunch Recipe) Works So Well
So many dessert popcorn recipes just taste like colored sugar, but that’s not how we do things here! What makes this batch of Red Velvet Popcorn (Cupid’s Crunch Recipe) truly addictive is that we nail the *actual* red velvet flavor profile. Normally, that taste comes from the reaction between cocoa powder and buttermilk, right?
Well, we mimic it perfectly in this coating. You get sweetness from the white chocolate, a light chocolate note from the cocoa, and just a tiny bit of tang that cuts through the richness. It’s surprisingly sophisticated for a popcorn snack!
- It’s crunchy on the outside, light and airy on the inside—the perfect texture contrast.
- The chocolate coating is sturdy enough to hold that beautiful vibrant color.
- It hits the sweet spot between a dessert and a salty snack.
Achieving the Signature Deep Red Color
If you skip this one tip, your popcorn might end up looking pink, and nobody wants that! You absolutely must use red *gel* food coloring. Liquid coloring has too much water, and it will totally thin out your chocolate coating, making it runny and greasy. Gel drops give you the deepest, most intense color payoff without messing up the luxurious texture we’re aiming for.
Gathering Ingredients for Your Red Velvet Popcorn
Alright, let’s talk goodies! Getting the right ingredients is half the battle, and that’s where we build trust—no ambiguous measurements here! You can’t make legendary treats with sub-par stuff, so pay attention to these quantities, especially the red coloring. We need 12 cups of wonderfully popped popcorn—and please, try to keep those unpopped kernels out of the batch, they are no fun when you bite into them!
For the coating, we’re using a full 12 ounces of white chocolate wafers or chips, a quarter cup of butter for richness, that essential vanilla, and a tiny splash of white vinegar to give us that classic red velvet tang. Don’t forget the cocoa powder and the required red gel coloring. This list ensures your Red Velvet Popcorn turns out exactly like the picture!
Ingredient Notes and Substitutions for Red Velvet Popcorn (Cupid’s Crunch)
Listen, that optional buttermilk powder is your secret weapon for authentic flavor; even that small amount adds the signature acidity that makes red velvet pop! If you skip it, that little bit of white vinegar helps carry the load. As for the chocolate, I always recommend microwave-safe white chocolate *wafers* rather than chips if you can find them. Wafers melt way silkier than chips, which usually have stabilizers that can cause seizing when you mix in the color and flavors.
Step-by-Step Instructions for Homemade Cupid’s Crunch
Now for the fun part! This is where we turn fluffy corn into vibrant, flavor-packed Red Velvet Popcorn. The key here is speed once those chocolates start melting, so have everything measured and your big bowl ready to go. First things first: Get your 12 cups of popped corn into the biggest bowl you own. Seriously, nothing is worse than trying to fold coated popcorn in a tiny container!
Next up is melting down the chocolate and butter. I do this slowly in the microwave in 30-second bursts because scorching white chocolate is my absolute nightmare. Stir well between each blast until it’s totally smooth—we want liquid silk! Once it’s perfect, you whisk in your flavor: vanilla, that little bit of vinegar, the cocoa for depth, and the red gel coloring. Make sure that color is vibrant and uniform before you even *think* about adding it to the corn!
Here comes the critical move: Pour that beautiful, thick red mixture right over the popcorn. Grab your biggest, flattest spatula and gently fold everything together. You have to work fast here, coaching the chocolate onto every piece before it starts setting up. Once everything looks coated—and I mean *everything*—you need to spread it out immediately onto your parchment-lined sheets.
Coating and Setting the Red Velvet Popcorn
This is what separates ours from just drizzled popcorn. We’re going to bake this mixture briefly at 250 degrees Fahrenheit for about 10 minutes. Don’t panic about the low temperature; we aren’t really baking it, we are just setting that candy coating nice and firm so it crisps up instead of crumbling when you grab a handful. After 10 minutes, pull those sheets out and just let them sit on the counter to cool completely. Don’t touch it! Let it air set at room temperature. That slow cooling locks in the flavor and the crunch.
The Final Drizzle and Finishing Touches for Red Velvet Popcorn
Once totally cool, you can prepare for the showstopper moment! Melt that extra cup of white chocolate chips separately—again, gentle microwave stirring wins the day. Drizzle this melted white chocolate back and forth over your cooled Red Velvet Popcorn clusters. This adds beautiful visual contrast.
If you’re using those adorable heart sprinkles, this is your last chance to deploy them! Sprinkle them right onto the wet, drizzled chocolate so they stick beautifully. Then, walk away until everything is hard set. Once it snaps apart easily, you’ve officially nailed your homemade Cupid’s Crunch!
Tips for Perfect Red Velvet Popcorn (Cupid’s Crunch)
Even with a great recipe, a few tiny adjustments can take your Red Velvet Popcorn from good to absolutely legendary. I’ve learned these little tricks over perfecting my own Valentine treats.
First, make sure your popcorn is bone dry before you coat it. Any residual steam or humidity will instantly create soft, gummy spots in your beautiful candy shell. Pop it fresh, or spread it on a baking sheet for ten minutes in a warm oven just to dry it out before you begin mixing.
Next, temperature matters! Work quickly when folding the coating in, but once you spread it on your parchment, leave it alone to cool naturally. If you try to rush it in the fridge, the chocolate can sometimes seize up weirdly or get that dull, chalky finish we hate.
Finally, always use a high-quality white chocolate for the coating. Cheap brands can have too much wax, which prevents that smooth, fudge-like texture that really pulls the whole Cupid’s Crunch experience together.
Serving Suggestions for Your Sweet and Salty Valentine Treats
Okay, so you have this gorgeous bowl of vibrant Red Velvet Popcorn. Now what? While eating it straight from the mixing bowl over the sink definitely counts as a serving suggestion in my house, these Sweet and Salty Valentine Treats look amazing when presented nicely!
If you’re packaging this up for gifts—which you absolutely should because it makes amazing popcorn gifts for her—use clear cellophane bags tied with red or pink ribbon; the color just pops against the clear bag. You can also set out small bowls of this popcorn alongside a tart sparkling cider or a creamy iced coffee. The slight tang in the popcorn coating is fantastic when paired with something slightly acidic or very cold!
Storage and Keeping Your Red Velvet Popcorn Fresh
When you make a batch this good, you hope it lasts a while, right? The great news about this Red Velvet Popcorn is that once that white chocolate coating has set completely, it’s pretty sturdy! But humidity is the enemy of any great popcorn treat.
You absolutely need to store your finished Cupid’s Crunch in an airtight container. Don’t use plastic bags unless they seal really well; sometimes the plastic allows a tiny bit of air in, and that moisture softens the coating. I prefer sturdy plastic bins with good snap-on lids.
Keep the container right on the counter at room temperature. No hiding this in the fridge, please! Putting candy-coated popcorn in the fridge often causes condensation the second you take it out, which makes the coating sticky again. Not fun!
If you follow the simple rule of keeping it airtight and cool (not cold!), this gourmet popcorn flavor lasts beautifully for about a week. Honestly though, I’ve never had a batch last longer than three days in my house!
Frequently Asked Questions About Red Velvet Popcorn Recipe
It’s funny how many questions pop up once you start making something as bright and fun as Red Velvet Popcorn! People always want to know if they can cheat the process or fix those little kitchen hiccups. I’ve gathered the most common worries about making our Red Velvet Chocolate Covered Popcorn treat right here for you.
If you ever have questions about liability or ingredient sourcing, you can always check our site disclaimer for context on how we test and present these recipes!
Can I make this Red Velvet Popcorn without baking?
You totally can! Baking it for that 10 minutes at 250°F just gives you that extra crispy shell we love for the best Cupid’s Crunch crunch. If you don’t want to turn on the oven, just spread your coated popcorn on the parchment paper, make sure it’s in one thin layer, and let it air dry completely for at least an hour, or until the chocolate is rock hard. It will still be delicious, but might be slightly softer than the oven-set version.
How do I get the best ‘Cupid’s Crunch’ texture?
Texture is everything, isn’t it? The main secret is that white chocolate quality we talked about earlier—use wafers or high-quality baking chips, not standard eating chocolate chips. Also, you *must* ensure that every single piece of popcorn is lightly coated before it hits the baking sheet. If you have big dry patches, those spots will be soft and chewy later, messing up that perfect airy crunch.
Estimated Nutritional Data for Red Velvet Popcorn (Cupid’s Crunch)
Okay, let’s be realistic: when you’re diving into a bowl of vibrant red, chocolate-y goodness like this Red Velvet Popcorn, you probably aren’t stopping to count macros! But I always get asked about balance, so I pulled together the estimated numbers for a standard one-cup serving size, just so you know what you’re snacking on.
Remember, this is just an estimate for the base Cupid’s Crunch recipe without loading up on extra sprinkles or chocolate chunks. The white chocolate coating means we lean toward the sweeter side, but since the fluff of the popcorn adds so much air, the calories are pretty reasonable for a dessert treat!
- Serving Size: 1 cup
- Calories: Roughly 250
- Total Fat: 16g (Be mindful of that saturated fat content!)
- Carbohydrates: 25g
- Sugar: 20g (Yep, it’s a sweet one!)
- Protein: 3g
- Sodium: Around 50mg
See? Not too bad for a gourmet popcorn flavor! It’s definitely a treat, but because it’s so airy, one cup feels really satisfying. Enjoy it guilt-free!
Share Your Homemade Cupid’s Crunch Creations
Now that you know every little trick to getting that perfect, vibrant coating on your Cupid’s Crunch, I absolutely have to see what you come up with! Sharing photos is my favorite part of recipe developing. Did you stick to the classic red drizzle, or did you go wild with pink and white stripes?
Seriously, take a snap of your beautiful Red Velvet Popcorn and tag me on social media! When you try the recipe, please jump down to the comments section and leave a rating. Knowing what works for you—and what you loved most about the flavor contrast—helps everyone who tries this recipe next time.
If you have any lingering questions after baking or just want to reach out about partnering on another holiday snack idea, feel free to use my contact page. Happy snacking, everyone, and I can’t wait to see all that delicious red!
PrintUltimate Valentine’s Red Velvet Popcorn (Cupid’s Crunch Recipe)

Make this vibrant, sweet, and slightly tangy Red Velvet Popcorn at home for a festive Valentine’s treat or gift.
- Prep Time: 15 min
- Cook Time: 10 min
- Total Time: 25 min
- Yield: 12 servings
- Category: Dessert
- Method: Baking
- Cuisine: American
- Diet: Vegetarian
Ingredients
- 12 cups popped popcorn (air-popped preferred)
- 12 ounces white chocolate melting wafers or chips
- 1/4 cup unsalted butter
- 1/2 teaspoon vanilla extract
- 1/4 teaspoon white vinegar
- 1 tablespoon unsweetened cocoa powder
- 1 to 2 teaspoons red gel food coloring
- 1/2 teaspoon buttermilk powder (optional, for tang)
- 1 cup white chocolate chips (for drizzling or mixing)
- 1/4 cup heart-shaped sprinkles (optional)
Instructions
- Pop your popcorn and set it aside in a very large bowl. Remove any unpopped kernels.
- In a medium, microwave-safe bowl, combine the white chocolate melting wafers and butter. Microwave in 30-second intervals, stirring well after each, until completely smooth.
- Stir the vanilla extract, white vinegar, cocoa powder, and red gel food coloring into the melted chocolate mixture until the color is uniform and deep red. If using, stir in the buttermilk powder now.
- Pour the red velvet coating evenly over the popped popcorn. Gently fold the popcorn with a large spatula until every piece is coated. Work quickly before the chocolate sets.
- Spread the coated popcorn in a single layer onto two large baking sheets lined with parchment paper.
- Bake in a preheated oven at 250 degrees Fahrenheit for 10 minutes to set the coating slightly. Remove from the oven and let cool completely at room temperature.
- Once cooled, melt the extra cup of white chocolate chips separately using the same microwave method. Drizzle the melted white chocolate over the cooled popcorn.
- Immediately sprinkle with heart-shaped sprinkles, if using. Allow the drizzle to set completely before breaking the popcorn apart.
Notes
- Use gel food coloring for the most intense red color without thinning the chocolate coating.
- For a crispier coating, you can bake the popcorn for 15 minutes instead of 10, but watch carefully to prevent burning.
- Store the finished popcorn in an airtight container at room temperature for up to one week.
Nutrition
- Serving Size: 1 cup
- Calories: 250
- Sugar: 20
- Sodium: 50
- Fat: 16
- Saturated Fat: 10
- Unsaturated Fat: 6
- Trans Fat: 0
- Carbohydrates: 25
- Fiber: 1
- Protein: 3
- Cholesterol: 10