

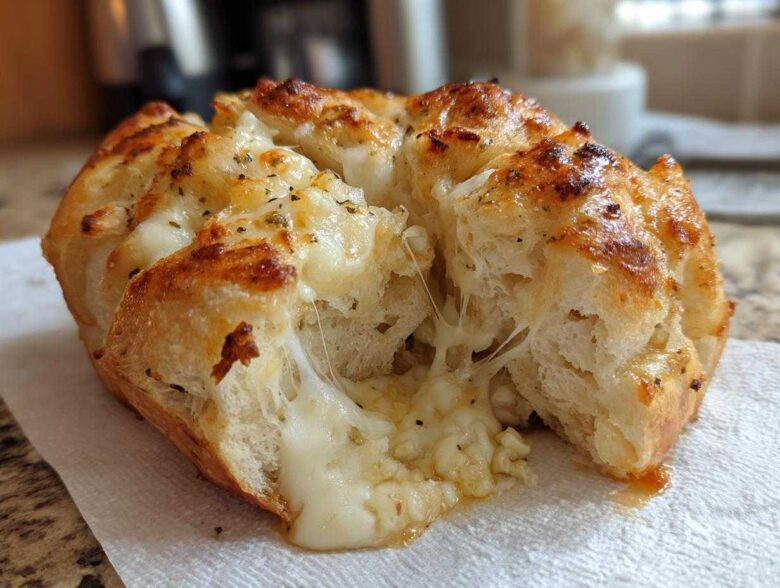
Ugh, weeknights. We all get stuck in that rut where dinner needs to be fast, but you secretly crave something that feels a little fancy, right? Well, I’ve got the absolute winner for you today! Say hello to my go-to Cheesy Garlic Chicken Rolls. These aren’t just simple chicken breasts; they are little treasures stuffed with so much creamy, garlicky goodness that your family will swear you spent hours on them. Trust me, perfecting the internal filling—making it smooth enough to roll but thick enough not to gush out everywhere—was a journey I took so you don’t have to!
Why You Will Make These Cheesy Garlic Chicken Rolls Often
Honestly, this recipe is going straight into your ‘Favorites’ folder. I keep coming back to it for three simple reasons. You get huge flavor payoff for minimal effort. Check out what makes these fantastic:
- They look way more complicated than they actually are. Seriously, you just pound, stuff, and roll!
- That filling combination of cream cheese, Parmesan, and fresh garlic is just pure comfort food heaven.
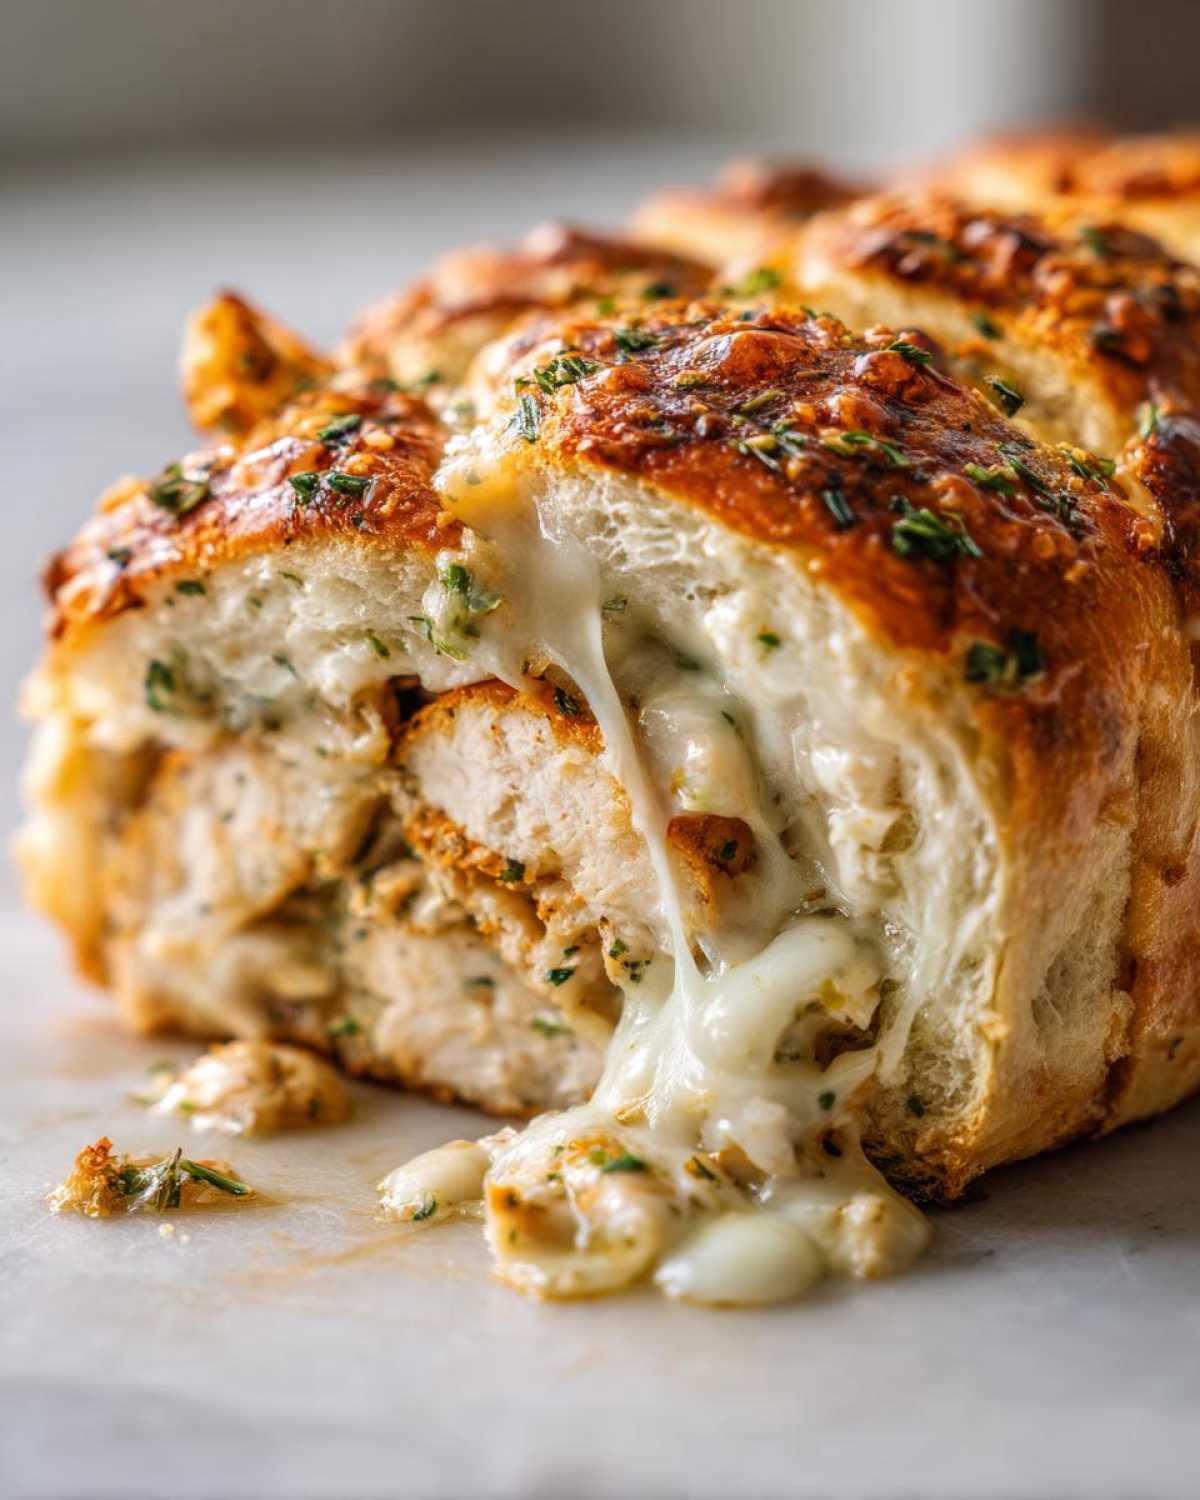
- The cheese pull! When you slice into one of these piping hot, you get that amazing ooey-gooey cheese stretch that kids (and I) live for.
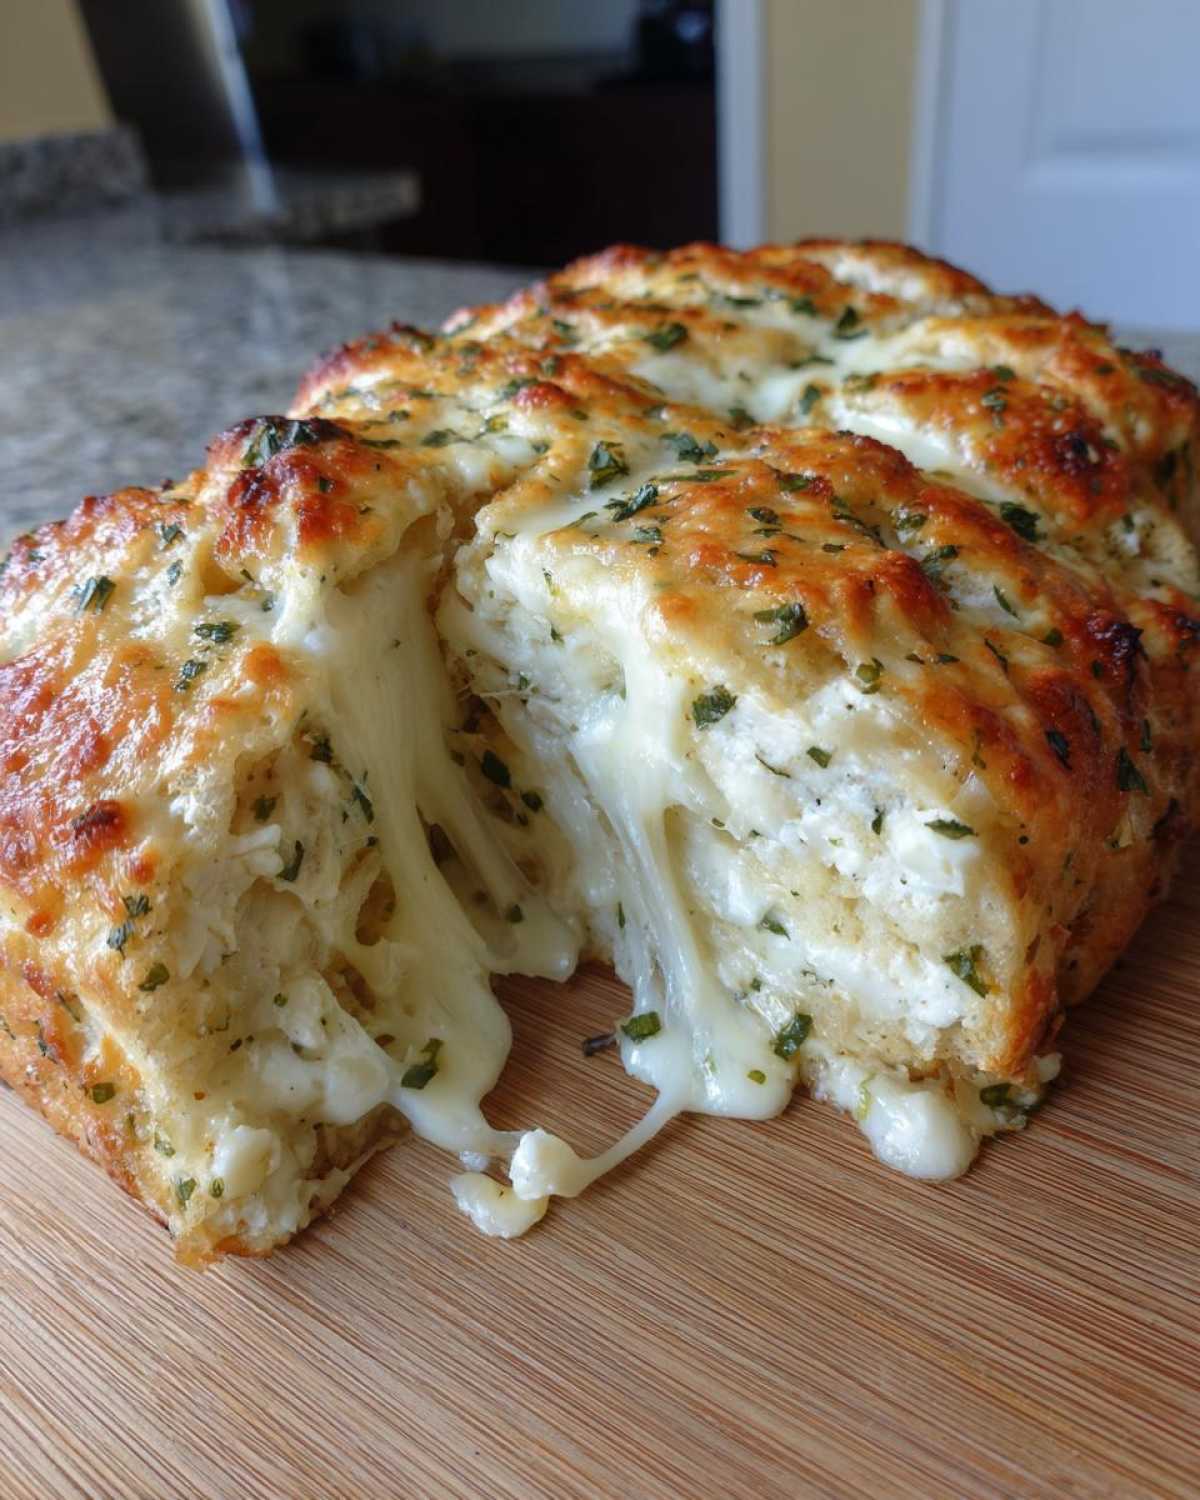
- They come together fast! We’re talking about a total time of under an hour, which is perfect for an impressive weeknight chicken dinner.
- The seasoning on the outside gets this beautiful, slight crispness while the inside stays super juicy.
- Cleanup is shockingly easy since everything bakes together right there in one dish.
- They feel special enough for company but simple enough for Tuesday night when you’re tired.
Essential Ingredients for Perfect Cheesy Garlic Chicken Rolls
Okay, let’s talk about what you need. Because this is a stuffed recipe, the quality of your filling items really shines through. We aren’t using a ton of stuff, so make sure what you use is good! Seriously, don’t skimp on the fresh garlic here—that’s where 90% of the flavor comes from.
Here is exactly what you need for four amazing servings:
- 4 boneless, skinless chicken breasts (about 6-8 oz each)
- 1 tablespoon olive oil (for rubbing the outside)
- 1 teaspoon salt
- 1/2 teaspoon black pepper
- 1/2 cup cream cheese, making sure it’s nice and softened!
- 1/2 cup shredded mozzarella cheese (the low-moisture kind works best)
- 1/4 cup grated Parmesan cheese (use the real stuff if you can!)
- 4 cloves garlic, minced super fine—we want flavor, not big chunks!
- 2 tablespoons fresh parsley, chopped up nice
- 1/4 teaspoon dried Italian seasoning
Ingredient Notes and Substitutions for Cheesy Garlic Chicken Rolls
You might be tempted to swap things out, but hear me out on a couple of these. The cream cheese is non-negotiable; it’s the glue that holds this whole operation together and makes the inside so creamy when it melts. If you don’t soften it properly, your filling will be lumpy and hard to spread!
If you’re out of fresh parsley, a teaspoon of dried Italian seasoning is okay, but fresh parsley really brightens up that heavy garlic and cheese mix. Also, while the recipe calls for chicken breasts, if yours are gigantic, you’ll need to pound them thinner than 1/4 inch, or they’ll dry out before the center cooks.
One trick my sister swears by? She sometimes adds a tiny pinch of onion powder to the filling mix along with the garlic. It just deepens that savory base. Don’t mess with the oven temperature though; 400°F is the sweet spot to cook the chicken through without drying it out before the cheese gets gooey warm—that’s the magic of baking these rolled chicken with garlic filling!
How to Make Cheesy Garlic Chicken Rolls Step-by-Step
Alright, this is where the fun starts! It looks complex, but I promise you, if you follow these steps closely, you’ll have crispy, juicy, cheesy masterpieces ready in no time. The goal here is even thickness and a tight roll, so pay attention to that pounding!
Preparing the Chicken for Rolled Chicken with Garlic Filling
First thing’s first: get that oven preheating to 400 degrees Fahrenheit—that high heat helps sear the outside nicely while the insides cook. Grease up a standard baking dish—I use just a light spray of avocado oil myself. Now for the chicken! Lay a breast between two sheets of plastic wrap. This is the best trick to keep your mallet—or rolling pin, if you don’t have a mallet—from getting messy. You need to pound it evenly to about 1/4-inch thickness. If one end is still thick, it won’t cook at the same speed as the thin end, and that equals dry chicken!
Creating the Garlic Cheese Chicken Roll-Ups Filling
While the oven is warming up, let’s make the stuffing magic happen! Grab a small bowl and mix that softened cream cheese until it’s smooth—no lumps allowed! Then whip in your mozzarella, Parmesan, that minced garlic, parsley, and Italian seasoning. Stir it until it looks like a thick, glorious pale green paste. I usually give a little taste test (I know, slight food safety risk, but you gotta know if the seasoning is right!). This consistency is perfect; it spreads but won’t run everywhere.
Assembling and Baking Your Cheesy Garlic Chicken Rolls
Take about two big spoonfuls of the filling and spread it right across the wide end of your pounded chicken. Don’t go all the way to the edges, or it will squirt out when you roll! Roll it up tightly, just like you’re rolling up a giant burrito, starting from that wide end. Seriously, wrap it tight! If you’re nervous about it unrolling, stick one or two toothpicks through the seam. Rub the outside of the garlic cheese chicken roll-ups with olive oil and sprinkle with salt and pepper. Place them seam-side down in your dish. Bake for 25 to 30 minutes. You absolutely must check that internal temperature; it needs to hit 165°F for safety. If you want a little extra color, pop an extra sprinkle of Parmesan on top for the last five minutes of baking!
Tips for Success with Your Garlic Cheese Chicken Roll-Ups
I’ve messed these up before—who hasn’t? They can easily lose some filling, or worse, the chicken gets dry. But I’ve learned a few tricks that guarantee you get juicy baked chicken rolls every single time, and keep that cheesy center locked inside.
My absolute number one tip is about the pounding. Make sure it’s even! If you have a very thick section, it takes way longer to cook, and the thin parts dry up waiting for it. If you don’t have a meat mallet, grab a heavy small saucepan or even a sturdy wine bottle—just use the smooth bottom side—and pound gently!
Also, don’t overstuff them! I know it’s tempting to pile that amazing garlic cheese filling right into the middle, but you need a good half-inch border around the edges. If you put too much in, the cheese melts instantly and pushes out the sides before the chicken even starts to seal up. Stuffing with about 2 tablespoons per breast is usually perfect.
If you want that extra layer of flavor that really makes these look professional, try taking an extra five minutes before baking. Get a skillet extremely hot with a smudge of oil and quickly sear the outside of the rolled chicken rolls for just one minute on each side. You aren’t cooking them through; you’re just locking in color and flavor before they go into the oven for the main cook time. It makes a huge difference!
Finally, don’t skip the resting time! I know pulling dinner out of the oven makes you want to slice it immediately, but let those rolls sit for 5 minutes before you pull out any toothpicks or slice them up. That rest time lets the juices redistribute back into the meat, which means your final product isn’t sitting in a puddle of run-off moisture!
Serving Suggestions for Your Melted Cheese Chicken Dinner
Now that you’ve got these gorgeous, cheesy, garlicky rolls ready to go, what are we going to put next to them? Because this dish—this glorious melted cheese chicken dinner—is rich and savory, you want sides that offer some contrast or are super simple so they don’t fight the star of the show.
My go-to choice is always something bright and green. A big, simple side salad with a sharp vinaigrette cuts right through the creaminess of the filling perfectly. You need that acidity!
If you want something heartier, roasted asparagus tossed with just a little lemon juice when it comes out of the oven is fantastic. The slight char on the asparagus marries beautifully with the roasted garlic flavor we have going on in the chicken. You really can’t mess that one up.
For the carb lovers? Keep it plain! A simple side of buttered egg noodles or even just some fluffy rice works great because they soak up any little pockets of garlic butter that might have seeped out during baking. Honestly, whatever you pick, make sure it’s quick, because once these come out of the oven, everyone’s going to want one immediately!
Storage and Reheating Instructions for Cheesy Garlic Chicken Rolls
The best part about making these amazing garlic parmesan chicken rolls is that they actually taste fantastic the next day too! Don’t even think about throwing leftovers away. I find they are perfect for quick lunches the next day, though you do have to reheat them carefully so you don’t dry out the chicken breast.
Once the rolls have completely cooled down after dinner, you need to store them properly. Pop any leftovers into an airtight container. This traps the moisture in, which is key because baked chicken breast hates to be left uncovered in the fridge! They should keep well for up to three, maybe four days max.
When you’re ready for round two—your easy reheated dinner—I strongly recommend using the oven. It keeps the exterior from getting soggy, which is what happens in the microwave instantly. Reheat them in a small baking dish covered loosely with foil. I set the oven to about 350°F (175°C) and let them warm through for about 15 minutes, or until the insides are steaming hot. If they look a little dry coming out, just spoon a tiny bit of leftover pan juice over the top before serving!
If you are in a true rush and must use the microwave, just heat them on medium power in 45-second bursts, making sure to wrap the roll in a damp paper towel first. That damp towel helps trap steam and prevents the meat from turning rubbery right away. Whatever way you reheat, always let the comfort food chicken recipe rest for just a minute before slicing into it. That short rest makes a huge difference in texture!
Frequently Asked Questions About Cheesy Garlic Chicken Rolls
I know you’ve got questions! When you’re dealing with stuffed chicken, it’s natural to worry about undercooking or cheese escaping. I’ve tried just about every mistake possible when making these simple chicken breast roll recipe variations, so let me save you some trouble!
Can I use frozen chicken for these Cheesy Garlic Chicken Rolls?
Oh, please don’t try to pound chicken straight from the freezer! You won’t get an even thickness, and you risk damaging your mallet or your counter. If you’re pressed for time, you can thaw it slightly so it’s still very firm, but it needs to be mostly thawed so you can flatten it safely and correctly. Thawed means safer cooking all the way through, too!
What is the best way to prevent the cheese filling from leaking out?
This is the classic worry with any melted cheese chicken dinner! The two best defenses are making sure your chicken is pounded evenly thin—no thick spots left behind—and rolling it up as tightly as you possibly can from the wide end. Think of it like rolling a very snug sleeping bag! Then, yes, use those toothpicks. I often slide one toothpick clear across the seam near the top and another near the bottom seam. They keep everything sealed while baking. Just remember to pull them out before you serve them, or someone’s going to have a surprise!
Also, don’t overfill! Seriously, 2 tablespoons is plenty for a standard breast. Too much filling guarantees leakage.
Another great question I always get is about cheeses. Can you swap the mozzarella? Sure, but you lose that classic meltiness. Fontina works well if you want something richer, but the combination of cream cheese for binding and mozzarella for stretch is what makes these specific garlic cheese chicken roll-ups so irresistible!
Nutritional Estimates for Your Garlic Cheese Chicken Roll-Ups
So, let’s talk quick facts, because knowing what’s in this amazing best chicken and cheese recipes entry is helpful, especially when trying to fit it into a busy week. You might be surprised how high in protein these rolls are, but remember, we are using cream cheese and Parmesan, so there is some fat content in there!
These numbers are just estimates for one single roll—and that’s assuming you used standard ingredients without adding extra oil for searing, for example. I always recommend checking your specific brands if you have tight dietary goals.
- Serving Size: 1 roll
- Calories: 380
- Protein: 48g (Wow! That’s a solid meal right there!)
- Fat: 18g (A good chunk of that is the creamy filling!)
- Saturated Fat: 9g
- Carbohydrates: 4g
- Sugar: 2g
- Sodium: 450mg
Now, a very important word of caution, because I always preach transparency here on my site. Please know that these are just estimates based on general averages for the ingredients listed. If you use low-fat cream cheese or a reduced-sodium Parmesan, those numbers will shift! For the most accurate counting, you should always refer to the nutrition calculator on my official site disclaimer page using the exact ingredients you bought. But for a satisfying, comfort food chicken recipe, these look pretty darn good!
Share Your Family Favorite Chicken Rolls Experience
That’s it! You have officially made my absolute favorite weeknight wonder. Seriously, when you slice into those rolls and see that melty garlic filling oozing out—tell me you aren’t proud? This recipe has been a lifesaver for me when company shows up unexpectedly and I need something that tastes amazing without stressing me out!
I really, truly hope these family favorite chicken rolls end up on your regular rotation just like they are on mine. I’m dying to know how they turned out for you! Did you add any secret ingredients to that filling mixture that I haven’t thought of?
Go ahead and drop a rating down below—tell me what you think out of five stars! And if you tried searing them first, or maybe used a different cheese blend, leave a comment so the rest of us can learn your genius tips! Happy cooking, friends!
PrintCheesy Garlic Chicken Rolls
Make impressive, juicy chicken rolls stuffed with a rich, cheesy garlic filling and baked until golden.
- Prep Time: 15 min
- Cook Time: 30 min
- Total Time: 45 min
- Yield: 4 servings
- Category: Dinner
- Method: Baking
- Cuisine: American
- Diet: Low Fat
Ingredients
- 4 boneless, skinless chicken breasts
- 1 tablespoon olive oil
- 1 teaspoon salt
- 1/2 teaspoon black pepper
- 1/2 cup cream cheese, softened
- 1/2 cup shredded mozzarella cheese
- 1/4 cup grated Parmesan cheese
- 4 cloves garlic, minced
- 2 tablespoons fresh parsley, chopped
- 1/4 teaspoon dried Italian seasoning
Instructions
- Preheat your oven to 400 degrees Fahrenheit (200 degrees Celsius). Lightly grease a baking dish.
- Place each chicken breast between two sheets of plastic wrap. Pound the chicken to an even 1/4-inch thickness using a meat mallet.
- In a small bowl, mix the softened cream cheese, mozzarella cheese, Parmesan cheese, minced garlic, parsley, and Italian seasoning until well combined. This is your filling.
- Place about 2 tablespoons of the cheese mixture onto the wide end of each pounded chicken breast.
- Roll the chicken tightly around the filling, starting from the wide end. Secure the roll with one or two toothpicks if necessary.
- Rub the outside of the chicken rolls with olive oil. Season the outside of the rolls evenly with salt and pepper.
- Place the rolls seam-side down in the prepared baking dish.
- Bake for 25 to 30 minutes, or until the internal temperature of the chicken reaches 165 degrees Fahrenheit (74 degrees Celsius) and the cheese is melted and bubbly.
- Remove the toothpicks before serving. Let the rolls rest for 5 minutes before slicing or serving whole.
Notes
- For extra flavor, you can sear the outside of the rolls in a hot skillet for 1-2 minutes per side before baking.
- If you prefer a crispier top, sprinkle a little extra Parmesan cheese over the rolls during the last 5 minutes of baking.
- Use fresh garlic for the best flavor in the filling.
Nutrition
- Serving Size: 1 roll
- Calories: 380
- Sugar: 2
- Sodium: 450
- Fat: 18
- Saturated Fat: 9
- Unsaturated Fat: 9
- Trans Fat: 0
- Carbohydrates: 4
- Fiber: 0
- Protein: 48
- Cholesterol: 140