

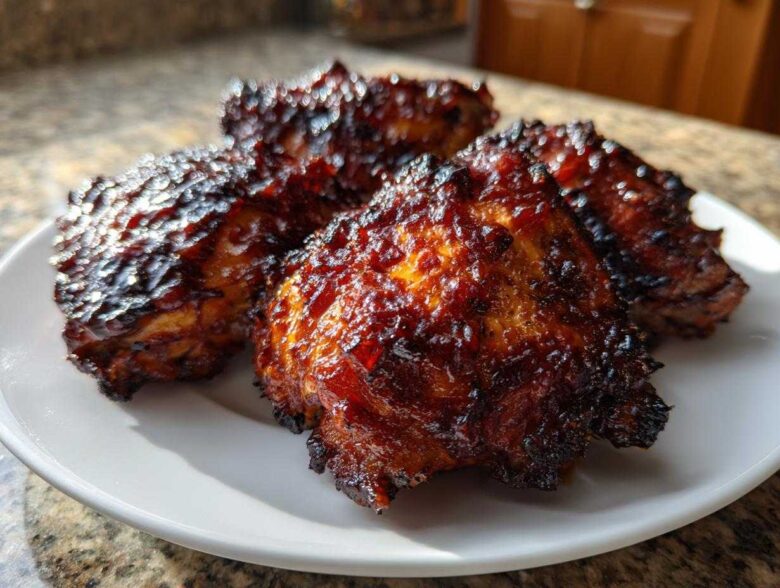
Oh, I absolutely *know* the pain. You get your chicken thighs all saucy and sweet, put them in the oven, and they come out looking like sad, steamed puddles? Soggy skin is the enemy when you’re craving that perfect bite! Well, stop cursing your oven right now, because I’ve cracked the code.
I spent years chasing that elusive texture, testing racks, temperatures, and glaze timing until I finally nailed it. This method guarantees you get truly Sticky BBQ Chicken Thighs with Crispy Edges every single time, even using just your regular oven. It’s all about airflow and layering that incredible BBQ flavor. Trust me, once you try this, you’ll never go back to just slathering sauce on raw chicken again!
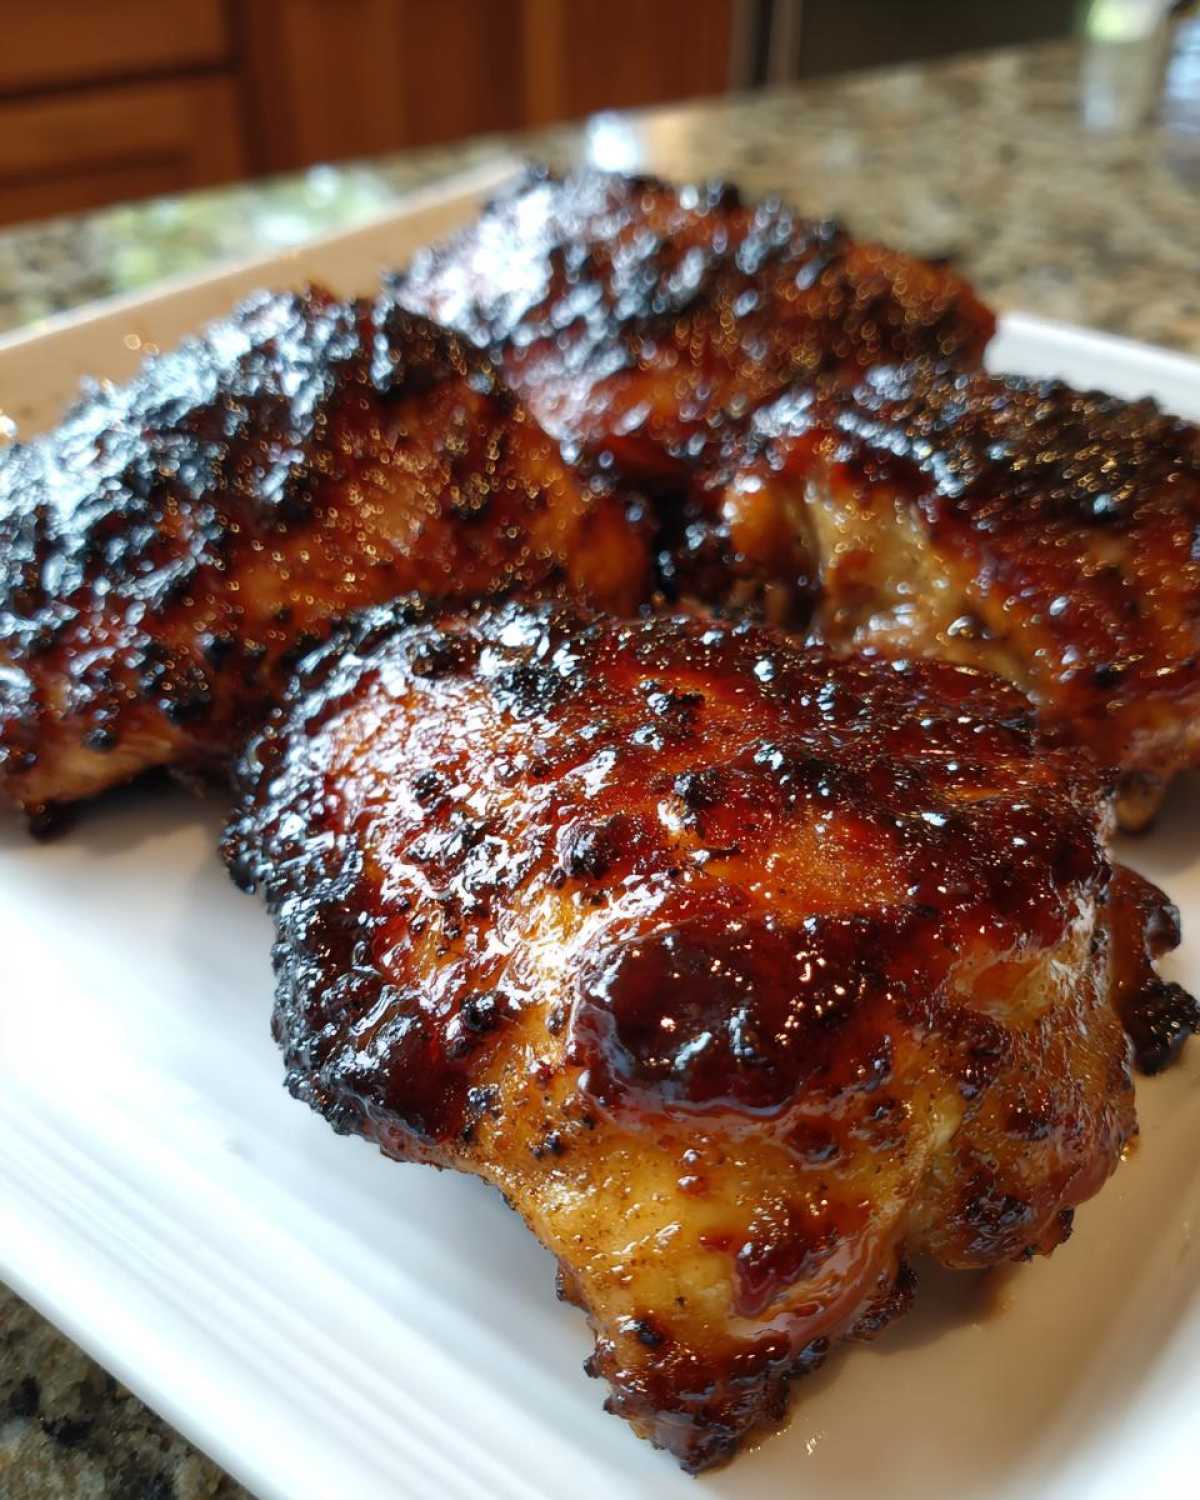
Why You Will Love These Sticky BBQ Chicken Thighs with Crispy Edges
Seriously, this recipe solves every single problem you might have with baked chicken thighs. You don’t need a smoker or even a grill to get incredible texture. It’s the weeknight secret weapon I didn’t know I needed until I figured out the rack trick!
- The skin gets genuinely crispy—no more sad, gummy pockets!
- We’re achieving those amazing, caramelized, Sticky BBQ Chicken Thighs with Crispy Edges right in the oven.
- The homemade glaze is ridiculously easy, balancing sweet smoke with just a little tanginess.
- Since we use bone-in thighs, the meat stays incredibly juicy underneath that crunchy coating.
- Cleanup is practically zero because we use foil and a rack to keep everything lifted off the pan.
- This simple baking method is perfect for serving up a crowd-pleasing dinner fast.
Essential Ingredients for Sticky BBQ Chicken Thighs with Crispy Edges
You only need a few things to make this magic happen, but listen closely: the type of chicken you buy matters a bunch! For the best results—meaning that crackly, sticky BBQ chicken thighs with crispy edges experience—you absolutely must use the bone-in, skin-on variety. They protect the meat and give us that lovely layer to crisp up.
We break this down into two parts: the simple rub that locks in flavor while the skin renders, and the thicker glaze we apply later so it caramelizes instead of just running off.
For the Dry Rub and Chicken Prep
This is your base layer of deliciousness. Don’t skip the paprika; it helps with that gorgeous reddish-brown color when it roasts!
- 8 bone-in, skin-on chicken thighs (The star of the show!)
- 1 tablespoon olive oil
- 1 teaspoon salt
- 1 teaspoon black pepper
- 1 teaspoon garlic powder
- 1 teaspoon smoked paprika (This is crucial for that BBQ depth!)
- 1/2 teaspoon onion powder
For the Sticky BBQ Glaze
The key to a truly sticky coating is balancing the sweetness with a little acid, and using a sauce that’s already nice and thick. If your favorite BBQ sauce is thin, it’ll burn before the chicken is cooked through. Aim for something hearty!
- 1 cup your favorite thick BBQ sauce
- 2 tablespoons brown sugar (The dark stuff, if you have it, adds more molasses flavor!)
- 1 tablespoon apple cider vinegar (This cuts through the sweetness perfectly)
Equipment Needed for Perfectly Glazed Chicken Thighs
You don’t need a dozen fancy gadgets for this recipe to work beautifully. In fact, the most important piece of equipment is one you might already have sitting in a drawer. This setup is what separates that sad, pale chicken from the crunchy winner we are aiming for!
When we talk about getting those amazing edges, airflow is everything. The chicken skin touching the pan traps steam, and steam equals soggy skin. We want dry heat hitting every surface!
- A Large Baking Sheet: Make sure it’s big enough to hold all eight thighs without them bumping into each other too much.
- A Wire Cooling Rack: This is the game-changer! You need a rack that fits inside your baking sheet. This lifts the chicken up so air can circulate underneath while the fat drips away.
- Aluminum Foil: I highly recommend lining the baking sheet *underneath* the rack with foil. This captures all the drips and makes cleanup a five-second job. Trust me on this one; sticky sauce baked onto a sheet pan is nobody’s friend.
- Small Saucepan: For gently warming up that beautiful glaze mixture until it’s smooth and ready to stick.
- Pastry Brush: To evenly paint that sweet, thick sauce onto the chicken during the final stages of cooking.
Step-by-Step Guide to Oven Roasted BBQ Thighs Crispy Skin
Okay, this is where the magic happens! We are moving carefully here because getting the timing right ensures we end up with juicy meat instead of that burnt, sticky mess! Remember, the secret to getting those fantastic Sticky BBQ Chicken Thighs with Crispy Edges is separating the initial cooking from the glazing process. We want the fat to render *before* we introduce all that lovely sugar!
Prepping the Chicken and Oven Setup
First things first: get that oven hot! We need a high start to dry out the skin quickly.
- Preheat your oven to 400 degrees Fahrenheit (200 degrees Celsius). Seriously, don’t rush this; let it heat up fully.
- Grab your baking sheet and line it with foil—I can’t stress this enough for easy cleanup! Then, set that wire cooling rack right on top of the foil.
- Next, grab your chicken thighs. You need to pat them completely dry with paper towels. Like, really dry! If they are damp at all, they will steam instead of crisp.
- In a little bowl, mix up your dry rub: salt, pepper, garlic powder, paprika, and onion powder.
- Brush the tops and bottoms with just a tiny bit of olive oil, then rub that dry seasoning mix all over every single surface of the chicken.
- Place the seasoned thighs skin-side up on the wire rack. Make sure there’s a little bit of breathing room between each one—again, airflow equals crispiness!
- Pop this whole setup into the oven for 30 minutes. This first blast cooks the chicken and starts rendering off that skin fat. Don’t touch the sauce yet!
Making the Easy Homemade BBQ Sauce for Thighs
While your chicken is getting its first bake going, whip up the glaze. It only takes five minutes, but it makes such a huge difference compared to using plain sauce straight from the bottle. It thickens up just enough without getting stiff.
In a small saucepan, mix your BBQ sauce, brown sugar, and that splash of apple cider vinegar. Heat this over medium-low heat. You just want to stir it until the sugar dissolves and the mixture looks a little smoother and slightly thickened. Be careful not to let it boil hard; we are just marrying the flavors here. Set it aside until the chicken is done with its first bake.
Baking and Applying the Sticky Glaze Layers
Now we transform them from perfectly roasted thighs into the legendary Sticky BBQ Chicken Thighs with Crispy Edges!
- When the 30 minutes are up, carefully pull the rack out.
- Brush a generous layer of that warm BBQ glaze all over the top and sides of the chicken thighs. Try not to let the glaze drip excessively onto the rack, though a little bit of run-off is fine.
- Slide the newly glazed chicken *back* into the 400°F oven for another 15 to 20 minutes. This cooks the glaze onto the meat, thickening it up perfectly. Check the temperature; you’re looking for that internal temp to hit 175°F (80°C).
- This is the final, critical step! Once the chicken is fully cooked, switch your oven over to a high broil setting.
- Take your brush and apply one *final*, thin layer of glaze over the tops. Seriously, stand right there and watch it! Broil for only 1 to 3 minutes until the glaze is bubbly, dark, and caramelized. They burn fast here, so keep your eyes glued to the oven door.
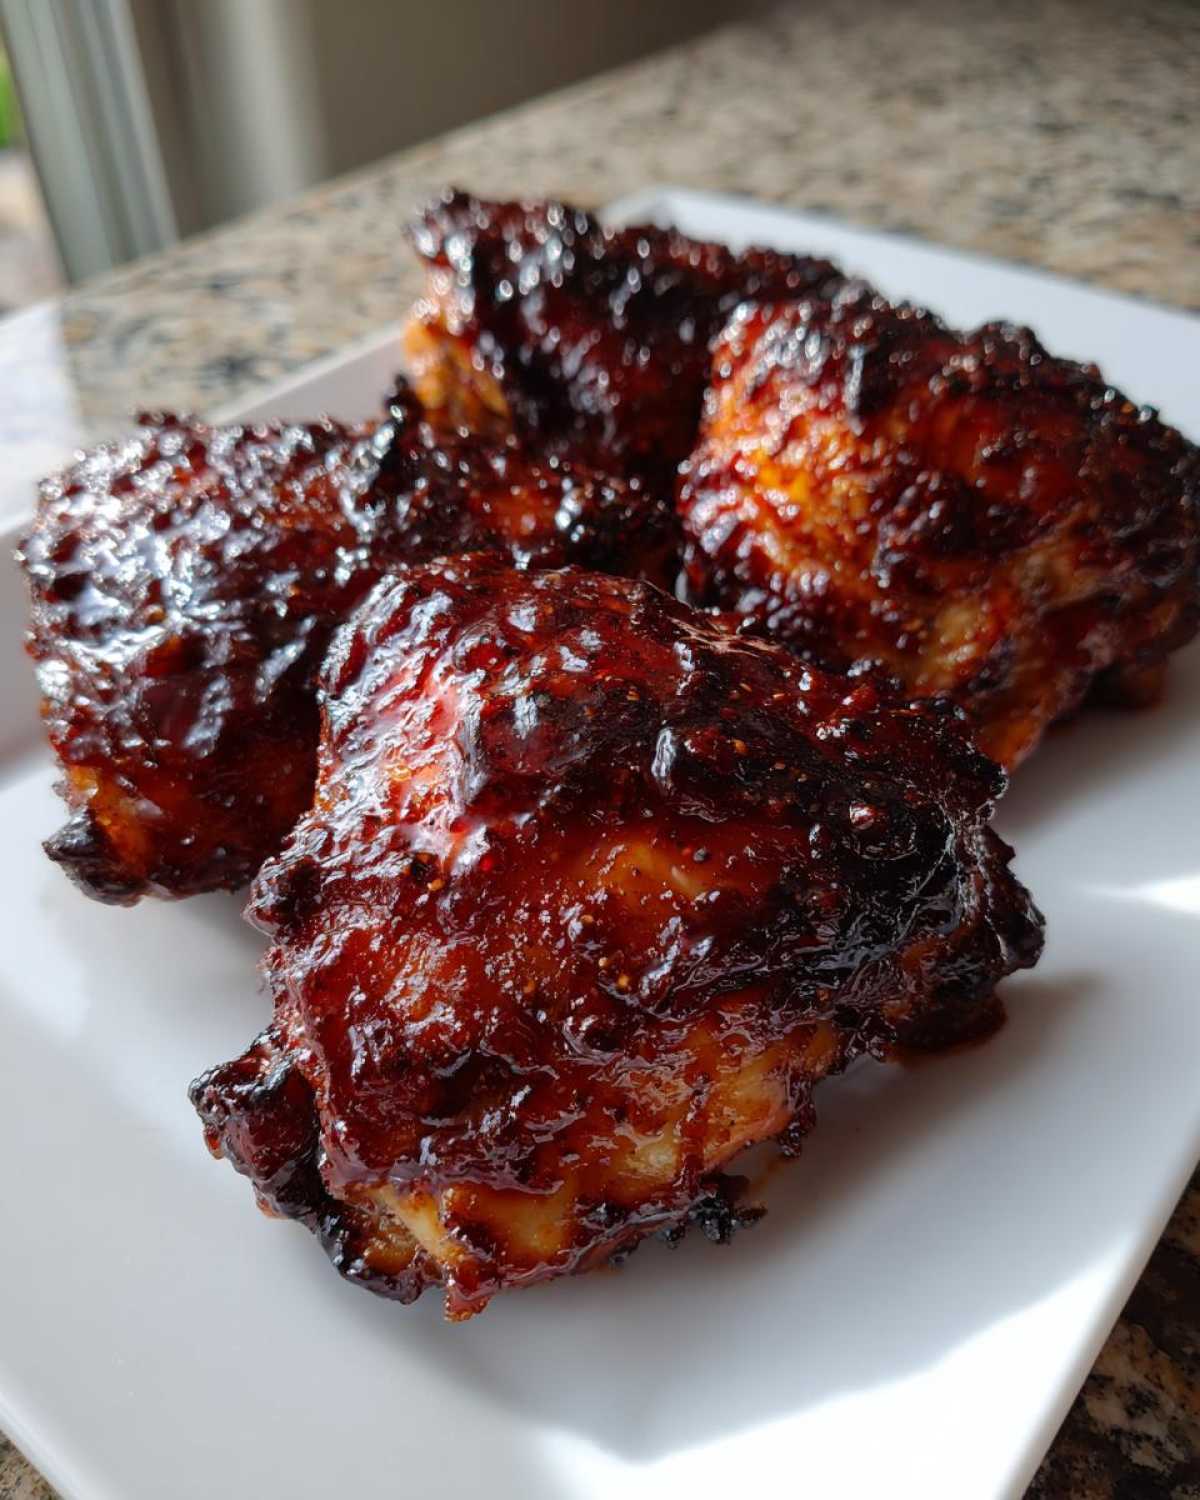
- Pull them out and let that glorious sticky chicken rest on the rack for about five minutes before you dig in. That rest time lets the juices settle. For more ideas on how to use a glaze, check out this pomegranate glazed beauty!
Expert Tips for How to Make Sticky Chicken Edges
You’ve got the recipe, but I want to share the little secrets that took me from decent BBQ chicken to the absolute best Sticky BBQ Chicken Thighs with Crispy Edges. My friends always ask how I manage to get that incredible texture when I bake them; it’s not luck, I promise, it’s just a few non-negotiable steps!
The entire secret hinges on managing moisture. Chicken skin is full of fat and water, and if you don’t remove that water before the heat hits, you end up cooking the skin in its own steam. Nobody wants that!
We already discussed the wire rack, but let’s talk about *why* it’s so essential for achieving true crispiness on bone-in chicken thighs. The rack lifts the chicken, giving us maximum surface area exposure to the 400-degree heat. This allows the fat to properly render out instead of pooling underneath the thigh and turning the bottom into mush.
The Crucial Drying Process
When I say pat the chicken dry, I mean aggressively dry. Grab your paper towels, lift the thigh, dry the bottom, set it down on a fresh towel, and then dry the top. I usually let the rubbed chicken sit uncovered on the rack for about 10 minutes while the oven preheats. This little air-drying moment before it even hits the oven helps tremendously!
If you’re dealing with a bone-in piece, that area right around the thigh joint tends to hold more moisture. Really focus your blotting attention there.
Understanding the Two-Stage Glazing
This is the trickiest part for folks trying to master sticky glazed chicken recipe perfection: sugar burns! If you brush on your thick BBQ sauce at the very beginning, by the time the thickest part of the thigh hits 175°F, your beautiful glaze will just be a pile of hardened charcoal.
We bake it plain for 30 minutes specifically to dry out the skin and cook the meat halfway. Only then do we apply that first layer of glaze. This allows the sauce to incorporate into the rendered fat and adhere properly. The second glaze application right before the broiler is pure decoration for that caramelized, shiny finish.
Adjusting for Boneless Thighs
If you happen to be making boneless thighs—or maybe you’re trying this technique out on breasts, though I prefer thighs for tenderness—you have to adjust your cooking time significantly! Boneless thighs cook much faster. You would likely cut that initial baking time down to 20 minutes, then apply the glaze and bake for only another 10 to 12 minutes total before finishing under the broiler. When you’re looking for that perfectly cooked juicy meat without the bone, always use an instant-read thermometer; it takes out all the guesswork!
For more thoughts on getting the perfect roast on any cut of meat, check out my latest baking thoughts over on the blog page!
Storage and Reheating Instructions for Leftover Sticky Glazed Chicken Recipe
I swear, sometimes the leftovers of this sticky chicken are even better the next day—especially if you like that concentrated, intense glaze flavor. But we have to treat them right, or we lose all that texture we worked so hard to achieve!
The biggest thing to remember is that any method that uses trapped moisture, like microwaving, is going to fight against the crispy skin we created. We need to use dry heat to bring that glaze and crispness back to life.
Storing Your Leftover Chicken Thighs
When you store the leftovers, make sure the chicken has completely cooled down first. Putting warm food into an airtight container is a recipe for condensation, which equals sogginess!
- Once cool, place the thighs in a sealed, airtight container. They don’t need to be perfectly layered; just don’t stack them too tightly if you have a lot of pieces.
- They will stay fantastic in the refrigerator for about three to four days. Any longer than that, and the texture starts degrading, even under the best storage conditions.
- Don’t drain off any leftover glaze or juices that collect in the container! That’s liquid gold flavor, and we are going to use it when we reheat.
Reheating to Preserve Crispiness
Forget the microwave! If you microwave these, the sticky glaze will get soft and soupy, and the skin will turn rubbery. We need to crisp them back up fast.
The Oven Method: Set your oven to 350°F (175°C). Place the cold thighs directly on a clean wire rack set over a baking sheet. If you have any of those leftover pan juices, you can brush just a tiny bit over the chicken to keep the meat moist, but don’t drench it. Bake for about 10 to 12 minutes. You are just aiming to heat them through, but that dry heat will revitalize any crisp bits still clinging to life.
The Air Fryer Method (My Favorite!): If you have an air fryer, it is your best friend for reheating BBQ chicken. Set it to 375°F (190°C). Pop the thighs in a single layer, and cook for about 5 to 7 minutes. Shake the basket halfway through. This blasts the exterior with heat and quickly brings back a great crunch to the skin and reheats that sweet glaze perfectly.
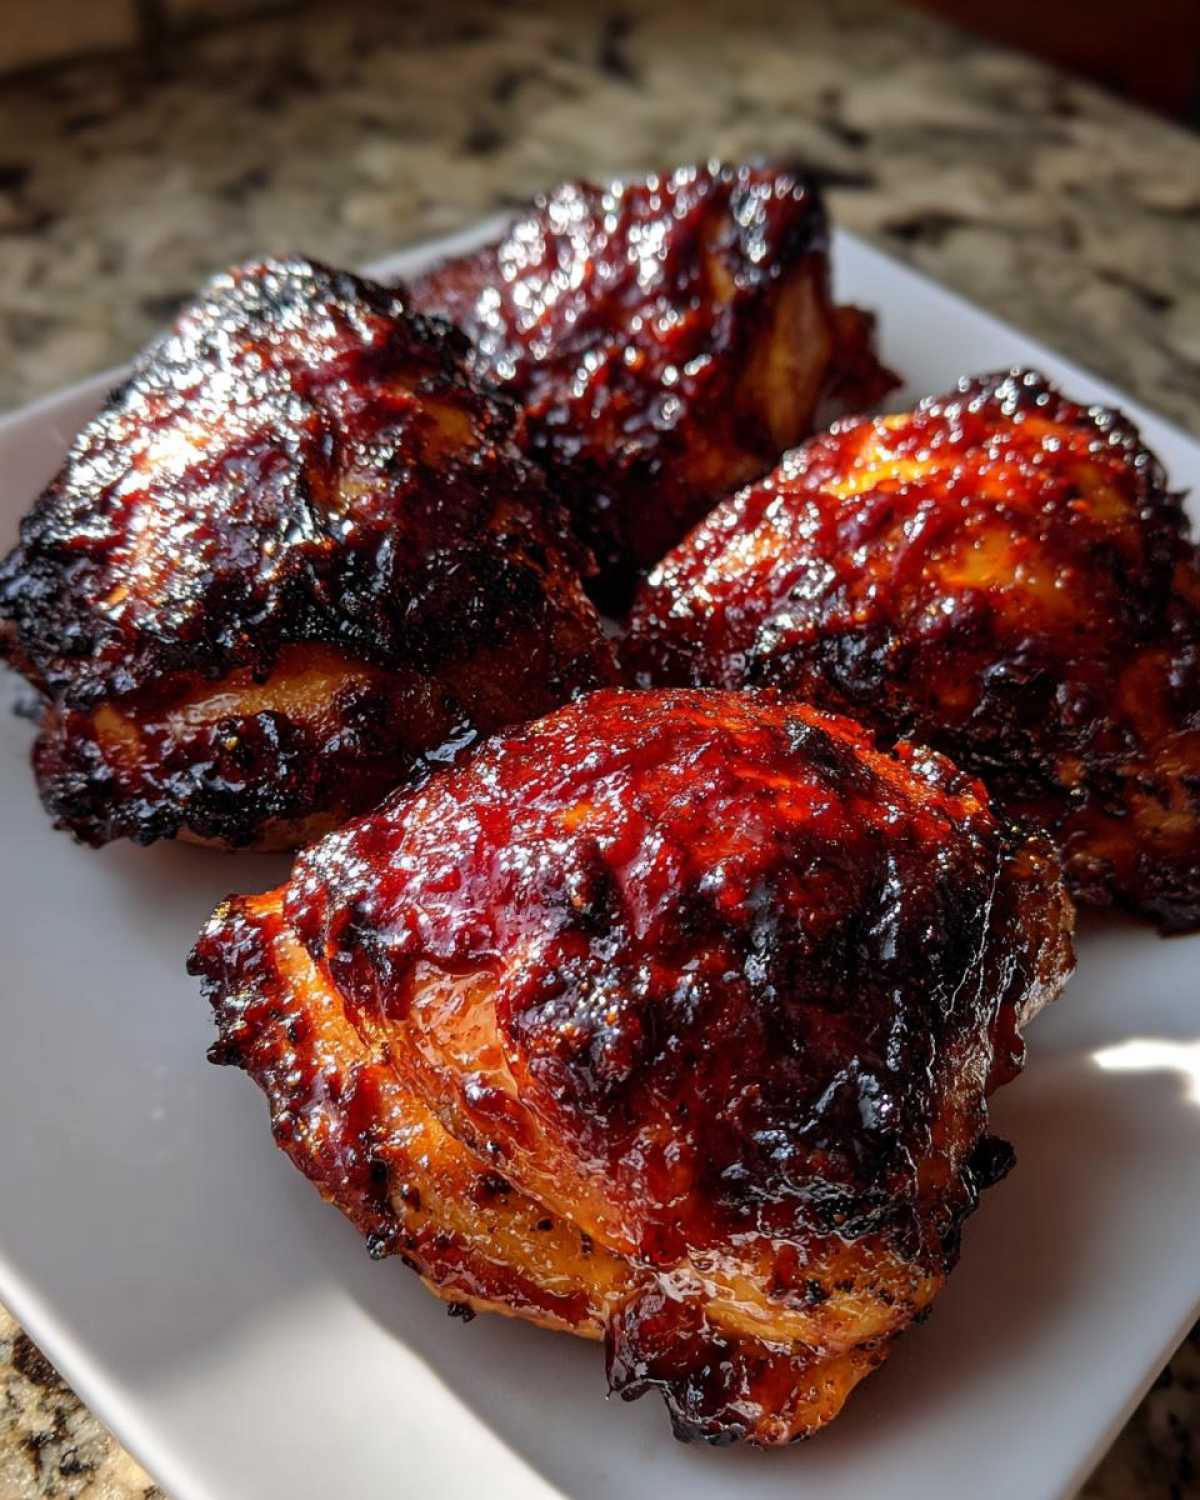
If you want to turn your leftovers into a completely new meal, shred the meat off the bone, toss it in those pan juices, and pile it high on some slider buns! It’s an amazing sweet and sticky chicken dinner hack.
Frequently Asked Questions About Sticky BBQ Chicken Thighs with Crispy Edges
It’s totally normal to have questions when you’re trying to master a new technique, especially when you want that perfect combination of sticky glaze and crunchy skin! I’ve gathered the most common things folks ask me about achieving the absolute best BBQ chicken thighs crispy skin.
Can I use boneless, skinless thighs for this recipe?
You certainly can! If you’re set on boneless, skinless thighs, you can absolutely make this recipe work, but you have to be careful about that glaze. Since there’s no skin to render fat, the high sugar content in the sauce can burn really fast. I usually recommend reducing the total cooking time by about 10 to 15 minutes compared to bone-in thighs. I’d suggest checking the temperature much earlier—around the 35-minute mark total—to avoid turning your caramelized BBQ chicken recipe into savory charcoal!
What internal temperature should the chicken reach?
This is a really important one for food safety *and* texture! For chicken thighs, unlike breasts, they actually taste better when they cook slightly past the minimum safe temperature. The recipe calls for 175°F (80°C). Cooking them to this point allows the dark meat collagen to break down, making the meat spoon-tender and juicy—which is exactly what you want when you bite through that satisfyingly sticky barbecue coating. Always use a meat thermometer in the thickest part, away from the bone!
How do I adapt this recipe for my air fryer or grill?
Oh, I love cheating and using my air fryer for leftovers, but you can totally bake them in there too! For the air fryer, I’d drop the temperature slightly to 380°F (190°C) and cook for about 18–20 minutes total. You still need to dry the skin well. For the grill, you’d want to use two zones: indirect heat for the first 30 minutes to cook through, and then move them over to direct heat with the glaze brushed on for a couple of minutes on each side to get that beautiful, sticky char. When you share your photos, let me know which method you tried!
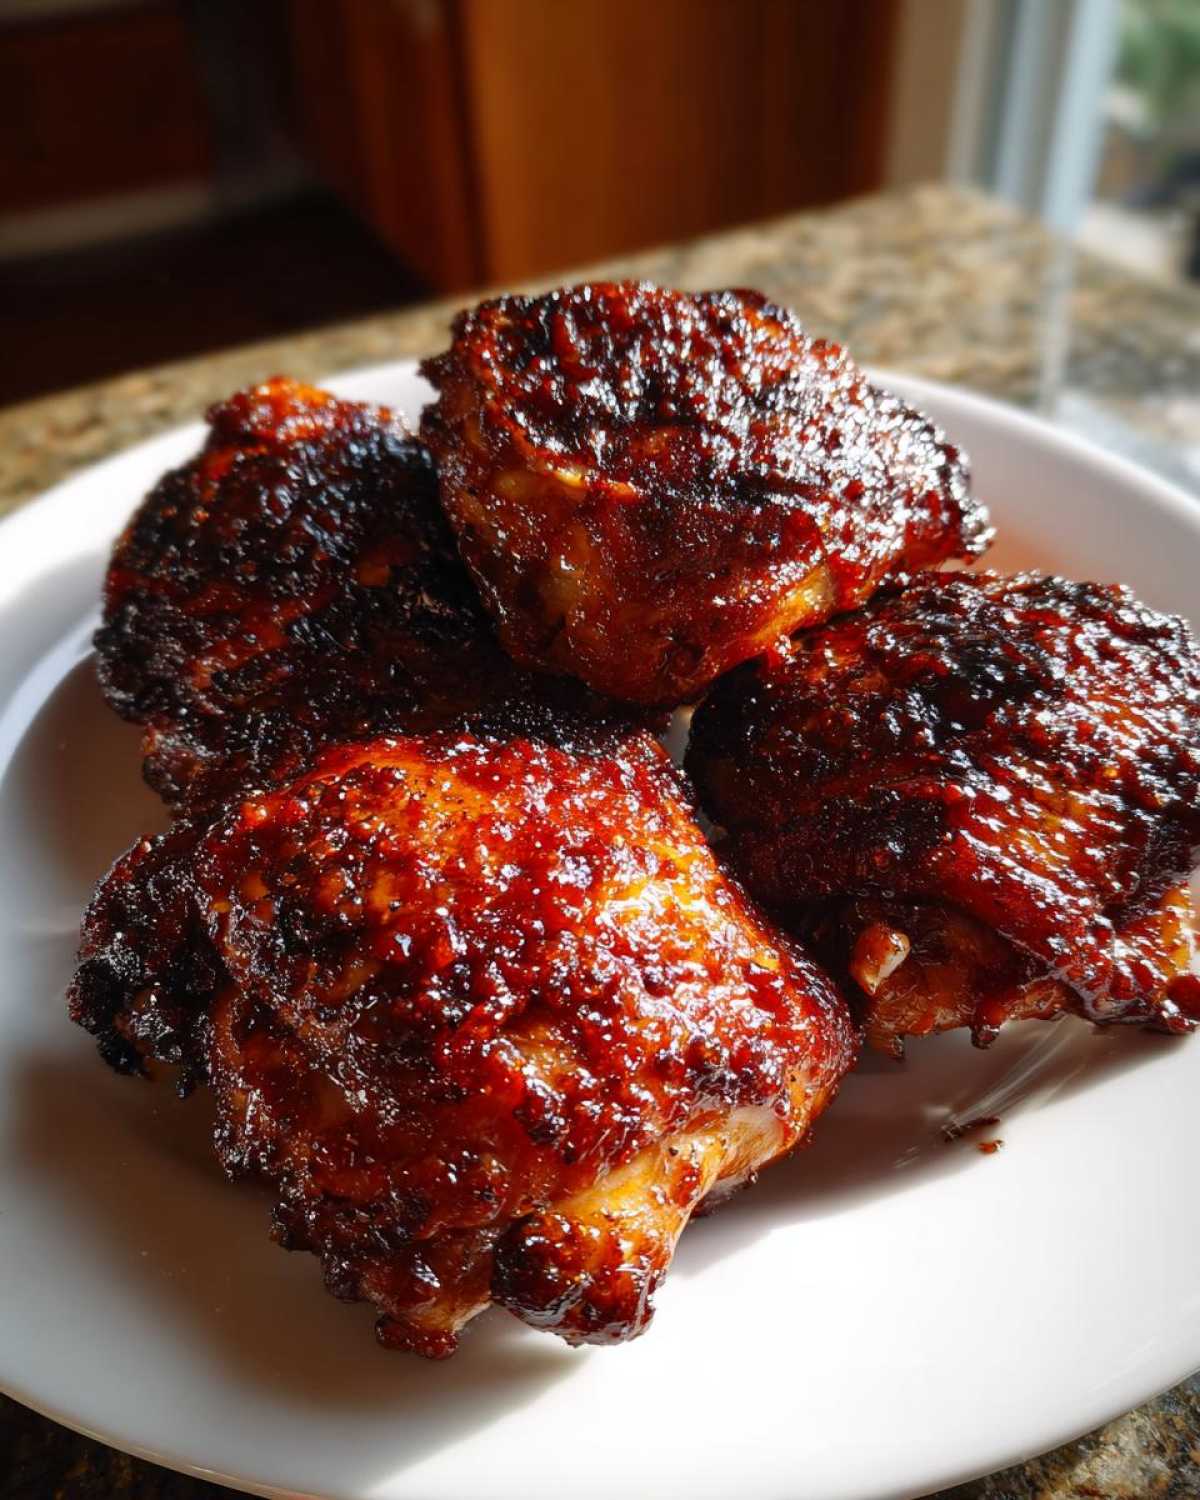
If you have other questions about timing or substituting ingredients for this perfectly glazed chicken thighs dish, feel free to reach out via the contact page. Happy cooking!
Estimated Nutritional Data for This Sweet and Sticky Chicken Dinner
Now, I know some of you lovely readers watch the numbers, and I totally get that! While this recipe is packed with flavor, especially from that glaze, it’s good to have an idea of what you’re getting into. These figures are estimates, alright? They depend a ton on exactly what brand of BBQ sauce you decide to use. Seriously, every sauce is different!
Because we are using bone-in, skin-on thighs, we get great flavor but also a decent amount of fat, though a lot of it renders out during that initial bake time. We’re counting this recipe as a fantastic, satisfying, and hearty meal!
This information is based on roughly two thighs per serving, cooked according to the recipe instructions. For more detailed nutritional information or questions about substitutions, please check out my official disclaimer page.
- Serving Size: 2 Thighs
- Calories: Around 450 per serving
- Protein: A whopping 30 grams! Great for fueling your day.
- Fat: Approximately 25 grams total fat. Remember, 17 grams of that is unsaturated fat, which is the better kind!
- Saturated Fat: About 8 grams.
- Carbohydrates: Roughly 28 grams. The majority of this comes from the thick BBQ sauce and the brown sugar in the glaze.
- Sugar: About 25 grams. This is what makes it sticky, so be mindful if you’re counting strictly!
- Sodium: This clocks in around 650mg. Since the sauce is the primary sodium source, using a low-sodium sauce can really help bring this number down if needed.
- Fiber: Very small amount, about 1 gram.
Share Your Perfectly Glazed Chicken Thighs Experience
I hope you’re already smelling that rich, caramelized BBQ aroma in your kitchen! Seriously, watching those thighs go from pale poultry to deeply colored, lacquered perfection under the broiler never gets old for me. I’m so invested in you succeeding with this recipe, and I truly want to know how it turned out!
When you make these, please take a moment and come back here to leave a rating. Did you get that satisfying crunch? Was the glaze perfectly sticky? Knowing what works for you helps me give better advice to the next person trying to master the perfectly glazed chicken thighs!
Did You Make a Few Changes? Let Us Know!
Maybe you tried these on the grill instead of the oven, or maybe you bumped up the vinegar because you like a sharper tang? Don’t keep those culinary secrets to yourself! I love hearing about the small tweaks that make a recipe feel like your own signature dish. It’s all part of the fun of cooking together, even from afar.
If you took a stunning photo of your finished batch—I’m talking about that glossy sheen and those dark, caramelized edges—I would be thrilled if you tagged me on social media! Seeing your beautiful cooking lights up my day and reminds me why I spend so much time testing these recipes!
Need Help or Just Want to Chat About Chicken?
If anything in the steps seemed confusing, or if your glaze didn’t thicken quite right, please don’t hesitate to drop a question in the comments below! I read every single one. We are a community here, and we all learn best when we troubleshoot together.
Whether you’re looking for the next great side dish to go with this chicken or just want to say hello, you can learn more about the kitchen philosophy behind all these recipes over on the About Us page. Come say hi—and happy cooking!
PrintOven-Baked Sticky BBQ Chicken Thighs with Guaranteed Crispy Skin
Follow these steps to make oven-baked chicken thighs with a thick, sticky BBQ glaze and perfectly crispy edges.
- Prep Time: 10 min
- Cook Time: 50 min
- Total Time: 60 min
- Yield: 4 servings
- Category: Dinner
- Method: Baking
- Cuisine: American
- Diet: Low Fat
Ingredients
- 8 bone-in, skin-on chicken thighs
- 1 tablespoon olive oil
- 1 teaspoon salt
- 1 teaspoon black pepper
- 1 teaspoon garlic powder
- 1 teaspoon smoked paprika
- 1/2 teaspoon onion powder
- 1 cup your favorite thick BBQ sauce
- 2 tablespoons brown sugar
- 1 tablespoon apple cider vinegar
Instructions
- Preheat your oven to 400 degrees Fahrenheit (200 degrees Celsius). Line a baking sheet with foil for easy cleanup, and place a wire cooling rack on top of the sheet.
- Pat the chicken thighs completely dry using paper towels. This step is key for crispy skin.
- In a small bowl, mix the salt, pepper, garlic powder, smoked paprika, and onion powder to create the dry rub.
- Rub the chicken thighs all over with olive oil, then generously coat them with the dry rub.
- Place the seasoned thighs skin-side up on the wire rack, ensuring there is space between each piece for air circulation.
- Bake for 30 minutes. This initial bake dries out the skin.
- While the chicken bakes, prepare the glaze. In a small saucepan, combine the BBQ sauce, brown sugar, and apple cider vinegar. Heat over medium-low heat until the sugar dissolves and the sauce thickens slightly, about 5 minutes. Do not boil.
- After the initial 30 minutes of baking, brush a generous layer of the BBQ glaze over the top and sides of the chicken thighs.
- Return the chicken to the oven and bake for another 15 to 20 minutes, or until the internal temperature reaches 175 degrees Fahrenheit (80 degrees Celsius) in the thickest part.
- For the final sticky coating, remove the chicken, brush with a final layer of glaze, and switch the oven setting to broil (high). Broil for 1 to 3 minutes, watching constantly to prevent burning, until the glaze is bubbly and caramelized.
- Remove from the oven and let the chicken rest on the rack for 5 minutes before serving.
Notes
- Using a wire rack allows heat to circulate underneath the thighs, which prevents the bottom from steaming and promotes overall crispiness.
- Apply the final glaze layer only after the chicken is nearly cooked to prevent the sugar in the sauce from burning during the main cooking time.
- If you prefer boneless, skinless thighs, reduce the total cooking time by about 10 to 15 minutes.
Nutrition
- Serving Size: 2 thighs
- Calories: 450
- Sugar: 25
- Sodium: 650
- Fat: 25
- Saturated Fat: 8
- Unsaturated Fat: 17
- Trans Fat: 0
- Carbohydrates: 28
- Fiber: 1
- Protein: 30
- Cholesterol: 120