

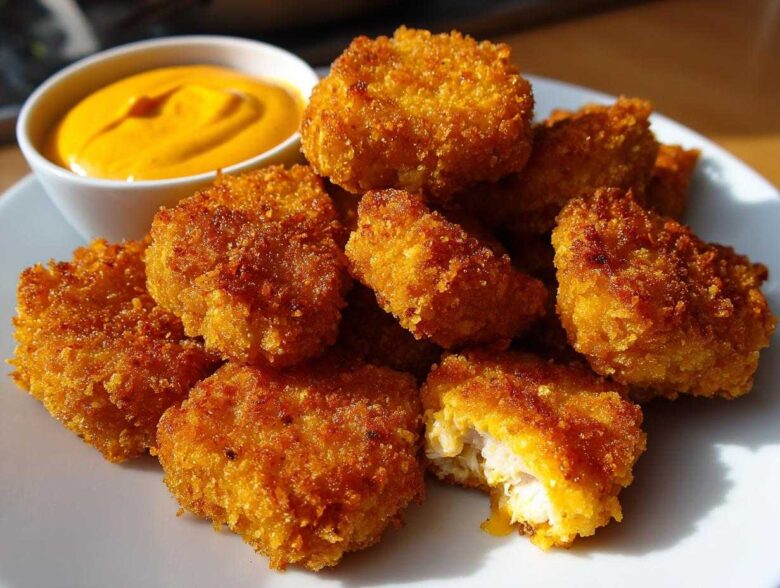
If I told you that you could pull a batch of truly crispy chicken nuggets out of your own kitchen—nuggets that actually *crunch* when you bite into them—you’d probably ask what kind of magic I was hiding. Well, grab your apron, because I’m sharing my secret! For years, I chased that elusive fast-food texture, and I finally cracked the code using a simple technique I call the double-dredge. Forget soggy snacks; this recipe for Crispy Chicken Nuggets with Spicy Mayo is a game-changer for family dinners. Trust me, once you master this ultimate crispy coating, you won’t be ordering takeout nuggets anymore! You can find more of my home cooking experiments over on the blog, but this one is truly special.
Why You Will Love This Crispy Chicken Nuggets with Spicy Mayo Recipe
Seriously, why wouldn’t you? You get dinner on the table fast, and everyone cleans their plates. It’s just that good!
- You get the absolute Best Crispy Chicken Nuggets thanks to our secret double-coating method.
- The inside stays unbelievably juicy—it’s the perfect example of Juicy Inside Crispy Outside Chicken!
- We’ll whip up an Easy Spicy Mayo Dipping Sauce in about two minutes flat.
- It’s a fantastic Family Friendly Dinner Idea that beats anything frozen.
- You can find more quick options like this when you check out my collection of quick chicken snack recipes!
Essential Ingredients for Crispy Chicken Nuggets with Spicy Mayo
Getting the best results means starting with quality stuff, especially when you’re aiming for that next-level crunch. Don’t skimp here, because the ingredients are what separate a soggy snack from perfection. We need three separate bowls ready to go for our breading process, but first, let’s look at what we’re working with. You can see all my favorite tools and related dipping sauce recipes on my page about homemade dipping sauces for chicken!
Ingredients for the Perfectly Breaded Chicken Bites
Remember, we’re aiming for that beautiful, bumpy coating, and that means more flour than you might think! The panko is non-negotiable for that truly professional crunch.
- 1.5 lbs boneless, skinless chicken breasts, cut precisely into 1-inch pieces. Make sure they are uniform so they cook evenly!
- 1 cup all-purpose flour (this is for our first seasoning dredge).
- 1 teaspoon salt and 1/2 teaspoon black pepper (for seasoning the initial flour).
- 1/2 teaspoon garlic powder (for a little savory background flavor).
- 2 large eggs, beaten well—these are our sticky glue!
- 1 cup panko breadcrumbs. Yep, these are the secret weapon for the ultimate crispy coating for nuggets.
- 1/2 cup all-purpose flour (this extra bit is crucial for the second, final coating).
Ingredients for the Easy Spicy Mayo Dipping Sauce
This sauce is so quick, you’ll be whisking it together while the chicken rests. It’s creamy, spicy, and just tangy enough to cut through the richness of the fried chicken.
- 1/2 cup mayonnaise—use your favorite creamy brand!
- 2 tablespoons sriracha sauce. Taste this as you go! If you like it hotter, add more, if you want it milder, start with one tablespoon.
- 1 teaspoon lemon juice. This wakes everything up!
- 1/2 teaspoon smoked paprika. This gives it that gorgeous, slightly smoky depth that regular mayo just doesn’t have.
The Ultimate Crispy Coating for Nuggets Technique
This is where the magic happens, people! If you want that amazing Juicy Inside Crispy Outside Chicken texture, you can’t just coat these once. We are going for maximum texture here, which means we have to dredge these little guys twice! It’s totally worth the extra minute of work, trust me. It builds that thick, craggy crust that holds up when you dip it.
First, make absolutely sure your cut chicken pieces are bone dry. Seriously, pat them down with paper towels until they squeak! Moisture is the enemy of crispiness when breading.
We need three separate shallow dishes set up in an assembly line. This is how you organize for success in the kitchen. We’ll call them Station 1, Station 2, and Station 3.
Station 1 is the Seasoned Flour: This is your first cup of flour mixed with your salt, pepper, and garlic powder. This dry coat helps the egg stick evenly.
Station 2 is the Egg Wash: Just your two large eggs, whisked really well until they are light yellow and uniform.
Station 3 is the Panko: This is your 1 cup of Panko breadcrumbs. They need to stay pure and fluffy for now!
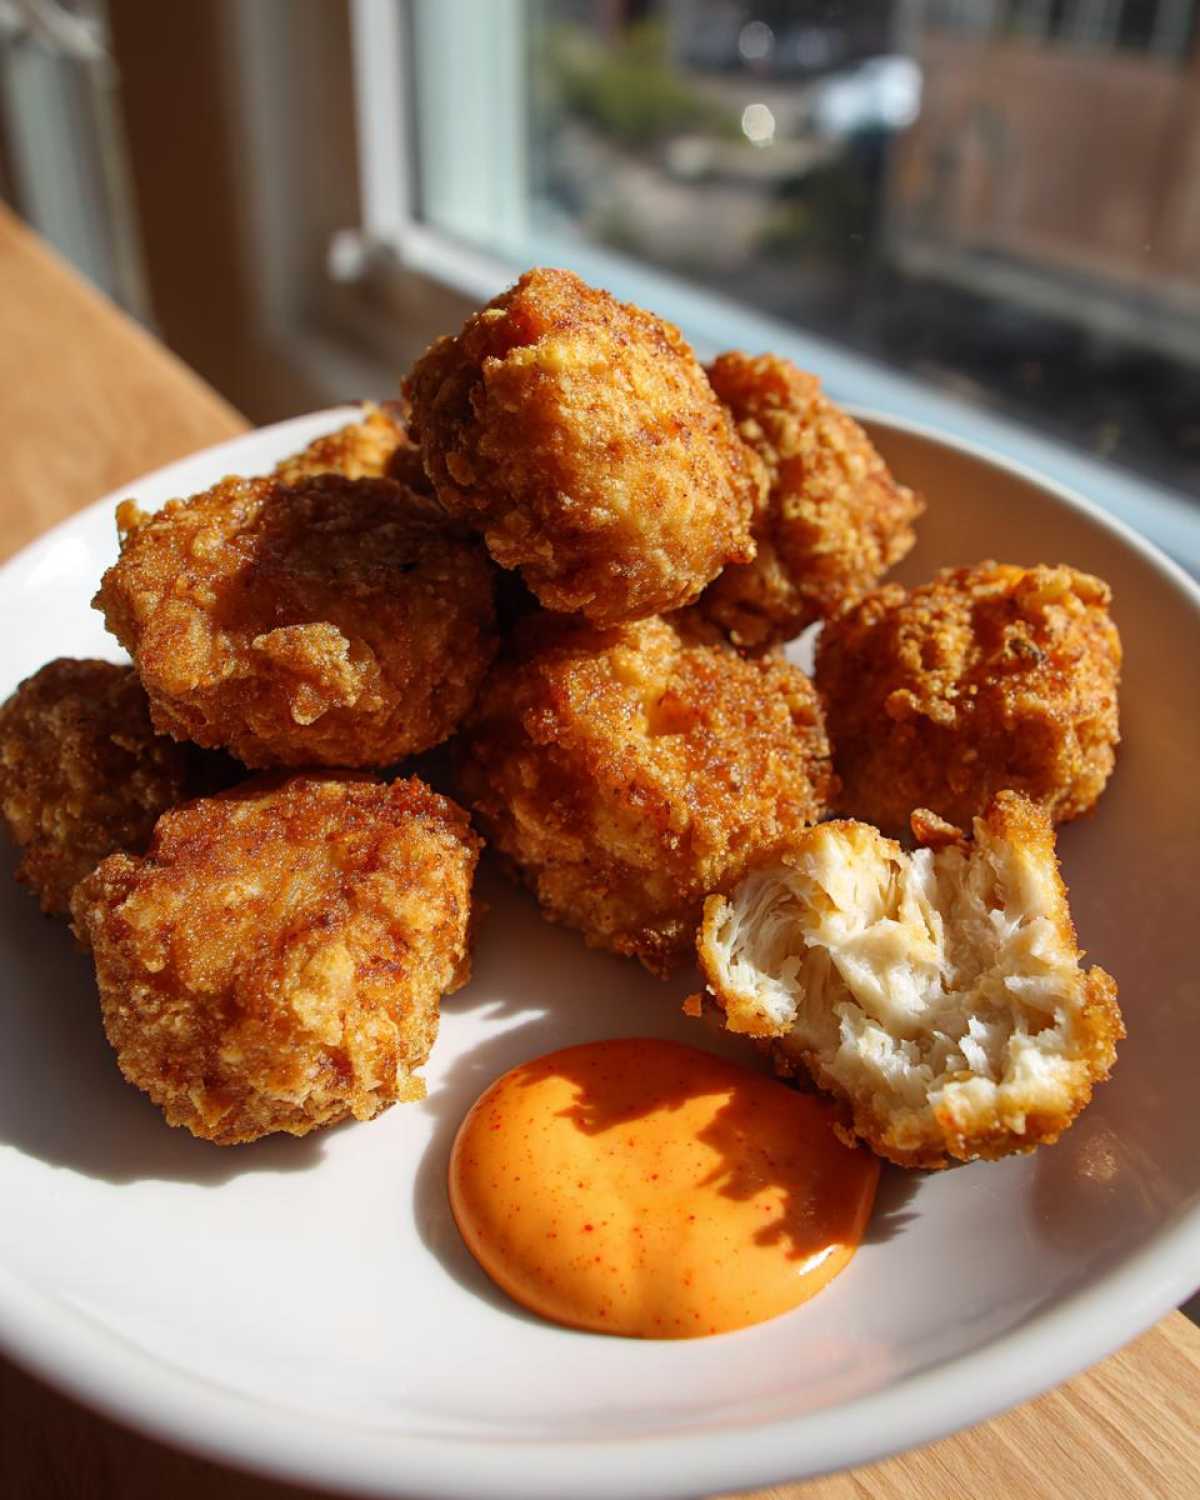
Now for the double-dip dance. You need to coat every single piece following this exact rhythm to build that incredible crust:
- First Dredge: Dip the dry chicken piece into the Seasoned Flour (Station 1), shaking off any major clumps. This is your base layer.
- Egg Bath: Move it into the Egg Wash (Station 2) just long enough to completely coat it. Let the extra drip off, like you’re finishing a dip in the pool.
- First Panko Coat: Press the piece firmly into the Panko (Station 3). Make sure every bit of chicken is covered in those lovely flakes.
Did you think we were done? Nope! We need one more layer for serious crunch. Now we use the final bit of plain flour we saved.
- Second Flour Layer: Take that already-panko-coated nugget and gently dip it into the remaining 1/2 cup of plain flour. Don’t over-press—we just want a light dusting here.
- Final Egg Bath: Dip it quickly back into the Egg Wash (Station 2).
- Final Panko Push: This is the most important push! Press it hard back into the Panko (Station 3). Really work those crumbs onto the nugget gently. This pressure creates those amazing little jagged edges that get super golden and crunchy when they cook.
Once fully breaded, put those beauties on a wire rack suspended over a baking sheet. You can see the full technique and how it leads to achieving the ultimate crispy coating for nuggets on the blog, but what I want you to do next is pop them in the fridge for about 15 minutes. Seriously, don’t skip this chill time! It lets the coating meld with the chicken, which stops it from falling off in the hot oil later. You are going to be so proud of these textures!
How to Prepare Crispy Chicken Nuggets with Spicy Mayo: Step-by-Step
Okay, now that we’re all excited about the double-breading secret we just covered, let’s get these things cooked! This whole process really goes quickly once you get your stations set up, which is why organization is key for making the Homemade Chicken Nuggets Recipe feel fast. Remember, we are aiming for that perfect crunch that we talked about, so follow these steps exactly. If you want to see the process laid out visually, I have a more detailed guide with photos over at my main homemade chicken nuggets recipe landing page.
Preparing the Chicken and Setting Up Breading Stations
First things first: Chicken Prep. You need to pat your 1-inch cut chicken pieces absolutely dry. I mean, use a whole stack of paper towels until you can’t see any more moisture—this step stops the breading from getting gummy. Once they’re dry, they get a light sprinkle of salt and pepper right on the chicken itself.
Next, get your three breading dishes ready right next to your workspace. Since we talked about the full process above, you just need to remember where everything is:
- Dish 1: The seasoned flour mix (1 cup flour + salt/pepper/garlic powder).
- Dish 2: The beaten egg wash (our sticky intermediary).
- Dish 3: The Panko breadcrumbs (the star of the show!).
It sounds simple, but keeping them separate and dry is how we guarantee a great coating.
Executing the Double-Dredge for Maximum Crunch
This is the crucial part where we build that amazing crust. We’re doing the full sequence: Flour, Egg, Panko, then repeating the last two steps with the ‘second chance’ flour.
Take your first piece of chicken. Coat it fully in the seasoned flour, shake off the excess, then dip it in the egg, letting it drip. Then, press it firmly into the Panko. That’s step one!
Now, immediately take that panko-coated piece and do the quick ‘second stage’: Lightly dredge it in the remaining 1/2 cup of *plain* flour—don’t mash it, just dust it. Quick dip back into the egg wash, and then press it hard into the Panko *again*. You want those crumbs to look uneven and bumpy—those bumps are your future crunch!
Place every fully breaded nugget on a wire rack set over a baking sheet. And here’s the magic that helps it stick? You absolutely must chill them. Pop that whole tray into the fridge for at least 15 minutes. This cooling period is vital! It helps the coating harden up beautifully, ensuring you get the best possible adherence before hitting the heat.
Cooking Methods: Frying or Air Fryer Chicken Nuggets Crispy
You have two main options here depending on what you’re aiming for—the *crispiest* possible (frying) or the *healthier* option that still rocks (air fryer). Either way, we need that internal temperature to hit 165°F (74°C).
For Frying (The Ultimate Crisp): Heat about 2 inches of vegetable oil in a deep skillet until it hits exactly 350°F (175°C). Don’t overcrowd the pan! Fry in small batches for only 4 to 6 minutes total, turning them gently until they are deep golden brown and cooked through. Drain them quickly on paper towels.
For Air Fryer Chicken Nuggets Crispy: Preheat your air fryer to 380°F (195°C). This is the perfect temperature for cooking them through without burning the outside too fast. Spray the nuggets *lightly* all over with cooking spray—this helps the crust brown. Cook for 12 to 15 minutes total, flipping them halfway through so they get golden on both sides.
Mixing the Easy Spicy Mayo Dipping Sauce
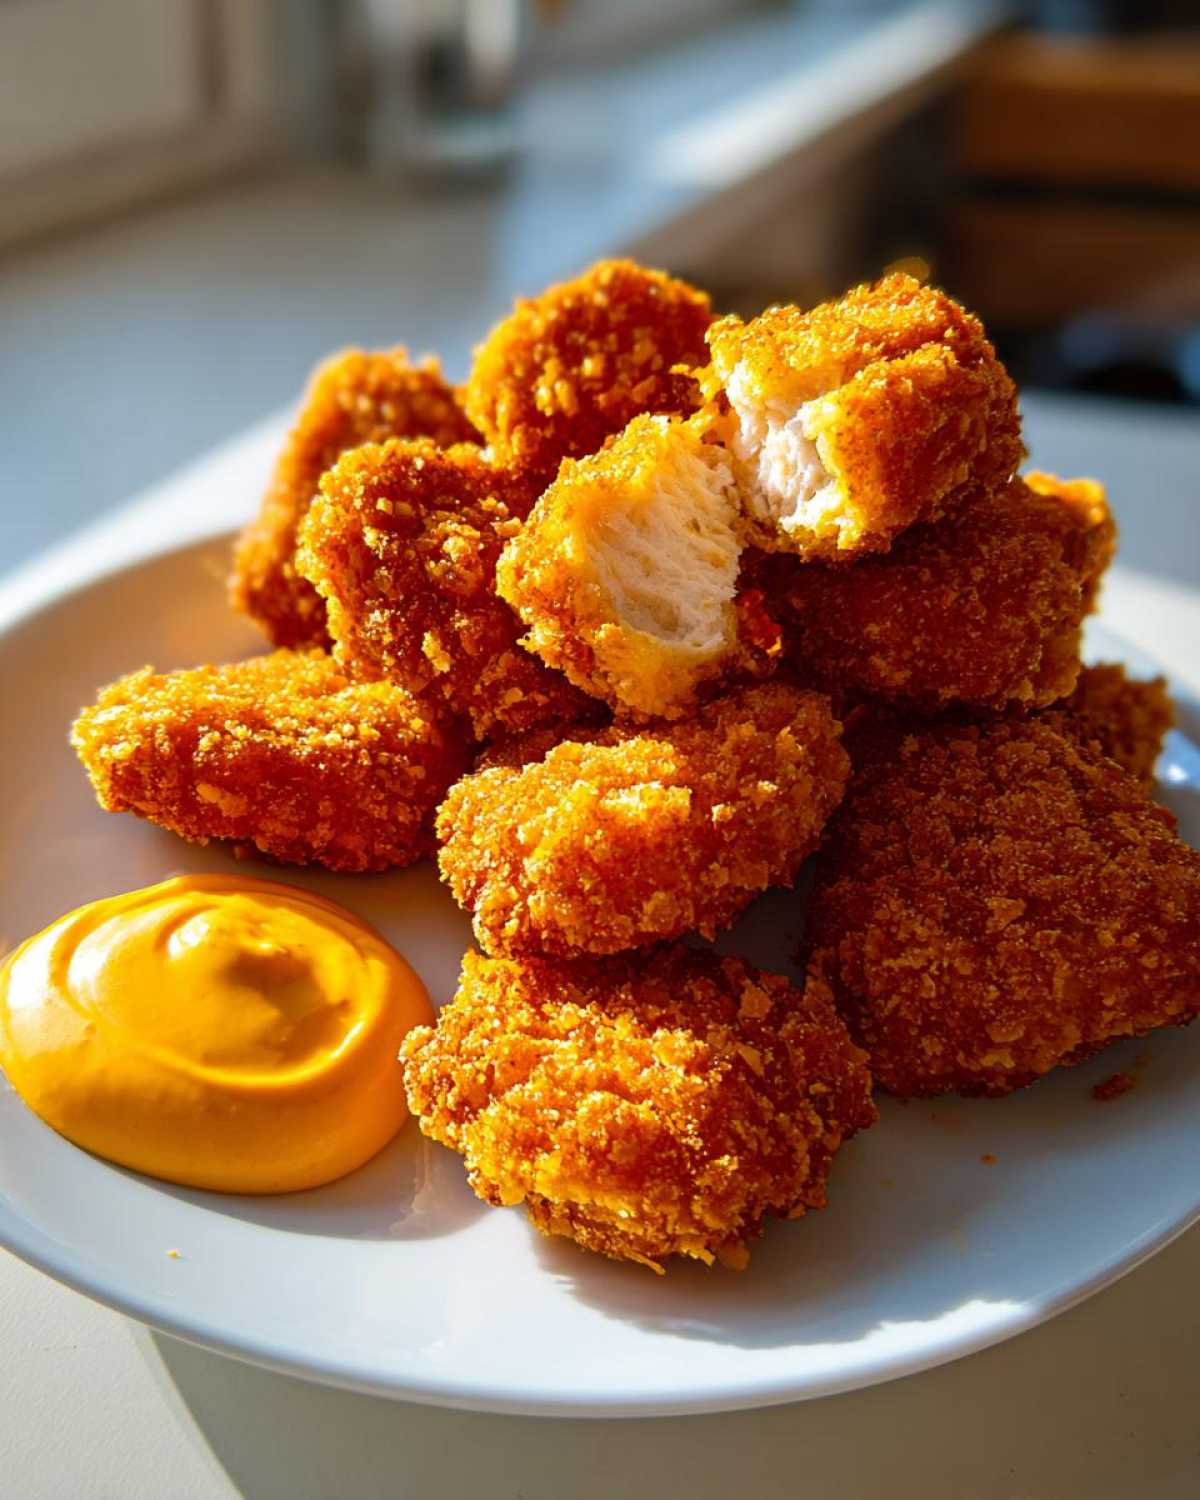
While those nuggets are chilling or while they’re cooking, you can whip up the sauce in literally one minute. Grab a small bowl. Put in the 1/2 cup of mayonnaise, the sriracha, the lemon juice, and the smoked paprika. Use a little whisk or even a fork and just stir it vigorously until everything is totally combined and smooth. Seriously, taste it! If you’re feeling brave, pour in a little more sriracha for extra kick. That’s it—you’ve made an Easy Spicy Mayo Dipping Sauce that tastes better than anything store-bought!
Tips for Success with Your Crispy Chicken Nuggets Recipe
I know I sound like a broken record, but listen, the difference between a good nugget and a restaurant-quality masterpiece lies in these tiny details! When I perfected this recipe—and believe me, there were some greasy failures along the way—it came down to respecting the chilling phase and listening to my palate when mixing the sauce.
My number one, non-negotiable tip for achieving that perfect, crackly crust is that 15-minute chill period after you bread everything. I keep mentioning it because it’s critical! When the exterior coating goes straight from the counter into hot oil or a hot air fryer, the breading gets steamed and can sometimes slide right off. By chilling those breaded pieces on a wire rack, you let the flour, egg, and panko really fuse together. It creates a tougher shell that locks in the moisture inside. Check out my tips for optimizing the air fryer method over at Air Fryer Chicken Nuggets Crispy for more crunch insights!
Another thing people forget is the initial handling of the chicken. Make sure all your chicken pieces are cut to about the same size. If you have one piece that’s a giant chunk and another that’s a tiny sliver, they won’t cook at the same rate, and you end up with dry edges or raw centers. Keep those 1-inch pieces consistent!
When it comes to the Spicy Mayo, remember that your spice tolerance is your own business! That recipe calls for two tablespoons of Sriracha, but honestly, I sometimes use two and a half because my husband likes things spicy. If you’re making them for kids or anyone sensitive to heat, start small—maybe just one teaspoon—and then always taste the sauce before you serve it. You can always add more heat, but you can’t take it away once it’s mixed in!
Finally, don’t be afraid to experiment with flavor in the initial seasoning flour. Garlic powder is great, but maybe you want a tiny pinch of onion powder, or even some paprika mixed into that first dredge? Just keep it subtle since the main flavor punch comes from that incredible dipping sauce.
Make-Ahead and Freezer Friendly Chicken Nuggets Prep
You know what’s better than having homemade Crispy Chicken Nuggets with Spicy Mayo for dinner tonight? Knowing you have an entire extra batch waiting for you in the freezer for a night when you just can’t face the kitchen!
This recipe is fantastic for prepping ahead, and honestly, I think they taste even better when you let the coating fully chill, which is why freezing them works so nicely. If you want to see my detailed guide that covers everything from storage containers to best practices, jump over to my post on Freezer Friendly Chicken Nuggets Prep.
The key here is to use the same technique we discussed for the fresh batch: make sure your nuggets are perfectly double-coated. Once they are fully breaded, stop right there! Do NOT cook them.
Here is the crucial step for getting perfectly separate, non-stuck nuggets:
- Lay out a large baking sheet—the bigger the better—and line it with parchment paper or a silicone mat.
- Place every single breaded nugget onto that sheet so they are not touching each other. Seriously, give them space!
- Pop this entire sheet pan into the freezer and let those nuggets freeze solid. This usually takes about an hour, maybe a little longer depending on how cold your freezer is. This is often called ‘flash freezing,’ and it ensures they won’t clump together into one giant chicken brick.
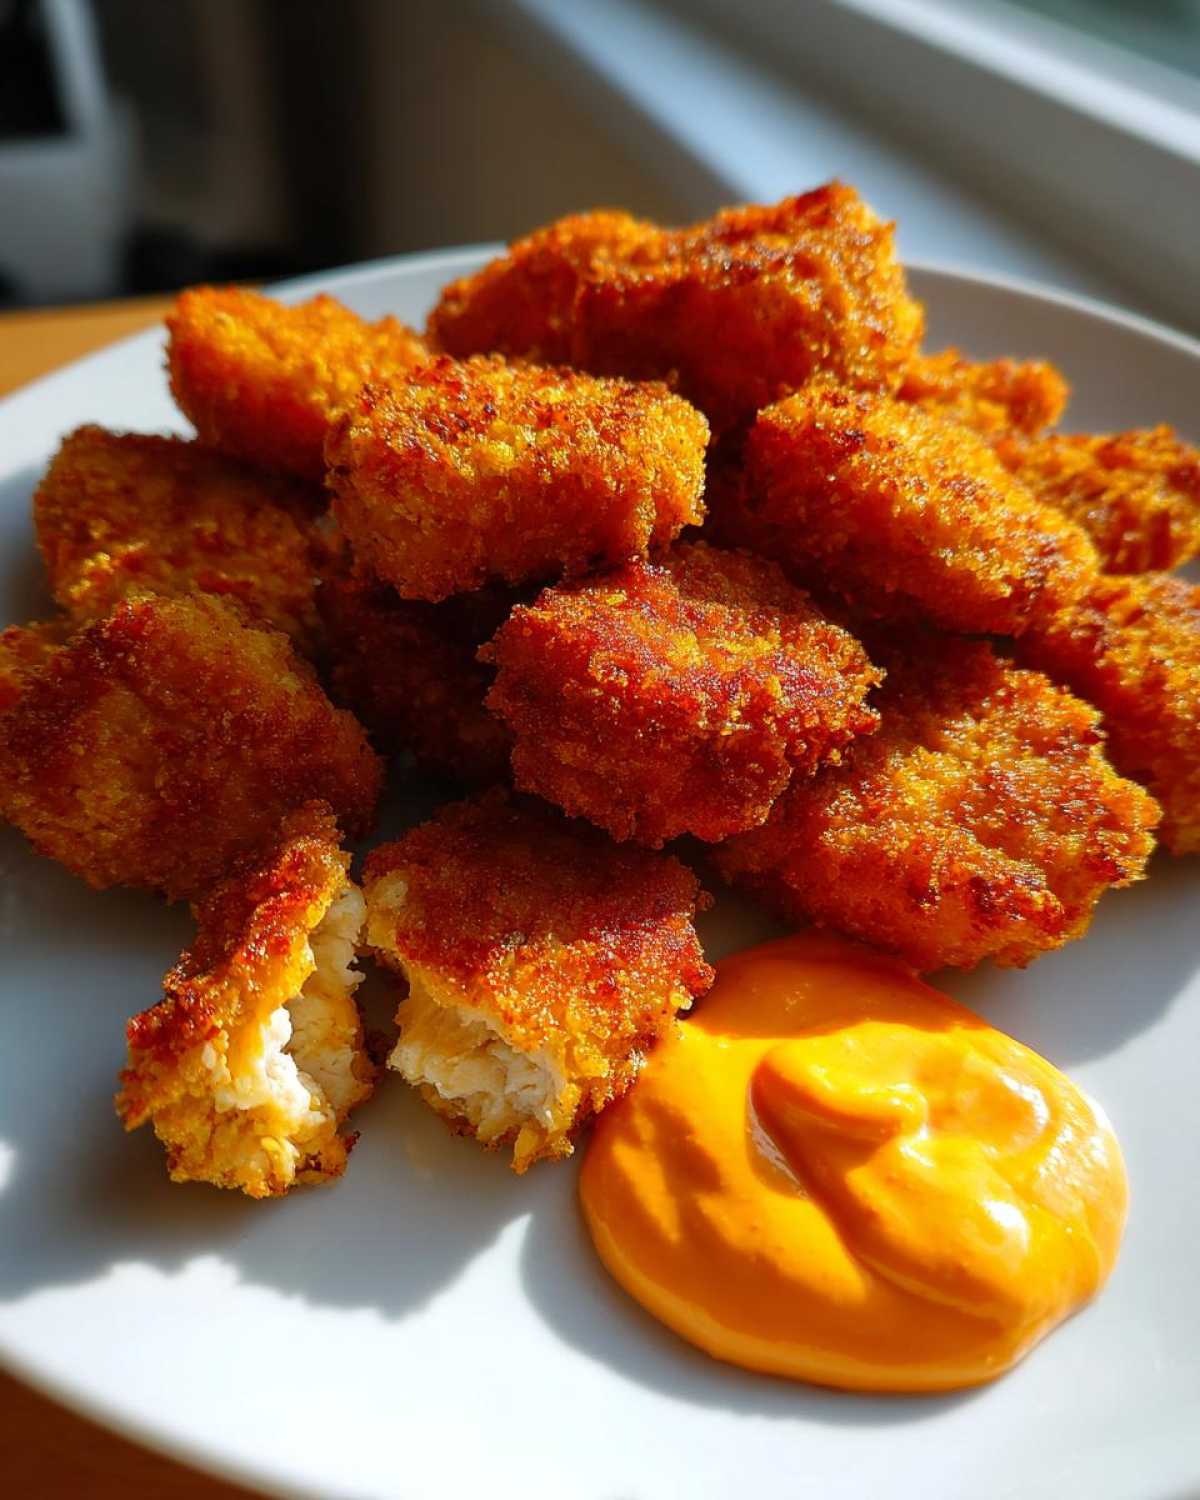
Once they are rock hard, you can transfer them! Carefully take the frozen nuggets off the sheet pan (you might need to wiggle them a bit) and put them straight into a heavy-duty freezer bag or an airtight container. Throw a piece of parchment paper between layers if you need to stack them for storage.
Now, for cooking from frozen—this requires just a little patience. You absolutely cannot cook them directly from frozen in the microwave, or you’ll lose all that glorious crispiness we fought so hard to achieve! You need to use the heat methods:
When Frying: You need to add an extra few minutes to the cooking time because the center is frozen solid. I usually check them around the 7-minute mark instead of 5. Keep your oil temperature steady at 350°F so the outside doesn’t burn before the inside thaws and cooks.
When Air Frying: For your Air Fryer Chicken Nuggets Crispy, just increase the time by about 3 to 5 minutes total, keeping the temperature the same at 380°F. A good 15 to 18 minutes should do the trick, shaking the basket halfway through. They will still come out fantastic!
Having these ready to go means you can have dipping sauce and nuggets on the table in under 20 minutes on a weeknight. It’s brilliant!
Serving Suggestions for Your Homemade Chicken Nuggets
So, you’ve got these golden, impossibly crispy nuggets, and you’ve made the fiery, creamy Spicy Mayo Dipping Sauce. Fantastic! Now we just need the supporting cast, right? You don’t want a heavy side that competes with the star of the show, but you do need something to make this a real meal, or at least a substantial snack. These pairings are all about making the whole experience feel like a complete victory. If you’re looking for more easy ways to turn this into a full spread, check out my ideas for a fantastic family friendly dinner idea.
First up, you absolutely need something a little sweet to balance that heat from the mayo. My number one go-to is sweet potato fries. They bake up beautifully, and the sweetness is just *perfect* against the savory, spiced chicken coating. Toss them with a little salt and maybe some chili powder while they’re hot!
If you want to keep things crisp for a great textural contrast, go for something crunchy on the side. A simple slaw works wonders. Forget the heavy, gloopy mayonnaise version, though! Make a super simple vinegar-based slaw with lots of crisp cabbage and carrots. It’s bright, light, and cleanses the palate between bites of rich chicken.
If you’re serving these to kids (or just want something super comforting), you can never go wrong with classic sides. Think about little cups of steamed broccoli—you can toss them in a tiny bit of melted butter and salt—or maybe some baked cheddar mac and cheese if you’re feeling indulgent. Honestly, with how good these nuggets are, even a side of good quality pickles can feel like the perfect accompaniment!
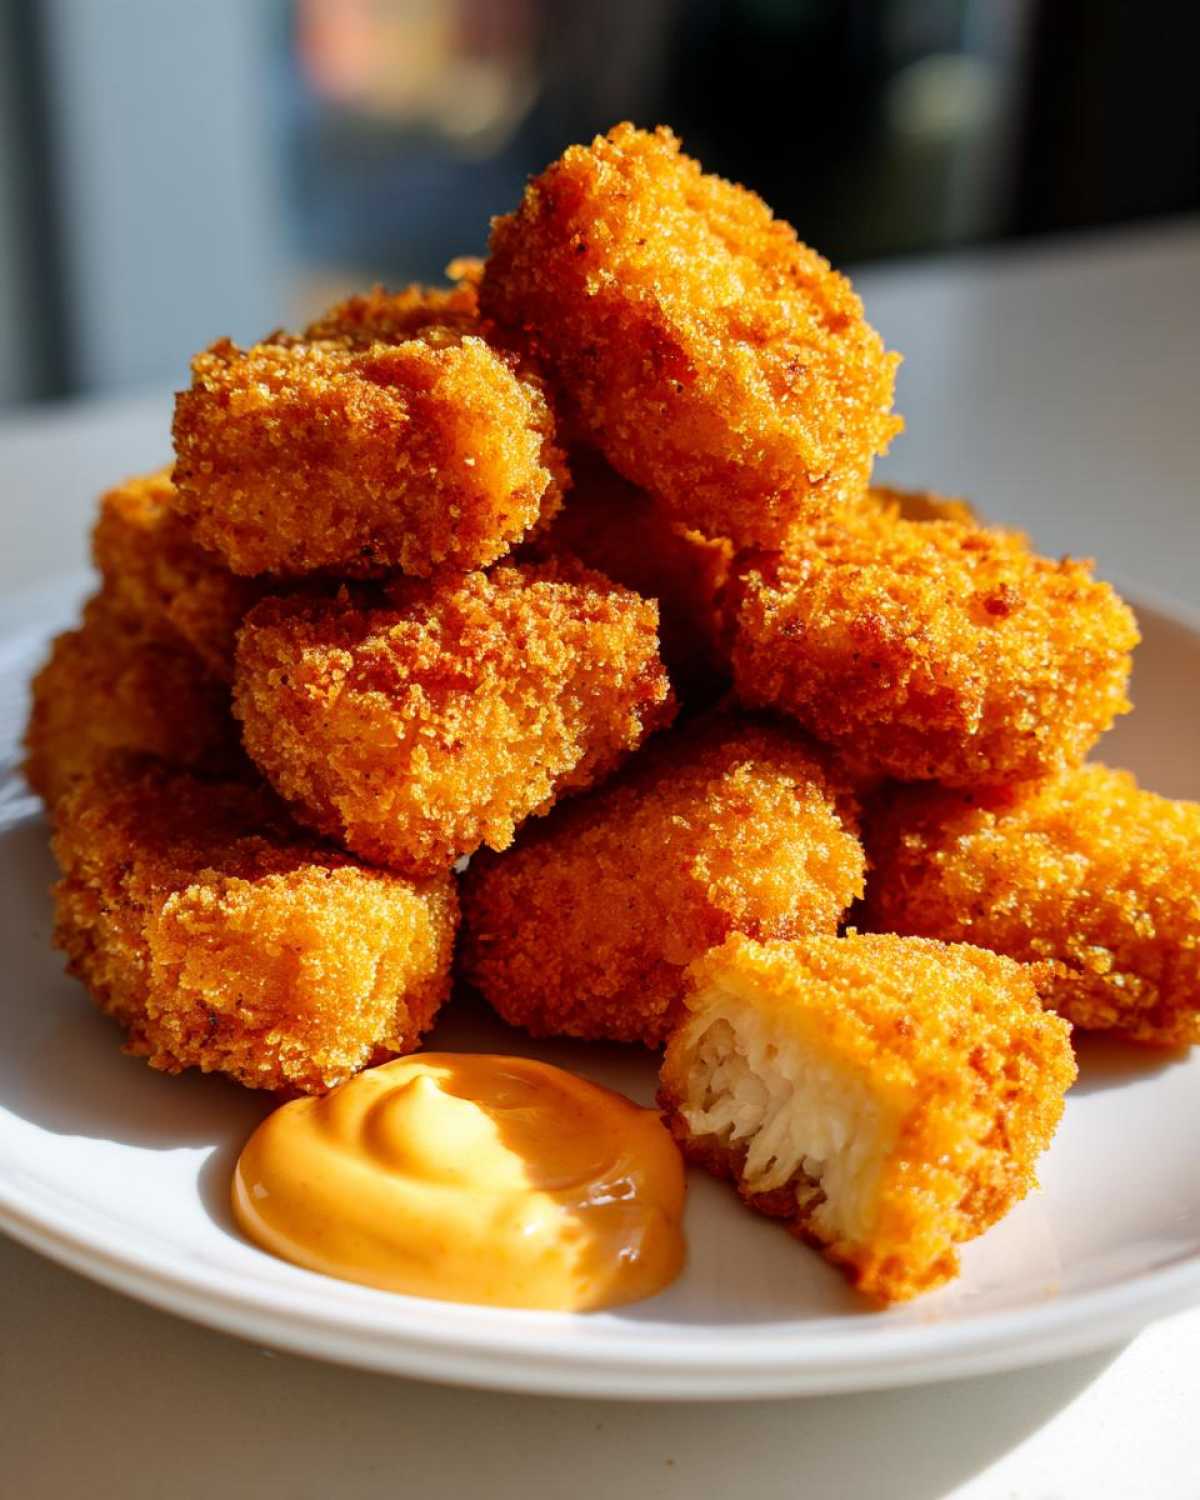
The main takeaway is this: let the texture and the spice of the nuggets shine. A light, fresh, or slightly sweet side dish is always the right choice here. Enjoy every crunchy bite!
Storage and Reheating Instructions for Leftover Crispy Chicken Nuggets
I always hope there are leftovers, because frankly, these nuggets are almost as good the next day—provided you reheat them correctly! If you somehow manage to have any of these Crispy Chicken Nuggets with Spicy Mayo left over, don’t stress about saving them. They’re easy to store, but you have to be very specific about how you bring back that crunch.
First, you have to let them cool down completely to room temperature before you store them. Putting hot food into an airtight container is basically trapping steam, and steam is what makes breading soggy overnight. Let them sit on the counter for about 20 minutes until they aren’t warm anymore.
Once they are cool, put them into an airtight container. Don’t just toss them in a Ziploc bag if you want them to stay crunchy! The hard sides of a plastic container help protect them a bit better from jostling around, though I do sometimes place a piece of paper towel at the bottom just to absorb any residual moisture, just in case.
Now for the most important part: Reheating! If you throw these in the microwave, I promise you, you will cry. The microwave is the enemy of crispiness because it heats the moisture inside the breading, turning it into rubbery sadness. We need dry, hot air to resurrect that crunch!
You have two perfect options here, both of which mimic the original cooking method:
- The Air Fryer Resurrection: This is my favorite way. Set your air fryer to about 375°F (190°C). You don’t need to spray them with oil! Pop the cold nuggets in a single layer (again, no overcrowding) and cook them for just 4 to 6 minutes. They come out unbelievably crispy, almost like they were just made.
- Oven Reheating: If you don’t have an air fryer, fire up your oven to 400°F (200°C). Place the nuggets on a wire rack set over a baking sheet—the rack is vital so air hits the bottom too. Bake for about 8 to 10 minutes. This dries out the crust perfectly and reheats the chicken core gently.
If you saved any of your amazing Easy Spicy Mayo Dipping Sauce, keep that covered in the fridge! It lasts about five days happily, and it’s ready to go whenever you reheat your nuggets. Seriously, resisting the urge to microwave them is the difference between a great leftover snack and a sad, slightly chewy disappointment!
Frequently Asked Questions About Crispy Chicken Nuggets with Spicy Mayo
I get so many questions about this recipe because everyone wants that perfect crunch! It’s natural to wonder about substitutions or alternative cooking methods, so I gathered the most common queries right here for you. If you need even more sauce inspiration, you can check out my guide on how to make spicy aioli since it’s very similar to our delicious mayo!
Can I bake these without sacrificing crispiness?
Oh, absolutely! While frying gives you that rich, deep crunch, you can definitely use the Oven Baked Chicken Nuggets Technique and still get great results. The key here is making sure the air can circulate all around the nugget, even when baking. Don’t just lay them directly on a sheet pan! You need to use that wire rack over a baking sheet combo, like we did for freezing prep.
Before they go into the oven (set it to 400°F or 200°C), you need to spray them super generously with cooking spray—aim for both the top and the bottom. The oil helps the breading crisp up rather than just bake dry. If you crowd the pan, they steam. Give them space, treat them like they’re frying, and you’ll get wonderfully crispy results!
What if I don’t have panko breadcrumbs?
That’s a fair question, especially if Panko stores are sold out! Panko is hands-down the best choice for that light, airy, jagged texture that makes these the Best Crispy Chicken Nuggets, because those flakes are lighter and absorb less oil. But if you’re in a pinch, you have a couple of options.
You can use finely ground regular dried breadcrumbs, but you’ll honestly need to double-coat them in the egg wash and breadcrumbs one extra time just to build up the bulk that Panko provides naturally. Another sneaky good substitution is crushed cornflakes! If you crush them almost into a fine powder but leave some medium-sized flakes, they give a fantastic crunch that rivals Panko pretty closely.
Just know that whatever you use, it won’t be *exactly* the same texture as the recipe suggests, but it will still be delicious!
How do I make the spicy mayo healthier?
I totally get wanting to make things a little bit lighter, especially when you’re making a big batch of nuggets. The great news is that our Easy Spicy Mayo Dipping Sauce is so simple that you can swap out the base mayo easily! The secret here is to replace about half of the standard mayonnaise with a thicker, protein-rich base.
Try swapping half of the mayonnaise volume with plain Greek yogurt, the full-fat kind if you can find it, just for the best texture. Greek yogurt is thick and tangy, and it acts just like mayo in a dressing. Alternatively, you can use a light mayonnaise, but make sure you taste it first, as light versions can sometimes thin out the sauce too much when mixed with the lemon juice.
When you swap, whisk everything together as normal. You might find you need just a tiny splash more lemon juice or a pinch more paprika to bring the flavor back up to where it was, but you’ve successfully cut down on the overall fat content while keeping that signature creamy spice!
PrintCrispy Chicken Nuggets with Spicy Mayo
Make restaurant-quality crispy chicken nuggets at home using a double-breading method, served with a simple, flavorful spicy mayonnaise dipping sauce.
- Prep Time: 25 min
- Cook Time: 15 min
- Total Time: 40 min
- Yield: 4 servings
- Category: Snack/Appetizer
- Method: Frying or Air Frying
- Cuisine: American
- Diet: Low Fat
Ingredients
- 1.5 lbs boneless, skinless chicken breasts, cut into 1-inch pieces
- 1 cup all-purpose flour
- 1 teaspoon salt
- 1/2 teaspoon black pepper
- 1/2 teaspoon garlic powder
- 2 large eggs, beaten
- 1 cup all-purpose flour
- 1 cup panko breadcrumbs
- 1/2 cup all-purpose flour (for second dredge)
- Vegetable oil, for frying (or cooking spray for baking/air frying)
- 1/2 cup mayonnaise
- 2 tablespoons sriracha sauce
- 1 teaspoon lemon juice
- 1/2 teaspoon smoked paprika
Instructions
- Prepare the chicken: Pat the chicken pieces completely dry with paper towels. Season lightly with salt and pepper.
- Set up the breading stations: In the first shallow dish, mix 1 cup flour, salt, pepper, and garlic powder. In the second dish, place the beaten eggs. In the third dish, place the panko breadcrumbs.
- First dredge: Coat each chicken piece thoroughly in the seasoned flour mixture, shaking off excess. Dip into the egg wash, letting excess drip off. Coat completely in panko breadcrumbs, pressing gently to adhere.
- Second crisping step: Take each breaded piece and dredge it again in the remaining 1/2 cup of plain flour. Then, dip it back into the egg wash quickly, and finally, coat it again in the panko breadcrumbs, pressing firmly to create a thick, craggy coating. Place coated nuggets on a wire rack.
- Cook the nuggets (Frying method): Heat 2 inches of oil in a deep skillet to 350°F (175°C). Fry the nuggets in batches for 4-6 minutes, turning occasionally, until golden brown and cooked through (internal temperature 165°F or 74°C). Drain on a paper towel-lined plate.
- Cook the nuggets (Air Fryer method): Preheat air fryer to 380°F (195°C). Lightly spray the nuggets with cooking oil. Air fry for 12-15 minutes, flipping halfway, until golden and crisp.
- Make the spicy mayo: In a small bowl, whisk together the mayonnaise, sriracha, lemon juice, and smoked paprika until smooth.
- Serve the crispy chicken nuggets immediately with the spicy mayo for dipping.
Notes
- For the juiciest interior, chill the breaded nuggets on the wire rack for 15 minutes before cooking. This helps the coating set.
- You can freeze uncooked, breaded nuggets on a baking sheet until solid, then transfer them to a freezer bag for later use. Cook directly from frozen, adding a few extra minutes to the cook time.
- Adjust the sriracha amount in the mayo to control the heat level.
Nutrition
- Serving Size: 6 nuggets
- Calories: 350
- Sugar: 2
- Sodium: 450
- Fat: 20
- Saturated Fat: 4
- Unsaturated Fat: 16
- Trans Fat: 0
- Carbohydrates: 18
- Fiber: 1
- Protein: 25
- Cholesterol: 90