

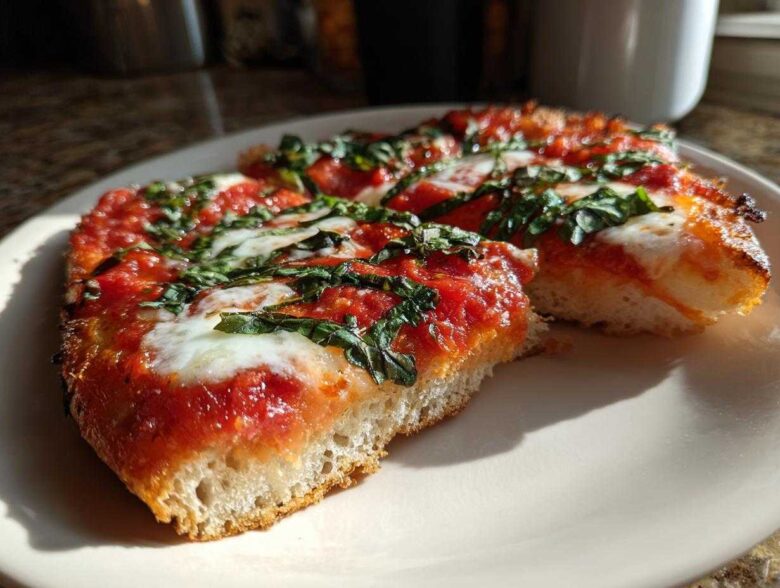
Oh my gosh, have I got a secret weapon for you today! For years, I thought that true, Neapolitan-style pizza was just off the table forever when we went strictly gluten-free. Everything turned out sad and cracker-like. But I finally cracked the code for a truly reliable, non-crumbly Gluten-Free Margherita Pizza that tastes exactly like the real deal. Trust me, this crust has chew! After so much trial and error—seriously, my kitchen looked like a flour explosion zone more than once—I finally found the perfect balance of ingredients to give you that satisfying bite. Forget everything you thought you knew about sad GF dough; this is going to make you cheer!
Why This Gluten-Free Margherita Pizza Recipe Works (E-E-A-T)
The biggest struggle with any Gluten-Free Pizza Dough Recipe is that dreaded crumbly texture. It just falls apart! My breakthrough came when I stopped trying to force GF flour blends to behave like wheat flour. The secret here is recognizing that structure needs help, which is why using a high-quality gluten-free all-purpose flour blend that *already includes xanthan gum* is non-negotiable. That gum acts like the gluten we are missing, giving us a dough that actually stretches instead of shatters.
And oh, the heat! You need roaring, I mean *fire-breathing*, heat to get that Neapolitan-style leopard spotting and a crispy bottom. We crank that oven up to 500°F and let that pizza stone supercharge for ages. This method bakes the crust fast from the bottom up, locking in moisture before it can dry out. It’s all about respecting the ingredients and the heat.
Achieving Authentic Italian Flavor in Your Gluten Free Margherita Pizza
Once you have that amazing crust structure, the toppings have to be impeccable, right? For a truly authentic taste, you can’t skimp here. I insist on using genuine San Marzano tomatoes—they are sweeter and less acidic, which makes such a difference for a brighter sauce. And please, use fresh mozzarella, the kind packed in water (that’s the fior di latte!). When it melts, it releases just the right amount of creamy liquid, and when you finish it with that burst of fresh basil and a drizzle of good olive oil? Wow. That’s where the real magic of the Gluten-Free Margherita Pizza comes alive. If you want to dive deeper into perfecting your pizza sauce game, I posted some thoughts over on my blog!
Essential Ingredients for Your Homemade Gluten Free Pizza Crust
Okay, now for the fun part: gathering our supplies! Since we are talking about a reliable Gluten Free Pizza Dough Recipe, we have to be precise here. Don’t just eyeball anything; gluten-free baking demands focus! When you look at this list, you’ll notice we don’t use any complicated sourdough starters or tricky overnight rises. This is meant to be accessible!
- 1 1/2 cups warm water (This is important! It really should be between 105-115°F, otherwise your yeast won’t wake up!)
- 1 teaspoon sugar
- 2 1/4 teaspoons active dry yeast
- 2 1/2 cups high-quality gluten-free all-purpose flour blend (This absolutely *must* contain xanthan gum, or we run into trouble!)
- 1 teaspoon salt
- 2 tablespoons olive oil, plus more for drizzling
- 1 (14.5 ounce) can crushed San Marzano tomatoes, drained slightly
- 8 ounces fresh mozzarella (fior di latte), sliced or torn
- 1/4 cup fresh basil leaves
- 1 tablespoon extra virgin olive oil for finishing
- Cornmeal or rice flour for dusting (This is your insurance policy against sticking!)
Ingredient Notes and Gluten-Free Flour Blend Guidance
Let’s talk about that flour blend for a minute because it is the backbone of this entire operation. You really need a reputable, high-quality gluten-free all-purpose flour blend. Don’t go for the cheap stuff! More importantly pictured on that bag, it needs to say it contains xanthan gum. If, and I mean *if*, you happen to grab a blend that doesn’t list it, you need to add 1 teaspoon of xanthan gum right in with your dry ingredients. That’s what gives us that essential chew for our Homemade Gluten Free Pizza Crust.
For the toppings, stick to the classic trio for your Gluten-Free Margherita Pizza. Those San Marzano tomatoes are worth the slightly higher price tag because they bake down perfectly. And honestly, that fresh basil sprinkled on at the very end? It transforms the aroma in the whole kitchen. If it’s not fresh and bright green, hold off until you can get some!
How to Make Gluten Free Pizza Dough Recipe
Making the actual dough for our Gluten Free Pizza Dough Recipe is surprisingly straightforward, but you have to embrace the stickiness! This isn’t like wheat dough where you can really knead it on a floured counter. We start by waking up that yeast in the warm water with just a pinch of sugar. Make sure it’s foamy—that’s your signal that it’s happy and ready to work. Once it’s bubbly, dump in all your flour blend and salt. If you have a stand mixer, use that paddle attachment! Seriously, it saves your arm. Mix it until everything comes together into a very sticky, almost wet-looking mass. Don’t freak out; this is normal for GF dough.
I always recommend letting it rest for about 30 minutes, even though it’s technically optional for a Quick Gluten Free Weeknight Meal. Gluten-free dough doesn’t really rise up huge like wheat dough; it mostly just hydrates and gets a tiny bit easier to handle when it rests. Trust me on this hydration period. Once it’s rested, we are ready to shape it, which is the next big step!
For more detailed shaping techniques, I walk through my entire process, including how I handle shaping the second time if I need to reform it, right here: how to make gluten free pizza at home!
Tips for Using Xanthan Gum in Pizza Dough
So, why do we keep harping on about that xanthan gum? Think of it as the structural glue for your Homemade Gluten Free Pizza Crust. Without it, the dough will just crumble into sand once it hits the heat. Xanthan gum mimics the elasticity that gluten usually provides, allowing the dough to hold together as it bakes and giving you that slightly chewy texture we crave. It traps the gas from the yeast, which keeps the bubbles formed during mixing intact, resulting in a crust that’s proud and sturdy, not flat and dusty. Just make sure you mix it thoroughly with the dry ingredients first so it distributes evenly before any liquid goes in!
Baking Preparation for the Best Gluten Free Margherita Bake
Okay, you’ve mixed the dough, you’ve shaped it—now comes the part where most folks mess up their Gluten Free Margherita Pizza because they rush the preheat step. Seriously, don’t rush this! If you want that glorious, Crispy Bottom Gluten Free Pizza that holds up to the sauce and cheese, you have to turn your oven into a high-powered pizza oven, and that means that pizza stone or steel needs a serious warm-up.
I mean it: place that stone or steel right in the middle of your oven rack, turn the oven up to the maximum setting—we are aiming for 500°F (260°C)—and then you walk away. Go check your emails, pour another glass of water, do a dance on one foot—whatever! You must let it preheat for a bare minimum of 45 minutes. If you put your pizza on a stone that feels warm but isn’t scorchingly hot, the bottom of your dough will steam instead of bake, and you’re back to that sad, soft texture we spent all this time avoiding.
And since we are talking about keeping this a totally safe, Celiac Safe Pizza Recipe, I have to mention equipment. If you are cooking for someone with high sensitivity, cross-contamination is a real issue. If you have ever used that stone for a regular wheat pizza, you need to give it a super deep clean—scrub it down until you’re sure nothing is left behind—or, better yet, dedicate one of your pizza steels or baking sheets solely for gluten-free baking. Better safe than sorry, right? This little precaution makes all the difference for enjoying that perfect Best Gluten Free Margherita Bake without worry!
When everything is preheated and ready, I always sneak a peek at my favorite recipes for inspiration, like this amazing dip I made once, just to keep my mind off how hot the kitchen is getting: which you can view right here.
Step-by-Step Instructions for Assembling Your Gluten-Free Margherita Pizza
Phew! The oven is hot—we mean scorching hot! Now it’s time for the assembly dance. This part moves fast, so have your tomatoes drained and your mozzarella sliced and ready to go. We want to work quickly once the dough hits that conveyor belt (the pizza peel) so it doesn’t have time to bond with it. Remember, this is our moment to create the Authentic Gluten Free Italian Pizza!
First things first: grab that pizza peel! Dust it generously with cornmeal or rice flour. This is non-negotiable insurance against sticking! Gently scrape your rested, sticky dough right onto that prepared surface. Don’t fuss about making a perfect circle yet. We are going to gently press and stretch it out to about 12 inches. Do not punch it down or try to stretch it like traditional dough; you’ll just tear it!
When it comes to topping, simplicity is key for a Margherita! Spread those slightly drained crushed San Marzano tomatoes all over the dough, leaving about a clean one-inch border for the crust. Then, arrange your chunks of fresh mozzarella evenly across the sauce. Don’t overload it—that’s the trick to keeping the center from getting soggy.
Now, slide it onto that screaming hot stone you waited 45 minutes for! We bake at 500°F (260°C) for about 10 to 14 minutes. Keep an eye on it! You’re looking for the edges to puff up and get beautifully golden brown, and for that mozzarella to become bubbly and maybe just kiss of gold in spots. When it comes out, it will smell incredible.
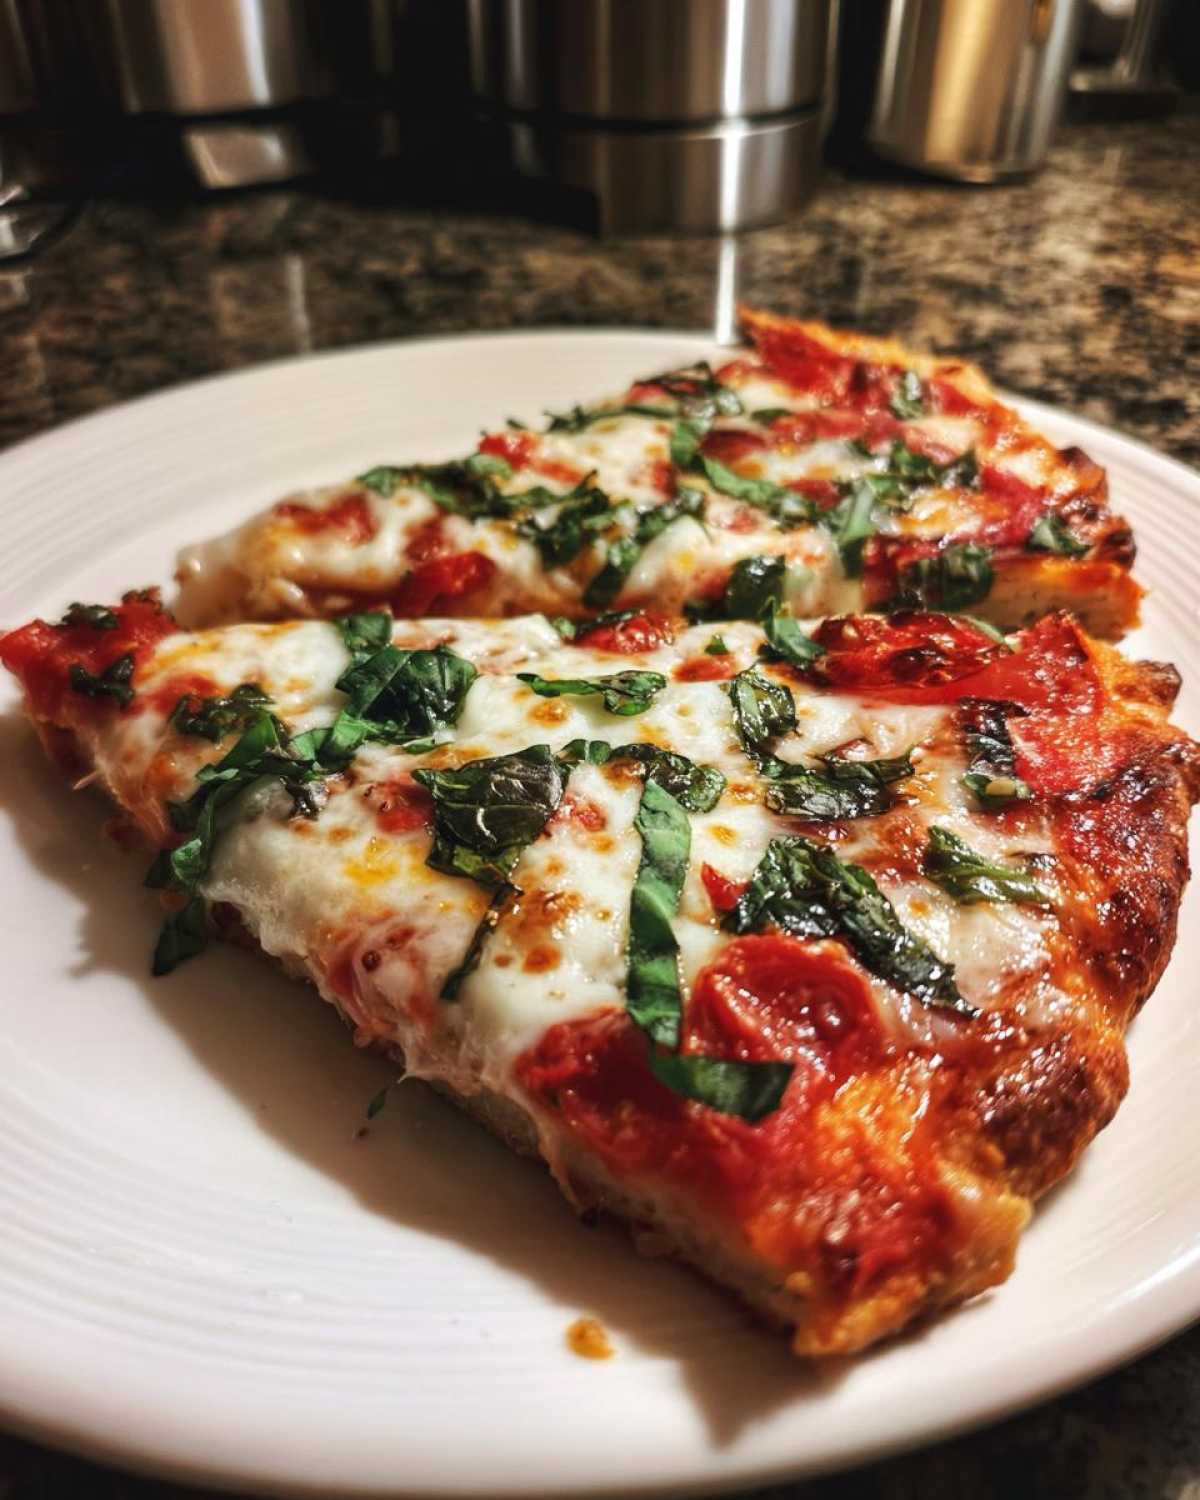
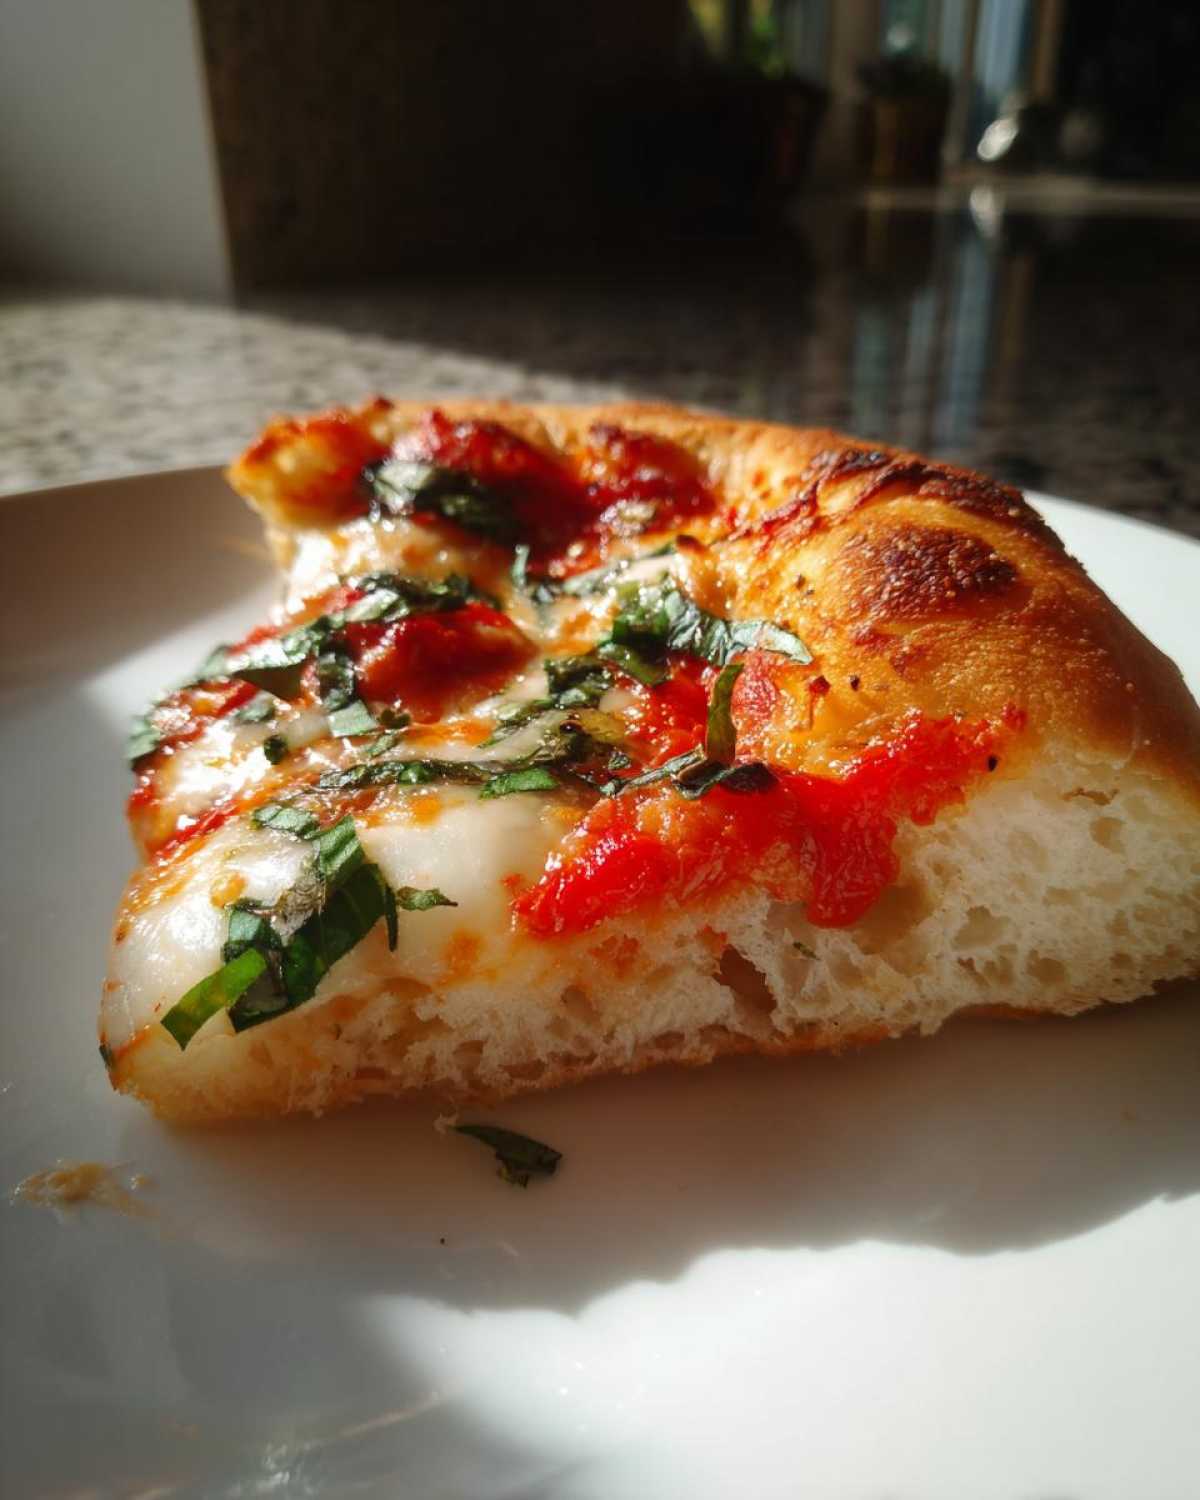
The final touch happens right after it exits the oven. Don’t wait! Immediately scatter your fresh basil leaves right over that hot cheese—the residual heat will wilt them just perfectly. Finish with a drizzle of the best extra virgin olive oil you have. That last bit of oil seals the flavor profile of your perfect Gluten-Free Margherita Pizza. Slice it up and eat it fast!
Shaping the Dough Without Tearing
Handling this delicate Homemade Gluten Free Pizza Crust takes a gentle touch. Because it lacks tensile strength, you need to be supportive underneath it at all times. My go-to trick—and this is super important—is to lightly oil my hands *before* I touch the dough on the peel. A tiny bit of oil prevents the sticky mass from adhering to your fingers when you start pressing it out.
Instead of throwing it or stretching it dramatically, think of it as gently persuading the dough outward from the center. Never try to build up a huge cornice or edge crust, because GF dough struggles there. Just press down lightly with your fingertips from the center outward, rotating the peel as you go. If you notice sticking to the peel, lift that spot up quickly and throw a pinch more cornmeal underneath it. Working quickly is the name of the game here!
Serving Suggestions for Your Authentic Gluten Free Italian Pizza
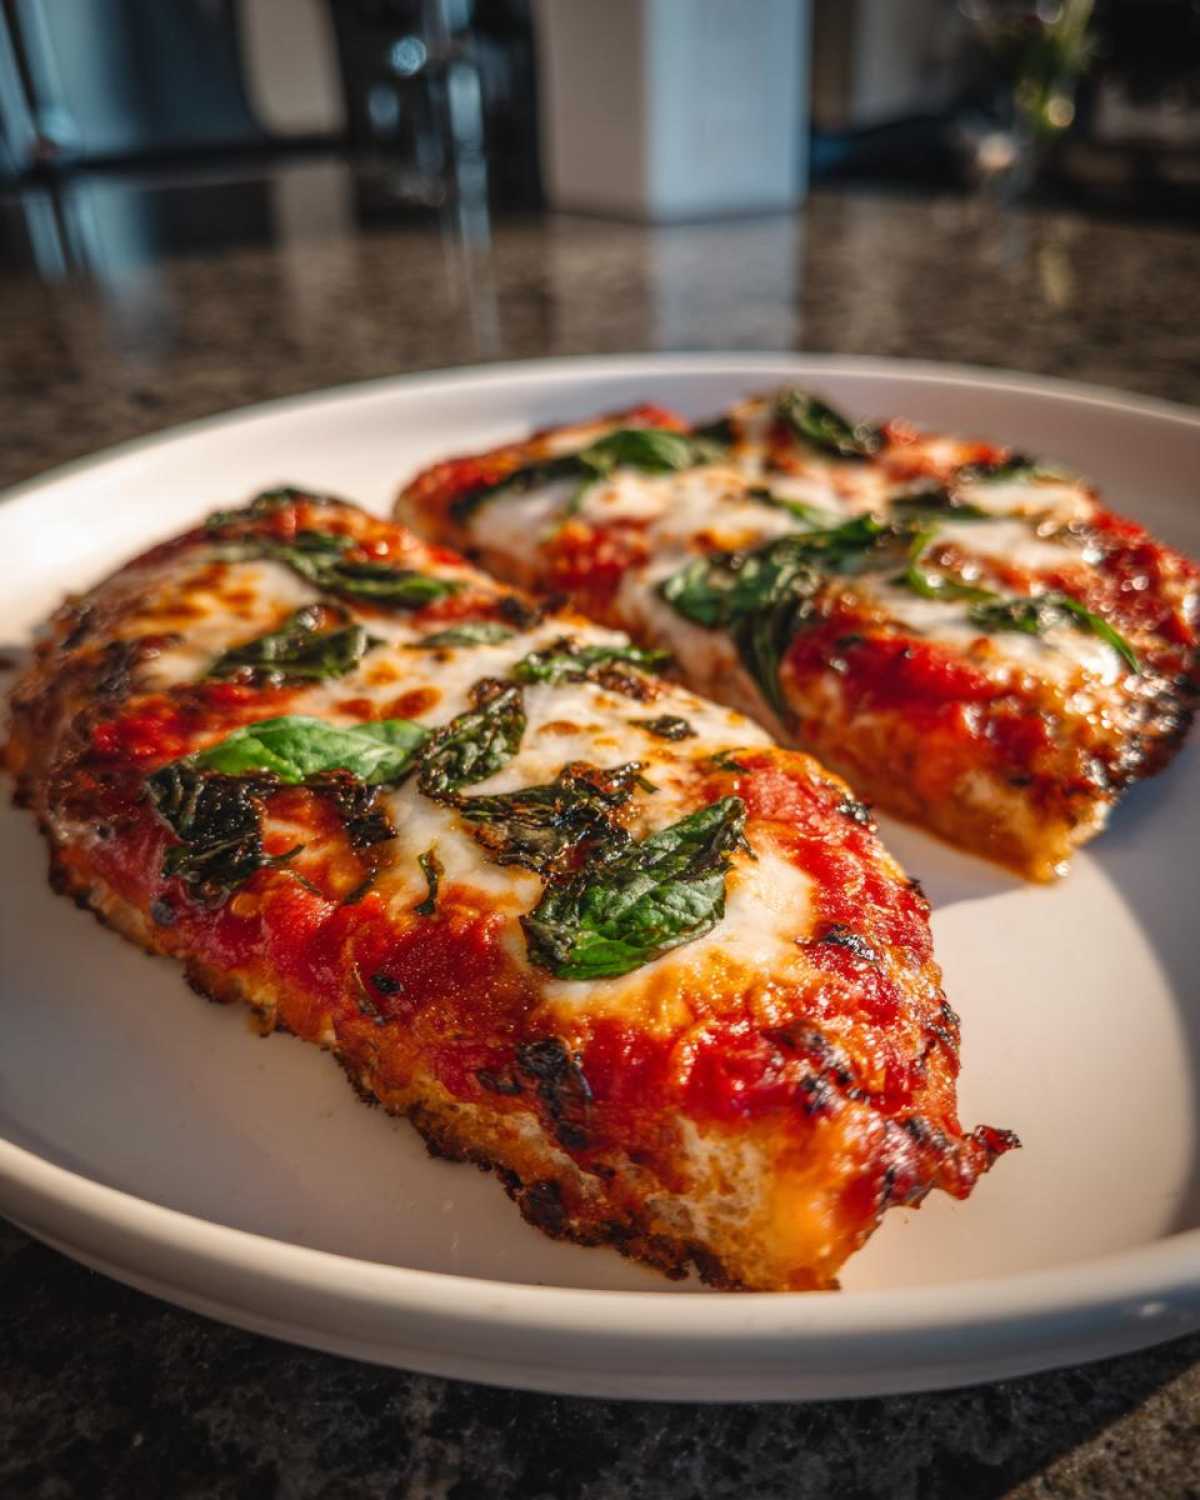
Once you pull that gorgeous, slightly charred, and perfectly flavorful Gluten Free Margherita Pizza out of the oven, you want to serve it right away! This pizza sings when it’s piping hot. Because the toppings are so fresh and bright—tomato, basil, mozzarella—you don’t want heavy sides that fight with those beautiful Italian flavors. Keep it light and let that pizza shine!
My favorite pairing is almost insultingly simple: a really light, slightly peppery arugula salad. Toss the arugula with just lemon juice, a tiny bit of salt, and maybe some shaved Parmesan if you want, but skip the heavy dressings like ranch or blue cheese. The peppery green cuts through the richness of the mozzarella perfectly.
And for drinks? You definitely want something refreshing to go with that acidity from the tomatoes and the fresh basil. Forget heavy beers. I usually serve this up with a sparkling water infused with mint, or if we’re feeling fancy, something crisp like a Pinot Grigio. I actually have a fantastic recipe for a Watermelon Mint Refresher that feels incredibly Italian and pairs shockingly well with the basil!
The key to enjoying your Authentic Gluten Free Italian Pizza is simplicity around it. You worked hard on that crust; let the quality of those three main ingredients—tomato, cheese, basil—be the star!
Storing Leftovers and Reheating Your Gluten Free Margherita Pizza
Okay, if you’re superhuman and actually have leftover Gluten-Free Margherita Pizza (which, honestly, is rare at my house), storage is key because GF crust can dry out fast. Don’t wrap it tightly in plastic wrap! That traps moisture against the crust and makes it gummy when you try to eat it cold the next day.
My hack is this: place a small square of parchment paper between each slice, stack them up, and then put the whole stack into a good, airtight container. This keeps the slices separated and helps them breathe just a little. You can keep it refrigerated for about two days. Any longer than that, and honestly, the magic starts to fade, even with that sturdy crust we worked so hard to build.
Now, reheating: You absolutely, positively cannot microwave this pizza. I know it’s fast, but it turns the crust into warm, soft rubber almost instantly. If you need a Quick Gluten Free Dinner Idea for leftovers, you have two better options.
First is the toaster oven or regular oven, which gives you that crispy bottom back. Set your oven to about 350°F (175°C) and pop the slice directly onto the rack. If you can, place another empty baking sheet on the rack below it to help radiate heat up evenly. Give it about 5 to 8 minutes. You’ll hear that crust crisp up again!
- Best Method: Oven or Toaster Oven at 350°F for 5-8 minutes.
- Avoid at all costs: The Microwave (it ruins the texture).
If you are really in a tearing-hurry, you can use a dry skillet over medium heat. Place the slice right in the pan—no oil!—and cover it for about 3 minutes until the bottom gets its crisp back. The cheese melts nicely under the covered heat, too. It’s faster than the oven and surprisingly effective for reviving that perfect Homemade Gluten Free Pizza Crust texture!
Frequently Asked Questions About Celiac Safe Pizza Recipe
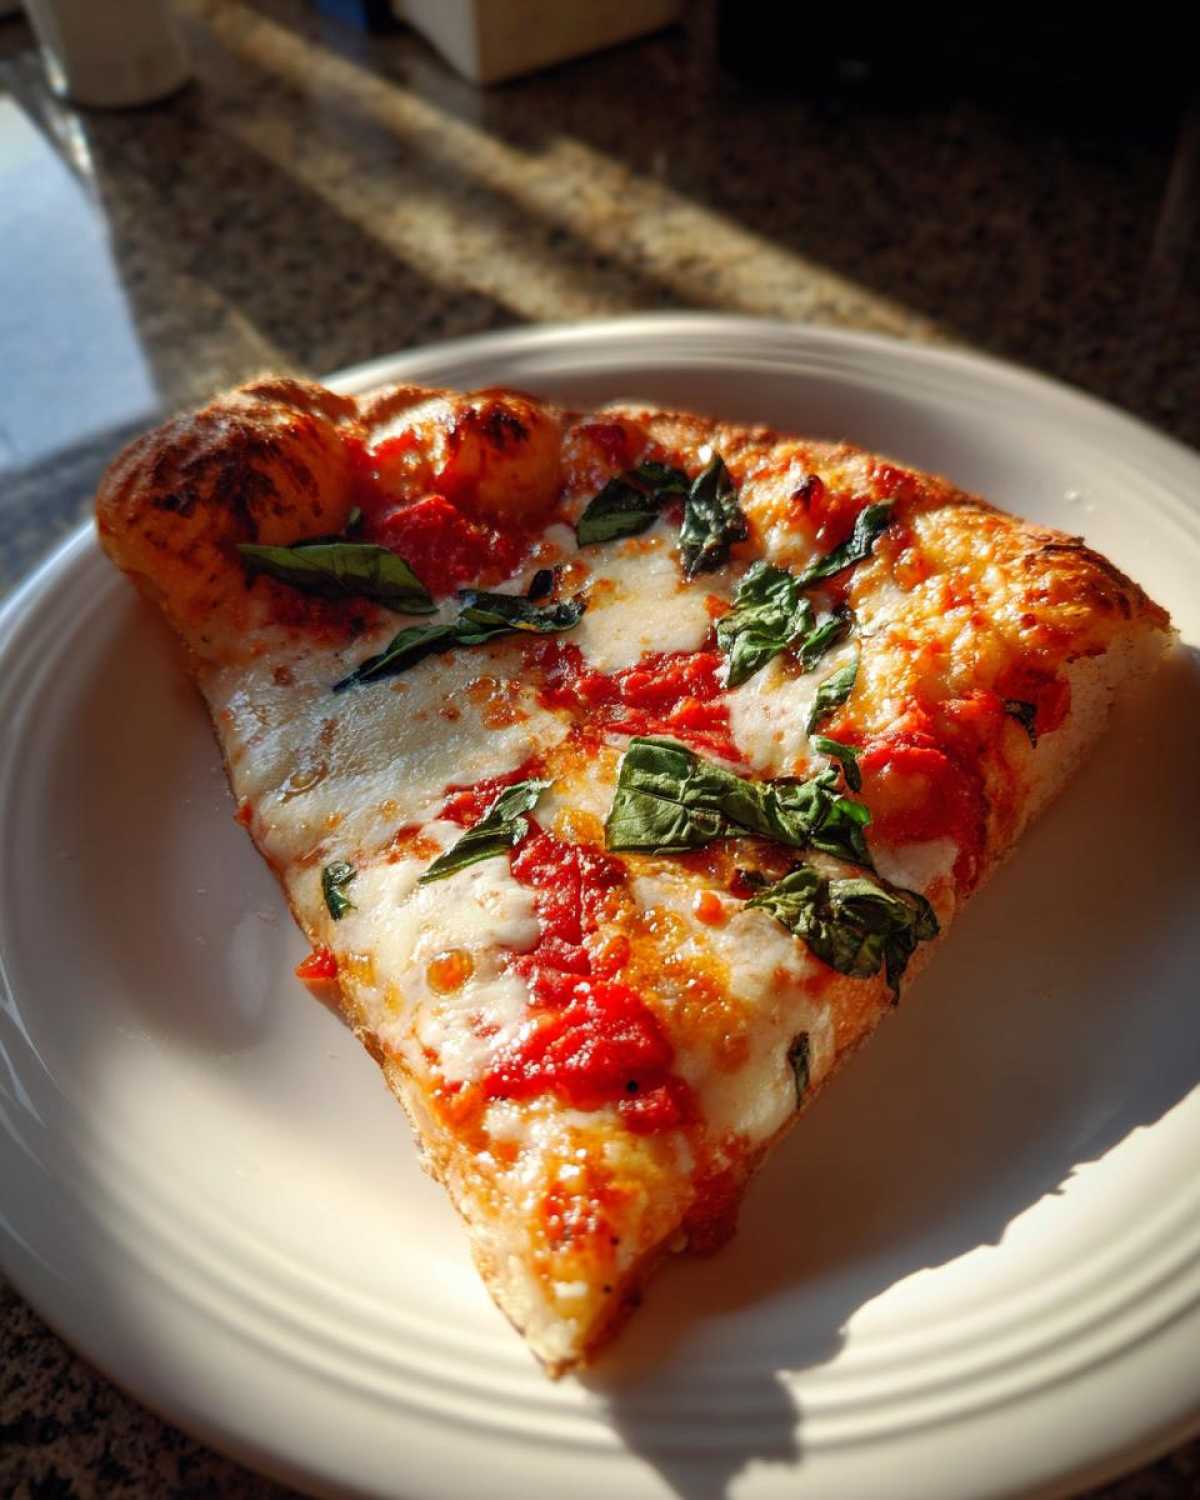
I get so many great questions about making sure this Celiac Safe Pizza Recipe is perfect for everyone. Dealing with gluten-free is all about anticipation, so let’s tackle the common hurdles you might run into when making your Gluten Free Margherita Pizza!
Can I use a regular pizza pan instead of a stone for this Gluten Free Margherita Pizza?
You totally can, but I won’t lie—your results will be different, and maybe a little upsetting if you were hoping for that intensely crispy crust! A regular metal pizza pan doesn’t hold or transfer heat the same way a thick pizza stone or steel does. When you use a pan, the dough heats up slower, which tends to encourage steaming rather than direct searing on the bottom. So, while it will cook through just fine, you might end up with a slightly softer or chewier bottom rather than the crisp texture we aimed for in this Gluten Free Pizza Dough Recipe.
What is the best way to make this an Easy Gluten Free Dinner Idea?
I totally understand needing a delicious meal tonight! To make this an Easy Gluten Free Dinner Idea, you can save a few minutes by prepping your sauce ahead of time. You can make a batch of that beautiful San Marzano sauce and keep it in the fridge for up to five days. Also, if you are chopping the mozzarella yourself—which I highly recommend for the texture—do that earlier in the day.
However, I absolutely draw the line at pre-made GF crusts. Trust me, the texture payoff isn’t worth it! If you want a super quick swap without sacrificing too much flavor, you could try using those jarred crushed tomatoes instead of canned, but only if they are high quality. The dough itself needs that 30-minute rest anyway, so keeping the prep time low is mostly focused on your toppings!
Can I make this a Dairy Free Mozzarella Pizza Option?
Yes, this is a super common request! The standard Margherita relies heavily on that fresh, milky mozzarella, which is a challenge to replace, but totally doable now. When you head to the store, look for high-quality vegan mozzarella shreds or balls designed to mimic fresh Italian cheese. Avoid the cheapest block-style vegan cheeses, as they often melt into an oily slick rather than forming that nice bubbly top we see here.
You might need to adjust the baking time slightly, too, because dairy-free alternatives sometimes react differently to high heat. Keep a close eye on it! The rest of the recipe, especially the crispy crust foundation, remains exactly the same for your Gluten Free Margherita Pizza!
Storing Leftovers and Reheating Your Gluten Free Margherita Pizza
Okay, if you’re superhuman and actually have leftover Gluten-Free Margherita Pizza (which, honestly, is rare at my house), storage is key because GF crust can dry out fast. Don’t wrap it tightly in plastic wrap! That traps moisture against the crust and makes it gummy when you try to eat it cold the next day.
My hack is this: place a small square of parchment paper between each slice, stack them up, and then put the whole stack into a good, airtight container. This keeps the slices separated and helps them breathe just a little. You can keep it refrigerated for about two days. Any longer than that, and honestly, the magic starts to fade, even with that sturdy crust we worked so hard to build.
Now, reheating: You absolutely, positively cannot microwave this pizza. I know it’s fast, but it turns the crust into warm, soft rubber almost instantly. If you need a Quick Gluten Free Dinner Idea for leftovers, you have two better options.
First is the toaster oven or regular oven, which gives you that crispy bottom back. Set your oven to about 350°F (175°C) and pop the slice directly onto the rack. If you can, place another empty baking sheet on the rack below it to help radiate heat up evenly. Give it about 5 to 8 minutes. You’ll hear that crust crisp up again!
- Best Method: Oven or Toaster Oven at 350°F for 5-8 minutes.
- Avoid at all costs: The Microwave (it ruins the texture).
If you are really in a tearing-hurry, you can use a dry skillet over medium heat. Place the slice right in the pan—no oil!—and cover it for about 3 minutes until the bottom gets its crisp back. The cheese melts nicely under the covered heat, too. It’s faster than the oven and surprisingly effective for reviving that perfect Homemade Gluten Free Pizza Crust texture!
Serving Suggestions for Your Authentic Gluten Free Italian Pizza
Once you pull that gorgeous, slightly charred, and perfectly flavorful Gluten Free Margherita Pizza out of the oven, you want to serve it right away! This pizza sings when it’s piping hot. Because the toppings are so fresh and bright—tomato, basil, mozzarella—you don’t want heavy sides that fight with those beautiful Italian flavors. Keep it light and let that pizza shine!
My favorite pairing is almost insultingly simple: a really light, slightly peppery arugula salad. Toss the arugula with just lemon juice, a tiny bit of salt, and maybe some shaved Parmesan if you want, but skip the heavy dressings like ranch or blue cheese. The peppery green cuts through the richness of the mozzarella perfectly.
And for drinks? You definitely want something refreshing to go with that acidity from the tomatoes and the fresh basil. Forget heavy beers. I usually serve this up with a sparkling water infused with mint, or if we’re feeling fancy, something crisp like a Pinot Grigio. I actually have a fantastic recipe for a Watermelon Mint Refresher that feels incredibly Italian and pairs shockingly well with the basil!
The key to enjoying your Authentic Gluten Free Italian Pizza is simplicity around it. You worked hard on that crust; let the quality of those three main ingredients—tomato, cheese, basil—be the star!
Estimated Nutritional Data for Gluten-Free Margherita Pizza
Look, no matter how careful we are, estimating nutrition for something as variable as Homemade Gluten Free Pizza Crust is tricky, especially when you factor in how much olive oil you choose to drizzle on top! But based on the exact ingredient measurements listed above, here’s what you can generally expect per serving slice. Remember, this is just my best estimate!
- Serving Size: 1 slice
- Calories: 350
- Fat: 15g
- Saturated Fat: 7g
- Trans Fat: 0g
- Cholesterol: 30mg
- Sodium: 450mg
- Carbohydrates: 38g
- Fiber: 3g
- Sugar: 3g
- Protein: 16g
If you have any final recipe questions or just want to chat more about technique, please don’t hesitate to reach out on my contact page! Happy baking, friends!
***
Disclaimer: Please remember that I’m a passionate home cook, not a certified nutritionist! This nutritional breakdown is purely an estimate based on standard ingredient calculations. For precise dietary needs, especially concerning Celiac disease, always consult the labels on your specific products. For more general information, please review my full legal disclaimer here.
Estimated Nutritional Data for Gluten-Free Margherita Pizza
Look, no matter how careful we are, estimating nutrition for something as variable as Homemade Gluten Free Pizza Crust is tricky, especially when you factor in how much olive oil you choose to drizzle on top! But based on the exact ingredient measurements listed above, here’s what you can generally expect per serving slice. Remember, this is just my best estimate!
- Serving Size: 1 slice
- Calories: 350
- Fat: 15g
- Saturated Fat: 7g
- Trans Fat: 0g
- Cholesterol: 30mg
- Sodium: 450mg
- Carbohydrates: 38g
- Fiber: 3g
- Sugar: 3g
- Protein: 16g
I always throw a little note about this stuff at the bottom, just in case you need the legal heads-up! You can check out my full thoughts over on the disclaimer page if you need more context on these numbers.
PrintGluten-Free Margherita Pizza
Follow this recipe to make an authentic-tasting Margherita pizza using a reliable gluten-free crust recipe. This recipe focuses on texture and traditional Italian toppings.
- Prep Time: 20 min
- Cook Time: 14 min
- Total Time: 34 min
- Yield: 1 large pizza (4 servings)
- Category: Dinner
- Method: Baking
- Cuisine: Italian
- Diet: Gluten Free
Ingredients
- 1 1/2 cups warm water (105-115°F)
- 1 teaspoon sugar
- 2 1/4 teaspoons active dry yeast
- 2 1/2 cups high-quality gluten-free all-purpose flour blend (must contain xanthan gum)
- 1 teaspoon salt
- 2 tablespoons olive oil, plus more for drizzling
- 1 (14.5 ounce) can crushed San Marzano tomatoes, drained slightly
- 8 ounces fresh mozzarella (fior di latte), sliced or torn
- 1/4 cup fresh basil leaves
- 1 tablespoon extra virgin olive oil for finishing
- Cornmeal or rice flour for dusting
Instructions
- Activate the yeast: In a large bowl, combine the warm water and sugar. Sprinkle the yeast over the top and let it sit for 5 to 10 minutes until foamy.
- Mix the dough: Add the gluten-free flour blend and salt to the yeast mixture. Mix with a sturdy spoon or a stand mixer with a paddle attachment until a sticky dough forms. Mix in the 2 tablespoons of olive oil.
- First rise (optional but recommended): Cover the bowl with plastic wrap and let the dough rest in a warm place for 30 minutes. Gluten-free dough does not rise as much as wheat dough.
- Preheat the oven and pizza stone: Place a pizza stone or steel on the middle rack of your oven. Preheat the oven to 500°F (260°C) for at least 45 minutes to ensure the stone is fully hot.
- Shape the crust: Dust a pizza peel generously with cornmeal or rice flour. Gently scrape the sticky dough onto the prepared peel. Lightly oil your hands and carefully press and stretch the dough into a 12-inch circle. Do not overwork it.
- Top the pizza: Spread the drained crushed tomatoes evenly over the dough, leaving a 1-inch border. Arrange the mozzarella pieces over the sauce.
- Bake: Carefully slide the pizza from the peel onto the hot pizza stone. Bake for 10 to 14 minutes, or until the crust is golden brown and the cheese is melted and slightly blistered.
- Finish: Remove the pizza from the oven. Immediately scatter the fresh basil leaves over the top and drizzle with the finishing extra virgin olive oil. Slice and serve immediately.
Notes
- If your gluten-free flour blend does not contain xanthan gum, add 1 teaspoon of xanthan gum to the dry ingredients.
- To prevent sticking when transferring to the oven, work quickly once the dough is on the peel.
- For a crispier bottom, bake the crust plain for 5 minutes before adding toppings, then return it to the oven for the remaining time.
- If you must avoid cross-contamination, clean your pizza stone thoroughly or use a dedicated pizza pan for gluten-free baking.
Nutrition
- Serving Size: 1 slice
- Calories: 350
- Sugar: 3
- Sodium: 450
- Fat: 15
- Saturated Fat: 7
- Unsaturated Fat: 8
- Trans Fat: 0
- Carbohydrates: 38
- Fiber: 3
- Protein: 16
- Cholesterol: 30