

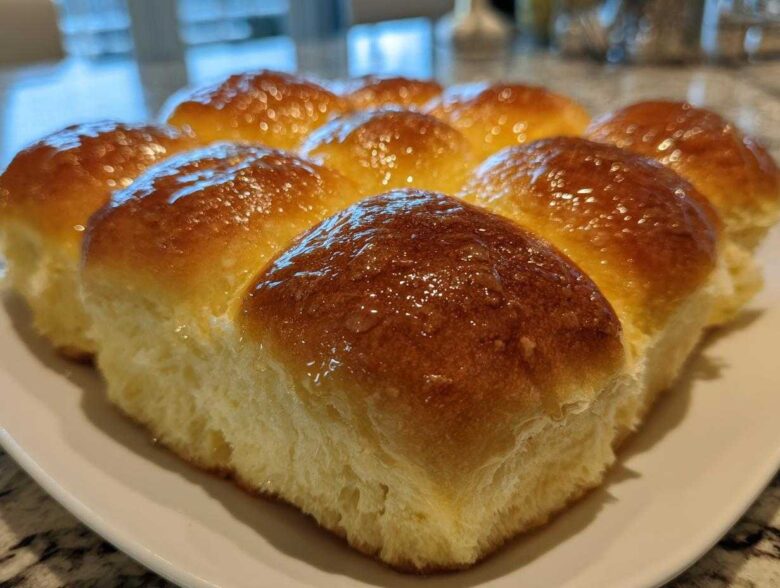
Oh, friend, you know that smell? That deep, warm, comforting cloud that only fresh bread baking can create? It’s the smell of home, the smell of Thanksgiving, the smell of everything good in the world wrapped up in yeast and butter. I’m Noah, and Hana and I have spent what feels like ages perfecting this recipe because when you decide to bake bread, you shouldn’t settle for good; you need perfection. Trust me when I say that these rolls are the ultimate soft, fluffy, and buttery **dinner rolls** you’ve ever pulled from your oven. Getting this classic recipe dialed in takes patience, which is what we talk all about on our About Us page. Forget that grocery store plastic bag; this is the real deal!
Why These Are the Best Homemade Dinner Rolls You Will Ever Make
I get it. You scroll past a dozen recipes promising heaven in a pan. But these aren’t just *good* rolls; these are the ones that make people stop talking when they take the first bite. We tested this time and time again so you don’t have to guess on your holiday table.
If you’re looking for the absolute Soft Dinner Rolls Recipe out there, you’ve found it. I’ve dedicated hours to ensuring they hit every mark you’re looking for.
- They are genuinely melt-in-your-mouth soft—never dense or heavy.
- The flavor is rich and perfectly balanced, thanks to real butter and just a hint of sweetness.
- They come out golden, ready for that amazing topping we talk about later!
These are, without a doubt, the Best Homemade Rolls you will ever serve. If you want to see more of the recipes we’ve perfected in our kitchen, check out our main Blog page!
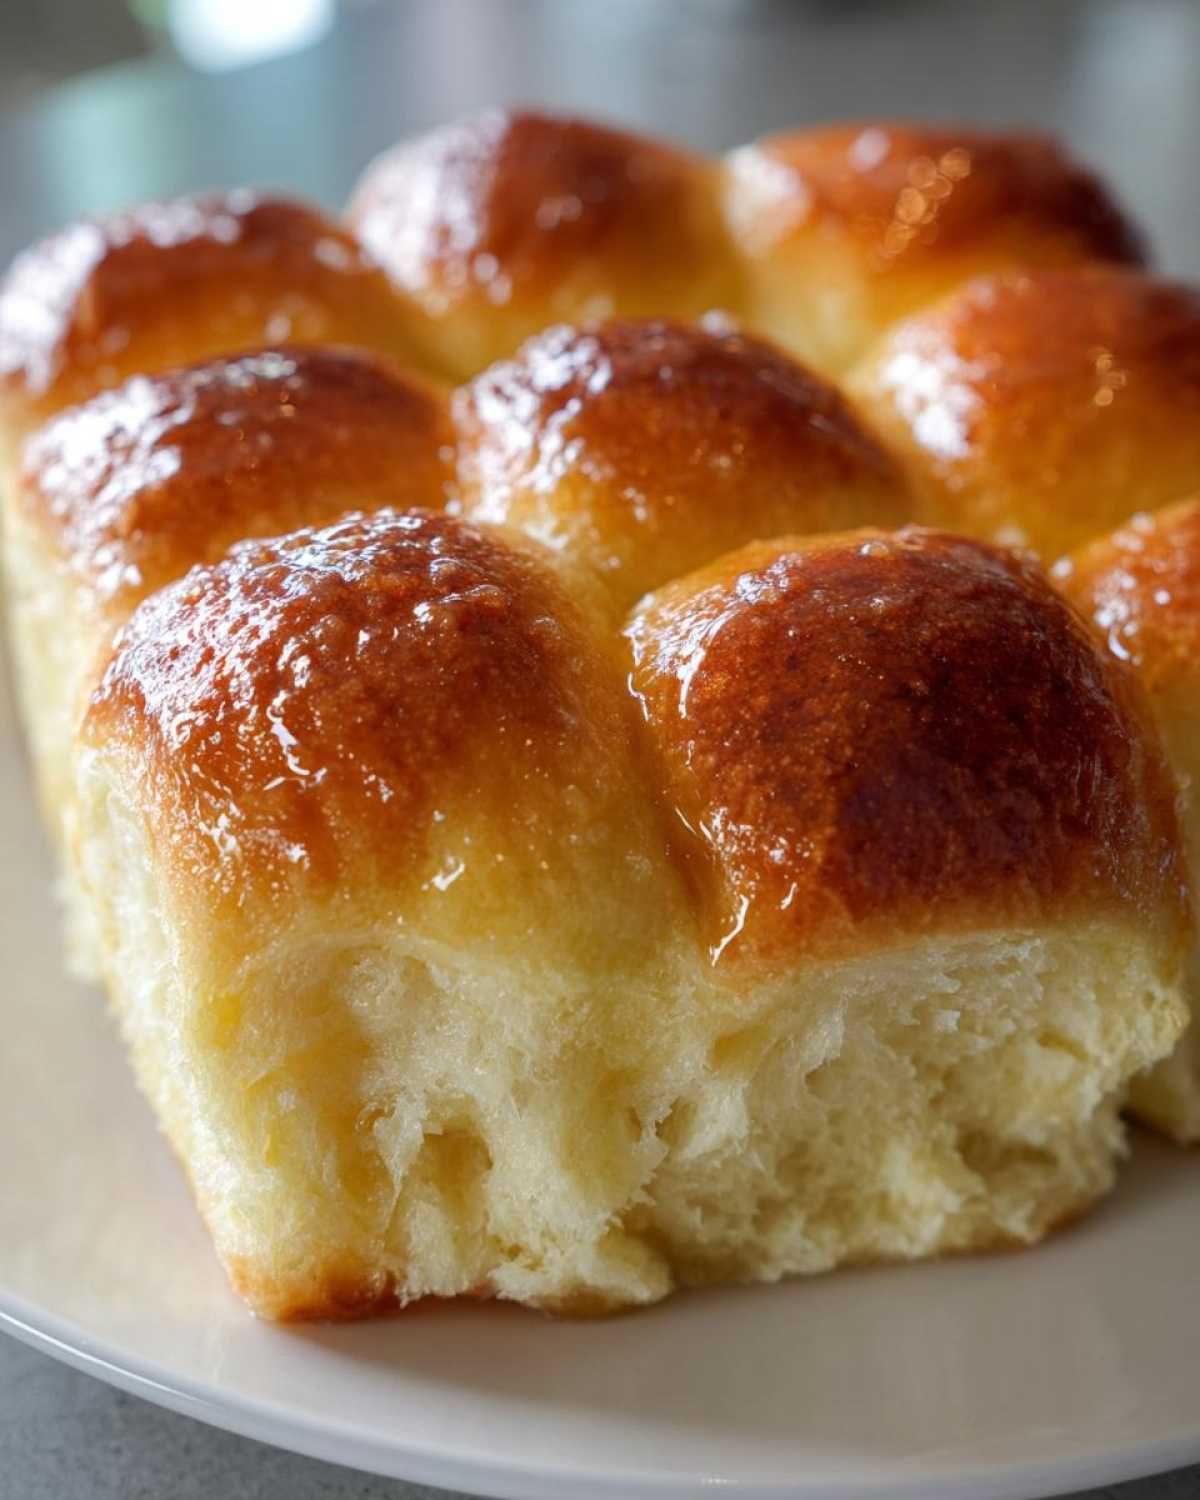
Achieving True Fluffy Homemade Bread Texture
What separates a slightly tough roll from one that feels like a cloud? It’s the science, honestly! It all comes down to the ratio of fat—that melted butter—to the flour, and then patience during the kneading phase. When we knead these long enough, we build strong gluten strands that trap the gases from the yeast. This process is what creates that incredible internal structure we call fluffiness. You’re building resilience into the dough so it can rise beautifully and hold its shape without collapsing.
Ingredients for Ultimate Soft and Fluffy Dinner Rolls
When you’re making something this classic, you absolutely have to get the ingredients right. This isn’t the time for half-measures! Every single item listed here plays a specific part in creating that perfect, tender crumb that melts in your mouth when you eat them hot. Pay close attention to the temperatures and states of the ingredients—that’s where the magic happens, and why this recipe is so trustworthy for your holiday table.
Ingredients for the Buttery Yeast Rolls Dough
This is the core of what becomes our light, airy bread. I always check that my butter is properly measured before melting, and don’t skip the room temperature egg!
- 1 cup warm milk (you want it between 105°F and 115°F—test it first!)
- 2 1/4 teaspoons active dry yeast
- 1/4 cup granulated sugar
- 1 large egg, make sure it’s room temperature
- 1/4 cup unsalted butter, melted
- 1 teaspoon salt
- 3 to 3 1/2 cups all-purpose flour (we’ll start with 3 cups and add more as needed)
Ingredients for the Melted Butter Topping
This topping is what takes these rolls from homemade good to restaurant-quality amazing. The butter has to be brushed on right when they come out of the oven, so have this ready!
- For the topping: 1/4 cup unsalted butter, melted
- For the topping: 1 teaspoon honey (this is optional, but if you want that sweet, slightly caramelized classic copycat flavor, definitely include it!)
Step-by-Step Instructions for Perfect Dinner Rolls
Alright, deep breaths! Now that we have our ingredients lined up, we can get down to the actual baking magic. Making amazing dinner rolls from scratch involves a few distinct phases, but honestly, most of the time is just spent waiting patiently for the dough to do its thing. While I love a weeknight bread recipe, these classic ones need a little extra quality time during the rising stages, and it is so worth it!
Preparing the Yeast and Activating the Dough for Dinner Rolls
Step one is crucial: we need to wake up that yeast. Pour your warm milk—remember, we’re aiming for that 105°F to 115°F sweet spot—into your large bowl, and sprinkle the yeast right on top. Let it sit for about 5 to 10 minutes. If it gets foamy and bubbly, you are golden! That’s the yeast saying, “I’m ready to work!” Next, whisk in the sugar, the room-temperature egg, the melted butter, and the salt. Don’t worry about smoothing it out perfectly; we just want everything acquainted before the flour comes in.
Kneading and the First Rise for Fluffy Homemade Bread
Time to add the flour, cup by cup. Once it gets too stiff to stir, turn that shaggy dough out onto a lightly floured counter. Now, this is where I tell Hana to step back because I get competitive! You need to knead this by hand for a good 6 to 8 minutes, or use the dough hook on your mixer for about 5. You are looking for ‘smooth and elastic.’ It should spring back slowly when you poke it, and it shouldn’t stick all over your hands like glue anymore. Pop it into a lightly oiled bowl, cover it, and let it rest in a warm spot for about 1 to 1.5 hours until it’s doubled. Patience here guarantees that fluffy homemade bread texture later.
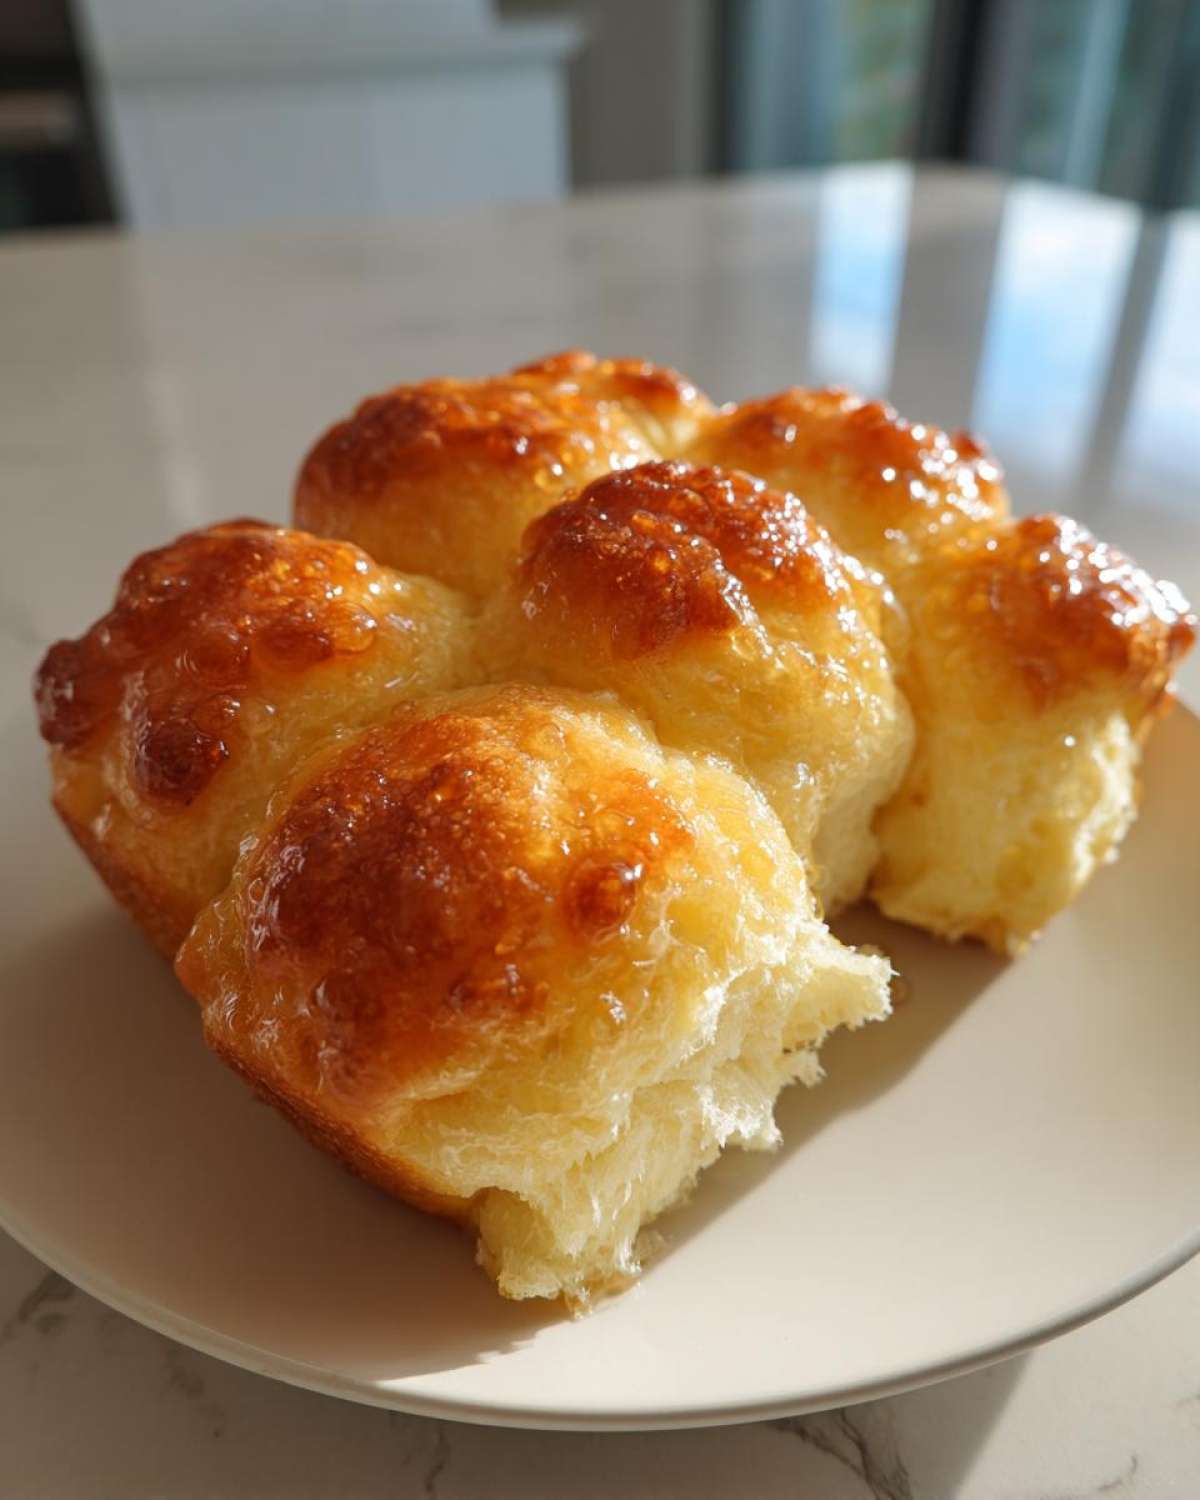
Shaping and the Second Rise: Ensuring Perfectly Risen Rolls
Okay, punch that gorgeous, puffy dough down gently—release all that built-up air! Now, we divide. You can make 12 big, beautiful rolls, or stretch it further for about 18 standard ones. Just try to make them equal so they bake evenly. Roll each piece into a tight little ball between your palms—this tension helps them rise upwards. Place them snugly into your buttered 9×13 pan, cover them loosely, and let them have their second nap for about 30 to 45 minutes. They should look noticeably puffy before they hit the oven.
Baking and Applying the Signature Buttery Yeast Rolls Topping
Preheat the oven to 375°F (190°C). Bake those beauties for 15 to 20 minutes. You’re watching for a lovely golden brown color on top. Now, here’s the secret everyone raves about: as soon as they come out of the oven, brush them generously with that extra melted butter. If you want that famous, slightly sweet sticky top, stir that teaspoon of honey right into the melted butter before you brush it on. That sweet, warm glaze sets instantly, giving you those incredible results mimicking Texas Roadhouse Style Rolls Copycat perfection. Serve them while they’re still steaming!
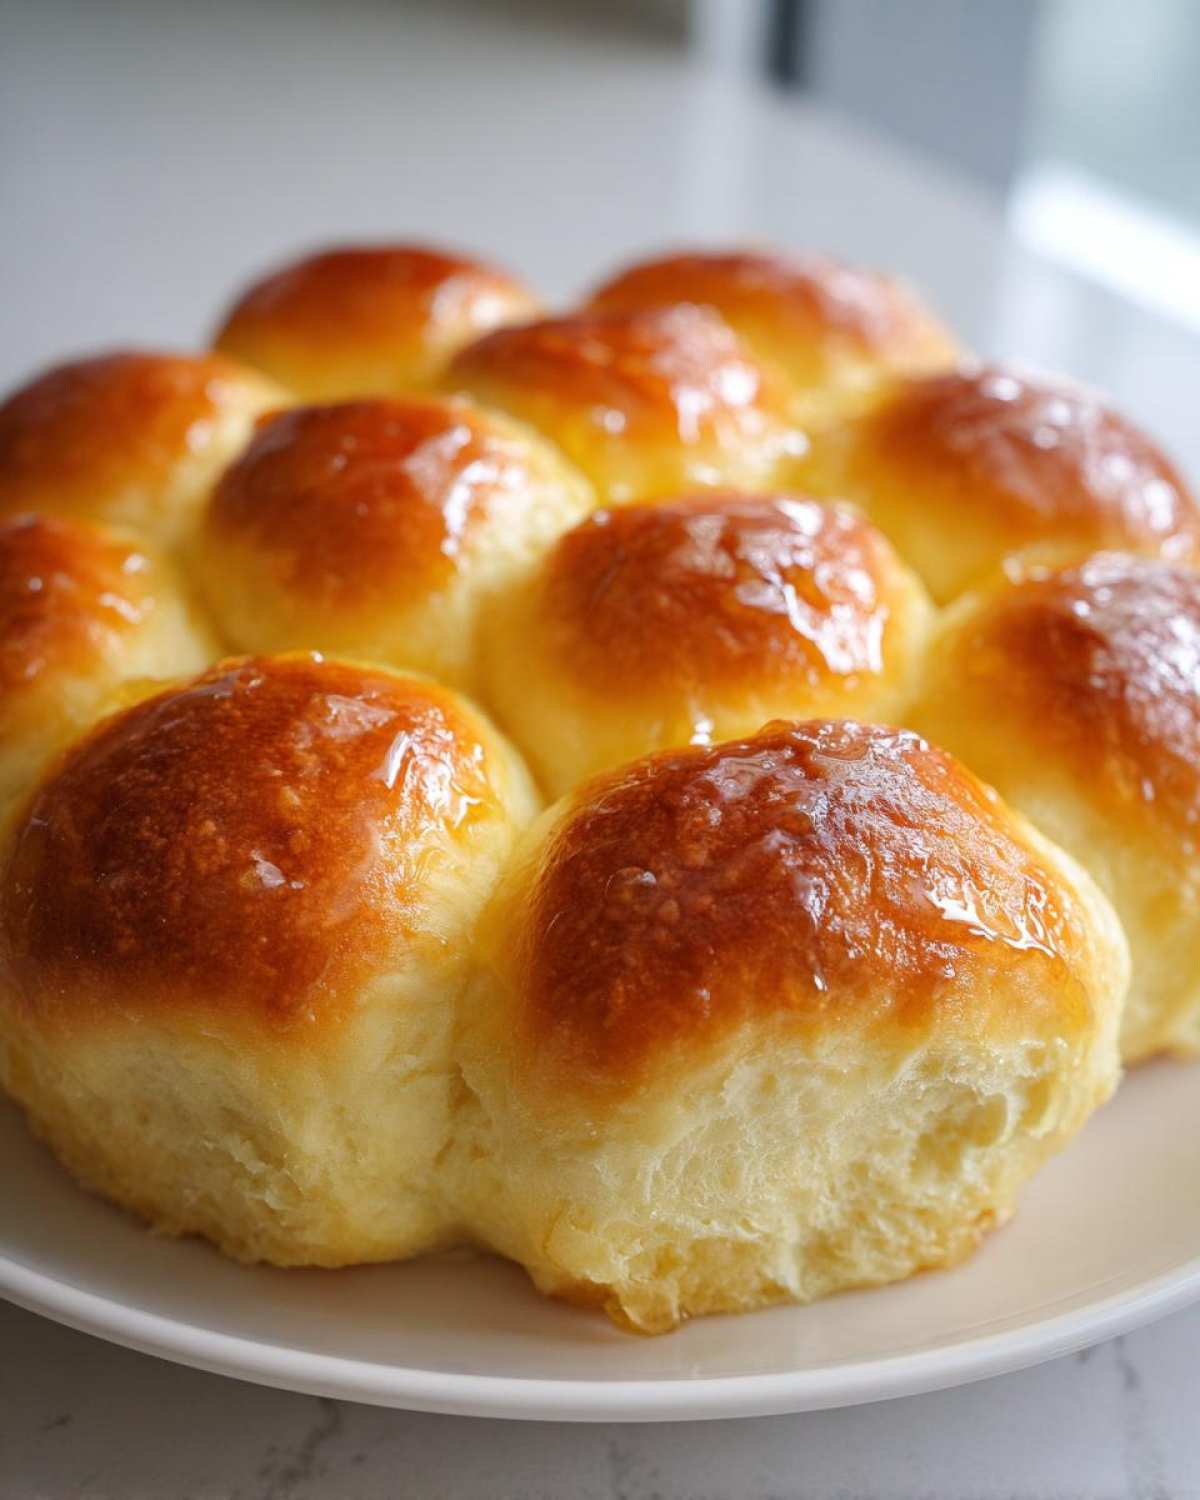
Tips for Success with Your Dinner Rolls Recipe
Baking is a journey, not a destination, right? Even I, Noah, have made rolls that looked like hockey pucks instead of fluffy clouds! My biggest early mistake was trying to rush the rise time—I remember once turning the oven on a *tiny* bit to warm the dough, forgetting to turn it off, and boiling the yeast alive. Oops! So, take my lesson to heart: don’t try to rush the rising process too much, or you’ll end up with a dense result instead of the magnificent Easy Dinner Roll Recipe we’ve designed here.
We included some professional notes in the recipe card because those little details make all the difference in creating something truly special.
Troubleshooting Common Issues with Dinner Rolls
If your rolls aren’t behaving exactly as expected, don’t panic! Usually, it comes down to simple temperature or technique issues.
- No Rise at All? Check your milk temperature first. If it was too hot, you might have killed your yeast before it even started working. Also, make sure your yeast wasn’t past its expiration date. Old yeast equals flat bread, plain and simple.
- Rolls are Dense or Heavy: This almost always means you either didn’t knead enough to develop that structure, or you added far too much flour. Remember, the dough should still be a tiny bit tacky (sticky) when you turn it out—it’ll firm up during the first rising period. Trust the process instead of dumping in extra flour!
- Uneven Baking/Burnt Tops: This usually means your oven temperature is running a bit hot, or your rolls were too close together in the pan, causing the outside ones to bake faster than the middle ones. Make sure you’re using an oven thermometer if you suspect your heat isn’t accurate for accurate baking times.
Follow these simple checks, and you’ll always get that soft, buttery outcome we’re aiming for!
Variations: Making Sweet Dinner Rolls or Garlic Butter Rolls Recipe
One of the best parts about a solid base recipe like this one is how adaptable it is! We’ve got our glorious classic buttery yeast rolls, but why stop there when you have this perfect canvas?
If you’re hosting people who love things a little sweeter—maybe for a brunch gathering—we can easily pivot this toward becoming lovely Sweet Dinner Rolls. It’s super simple: just bump up that granulated sugar in the main dough from 1/4 cup to a full 1/3 cup. Keep the honey in the topping exactly as we discussed for the Texas style finish. You get that gorgeous rich sweetness throughout the bread. I love serving those ones with just a tiny pat of salted butter on top, honestly.
Now, let’s go savory, because who doesn’t love garlic and butter together? If you want to switch gears for serving alongside something like a spaghetti dish or maybe my garlic and parsley crab leg bake, you should definitely try transforming these into a Garlic Butter Rolls Recipe.
Here’s how you do it:
- Skip the honey in the topping completely.
- In place of that 1/4 cup of plain melted butter for brushing, you’re going to whip up a quick garlic butter blend. Melt your butter, and then stir in maybe two cloves of minced garlic (or a teaspoon of garlic powder if you’re feeling lazy, which I totally do sometimes!), along with about a tablespoon of fresh, finely chopped parsley and maybe just a tiny pinch of salt.
- Brush this herb-infused mixture over the hot rolls straight from the oven, just like we did with the plain butter.
See? That same fluffy texture, but you’ve got a completely different flavor profile! It’s like having two recipes in one, all thanks to a little butter swap. That’s what I love about working with tried-and-true dough; it’s incredibly versatile.
Make Ahead Dinner Rolls and Storage Instructions
I know, I know. If you’re baking for Thanksgiving or Christmas, you don’t want to be wrestling with dough while the turkey is getting cold! My favorite secret weapon for those busy baking days is prepping ahead, and luckily, this dough is fantastic for it. You absolutely can make these ahead, and they freeze beautifully too. This is truly the secret to being calm during the holiday rush, making these perfect candidates for Make Ahead Dinner Rolls.
We actually test-ran this method last year when Hana’s cousins dropped by unexpectedly the day before Easter. We baked just half the batch fresh and prepped the other half for the next day. It saved us so much stress!
Preparing the Dough for Refrigeration
You handle everything exactly as you would normally, right up until we shape those little balls in Step 6. That’s your cut-off point if you are using the refrigerator method. Once you’ve divided the dough into 12 or 18 balls and nestled them snugly into their greased 9×13 pan, cover that pan *very* tightly—I mean, wrap it over the top with plastic wrap, then maybe another sheet to really seal it. This keeps the dough from drying out.
Tuck that covered pan into the coldest part of your regular refrigerator. It can happily proof slowly in the fridge for up to 24 hours. The cold temperature slows the yeast WAY down, letting those flavors deepen without the dough over-proofing and collapsing. When you look up recipes online, some folks link to ideas about freezing dough, and yes, you can do that too, but short-term chilling is my go-to for near-fresh results the next day.
Baking Make Ahead Dinner Rolls
When it’s time for baking day, pull the pan out of the fridge about 30 minutes before you need to start warming the oven. Let them sit on the counter while the oven preheats to 375°F (190°C). They need that little bit of warmth to wake back up. Because they are already chilled, they might take about 3 to 5 minutes longer in the oven than the fresh batch, so keep an eye on that golden color. Then, brush them with the melted butter topping just like normal!
Storing Leftovers So They Stay Fluffy
What if you actually have leftovers? (Which, let’s be honest, rarely happens.) Store any uneaten rolls in an airtight container at room temperature for up to three days. They should stay surprisingly soft, but they will dry out eventually.
To bring Day-Two rolls back to life, I have a trick Noah hates because it involves a touch of water, but it works! Wrap the rolls loosely in a damp paper towel (not soaking wet, just damp!) and microwave them for about 10 to 15 seconds. They steam just enough to revitalize that soft texture. For a whole batch, wrap them in foil and warm them through in a 300°F oven for about 10 minutes, just until they are steaming hot again.
If you’re looking for other ways people approach timing their holiday bakes, check out what my friends at Kristine’s Kitchen suggest for their methods!
Serving Suggestions for Your Homemade Dinner Rolls
Honestly, serving these rolls is half the fun! They are the perfect little golden pillows that seem to soak up every bit of flavor from whatever you put on your plate. The buttery goodness in these yeast rolls pairs beautifully with just about anything, but they truly shine when they are there to sop up sauces or balance out rich, savory main dishes. They make any meal feel a little more special, even if it’s just a Tuesday night.
We always think of holidays, of course, when these are crucial for success in Holiday Side Dish Baking. But don’t just save them for Thanksgiving or Christmas! These are built for comfort food any day of the year.
Perfect Pairings for Savory Comfort Meals
Since these rolls have a subtle sweetness—even if you skip the honey topping—they balance out deeply seasoned or slightly tangy mains so well. They are just begging to be dunked into a thick stew. Think about making my Cowboy Beef Stew with Hearty Vegetables; those rolls are the ideal vehicle for getting every last drop of that rich broth.
They are also fantastic alongside:
- Slow-cooked pulled pork or chicken. The slight sweetness of the roll cuts through the barbecue sauce perfectly.
- Any hearty soup! Tomato soup, potato soup, French onion—you name it, these rolls are the perfect scoop. Even if you go with the garlic butter variation, they are still a winner here.
- Roast chicken or turkey. They are essential for soaking up those pan drippings!
The Holiday Table Essential
When it comes to big family feasts, these rolls really steal the show. They elevate simple mashed potatoes and gravy. For big holiday meals, I like to arrange them in the serving dish and then drizzle just a touch more melted butter over the top right before setting them on the table. It makes them glisten, and the aroma just floods the room. You’ll find people reaching for the bread basket before they even touch the turkey, I promise you that!
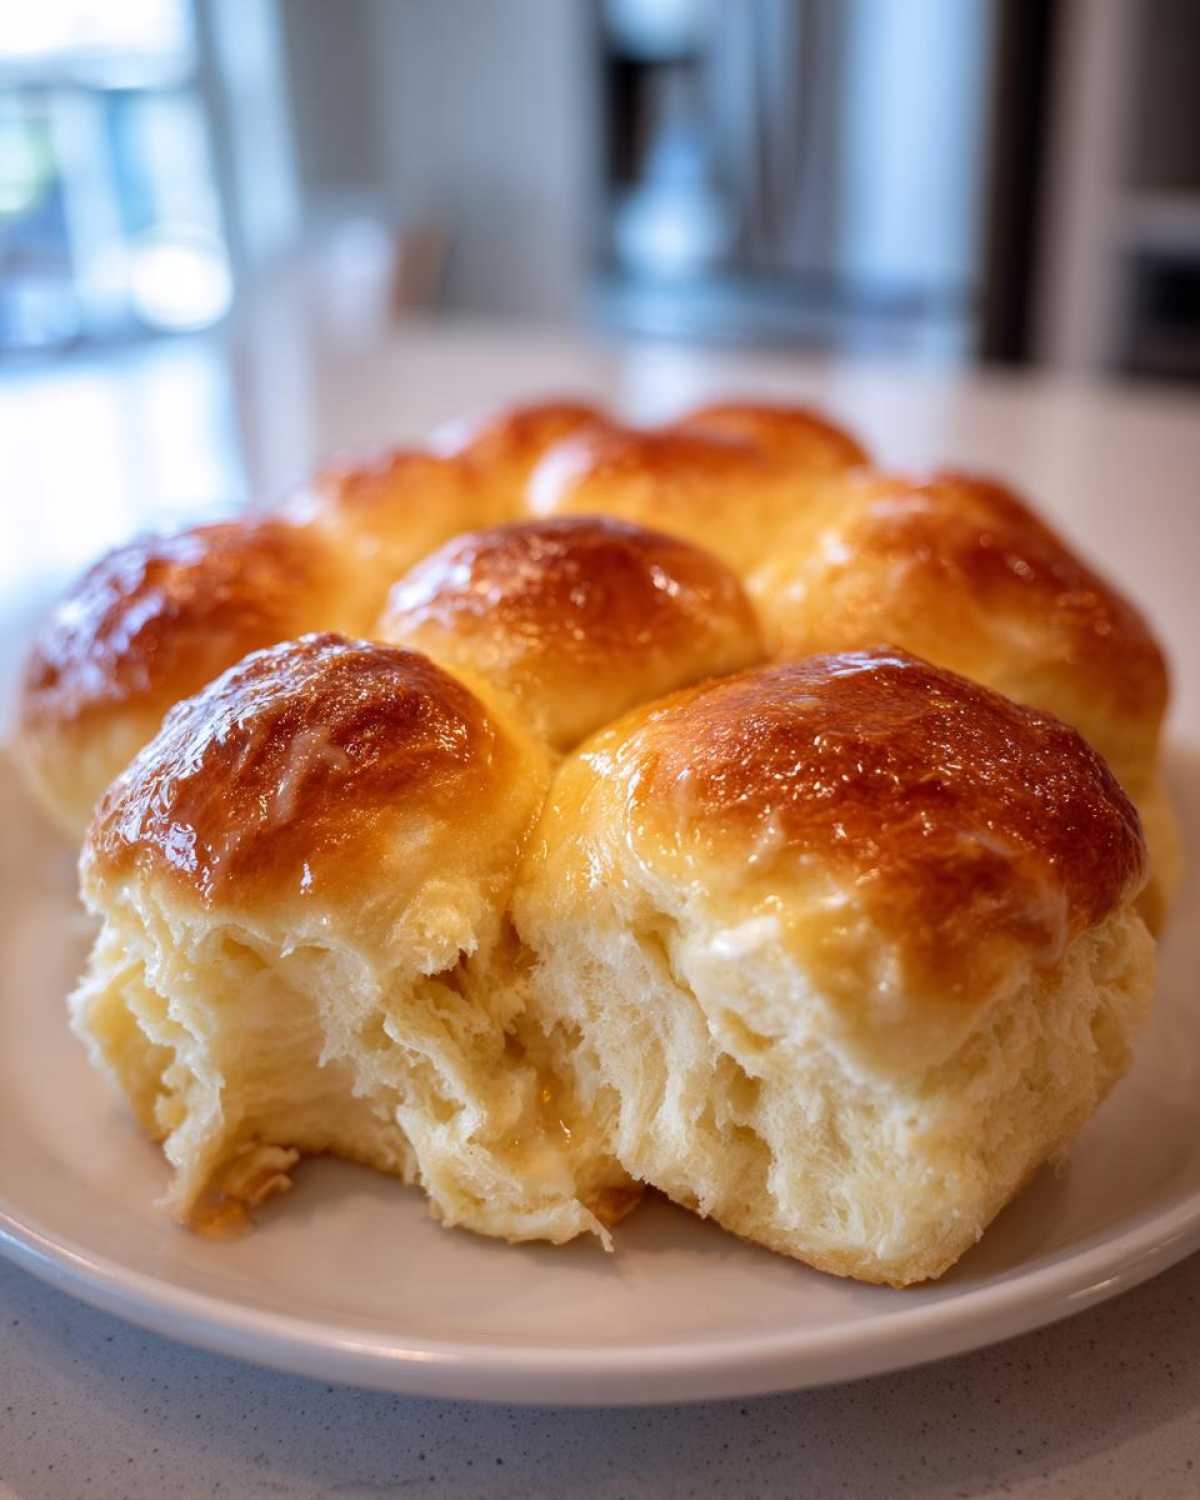
They complement everything from ham glazes to cranberry sauces. Seriously, once you serve these incredibly soft rolls, nobody wants to go back to the stuff in the can. They become the centerpiece of the side dishes!
Frequently Asked Questions About Making Dinner Rolls
We get asked so many questions about these beautiful, buttery rolls, and I’m always happy to chat about them! Baking bread always seems intimidating, but once you nail down a few key concepts, it just clicks. Hopefully, these quick thoughts will give you the confidence to try this yeast roll recipes batch right now.
Can I make these Old Fashioned Dinner Rolls faster?
That’s the eternal question, right? You want them *now*! While I truly believe the two-rise process is what makes these the ultimate Old Fashioned Dinner Rolls—it builds flavor and structure—there are ways to speed things up if you’re truly desperate for Quick Dinner Rolls. The easiest way is managing the first rise. Instead of letting it sit for an hour or more at room temperature, you can create a warm, humid environment. Place your covered dough bowl in your oven (make sure the oven is OFF!), and set a pan of genuinely hot water on the bottom rack underneath it. The warmth and humidity will help that yeast work faster. You might shave 20 minutes off the first rise, but please, don’t rush the second rise too much. That time on the counter before baking is crucial for that pillowy finish!
What is the best way to get that Texas Roadhouse Style Rolls Copycat look?
Oh, that irresistible glaze! If you want the rolls to truly look like restaurant-quality bread, the secret isn’t just the honey; it’s the timing. You must brush the rolls immediately after they come out of the oven. When that 1/4 cup of melted butter—mixed with that crucial teaspoon of honey—hits that hot, fresh bread, it melts right into the crust and sets into that perfect, slightly sticky, shiny shell we all crave. If you wait even five minutes, the heat dissipates, and the topping just sits on top instead of soaking in and marrying with the crust. Brush it on piping hot!
Why do my yeast roll recipes sometimes fail to rise?
This is the absolute number one frustration when working with yeast, and it nearly always comes down to two culprits, which is why checking your water temperature is so important for buttery yeast rolls. First, your water was too hot! If the milk temperature climbs above about 125°F, it starts killing the hungry little yeast organisms. Sad, right? They die, and nobody inflates. Second, check the date on your yeast packet. If it’s months past its prime, it’s often weak or completely dead. Always do the initial bloom test (Step 1 in the instructions) to ensure your yeast is alive and ready to go before you add all your other beautiful ingredients!
Nutritional Estimates for These Buttery Dinner Rolls
Now, I know what you’re thinking. Can something this delicious possibly fit into my day? Well, because these are made from scratch with real ingredients—flour, butter, and sugar—they do pack a little something. But honestly, compared to the preservatives and mystery ingredients lurking in store-bought versions, I feel a lot better about feeding my family these homemade rolls.
Please remember this: the numbers below are just estimates based on dividing the recipe into 12 standard servings, assuming average ingredient usage, especially with the flour amount. Nutrition can swing a bit based on how perfectly you measure, but this gives you a good baseline for our beloved buttery yeast rolls.
- Serving Size: 1 roll
- Calories: 180
- Sugar: 4g
- Sodium: 250mg
- Fat: 6g
- Saturated Fat: 3.5g
- Unsaturated Fat: 2.5g
- Trans Fat: 0g
- Carbohydrates: 28g
- Fiber: 1g
- Protein: 5g
- Cholesterol: 20mg
Again, these are estimates based on the core recipe we laid out. Knowing what goes into your food—like the quality of the butter Hana insists upon—is always better than relying on mystery factory labels. Enjoy your warm bread responsibly!
Share Your Soft and Fluffy Dinner Rolls Creations
That’s it! You’ve successfully made my pride and joy—the ultimate fluffy, buttery batch of goodness. Honestly, seeing your photos and hearing about your successes is truly the best part of sharing these recipes, especially for us here at Spoon Swirl. It builds our trust in these recipes, and it lets us know we’ve succeeded in bringing that warm, comforting feeling right to your table.
If you followed along and made these amazing **dinner rolls**, I really, really want to hear about it! Don’t be shy. Did they come out perfectly soft? Did your family fight over who got the last one? Slide down to the comments section and leave a star rating—it helps other bakers know this recipe is a winner.
And please, if you snap a picture of those golden, puffy creations, tag us on social media! I’m always scrolling, looking for that perfect shot of homemade bread bliss that proves we’re all in this together. For any questions about the recipe you can always reach out through our Contact Page. Happy baking, my friends!
PrintThe Ultimate Soft and Fluffy Homemade Dinner Rolls (Classic Buttery Recipe)

Bake incredibly soft, fluffy, and buttery dinner rolls from scratch. This easy recipe delivers warm, comforting bread that is far better than store-bought options, perfect for any family meal or holiday gathering.
- Prep Time: 20 min
- Cook Time: 20 min
- Total Time: 1 hour 50 min
- Yield: 12 large rolls
- Category: Side Dish
- Method: Baking
- Cuisine: American
- Diet: Vegetarian
Ingredients
- 1 cup warm milk (105-115°F)
- 2 1/4 teaspoons active dry yeast
- 1/4 cup granulated sugar
- 1 large egg, room temperature
- 1/4 cup unsalted butter, melted
- 1 teaspoon salt
- 3 to 3 1/2 cups all-purpose flour
- For the topping: 1/4 cup unsalted butter, melted
- For the topping: 1 teaspoon honey (optional, for Texas Roadhouse style)
Instructions
- Activate the yeast: In a large bowl, combine the warm milk and yeast. Let it sit for 5 to 10 minutes until foamy. This shows the yeast is active.
- Mix wet ingredients: Add the sugar, egg, melted butter, and salt to the yeast mixture. Whisk gently to combine.
- Add flour: Gradually add the flour, one cup at a time, mixing until a shaggy dough forms.
- Knead the dough: Turn the dough out onto a lightly floured surface. Knead for 6 to 8 minutes until the dough is smooth and elastic. If using a stand mixer, use the dough hook for 5 minutes on medium-low speed.
- First rise: Place the dough in a lightly oiled bowl, turning to coat. Cover the bowl with plastic wrap or a clean kitchen towel. Let the dough rise in a warm spot for 1 to 1.5 hours, or until doubled in size.
- Shape the rolls: Gently punch down the risen dough. Divide the dough into 12 equal pieces (for large rolls) or 18 pieces (for standard rolls). Roll each piece into a smooth ball.
- Second rise: Arrange the dough balls in a greased 9×13 inch baking pan, leaving a small space between each roll. Cover the pan loosely and let the rolls rise again in a warm place for 30 to 45 minutes, or until puffy.
- Preheat and bake: Preheat your oven to 375°F (190°C). Bake the rolls for 15 to 20 minutes, or until they are golden brown on top.
- Apply butter topping: While the rolls are still hot, brush the tops generously with the 1/4 cup of melted butter. For a sweeter, Texas Roadhouse style finish, mix the honey into the melted butter before brushing.
- Serve warm: Serve your soft, fluffy dinner rolls immediately.
Notes
- For the softest texture, ensure your milk is warm, not hot, to avoid killing the yeast.
- If you need quick dinner rolls, you can try to speed up the rising time by placing the covered bowl in a slightly warm oven (turned off) with a pan of hot water on the rack below.
- You can make these ahead: After shaping (Step 6), place the rolls in the pan, cover tightly, and refrigerate for up to 24 hours. Before baking, let them sit at room temperature for 30 minutes, then bake as directed, adding 3-5 minutes to the bake time.
Nutrition
- Serving Size: 1 roll
- Calories: 180
- Sugar: 4
- Sodium: 250
- Fat: 6
- Saturated Fat: 3.5
- Unsaturated Fat: 2.5
- Trans Fat: 0
- Carbohydrates: 28
- Fiber: 1
- Protein: 5
- Cholesterol: 20